Power Craft PGSG-135 Technical manual

User Guide & Warranty
135W MINI SOLDERING TORCH KIT
After Sales Support
Now you have purchased a Power Craft
product you can rest assured in the
knowledge that as well as your 3 year
parts and labour warranty you have
the added peace of mind of dedicated
helplines and web support.
AFTER SALES SUPPORT
UK / N.IRELAND HELPLINE NO 0870 7323023
REP. IRELAND HELPLINE NO 1800 481005
WEB SUPPORT www.omegawolf.com/powercraft
MODEL NUMBER: PGSG-135
In order to deal with your enquiry as quickly and efficiently as possible, we ask you to send your
daytime telephone number.
Alternatively, you can contact our freephone service hot-line on the number given below.
Office hours are as follows:
Mon - Fri: 8 am - 6 pm, Sat: 10 am - 2 pm, Sun: 10 am - 4 pm
UK / NORTHERN IRELAND HELPLINE:
0870 7323023
REPUBLIC OF IRELAND HELPLINE:
1800 481005
WEB SUPPORT:
www.omegawolf.com/powercraft
Omega, Interex House, Prospect Close, Lowmoor Business Park
NG17 7LF Kirkby In Ashfield, England
Replacements or repairs under guarantee regulations are free of charge.
GB/IRE-0706-22
Name:
Address:
Contact Telephone No.:
E-mail:
Location of purchase:
Fault Description:
If you are requested by the manufacturer to return the item for
repair please complete the enclosed section and send it together
with your product and your receipt (proof of purchase) to the
service address shown below.
135W MINI SOLDERING TORCH KIT
PGSG-135

Helpline No. UK / Northern Ireland 0870 7323023 • Rep. Ireland 1800 481005
Web support: www.omegawolf.com/powercraft
Model Number: PGSG-135
11
Warranty
Helpline No. UK / Northern Ireland 0870 7323023 • Rep. Ireland 1800 481005
Web support: www.omegawolf.com/powercraft
Model Number: PGSG-135
02
Contents
03 Introduction
04 Machine specifications
06 Safety instructions
- Additional safety instructions
07 Operation
- Gas filling and refilling
- Ignition
- Shutting off
- Flame length or temperature adjustment
- Operating tips
- How to fit for replace different accessoires
09 Maintenance
11 Warranty
WARRANTY CERTIFICATE
Year of manufacture: 10/2007 MINI SOLDERING TORCH KIT PGSG-135
Congratulations! You have made an excellent choice with the purchase of this Quality
product. Our commitment to quality also includes our service. Should you, contrary to
expectations, experience defects due to material or manufacturing faults during private use
within 36 months of the date of purchase we shall be liable for warranty in accordance with
statutory warranty regulations, provided that: - The device was not put to any use other than the intended.-
Was not overloaded. - Was not used with the wrong accessories. - Repairs where not carried out by any
other than the authorised workshop. The warranty certificate is only valid in connection with the receipt.
Please keep both in a safe place. The warranty does not affect your statutory rights.
The product is guaranteed for a period of three years beginning on the day of purchase. Keep your purchase
receipt safe as proof of the date of purchase. The guarantee period can only be extended for the duration of
any repair required.
During the warranty period, defective devices can be sent FREIGHT PREPAID to the service address stated at
the end of this booklet. We will, at our discretion either repair or exchange the device in accordance with
warranty legislation.
Please include the following when sending in your product for repair:
1. The receipt (proof of purchase)
2. This warranty certificate with your name, address, contact details and a fault description
completed overleaf.
If the original receipt is not enclosed the repair will be charged for in all cases. After the warranty has
expired you can still send defective devices for repairs FREIGHT PREPAID to the address at the end of this
booklet. Quotes as well as repairs after warranty period are to be paid for in all cases. Ensure the product is
sent well packed as no responsibility can be accepted for items lost or damaged in transit. This warranty
does not affect your statutory rights.
EC DECLARATION OF CONFORMITY
We Ferm B.V.
Lingenstraat 6, 8028 PM Zwolle, The Netherlands
declare that the design and construction of the following machine, in the form supplied by us, comply with
the requirements of the appropriate EC directives.
Product Description: 135W MINI SOLDERING TORCH KIT
Model: PGSG-135
Appropriate EC directives: 98/37/EEC
Applicable harmonised norms: DVGW VP 103, DIN EN 731, DIN EN 521, DIN 30665-1
J.A. Bakker - van Ingen J. Lodewijk
CEO Ferm B.V. Quality Manager Ferm Global 10/2007

Helpline No. UK / Northern Ireland 0870 7323023 • Rep. Ireland 1800 481005
Web support: www.omegawolf.com/powercraft
Model Number: PGSG-135
03
Introduction
Congratulations on choosing to buy a
PowerCraft product.
By doing so you now have the assurance and peace of mind that comes with
purchasing a product made by one of Europe’s leading manufacturers.
All products brought to you by PowerCraft are manufactured to the highest
standards of performances and safety, and, as part of our philosophy for
customer service and satisfaction, are backed by our comprehensive
3 Year Warranty.
We hope you will enjoy using your purchase for many years to come.
135W MINI SOLDERING TORCH KIT
Always read the instructions carefully before use. It will help you
understand your product better and avoid unnecessary risks. Keep
this instructions manual in a safe place for future use.
This machine is developed for soldering, shrinking and hot cutting.
Helpline No. UK / Northern Ireland 0870 7323023 • Rep. Ireland 1800 481005
Web support: www.omegawolf.com/powercraft
Model Number: PGSG-135
10

Helpline No. UK / Northern Ireland 0870 7323023 • Rep. Ireland 1800 481005
Web support: www.omegawolf.com/powercraft
Model Number: PGSG-135
09
Troubleshooting
Faults
Should a fault occur, please contact the address on the warranty card.
• The machine does
not ignite
• Torch flame has no
proper power
• Tip does not heat
• Empty gas
• Gas pressure too
high or too low
• Insufficient gas
power
• Insufficient gas
power
• Catalyst is damaged
• Refill butane gas
• Slide flow control
knob (6) to lower
or higher position
• Refill butane gas
• Refill butane gas
• Replace with new
part
Helpline No. UK / Northern Ireland 0870 7323023 • Rep. Ireland 1800 481005
Web support: www.omegawolf.com/powercraft
Model Number: PGSG-135
04
Machine specifications
Product information
Fig. 1
16
14
12
13
10
11
9
15
7
2
1
6
5
4
3
8
Maintenance

Helpline No. UK / Northern Ireland 0870 7323023 • Rep. Ireland 1800 481005
Web support: www.omegawolf.com/powercraft
Model Number: PGSG-135
05
Machine specifications
Features
1. Switch
2. Shut off lever
3. Nut
4. Soldering head
5. Filling valve
6. Flow control knob
7. Ignition button
8. Guard
9. Standard tip
10. Diagonal tip (3 mm)
11. Chisel tip (3,5 mm)
12. Hot knife
13. Hot blower
14. Reflector
15. Wrench (7 mm)
16. Wrench (8 mm)
Package contents
1 Mini soldering torch kit
6 Accessories
1 Sponge
1 Soldering wire
2 Wrenches
Helpline No. UK / Northern Ireland 0870 7323023 • Rep. Ireland 1800 481005
Web support: www.omegawolf.com/powercraft
Model Number: PGSG-135
08
Operation
(4). Now the unit becomes an open flame torch.

Helpline No. UK / Northern Ireland 0870 7323023 • Rep. Ireland 1800 481005
Web support: www.omegawolf.com/powercraft
Model Number: PGSG-135
07
Operation
Gas filling and refilling
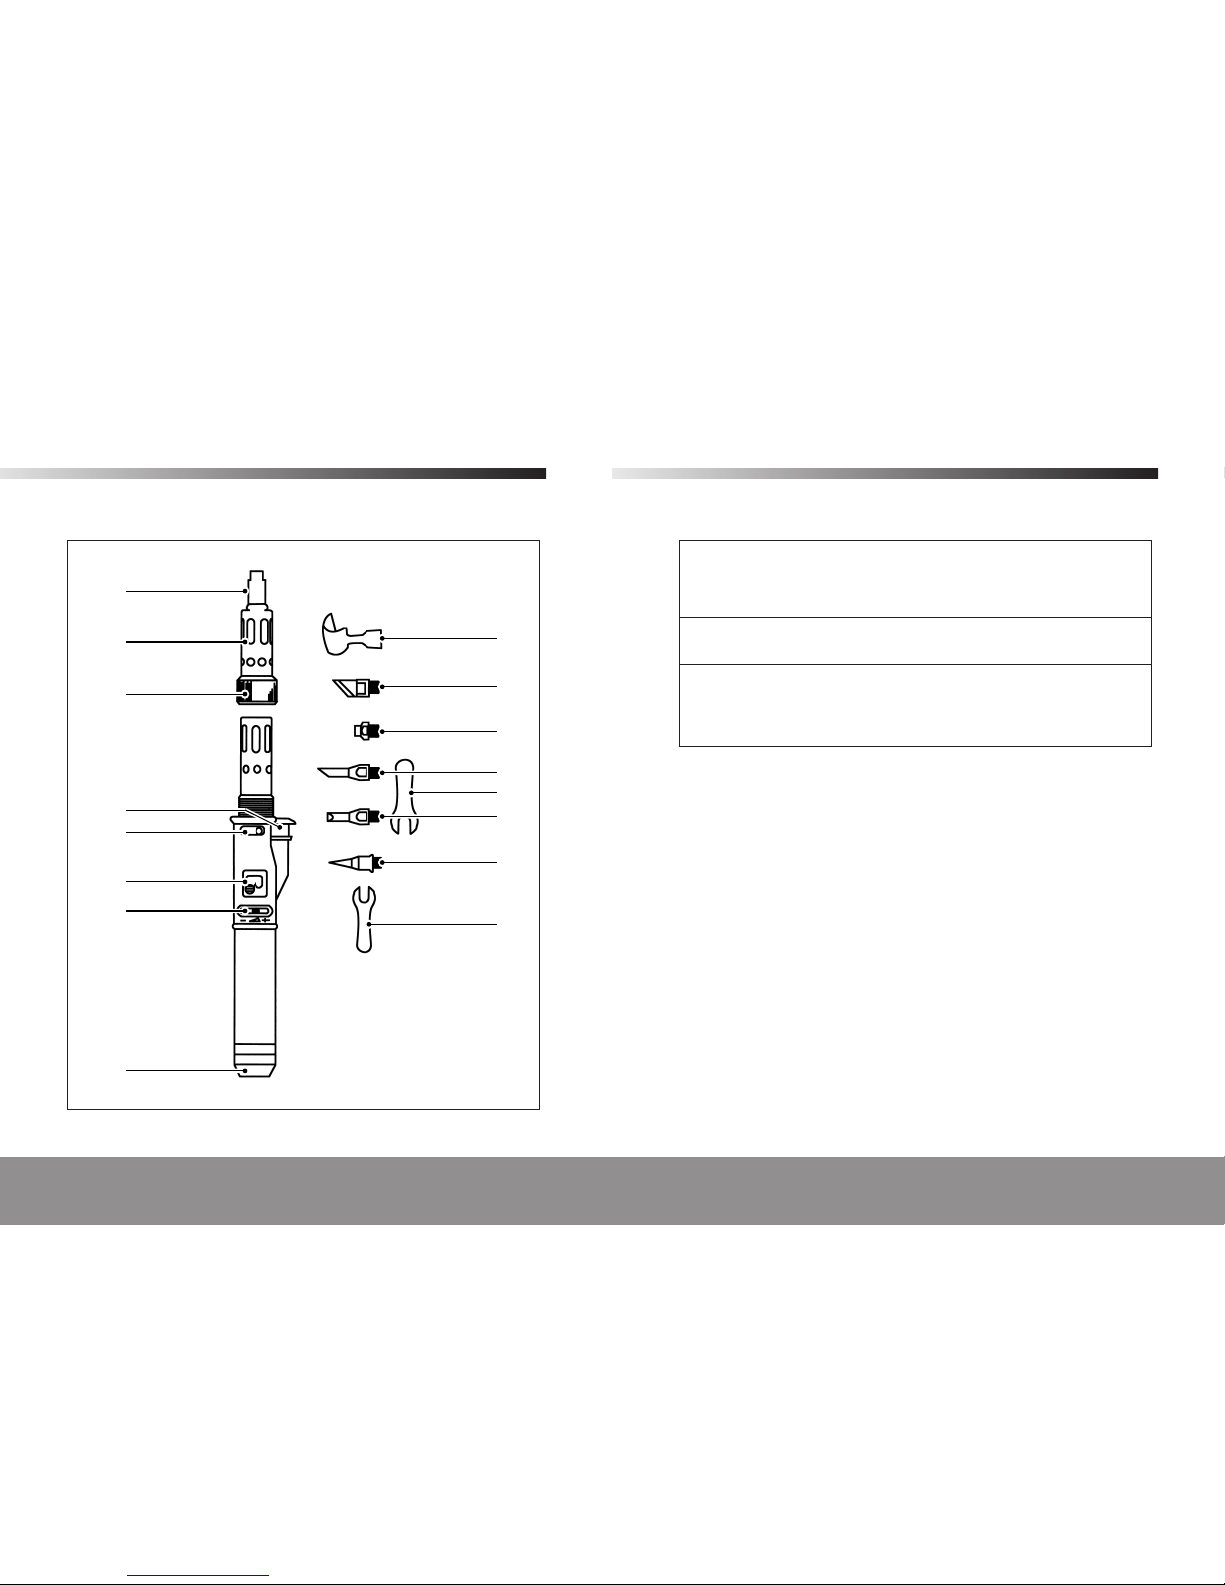
• Ensure the switch (1) is turned to the OFF position before filling
• Insert the gas container’s nozzle vertically into the filling valve (5)
• When the gas starts to escape from the filling valve, remove the nozzle from the
filling valve
Ignition
• Move the flow control knob (6) to the middle position
• Move the switch (1) upward and to the right
• Press down the ignition button (7) to light up the open flame
• When the unit is working as a soldering tool, 3 seconds after lighting the torch,
please move the shut off lever (2) to the left and release it. Then the open flame
will be shut off and you will find the soldering head (4) becomes red.
Shutting off
Move the switch (1) upwards and to the left. The switch will return to OFF position.
Flame length or temperature adjustment
After ignition, turn the flow control knob (6) to the right to increase the flame length
of the torch or the temperature of soldering tip or hot air. After ignition, turn the
flow control knob to the left to decrease the flame length or the temperature.
Operating tips
• Soldering tips must be tin-plated before using them for the first time. A thin layer
of solder should be applied to the tip when it has been heated.
• Soldering should NOT be carried out on “live” circuits, as this soldering unit does
not possess any special electrical insulation
• Keep your soldering sponge moist
How to fit for replace different accessoires
Always allow unit to cool before removing or replacing tips
Replace soldering tips
• With 7 mm wrench (15) on the soldering tip or hot blow head (9 till 14) and 8 mm
wrench on the soldering head (4), you can tight the tip or hot blow head or
unscrew them.
• When you unscrew the nut (3), you can remove the guard (8) and soldering head
Helpline No. UK / Northern Ireland 0870 7323023 • Rep. Ireland 1800 481005
Web support: www.omegawolf.com/powercraft
Model Number: PGSG-135
06
Safety instructions
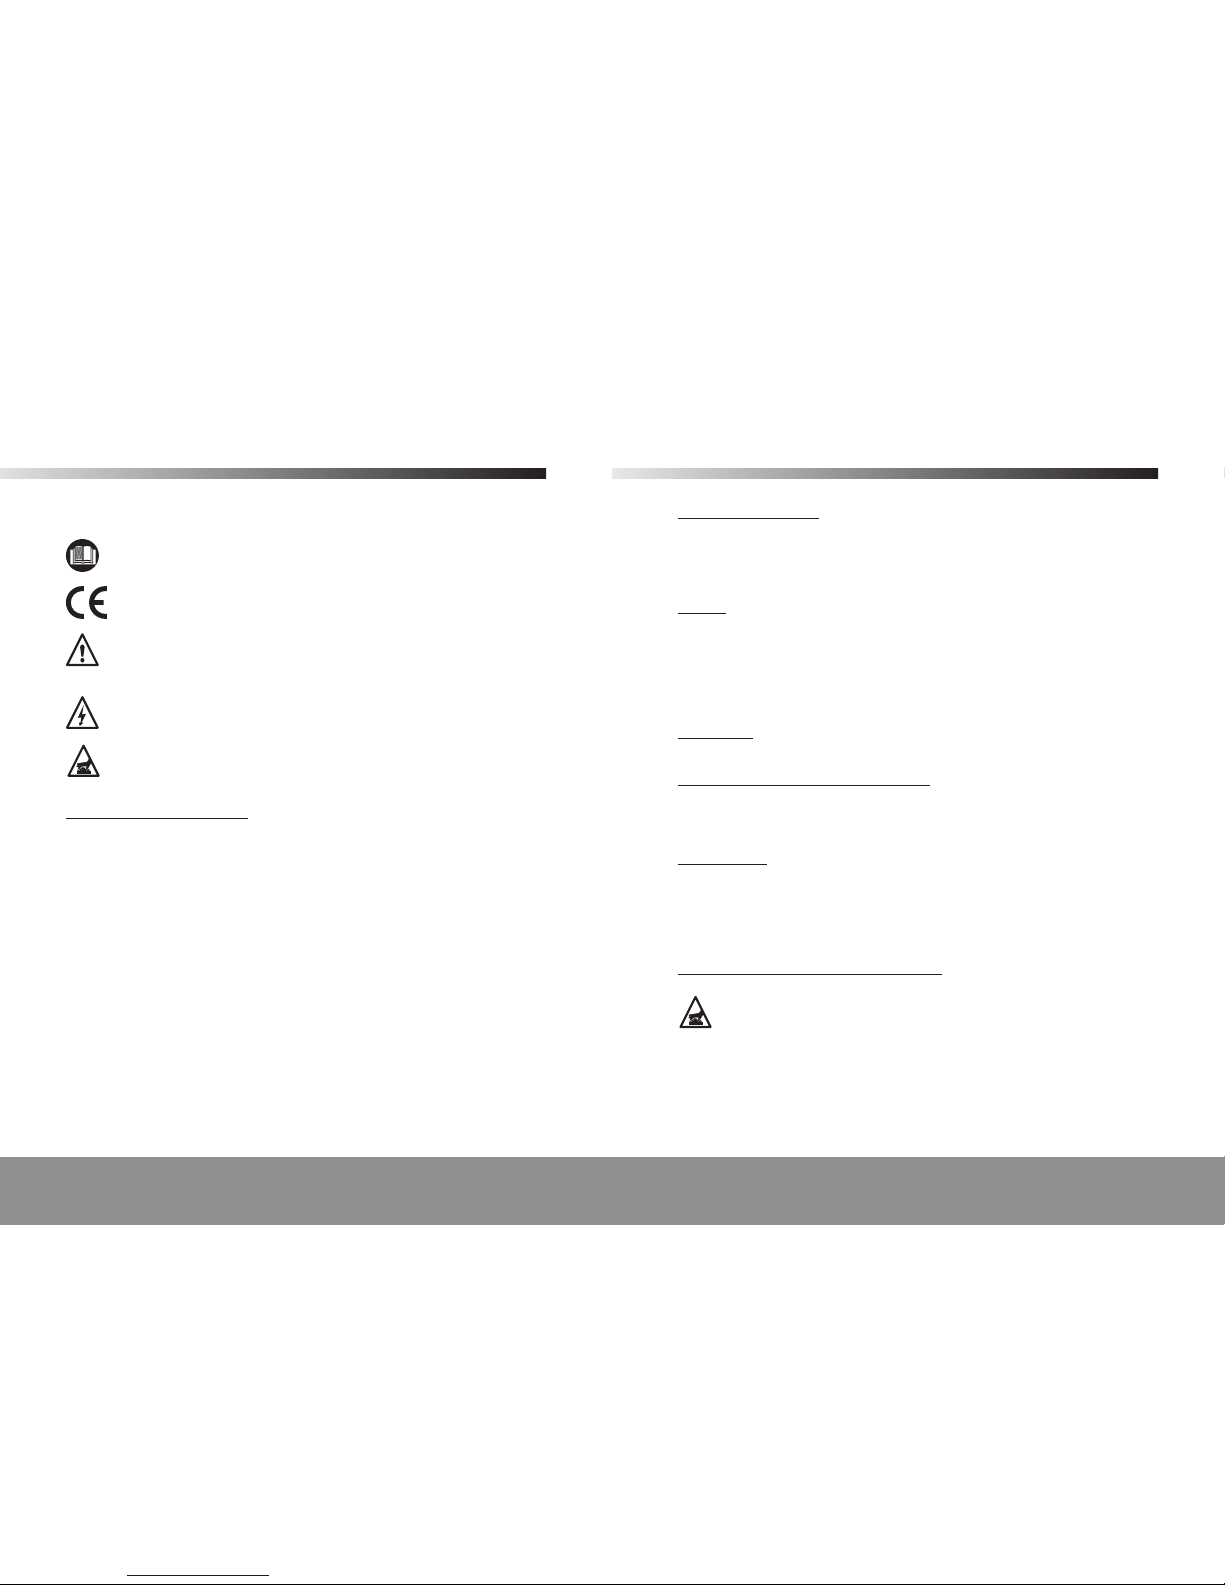
The following symbols are used in these instructions:
Read the instructions carefully.
Conformity with the relevant EU safety directives.
Danger of life and risk of injury as well as risk of damage to the
machine in case of non-adherence to the safety instructions in
these instructions of use.
Danger of electric shock.
Warning! High temperature.
Additional safety instructions
• Do not fill gas or store near open flame, heater or combustible materials
• Use only high quality butane gas
• Butane gas is highly flammable, please handle with care
• Do not drop, puncture, or incinerate
• Do not store or operate in a place where the temperature is above 50º C
(122º F)
• Keep out of reach of children
• Cool down before putting protective cap on and before storing
• Always ignite your micro soldering torch with the pizzo-electric igniter,
never use a lighter or match.
• Allow any spillage to evaporate
• Do not fill in a confined area
• Ensure that the area you are filling in is well ventilated.
• Max. working time: approx. 1 hour
• After filling or refilling with gas, wait for approximately 2 minutes so that
the gas in the cylinder becomes stable.
Table of contents
Other Power Craft Soldering Gun manuals