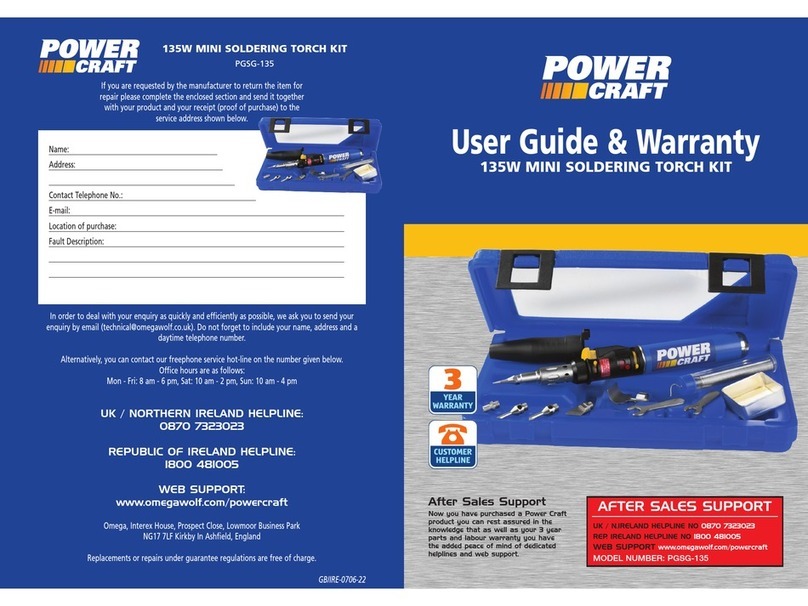
Power Craft PSG-150K User manual

0403-25
UK Subject to change
UK USERS MANUAL
Art.nr. SGM6002
PSG-150K

ELECTRIC SOLDERING SET
TECHNICAL SPECIFICATIONS
PACKAGE CONTENTS
When unpacking, you will find the following parts in the
plastic packaging:
1Soldering gun with tip
1Roll of solder
1Soldering grease
1Spare tip
1Cutting tip
1Operating instructions
Check all parts for shipping damage. Should you detect
any damage, or should any parts be missing, please notify
the dealer from whom the machine was bought.
PRODUCT INFORMATION
1. Tip
2. Fixing screw
3. Status light
4. Switch
5. Handle
6. Power supply lead.
OPERATIVE RANGE
This appliance is designed for domestic use. This
soldering gun is suitable for soldering on printed circuit
boards, soldering of plastic and for burning work on
wood and leather. All other applications are specifically
excluded.
EXPLANATION OF SYMBOLS
In accordance with essential applicable safety
standards of European directives.
Class II machine – Double insulation – You don’t
need any earthed plug.
Risk of material damage and/or physical injury.
Risk of an electric shock.
SAFETY INSTRUCTIONS
The following symbols are used in these instructions for
use:
Denotes risk of personal injury, loss of life or
damage to the tool in case of non-observance of
the instructions in this manual.
Denotes risk of electric shock.
Carefully read this manual before using the machine.
Make sure that you know how the machine functions and
how to operate it. Maintain the machine in accordance
with the instructions to make sure it functions properly.
Keep this manual and the enclosed documentation with
the machine.
ELECTRICAL SAFETY
Alwayscheckthatthepowersupplycorrespondstothe
voltageontheratingplate.Alsocheckthatyourmains
voltagecorrespondstotheinputvoltageofthebatterycharger.
Thebatterychargerisdoubleinsulatedinaccordance
withEN60335;thereforenoearthwireisrequired.
Replacing cables or plugs
Immediately throw away old cables or plugs when they
have been replaced by new ones. It is dangerous to insert
the plug of a loose cable in the wall outlet.
Using extension cables
Only use an approved extension cable suitable for the
power input of the machine. The minimum conductor
size is 1.5 mm2. When using a cable reel always unwind
the reel completely.
GENERAL SAFETY INSTRUCTIONS
Warning! When using electric tools, basic safety
precautions should always be followed to reduce the
risk of fire, electric shock and personal injury,
including the following. Read all these instructions
before attempting to operate this product.
Retain for future refence.
Voltage | 230 V~
Frequency | 50 Hz
Power consumption | 150 W
Specified operation cycle | 12 s on / 48 s off
Type of protection | II
Weight | approx. 1.08 kg
2Powercraft Powercraft 7

6Powercraft
1. Keep work area clean
Cluttered areas and benches invite injuries.
2. Consider work area environment
Don’t expose power tools to rain. Don’t use power
tools in damp or wet locations. Keep work area well
lit. Don’t use power tools in presence of flammable
liquids or gases.
3. Guard against electric shock
Prevent body contact with grounded surfaces (e.g.
pipes, radiators, ranges refrigerators).
4. Keep children away
Do not let visitors contact tool or extension cord.
All visitors should be kept away from work area.
5. Store idle tools
When not is use, tools should be stored in dry, high,
or locked-up place, out of reach of children.
6. Don’t force tool
It will do the job better and safer at the rate for which
it was intended.
7. Use right tool
Don’t force small tools or attachments to do the job
of heavy duty tool. Don’t use tools for purposes not
intended.
8. Dress properly
Do not wear loose clothing or jewelry. They can be
caught in moving parts. Rubber gloves and nonskid
footwear are recommended when working
outdoors. Wear protective hair covering to contain
long hair.
9. Use safety glasses
Also use face or dust mask if cutting operation is
dusty.
10.Don’t abuse cord
Never carry tool by cord or yank it to disconnect it
from receptacle. Keep cord from heat, oil and sharp
edges.
11.Secure work
Use clamps or a vise to hold work. It’s safer than
using your hand and it frees both hands to operate
tool.
12.Don’t overreach
Keep proper footing and balance at all times.
13.Maintain tools with care
Keep tools sharp and clean for better and safer
performance. Follow instructions for lubricating and
changing accessories. Inspect tool cords periodically
and, if damaged, have repaired by authorized service
facility. Inspect extension cords periodically and
replace if damaged. Keep handles dry, clean and free
from oil and grease.
14.Disconnect tools
When not in use, before servicing, and when
changing accessories such as blades, bits and cutters.
15.Remove adjusting keys and wrenches
Form the habit of checking to see that keys and
adjusting wrenches are removed from tool before
turning it on.
16.Avoid unintentional starting
Don’t carry plugged-in tools with finger on switch.
Be sure switch is off when plugging in.
17.Outdoor use extension cords
When tool is used outdoors, use only extension
cords intended for use outdoors and so marked.
18.Stay alert
Watch what you are doing. Use common sense. Do
not operate tool when you are tired.
19.Check damaged parts
Before further use of the tool, a guard or other part
that is damaged should be carefully checked to
determine that it will operate properly and perform
its intended function. Check for alignment of moving
parts, binding of moving parts, breakage of parts,
mounting, and any other conditions that may affect
its operation. A guard or other part that is damaged
should be properly repaired or replaced by an
authorized service center unless otherwise
indicated elsewhere in this instructions manual.
Have defective switches replaced by an authorized
center. Do not use tool if switch does not turn it on
and off.
20.Warning
The use of any other accessory or attachment other
than recommended in this operation instructions or
the catalog may present a risk of personal injury.
21.Have your tool repaired by an expert
This electric appliance is in accordance with the
relevant safety rules repairing of electric apliances
may be carried out only by experts otherwise it may
cause considerable danger for the user.
22.Connect the dust extraction device
Whenever there are facilities for fitting a dust
extraction system, make sure it is connected and
used.
SPECIFIC SAFETY RULES
Safe handling of the machine is only possible when
you read the safety and operating instructions
thoroughly and rigorously follow the instructions which are
included inside.
•For all work on the soldering gun, pull the plug out of
the socket.
•The power supply lead and the plug must be in
perfect condition. Always keep the power supply
lead away from the area of work.
•Do not drill into housing of the machine, as
otherwise the double insulation will be broken (use
adhesive shields).
•The voltage of the electric power source must tally
with the instructions on the type plate of the
appliance.
•Always fasten the nut tightly when attaching the tip.
This ensures a good electric connection.
•Ventilate the place of work sufficiently in order to
take unwanted vapours quickly away from melting
material.
•During use, the soldering gun should be left off.
•The mains power supply lead for the soldering gun
may only be replaced by a specialist electrician.
•Use only original accessories which are supplied or
recommended by the manufacturer.
Powercraft 3

Handling of plastic
As it is used for many household items, flooring materials
and toys, plastic can be worked on with the soldering
gun. The shape of the cutting point is specially designed
for this.
•Warm up the cutting point carefully and check until
the material becomes pasty.
•Temperatures which are too high will harden or
burn the material. Plastic may therefore separate or a
point of rupture join together again.
Burning work on wood or leather
If you enjoy burning work, then the cutting point offers
you a special accessory specially prepared for engraving.
The rapid adaptation of the working temperature to the
material allows for work without interruptions.
MAINTENANCE
Repairs may only be carried out by a qualified
electrician or at a service workshop!
The Powercraft machines have been designed to
operate over a long period of time with a minimum of
maintenance. Continuous satisfactory operation
depends upon proper machine care and regular cleaning.
Cleaning
Regularly clean the machine housing with a soft cloth,
preferably after each use. Keep the ventilation slots free
from dust and dirt.
If the dirt does not come off use a soft cloth moistened
with soapy water. Never use solvents such as petrol,
alcohol, ammonia water, etc. These solvents may
damage the plastic parts.
Lubrication
The machine requires no additional lubrication.
Faults
Should a fault occur, e.g. after wear of a part, please
contact your local Powercraft dealer.
ENVIRONMENT
In order to prevent the machine from damage during
transport, it is delivered in a sturdy packaging. Most of
the packaging materials can be recycled. Take these
materials to the appropriate recycling locations.
Take your unwanted machines to your local Powercraft-
dealer. Here they will be disposed of in an
environmentally safe way.
GUARANTEE
For the conditions of guarantee, please refer to the
separately provided guarantee card.
We declare under our sole responsability that this
product is in conformity with the following
standards or standardized documents
EN55014-1, EN-55014-2,
EN61000-3-2, EN61000-3-3,
EN60335-1, EN60335-2-45,
in accordance with the regulations.
73/23/EEC,
89/336EEC
from 01-03-2004
Oststrasse 11 - 13
50996 KÖLN BRD
E. Kok
Quality department
CE
ı
DECLARATION OF CONFORMITY (UK)
Powercraft 5
IMMEDIATELY UNPLUG THE SOLDERING
GUN IN CASE OF:
•The soldering gun is overheated.
•Malfunction of the mainsplug, -socket or damaged
cables.
•Broken switch.
•Smoke or smell caused by scorched insulation.
OPERATING
Use this appliance only for work which is included
in the established operative range.
SOLDERING GUN
•Switch-on: press switch 4 and leave pressed.
•Switch-off: release switch 4.
•The duration of the current supply determines the
heat of the solder (longer current supply = higher
solder temperature). While soldering, do not keep
the switch pressed for too long. Determine the
necessary duration for current supply in practice
through control of the temperature of the solder. In
order to achieve a constant temperature, avoid
constant current for more than 12 seconds and
cutoff current of over 48 seconds. As soon as you
release the switch, the temperature of the solder is
automatically reduced. A subsequent turning on of
the switch ensures a fast increase in temperature.
Constant solder temperature guarantees optimum
solder quality, avoids running the soldering tip at
temperatures which are too high and extends the
service life of the appliance.
Below, we give you some examples of poorly
soldered joints:
•If the soldering tin is tear-shaped, the soldering
coagulate was too cold.
•If the soldering tin is dull and slightly porous or
crystalline, the parts were probably moved during
the cooling process.
•If too little soldering tin has been left in the joint, the
soldering was too warm or the soldering tin was not
melted sufficiently.
•If the soldering tin is yellow or black, this means that
too much soldering paste has been used or that the
inner core of the tin solder wire has become
overheated during soldering.
You must avoid this above all in electronic circuits
since most acid pastes are corrosive and reduce the
service life of electronic wiring.
REPLACEMENT OF THE SOLDERING TIP
Pull out the mains plug!
•The tip and housing of the soldering gun are
connected by means of a contact piece so that the
soldering gun can be comfortably repaired and
changed. Wear and tear of the tip after longer
periods of use make replacement necessary at
regular intervals.
•To replace the soldering tip:
a. Unscrew the 2 fixing screws, which hold the tip and
the housing together, and remove the old tip.
b. Put in the new tip 1 and tighten up the two screws 2
again. The appliance is now ready for work again.
Make sure that the tip is cooled down before
replacing it.
WORKING INDICATIONS
For good soldering
•The soldering joint must be reguline. Remove
oxidation, grease and so forth by means of
mechanical (abrasive paper, brushes, file) or
chemical cleaners (alcohol, fluxing agent).
•The soldering tip
a. Give a good plating of soldering tin.
b. Remove corrosion and scaling with a wet sponge.
c. Never work on it with a file.
•Pretinplating of the parts which are to be tinplated
makes the soldering easier and ensures a perfect
electrical contact.
•Ensure that the wires are mechanically connected
before soldering (twist together, hook into place,
attach round eyelets).
•First heat up the soldering joint and then melt the
solder over the soldering joint and allow it to flow in.
•Melt as little solder as possible.
•Keep the heat load (soldering time) as short as
possible.
•Aperfect soldering joint is shiny and smooth. The
edge shows a clean, bonding join to the metal.
Soldering tin - solder
Soldering tin is essentially an alloy of tin and lead. The
designation of 60/40 means a combination of 60% tin
with 40% lead. For electrically soldered joints, use only
non-acid solder and fluxing agent. For information on
special solder for specific work, consult the
manufacturer.
Flux
The melting of the solder is improved with the use of flux
while, at the same time, impurities such as grease or metal
oxide are removed and evaporate during soldering.
•Organic fluxing agents like colophonium and resins
for acid-free soldering.
•Inorganic fluxing agents, which are highly effective
these are effective but corrosive. Use only for larger
joints and clean the soldering joint thoroughly
afterwards.
Printed circuits
The strip conductors and the miniature component
parts are very temperature-sensitive and can therefore
be easily damaged. Pay attention to the following:
•Prepare the soldering work well.
•Pre-assemble the component parts.
•Secure the printed circuit board or soldering joint
against shifts.
•Use only first class solder with anticorrosive flux.
•Do not apply any surplus solder.
•Keep the soldering time (heat load) as short as
possible.
4Powercraft
Other Power Craft Soldering Gun manuals


