TABLE OF CONTENTS
GENERAL SAFETY PROCEDURES.....................................................................................................1
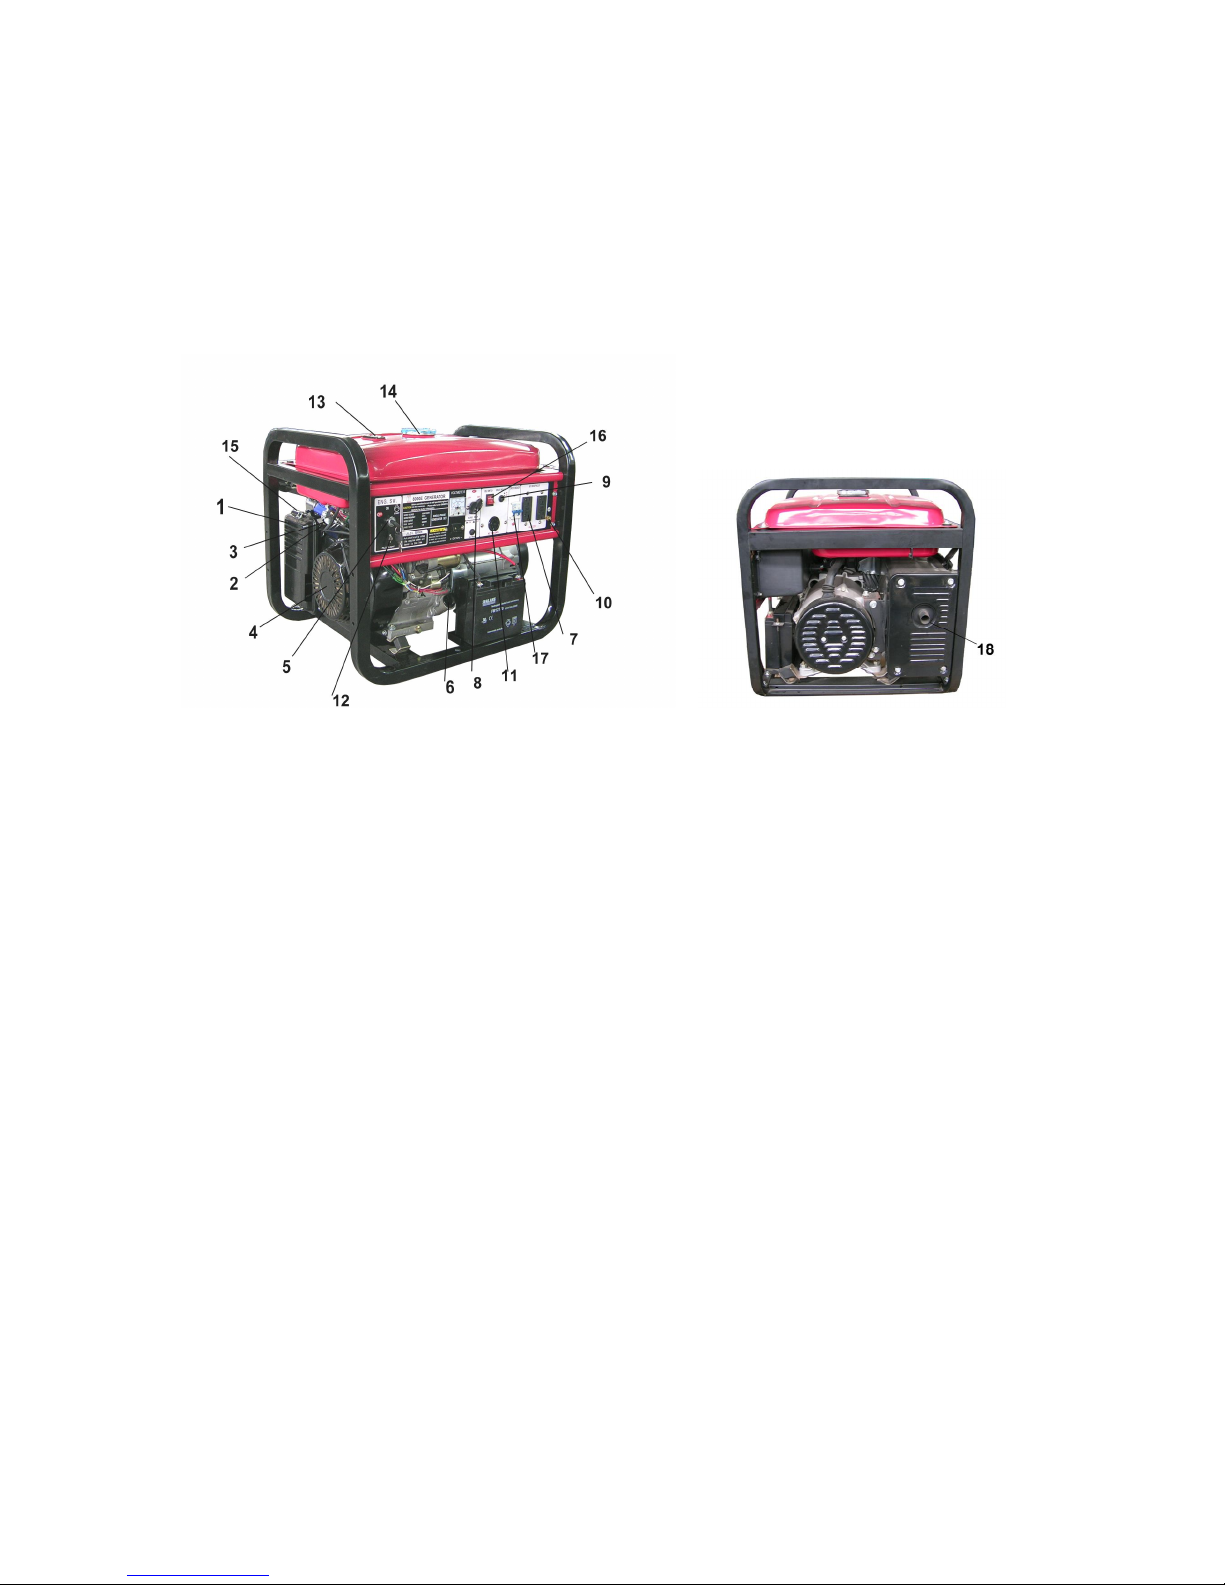
GENERATOR COMPONENTS¡¡¡¡¡¡¡¡¡¡¡¡¡¡¡¡¡¡¡¡¡¡¡¡¡¡ ...3
PREPARING THE GENERATOR FOR USE .......................................................................................4
Using the Generator for the First Time...............................................................................................4
Step 1- Add oil.............................................................................................................................4
Step 2- Add Gasoline¡¡¡¡¡¡¡¡¡¡¡¡¡¡¡¡¡¡¡¡¡¡¡¡¡¡¡ ¡¡¡ ... 4
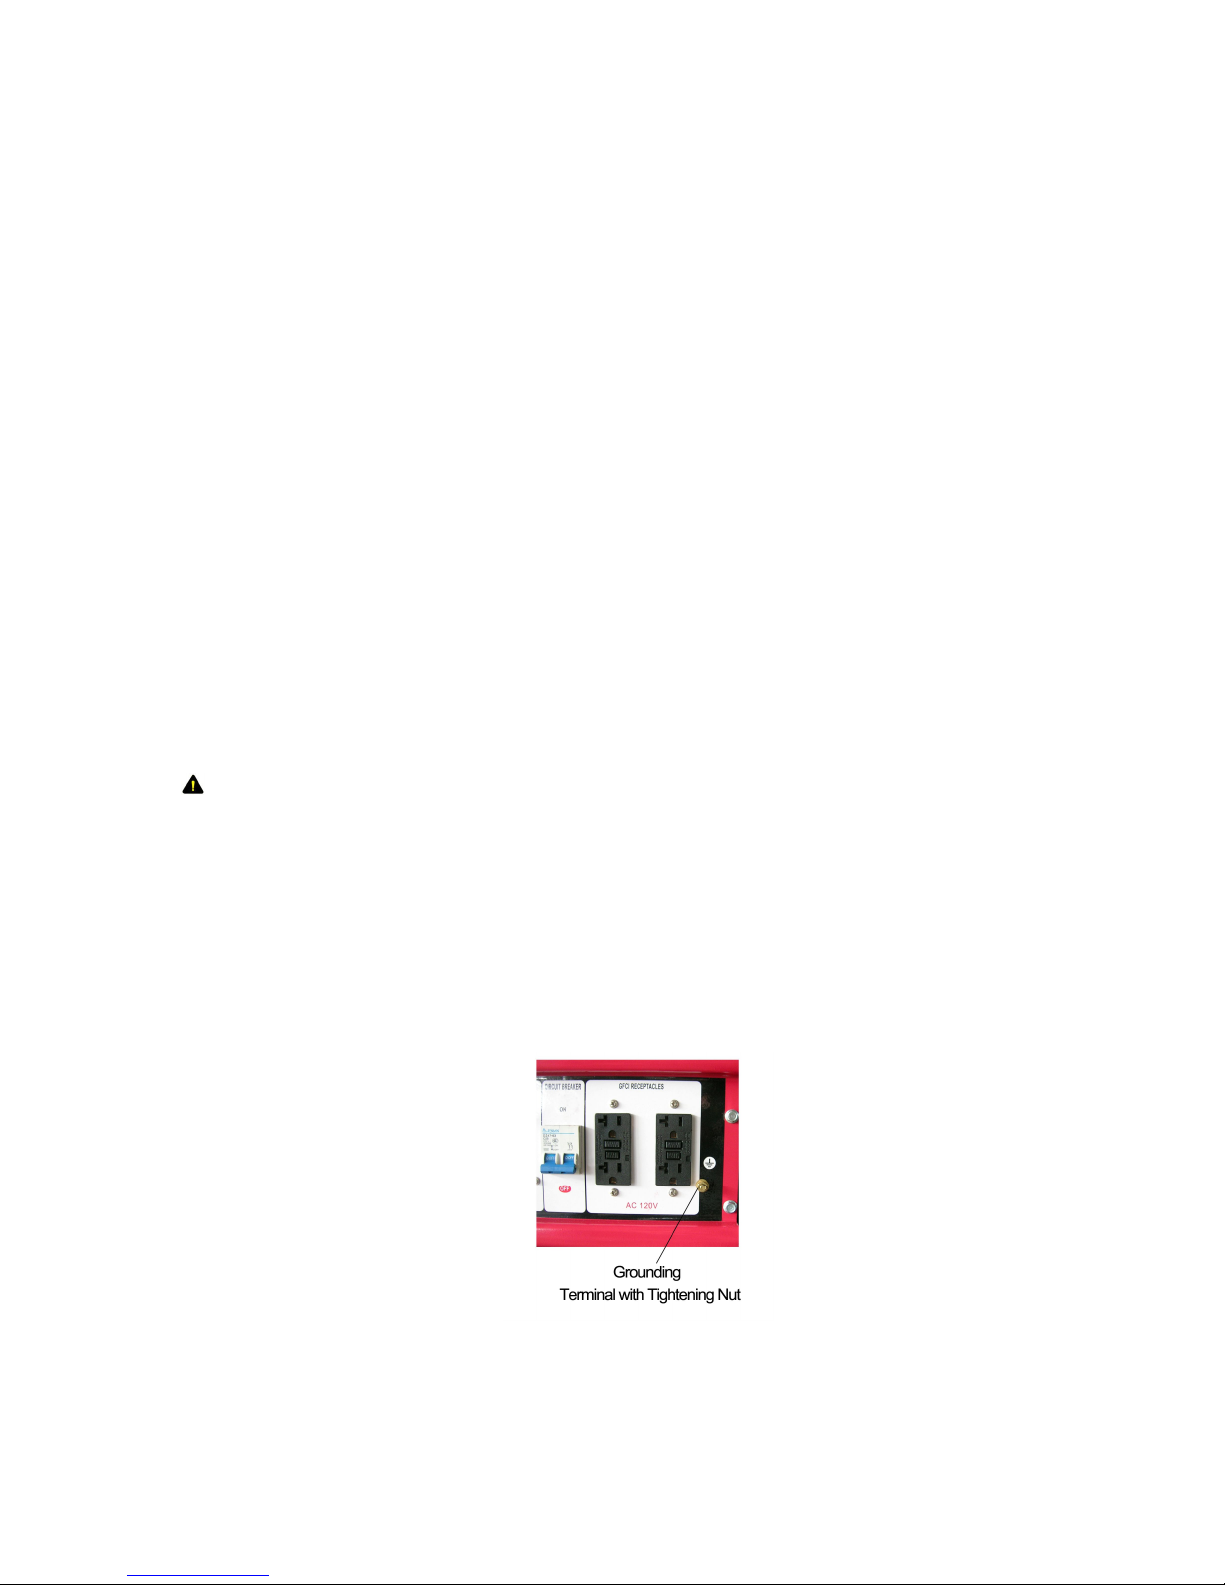
Step 3- Ground the Generator.....................................................................................................5
Subsequent Use of the Generator ........................................................................................................6
Step 1- Check the Oil..................................................................................................................6
Step 2 ¨ Check the Gas Level.....................................................................................................6
Step 3- Ground the Generator.....................................................................................................7
STARTING THE GENERATOR .............................................................................................................8
USING THE GENERATOR....................................................................................................................10
STOPPING THE GENERATOR............................................................................................................13
MAINTENANCE / CARE........................................................................................................................13
Cleaning the Generator.......................................................................................................................13
Checking the Oil.................................................................................................................................14
Changing/ Adding Oil........................................................................................................................14
Air Cleaner Maintenance ...................................................................................................................15
Fuel Filter Cup Cleaning....................................................................................................................16
Spark Plug Maintenance.....................................................................................................................16
Emptying the Gas Tank......................................................................................................................17
STORAGE/TRANSPORT PROCEDURES¡¡¡¡¡¡¡¡¡¡¡¡¡¡¡¡¡¡¡¡¡ ..17
SPECIFICATIONS¡¡¡¡¡¡¡¡¡¡¡¡¡¡¡¡¡¡¡¡¡¡¡¡¡¡¡¡¡¡¡ ..18
TROUBLESHOOTING¡¡¡¡¡¡¡¡¡¡¡¡¡¡¡¡¡¡¡¡¡¡¡¡¡¡¡¡¡ .. 19
WIRING DIAGRAM ................................................................................................................................20
NOTICE REGARDING EMISSIONS
Engines that are certified to comply with U.S. EPA emission regulations for SORE (Small Off Road
Equipment), are certified to operate on regular unleaded gasoline.