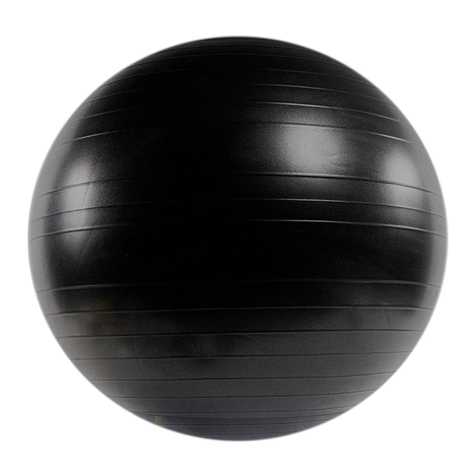
Power Systems Versacore Trainer Operating manual

1 Rev. 06/04
VERSACORE™ TRAINER
IMPORTANT INFORMATION
PLEASE READ AND KEEP

2 Rev. 06/04
VersaCore™ Trainer
Exercise gym balls / stability balls offer a dynamic training environment for a variety of
exercises at a variety of difficulty levels. Serious injury can occur when not used properly.
Power Systems brand gym balls are intended for use only as described in the enclosed
instructions. Other uses are not recommended. In addition to the enclosed instructions for
use, please observe the following precautions each and every time before using your gym
ball.
•The maximum loading capacity on the VersaCore™ Trainer Gym Ball is 250 lbs. or 115 kgs.
•Inspect your gym ball prior to each use. Look for any nicks, scratches, cuts, worn spots, or
any other defect that may cause the ball to break during use.
•DO NOT USE ball if damage or other defects are found. Discard and replace immediately.
Do not attempt to repair or patch a damaged ball.
•Gym balls are designed for indoor use. Do not use the ball outdoors.
•Gym balls are not toys. Children should only use with adult supervision.
•Only use the ball in an open space away from furniture, walls or other equipment. Inspect
the floor surface for any small objects that could puncture the ball.
•Do not exceed the maximum or suggested weight capacity for your ball.
•Do not wear jewelry, rings, watches, belt buckles or other sharp objects that could puncture
the ball.
•Maintain optimal posture when exercising on the ball. To avoid possible back injury, do not
bounce on the ball while bending or twisting the spine.
•Avoid prolonged exposure to sunlight or water.
•Keep the ball away from direct heat sources such as heaters and fireplaces.
•Life expectancy of this product is consistent with the amount of usage sustained. As a
precaution, gym balls should be replaced every year if used in an institutional or commercial
setting and every two years if used strictly for personal use.
•Always consult your physician before beginning any exercise program.
•POWER SYSTEMS, INC. ASSUMES NO LIABILITY FOR INJURY OR DAMAGES
THAT MAY OCCUR WITH USE OF THIS PRODUCT. POWER SYSTEMS WARRANTS
THAT THE DESIGN OF THE EXERCISE GYM BALLS/STABILITY BALLS IS IN
CONFORMANCE WITH ALL APPLICABLE DESIGN STANDARDS, RULES,
SPECIFICATIONS, REGULATIONS AND PRODUCT QUALITY STANDARDS
APPLICABLE TO SUCH EXERCISE GYM BALLS/STABILITY BALLS, THE
INDUSTRY USING THE EXERCISE GYM BALLS/STABILITY BALLS AND AT THE
TIME OF SALE, THE EXERCISE GYM BALLS/STABILITY BALLS SHALL BE FREE
FROM DEFECTS IN WORKMANSHIP OR MATERIALS. POWER SYSTEMS
EXPRESSLY DISCLAIMS ALL WARRANTIES OF ANY KIND RELATED TO THE
EXERCISE GYM BALLS/STABILITY BALLS OR THEIR SPECIFICATIONS OR
DESIGNS, WHETHER EXPRESS, IMPLIED OR STATUTORY, INCLUDING WITHOUT
LIMITATION THE IMPLIED WARRANTIES OF TITLE, MERCHANTABILITY AND
FITNESS FOR A PARTICLUAR PURPOSE.
3 Rev. 06/04
Inflation Instructions
The centimeter size indicated on your gym ball refers to the maximum inflated diameter of the
ball. Do NOT inflate the ball larger than the indicated ball size or the ball will become weaker,
increasing the risk of ball failure/bursting.
IMPORTANT: Balls must be only partially inflated (80% full) and left unused for a
period of 24 hours before first use. After 24-hour waiting period, balls can be inflated to
the maximum size and used.
•The ball must be measured when inflating to ensure the correct diameter of the ball.
•Mark a line on the wall the distance from the floor that you need your ball diameter to be.
The VersaCore™ Trainer gym ball is a 50cm ball, therefore your mark needs to be at 50cm
or 19.75 inches.
•Hold a yardstick as level as possible on top of the ball while inflating. When the yardstick is
level with the mark on the wall, your ball is inflated to its maximum diameter.
•Once the ball is properly inflated, fully insert the plug to seal the ball.
•Balls can be used slightly under inflated to fit the individual user; however, never over inflate
the exercise ball.
•Never use sharp objects such as scissors or knives to remove the plug.
Assembly Instructions
To assemble the VersaCore™ Trainer base remove the gray base and position it on a level
surface. Take the two metal supports and insert the ends into the molded openings on the base.
Do not force the posts into the holes as this could deform the supports. Secure the metal
supports using the enclosed nuts. The assembled unit is pictured below: note position of stability
ball.

4 Rev. 06/04
SEATED STABILIZATION
START: Sit on the stability ball as if sitting in a chair with an erect
upper body. The feet should be positioned firmly on the floor about
shoulder width apart. Arms should extend directly down at sides.
ACTION: Beginners should continue to maintain this seated position
for 45 to 60 seconds. As the user becomes more acclimated, increase
the level of difficulty by moving the feet together, directly in front of
the ball. This will reduce the lateral stability offered by the legs and
shift the task of balancing to the core musculature.
ADVANCED: While sitting on the ball lift one or both feet off the
floor and extend at the knee holding the leg parallel with the floor while
continuing to maintain an upright posture on the ball. Use the arms to
help steady the body, by extending the arms outward from the side of
the body. CAUTION: Due to the risk of injury from falling off the ball
a spotter should always be present to assist the user in the event they
cannot maintain balance.
EXERCISES:
The following are a series of exercises to get you started using the VersaCore™ Trainer. These are
just a sample of the exercises that can be performed using the VersaCore™ Trainer. Consult with
your coach or trainer to help design a program that is specific to the goals of your training.
CAUTION: Advanced exercises should only be performed under the supervision of a qualified
coach or trainer and with a spotter for safety. Serious injury can result if exercises are performed
incorrectly.
CRUNCHES
START: Start by sitting forward on the ball so that primary contact
is between the ball and the user’s lower back/hips. The shoulder
blades should be lightly contacting the ball at this time. Feet should
be spaced about shoulder width in front of the user with the soles of
the feet flat on the floor. Arms should be crossed over the chest
with hands on the opposite shoulders.
ACTION: Perform a traditional crunch contracting the abdominal
muscles which will cause the upper body to curl upwards. Pause
briefly when the abdominals are completely contacted then slowly
lower back to the starting position. Continue to repeat movement
for duration of the training set.
ADVANCED: Advanced user’s can increase the level of instability
by moving the feet closer together prior to performing this exercise.

5 Rev. 06/04
SIDE BENDS
START: Position the body so that the either the right or left
side of the hips are in contact with the stability ball.
Position the feet comfortably so that they are in contact with
the floor and will prevent the user from sliding off the ball
during the exercise. The hand should be crossed over the
chest.
ACTION: Crunch laterally, raising the shoulders away from
the ball. Continue until the torso, hips and legs are all
inline. Pause 2-3 seconds then lower back to the starting
position. Repeat movement for the duration of the exercise.
BRIDGES
START: Lie against the stability ball so that the shoulders are in
contact with the top of the stability ball. The feet should be spaced
approximately shoulder width apart with the soles flat on the floor.
ACTION: Keeping the feet on the floor and shoulders on the ball,
elevate the hips until the hips are parallel with the floor. The knees
should be at 90 degrees in this position with weight of the body
pressing through the shoulders into the stability ball and through the
heels of the feet into the floor. Hold the hip extension for 2 to 5
seconds, then slowly lover the hips towards the floor. Repeat
movement for the duration of training set.
ADVANCED: Once in a bridge position, attempt to extend one leg at
the knee raising the foot off the floor.
HYPEREXTENSIONS
START: Lie face down on the ball so that the top of the ball is
positioned under the hips and lower abdomen. Feet should be spaced
shoulder width apart with weight on the ball of the foot. Arms can
either be crossed over the chest or hand can be placed behind the head.
ACTION: Lift the shoulders upward using the muscles of the lower
back. Be sure to keep the torso straight as you perform this lift.
Continue to extend the back at the hips until the range of motion is
complete. Pause 2 to 3 seconds before returning to the starting
position. NOTE: Do not continue extension if pain is felt in the back.
Cease the exercise and consult a physician before returning to your
stability ball training.
ADVANCED: To increase the intensity of this exercise, position the
arm directly out in front of the body, as if raising them directly over
your head. This extends the lever arm of the upper body and places
more strain on the muscles performing this exercise.

6 Rev. 06/04
SINGLE LEG LUNGES
START: Stand in front of the VersaCore™ Trainer. Extend one leg
behind you placing the ankle/shin on top of the ball. The knee
should be slightly bent. Slide the front leg forward until the
majority of the body’s weight is supported on this leg.
ACTION: Sink the hips toward the floor, bending the knee of the
front leg until the thigh is parallel with the floor. To reduce stress
on the knee and ankle, keep the knee of the front leg positioned
over the ankle so that the knee is bent at 90 degrees. Pause 2 to 3
seconds before extending the front leg, lifting the hips back to the
starting position. Repeat movement for duration of the set.
PUSH-UP (HANDS ON BALL)
START: Stand facing the VersaCore™ Trainer. Lean forward
and place hands on the ball while keeping the feet in contact with
the floor. The torso, hips and legs should remain in a straight
line.
ACTION: Bend at the elbows to 90 degrees. To reduce the strain
on the shoulder girdle, keep the elbows below the shoulders
during this exercise. Once the elbows are at 90 degrees pause
briefly then extend arms till they are straight. Repeat movement
for duration of training set.
PUSH-UP (LEGS ON BALL)
START: Lie on the stability ball, placing the abdomen on top
of the ball. Extend the arm out in front until the hands are flat
on the floor. Use the hands to walk the body forward until the
ankles are on top of the stability ball. Keep the core muscles
tight, the hips should not sag downward at any time.
ACTION: Bend at the elbows to 90 degrees. To reduce the
strain on the shoulder girdle, keep the elbows below the
shoulders during this exercise. Once the elbows are at 90
degrees pause briefly then extend arms till they are straight.
Repeat movement for duration of training set.

7 Rev. 06/04
ADDITIONAL TRAINING AIDS
The VersaCore™ Trainer can be used with a variety of additional exercise equipment. Add
dumbbells, tubing, or medicine balls just to name a few to increase the intensity of your training.
Power Systems, Inc. offers an excellent selection of dumbbells, tubing products, medicine balls and
other training products to enhance your training session. Contact a Customer Service Representative
at 1-800-321-6975 or visit www.power-systems.com for pricing and availability.
For more information on the VersaCore™ Trainer
or other training products and programs, contact:
Power Systems, Inc.
P.O. Box 31709
Knoxville, TN 37930
1-800-321-6975
www.power-systems.com
Copyright © 2004 by Power Systems, Inc.
KNEEL ON BALL – ADVANCED USERS ONLY
START: With assistance from the spotter kneel on top of the
stability ball with knees shoulder width apart. Keep the torso
upright and the glutes and hamstrings tight to keep the hips in line
with the torso.
ACTION: Signal the spotter to step back and extend the arms
outward from the body to help with balance. The key to this drill is
to remain in an erect, tall position without any movement.
Continue to hold this position for the duration of the training set.
Always have the spotter near to assist in the event balance is lost to
prevent the user from falling off the ball and seriously injuring
themselves.
Table of contents
Other Power Systems Fitness Equipment manuals

Power Systems
Power Systems TORSO TRAINER User manual

Power Systems
Power Systems POWER GRIP-BALL Operating manual

Power Systems
Power Systems Power Behind Perfomance VersaSteps Operating manual

Power Systems
Power Systems STRETCH MACHINE User manual

Power Systems
Power Systems CorDisc User manual

Power Systems
Power Systems VersaDisc Instruction Manual

Power Systems
Power Systems VersaRoll 50cm User manual

Power Systems
Power Systems VERSADISC PRO User manual

Power Systems
Power Systems Power Throw-Ball User manual

Power Systems
Power Systems Power VersaBall User manual