6
Illuminated Mirror Owner’s Manual
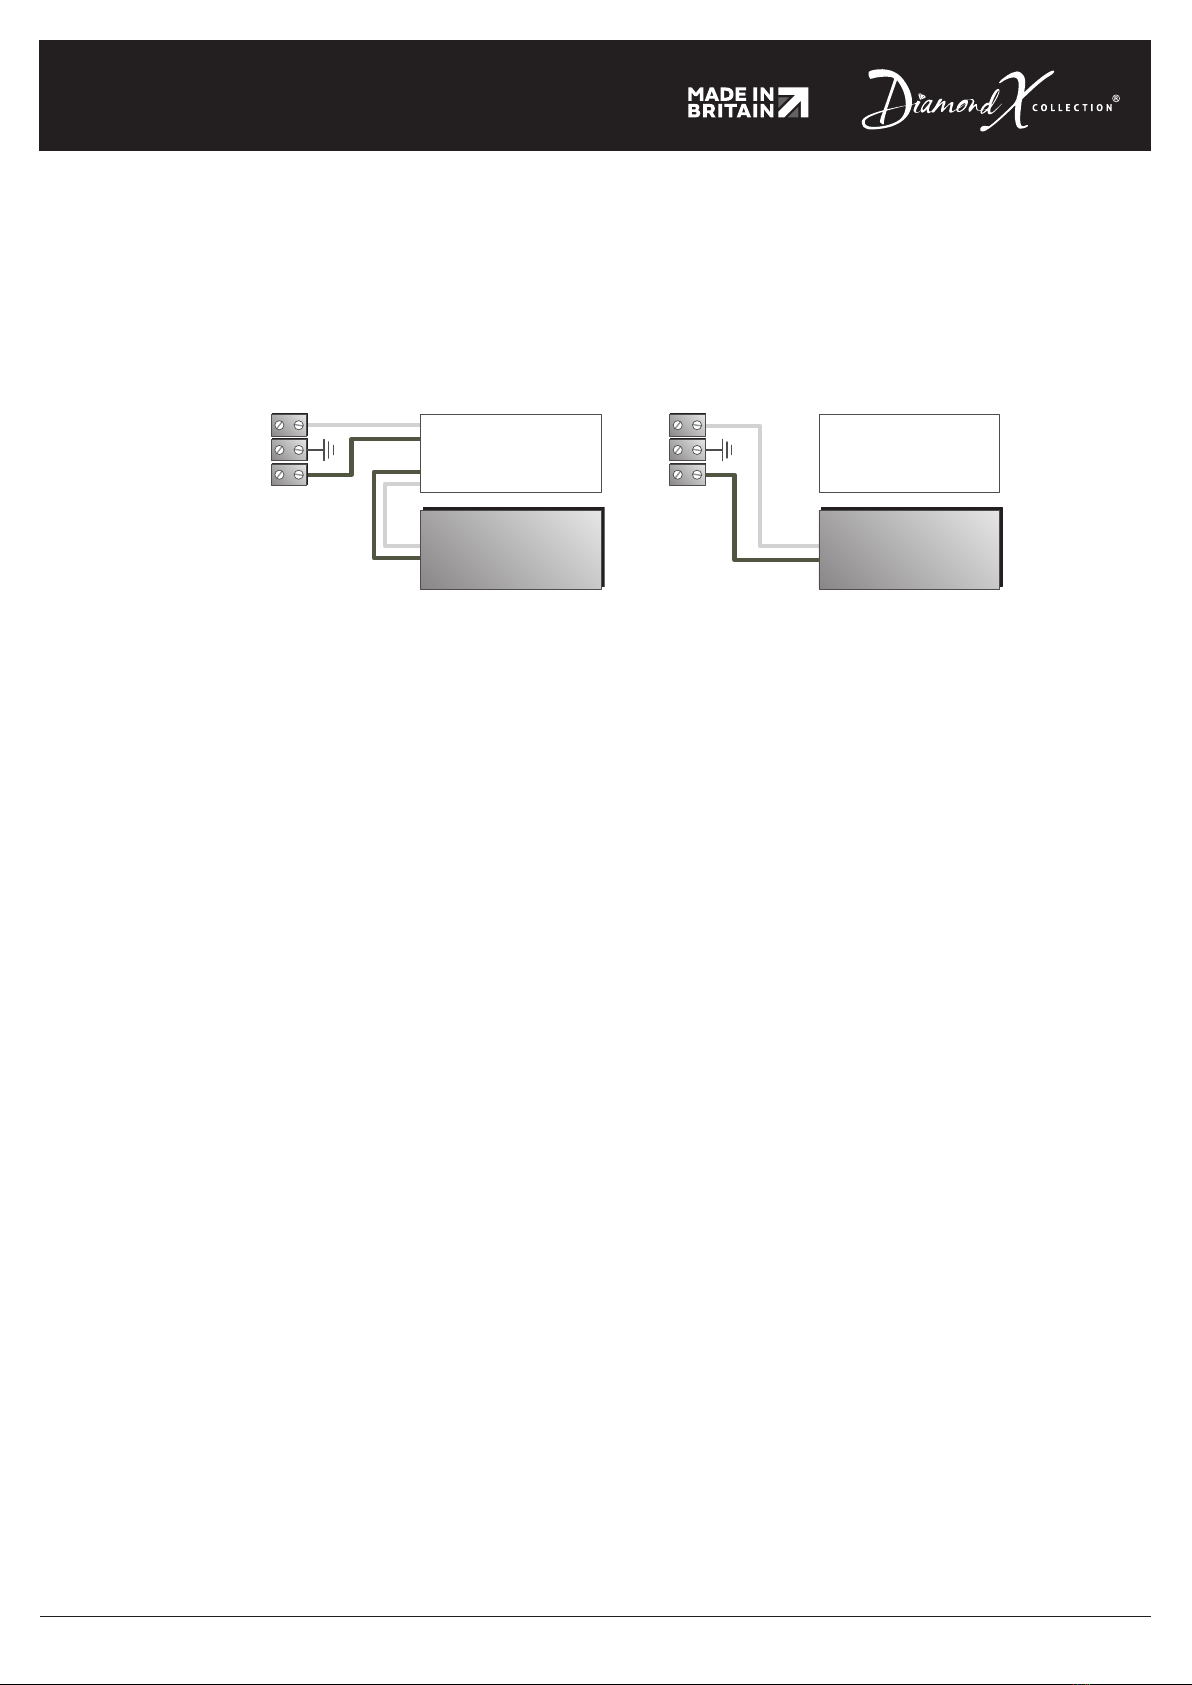
Connecting to bathroom lights (Optional)
If required, a qualified electrician can connect your mirror to the bathroom lighting circuit so that the mirror
is operated using the same switch as the main bathroom lights. The following diagram shows how the
infrared switch may be bypassed.
Infrared
SWITCH
INPUT
OUTPUT
INPUT LED
DRIVER OUTPUT
Infrared
SWITCH
INPUT
OUTPUT
INPUT LED
DRIVER OUTPUT
Infrared switch ON/OFF (as supplied) Controlled by bathroom lighting circuit
Operating instructions
1. Switching on and off using the infrared sensor
Our mirrors include an infrared proximity sensor to control the main mirror lights. Wave your hand across
the sensor, and it will power up the mirror lights and demister pad. Repeat the action to turn them off
again.
2. Selectable cool white/warm white(model-dependent)
A 3-position rocker switch controls the LEDs’ operation and colour temperature. The centre position turns
the lights off. Moving the rocker to the side of the centre will select either warm white (3000°K) or cool
light (5000°K) LED colour.
3. Shaver socket
Our shaver mirrors include a 240 Volt shaver socket to power electric shavers or toothbrushes. A dedicated
on/off rocker switch controls power to the shaver socket. The socket operates independently from the
mirror lights and demister pad.
4. Additional Aura ambient underlighting (model-dependent optional extra)
Single-colour and white ambient underlighting models use the infrared proximity sensor to operate
underlighting. The main mirror lights, demister pad and underlighting, turn on and off together. The main
mirror lights can be switched off independently from the Aura ambient underlighting.
5. Additional Aura colour-change lighting (optional extra)
Single colour lights, dimming and lighting programs are all controlled using the remote control supplied.
The Aura colour-change lighting system will only operate if the main mirror lights are turned on using the
infrared proximity sensor.
Point your remote towards the small black receiver located on the bottom of the mirror frame (d) and press
the “ON” button. Select a static colour option from the keypad by pressing the appropriate colour button.
You can also adjust the brightness by pressing the “UP” and “DOWN” buttons.