PowerPac PP939 User manual

Model: PP939

PARTS & DESCRIPTION
LIST OF COMPONENTS
1.
2.
3.
4.
5.
Top Blade
Bottom Blade
Guide Comb (3/6/9/12 mm)
Blade Lever
ON/OFF Switch
Top Blade
①3 mm (⅛in)
③9 mm (⅜in)
Comb Scissors Oil Brush
②6 mm (¼ in)
④12mm (½ in)
Bottom Blade
Blade Lever
ON/OFF
Switch
1

WARNINGS
ATTENTION :
Read this booklet carefully as it contains important instructions for a safe installation, use and
maintenance.
Important instructions to be kept for future reference.
The following basic precautions should always be followed when using electrical appliances:
1.
2.
3.
4.
5.
6.
7.
8.
9.
10.
11.
Read all instructions before using the appliance.
This appliance must be used only for the purpose it was expressly designed; any use NOT
complying with the instructions contained in the manual is considered inappropriate and
dangerous. The manufacturer is NOT responsible for possible damages caused by the
inappropriate and/or unreasonable use.
This appliance is NOT suitable to be used or stored near heat sources (open flame, ovens,
heaters, stoves, etc.) and/or in an explosive environment (in the presence of flammable
substances such as gas, vapour, mist or dust, in atmospheric conditions when, after ignition,
the combustion is spread in the air). Items containing these substances should never be
placed in the appliance, and never be used to clean the appliance in order to avert the risk of
fire or explosion.
The packing materials (plastic bags, expanded polystyrene, etc.) must be kept out of the
reach of children or disabled persons since they represent potential sources of danger.
The installation/assembly of the appliance will be made in accordance with the indications
of the manufacturer. A wrong procedure may cause damages to persons, animals or objects,
for which the manufacturer cannot be considered responsible.
Before use, check the integrity of the appliance and charging cable. DO NOT use the
appliance with a damaged Guide Comb, with teeth missing from the Blades, or with
unaligned Blades. DO NOT pull, twist or bend the charging cable, nor place heavy objects on
it; or use a charging cable that is worn or frayed. If the charging cable is damaged, it must be
replaced by the manufacturer or its service agent or a qualified technician in order to avoid a
shock hazard.
Before powering the appliance make sure the rating (voltage and frequency) corresponding
to the grid and the socket is suitable for the charging cable, and that the wall socket is
properly grounded.
DO NOT power the appliance using multiple sockets. If possible, avoid the use of adapters
and/or extension cables; if their use is absolutely necessary, use only materials in compliance
with the current safety regulations and according to the electrical parameters of the adapters.
The appliance must NOT be switched on using external timers and/or other remote control
appliances which are not specified in this manual.
Only use original components & accessories provided by the manufacturer. Any non-original
components & accessories (e.g. Blades & Guide Combs) NOT recommended by the
manufacturer may cause injuries to persons or damage to the appliance. Doing so will void
the warranty and may cause serious injury.
If you are using the appliance for the first time, you should:
a. Ensure that the appliance is switched off before cleaning the appliance.
If the exterior of the appliance is sticky, you can apply a small amount of detergent and
clean it with a soft wet cloth. DO NOT use cleaners or chemical substances. DO NOT use
metal scouring pads. DO NOT immerse the appliance, excluding the Blades and the Guide
Comb, in water or other liquids, wash it under the tap, or let any liquid flow into the
internal casing of the appliance to prevent electric shock. DO NOT clean any part of the
appliance in the dishwasher. Wipe the appliance’s surface with a dry cloth.
2

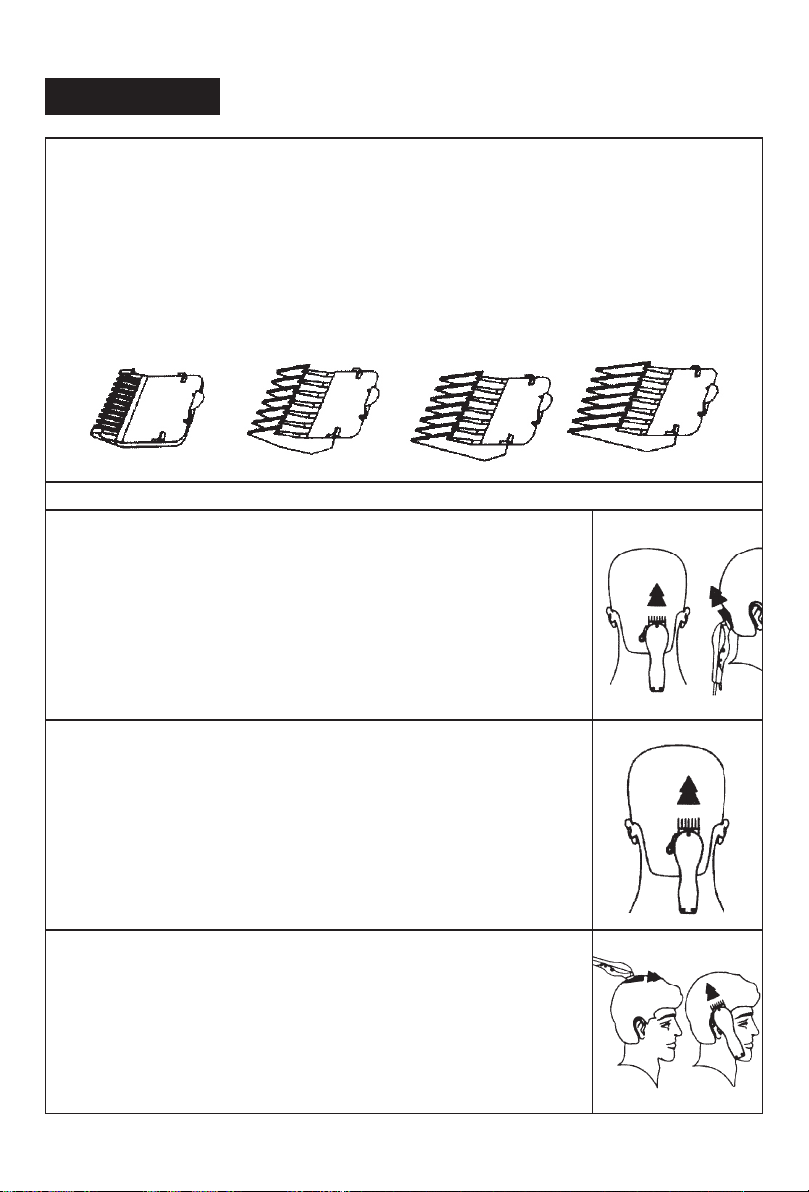
Clean the Blades immediately after using the appliance. To remove the Blades (after
removing the Guide Comb), hold the appliance and press your thumb against the flat
section of the Blades and push upwards. You can rinse the Blades & Guide Comb under
running water. Dry them before re-attaching it to the appliance. To re-attach the Blades,
slip the bottom of the Blades into the catch and, using your thumb, press the Blades into
the appliance.
The Blades have a fixed life. In order to obtain the best result, please replace the Blades
regularly. Using blunt, deformed or damaged Blades may result in skin irritation or injury.
Apply oil to the Blades prior to each use. DO NOT use hair oil, grease, oil mixed with
kerosene or any solvent. To re-align the Blades, switch OFF and unplug, loosen screws
slightly, match the Top and Bottom Blade teeth up, point for point, with the end of the Top
Blade teeth 1.2 mm back from the end of the Bottom Blade teeth, and tighten the screws
use the appliance to trim artificial hair or animal hair;
use the appliance on skin that is wounded, sunburnt, cut or blistered;
use the appliance in an inverted position as it may cause the Blades to cut too deep,
leading to injury;
cover the appliance during functioning;
place the appliance in the microwave or conventional oven, or pour boiling water over any
part of the appliance in order to sterilise it;
place the appliance on any surface while it is operating;
insert objects or body parts inside the protection cover of the appliance;
touch the Blades with your fingers or any utensil while the appliance is operating to avoid
personal injury or damage to the appliance;
operate the appliance for more than 2 minutes without interruption. Let the appliance rest
for 1 minute between processing cycles. After 3 processing cycles, allow an interval of 10
minutes to let the appliance cool down before the next use, so as to prolong its service life.
DO NOT allow the appliance to idle while in operation;
press the Blade Lever or the ON/OFF Switch too forcefully;
leave the appliance unsupervised during operation.
12.
13.
14.
15.
16.
17.
18.
19.
b.
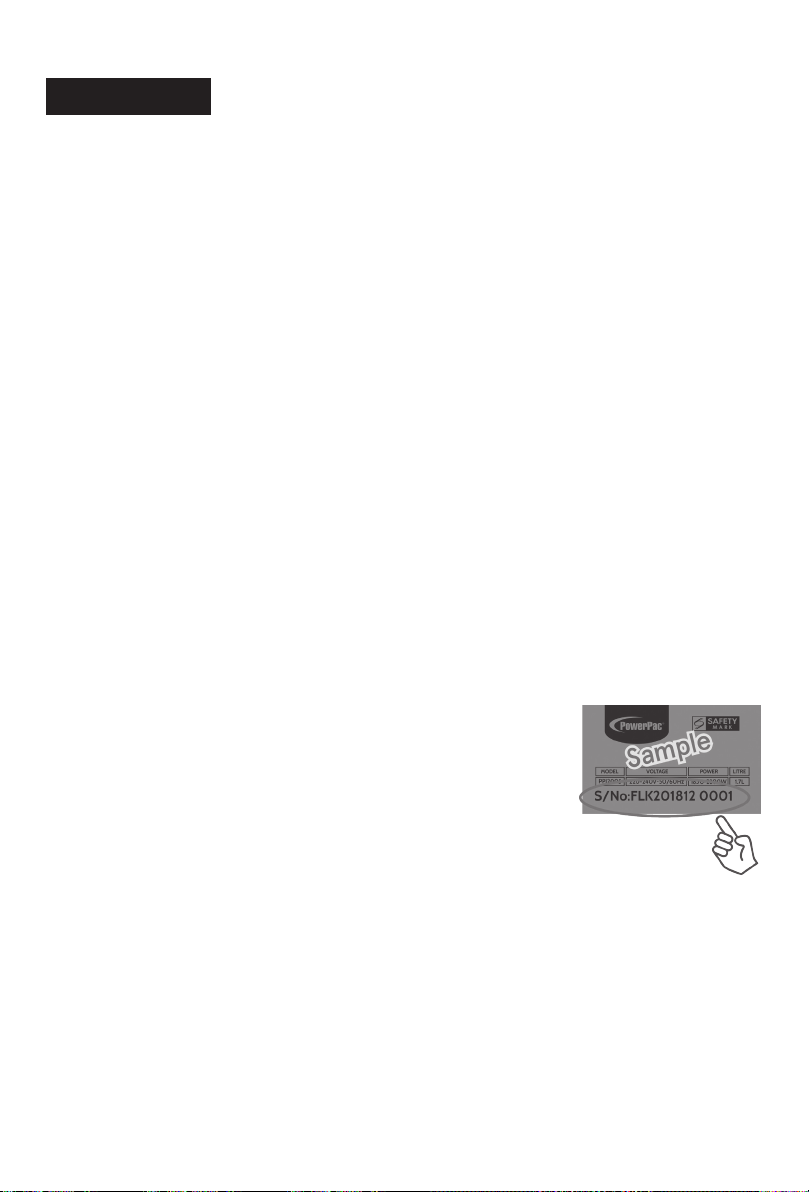
Make sure to remove any label or protective sheet which may prevent its proper functioning.
DO NOT:
•
•
•
•
•
•
•
•
•
•
•
During operation, DO NOT use the appliance whilst showering or touch the appliance with
wet body parts, and it is recommended to have between you and the standing surface, an
isolating element (for example, wearing shoes with rubber soles.
Avoid placing the appliance or charging cable on abrasive or sharp surfaces or in positions
where it can be damaged easily. The cable must NOT be placed under carpets, or covered
with throw rugs, runners or similar. Arrange the cable away from the high traffic area, and
where it will NOT be tripped over.
Always remember to unplug the cable of the appliance after use, before storing, using,
cleaning or performing any maintenance operation.
Avoid carrying out operations which are NOT specified in this manual (such as disassembling
and/or altering).
In case of malfunction or anomaly during the functioning, switch off the appliance
immediately and check the cause of the anomaly, if possible, with the support of a qualified
person.
If smoke is observed coming out of the appliance, switch off the appliance immediately. Let
the appliance and its contents cool before attempting to remove the Blades and the Guide
Comb out of the appliance.
This appliance is NOT intended for commercial use but to be used in households and similar
applications.
DO NOT use or store the appliance outdoors. Store and use the appliance only indoors, or in
any case, protected from weathering such as rain, direct radiation of the sun and dust.
3

Safety Protection
If the appliance overheats, the thermal switch will be activated, leading to the motor being
shut off. Press the ON/OFF Switch OFF. Allow the appliance to cool for at least 15 minutes
before using the appliance.
The Blade Lever
The Blade Lever allows you to gradually change the closeness of the cut without changing
the Guide Comb. When the Blade Lever is at its highest position, your hair will be very short.
When the Blade Lever is at its lowest position, your hair will be longer, just like using Guide
Comb 3 mm (⅛in).
The Blade Lever extends the life of the Blades since a different cutting edge is used for each
setting.
With the Clipper in operation, rapidly move the Blade Leaver from“Close cut” to “Longer cut”
a few times. This action removes hair that had become wedged between the Top & Bottom
Blades, without the need to loosen the screws and remove the Blades. With all the wedged
hair removed, if the Clipper stops cutting and the Blades are jammed even with this action
being repeatedly carried out, the Blades have become dull, and should be replaced.
4

HOW TO CUT
Begin with the Guide Comb of the longest length – ④which leaves 12mm (½ inch) of hair –
until you get used to the length to which each Guide Comb cuts the hair.
To attach a Guide Comb, hold it with the teeth pointing upwards and slide it along the Blades
until the front of the Guide Comb firmly seats against the Blades. To remove the Guide Comb,
pull it upward and away from the Blades.
Comb the DRY hair frequently during cutting to check for uneven strands and to remove cut
hair.
Nape of the Neck
• Attach Guide Combs ①or ②.
• Hold the Clipper with the Blade teeth pointing upwards.
• Begin at the centre of the head at the base of the neck, and stop at the
level near the middle of the ears.
• Slowly work the Guide Comb through the hair without forcing it
through as you work upwards and outwards through the hair,
trimming a little at a time.
• Continue on each side of where you started until the entire nape of
the neck is shaved.
Guide Combs
To cut hair in the region
①3 mm (⅛in) ②6 mm (¼ in) ③9 mm (⅜in) ④12mm (½ in)
Back of the Head
• Attach Guide Combs ③or ④.
• Hold the Clipper with the Blade teeth pointing upwards.
• Begin at the centre of the head where you left off earlier, and stop at
the level near the top of the head.
• Slowly work the Guide Comb through the hair without forcing it
through as you work upwards and outwards through the hair,
trimming a little at a time.
• Continue on each side of where you started until the entire back of
the head is shaved.
Side of the Head
Attach Guide Combs ①or ②and trim both sideburns.
Then attach Guide Combs ③or ④.
Hold the Clipper with the Blade teeth pointing upwards.
Begin at the top of the sideburns, and end at the level near the top of
the head.
5

Top of the Head
• For hair of normal length, use Guide Combs ③or ④.
• If you desire a crew-cut, use Guide Combs ①or ②.
• It is advisable to use a longer Guide Comb first, and then use a shorter
one.
• For long hair which you desire to keep a certain length, use the Comb
provided to lift the hair to the desired length and cut ABOVE the Comb.
• In this case, you need not attach the Guide Comb.
• Alternatively, you can also use your fingers to lift the hair to the
desired length, and cut the hair ABOVE the fingers.
• In this case, you need not attach the Guide Comb.
In all cases:
• Hold the Clipper with the Blade teeth pointing upwards.
Begin where you left of at the back of the head, and end at the front of
the head, against the direction of hair growth. In some cases, that
would mean cutting from the front to the back.
The Finishing Touches
• Remove the Guide Comb from the Clipper. Carefully trim the hair all
around the head evenly.
• To achieve clean straight lines at the sideburns, turn the Clipper over.
Then, press the Clipper at right angles to the head, with the tips of the
Blades lightly touching the skin and work downward. This achieves as
clean a cut as you would from a razor.
Short Tapered Styles – ‘Flat Tops’
• Attach Guide Comb ④.
• Hold the Clipper with the Blade teeth pointing upwards.
• With the Guide Comb flat against the head, begin at the centre of the head at the base of the
neck, and stop at the crown.
• Continue on each side of where you started until the entire back and sides are shaved.
• Then, cut the hair from the front of the head to the crown, against the direction of hair
growth. (refer to diagram)
• Remove the Guide Comb from the Clipper. To achieve a‘Flat Top’, use the Comb provided and
cut the hair ABOVE the Comb.
• Attach Guide Comb ①.
• Hold the Clipper with the Blade teeth pointing upwards.
• Taper the hair down to the neckline as desired.
• Comb hair and check for uneven areas. Use the Clipper to smoothen out such areas.
6

This appliance, along with all other electronic appliances, should, when it is no longer capable of
functioning, be disposed with the least possible environmental damage according to the local
regulations in your area. In most cases you can discard the appliance at your local recycling centre.
DISPOSAL: Do not dispose this appliance as unsorted municipal waste.
Collection of such waste separately for special treatment is necessary.
Risk of child or animal entrapment
Before you discard this appliance, please remove all doors and leave the shelves inside so that
children or animals may not easily get trapped inside.
ENVIRONMENTAL TIP
7

Warranty Conditions
1.
2.
3.
4.
5.
6.
7.
8.
9.
10.
This warranty provides against defective materials and manufacturing faults throughout for
two years from the date of purchase of the appliance. The warranty on the Compressor is 10
years subject to the same conditions as above.
This warranty also does not cover normal wear and tear, replacement of consumable
materials and accessories, and the cost of maintenance of the appliance.
This warranty does not cover the repair or replacement of part/s damaged by misuse,
accidents, negligence, alterations, or modifications in any way, or repairs done by any repair
organisation without the prior consent of PowerPac Electrical Pte Ltd.
Repair and service are to be performed at: 5 Changi South Lane #03-01 Singapore 486045.
A transport fee will be charged for personal doorstep service.
The original purchaser of the appliance must furnish proof of purchase to our Service Centre
with the email or number as registered during submission of warranty when this appliance is
sent for repair/service. Failure to do so may delay the receipt of said repair/service by the
customer.
Under no circumstances whatsoever shall the serial number be erased, defaced or altered by
the customer and/or his representatives, or the dealer and/or his agents. Failure to ensure
this shall invalidate the warranty.
This warranty is deemed to be void if the defect is cause by the attack of household pests,
fire, lightning, natural disasters, pollution, abnormal voltage or the usage of generators.
This warranty is valid in Singapore only.
This warranty will be honoured subject to the customer’s registration of the warranty
inclusive of original invoice or valid purchase receipt. Failure to present these documents will
result in denial of service. However, if the customer still requests that the defective appliance
be repaired, PowerPac Electrical Pte Ltd may, at its discretion, repair the appliance but impose
a labour charge, as well as the costs of the replacement parts, to be borne solely by the
customer.
Please refer to the attached picture for the location of one of our appliance’s serial number,
as an example.
Please complete the on-line registration warranty form available
on our website. There is no further requirement to send us any
hard copy as part of our efforts to save the environment.
In accordance with the terms and conditions of this limited
warranty as stated above, PowerPac Electrical Pte Ltd, at its
expense shall provide free services for the appliance within the
warranty period from its date of purchase from our Authorised
dealers.
WARRANTY
8

PP939
MODEL
220-240V ~ 50/60Hz
VOLTAGE
9W
WATTS(W)
SPECIFICATION
9
Table of contents
Popular Cutter manuals by other brands

Marshalltown
Marshalltown Bullet SharpShooter 2.0 manual

Huskie Tools
Huskie Tools Pro Line 7 Series Operator's manual

KISANKRAFT
KISANKRAFT KK-FEC-2500 user manual

Proxxon
Proxxon Microcutter MIC manual

Roland
Roland CM-500 user manual

Hitachi Koki
Hitachi Koki VB16Y - Rebar Cutter And Bender Safety instructions and instruction manual