Powersmart PS76170A User manual

INSTRUCTION MANUAL
20V Cordless Brushless Brad Nailer and Stapler
Model # PS76170A
Have product questions or need technical support? Please scan the QR code to enter our official
website and contact us!
Website: www.powersmartusa.com
Toll free: 1-800-791-9458 M-F 9-5 EST
Email: support@amerisuninc.com
Website

2

3
CONTENTS
Technical data …...……………………………………………………… 3
Introduction …...………………………………………………………... 4
Safety information …...………………………………………………… 4
General safety rules…….………………………………………….…… 5
Special safety rules for brad nailer……………………………………. 10
Symbols …...………………………………………………………..… 11
Knowing your brad nailer.……………….………………………….… 12
Assembly instruction…………………………………………….………. 13
Operating instruction…………………………………………………....... 15
Maintenance……………………………………………………...………. 17
Trouble shooting…………………………………………………………. 18
Exploded view & parts list………………………………………………… 19
Warranty statement………………………………………………………. 22
TECHNICAL DATA
20V Cordless Brushless Brad Nailer and Stapler Model # PS76170A
Nail gauge: 18
Nail type: Brad nail / 1/4"Narrow crown staple
Brad nail length: 5/8"~2"
Crown staple length: 5/8"~1-5/8"
Magazine capacity: 100pcs
Battery type: 20V Lithium-ion, 4.0Ah
Battery model: PS76440B
Charge time: 2.5 hours
Charger model: PS76018C
Charger rating: Input: 120V AC, 60Hz, 0.54A; Output: 20V DC, 1.5A
Package dimensions (L x W x H): 18.6 x 5.2 x 13.8 inches
Weight: 14.1 lb.

4
INTRODUCTION
Thank You for Purchasing a PowerSmart®Product. This manual provides information regarding the safe
operation and maintenance of this product. Every effort has been made to ensure the accuracy of the
information in this manual. PowerSmart®reserves the right to change this product and specifications at
any time without prior notice.
Please keep this manual available to all users during the entire life of the power tool.
This manual contains special messages to bring attention to potential safety concerns, power
tool damage as well as helpful operating and servicing information. Please read all the
information carefully to avoid injury and machine damage.
QUESTIONS? PROBLEMS?
Please contact our Customer Service Dept. with any questions and/or comments, either by Email:
support@amerisuninc.com, or Toll Free at (800)791-9458. We are available Mon-Fri 9am-5pm EST to
help solve any issues that you might encounter.
SAFETY INFORMATION
Before operating this power tool, read and observe all warnings, cautions, and instructions on the power
tool and in this Owner’s Manual.
NOTE: The following safety information is not meant to cover all possible conditions and situations that
may occur. Read the entire Owner’s Manual for safety and operating instructions. Failure to follow
instructions and safety information could result in serious injury or death.
This safety alert symbol is used to identify safety information about hazards that can result in personal
injury.
A signal word (DANGER, WARNING, or CAUTION) is used with the alert symbol to
indicate the likelihood and the potential severity of injury. In addition, a hazard symbol may
be used to represent the type of hazard.
DANGER Indicates a hazard, which, if not avoided, will result in death or serious injury.
WARNING Indicates a hazard, which, if not avoided, could result in death or serious injury.
CAUTION Indicates a hazard, which, if not avoided, might result in minor or moderate injury.
CAUTION Without the alert symbol, indicates a situation that could result in damage.

5
GENERAL SAFETY RULES
Safety is a combination of common sense, staying alert, and knowing how your power tool works.
SAVE THESE SAFETY INSTRUCTIONS.
WARNING: Do not operate this unit until you read this instruction manual for safety,
operation and maintenance instructions. Failure to follow all instructions listed below may
result in electric shock, fire, and/or serious personal injury.
WORK AREA SAFETY
Keep your work area clean and well lit. Cluttered and dark areas invite accidents.
Do not operate power tools in explosive atmospheres, such as in the presence of flammable liquids,
gases, or dust. Power tools create sparks which may ignite the dust or fumes.
Keep bystanders, children, and visitors away while operating a power tool. Distractions can cause
you to lose control.
Avoid unintentional misfires. Always use caution to avoid accidentally firing. Do not point towards
yourself or anyone whether it contains fasteners or not.
ELECTRICAL SATETY
Grounding instructions
IN THE EVENT OF A MALFUNCTION OR BREAKDOWN, grounding provides the path of least
resistance for electric current and reduces the risk of electric shock. This tool is equipped with an electric
cord that has an equipment grounding conductor and a grounding plug. The plug MUST be plugged into
a matching outlet that is properly installed and grounded in accordance with ALL local codes and
ordinances.
DO NOT MODIFY THE PLUG PROVIDED. If it will not fit the outlet, have the proper outlet installed
by a licensed electrician.
IMPROPER CONNECTION of the equipment grounding conductor can result in electric shock. The
conductor with the green insulation (with or without yellow stripes) is the equipment grounding
conductor. If repair or replacement of the electric cord or plug is necessary, DO NOT connect the
equipment grounding conductor to a live terminal.
CHECK with licensed electrician or service personnel if you do not completely understand the grounding
instructions, or if you are not sure if the tool is properly grounded.
USE ONLY THREE-WIRE EXTENSION CORDS that have 3-pronged plugs and outlets that accept the
tool's plug as shown in Fig. A. Repair or replace a damaged or worn cord immediately.

6
CAUTION: In all cases, make certain the outlet in question is properly grounded. If you are not sure if it
is, have a licensed electrician check the outlet.
WARNING: Do not expose to rain or use in damp locations.
Guidelines for using extension cords
Make sure your extension cord is in good condition. When using an extension cord, be sure to use one
heavy enough to carry the current your product will draw. An undersized cord will cause a drop in line
voltage resulting in loss of power and overheating. The table below shows the correct size to be used
according to cord length and nameplate ampere rating. If in doubt, use the next heavier gauge. The
smaller the gauge number, the heavier the cord.
Minimum Gauge for Extension Cords (AWG)
(When using 120 V only)
Make sure your extension cord is properly wired and in good condition. Always replace a damaged
extension cord or have it repaired by a qualified person before using it.
Protect your extension cords from sharp objects, excessive heat and damp or wet areas.
Use a separate electrical circuit for your tools. This circuit must not be less than a #12 wire and should be
protected with a 15 A time-delayed fuse. Before connecting the motor to the power line, make sure the
switch is in the OFF position and the electric current is rated the same as the current stamped on the motor
nameplate. Running at a lower voltage will damage the motor.
WARNING: This tool must be grounded while in use to protect the operator from electric
shock.
PERSONAL SAFETY
Always wear eye protection. Operator and others in the work area should always wear
ANSI-approved safety goggles with side shields. Eye protection is used to guard against flying
fasteners and debris, which may cause severe eye injury. You can use the goggles packed with the
tool.
Ampere Rating
Total Length of Cord in feet
More Than Not More
Than
25 50 100 150
0
6
18
16
16
14
6
10
18
16
14
12
10
12
16
16
14
12
12
16
14
12
Not Recommended

7
Use safety equipment. A Dust mask, non-skid safety shoes, hard hat, or hearing protection must be
used for appropriate conditions. Wear a full face shield if you are producing metal filings or wood
chips.
Dress properly. Do not wear loose clothing or jewelry. Contain long hair. Keep your hair, clothing,
and gloves away from moving parts. Loose clothes, jewelry, or long hair can be caught in moving
parts.
Stay alert, watch what you are doing and use common sense when operating a power tool. Do not use
a power tool while you are tired or under the influence of drugs, alcohol or medication. A moment of
inattention while operating power tools may result in serious personal injury.
Prevent unintentional starting. Ensure the switch is in the off position before connecting to power
source and/or battery pack, picking up or carrying the tool. Carrying power tools with your finger on
the switch or energizing power tools that have the switch on invites accidents.
Keep proper footing and balance at all times. Proper footing and balance enables better control of the
tool in unexpected situations.
Do not use on a ladder or unstable supports. Stable footing on a solid surface enables better control
of the tool in unexpected situations.
Dress properly. Do not wear loose clothing or jewelry. Keep your hair, clothing and gloves away
from moving parts.Loose clothes, jewelry or long hair can be caught in moving parts.
POWER TOOL USE AND CARE
Know this tool. Read manual carefully, learn its applications and limitations, as well as the specific
potential hazards related to this tool.
Use only fasteners that are recommended for your models. Do not use the wrong fasteners or load the
fasteners incorrectly.
Check for misalignment or binding of moving parts, breakage of parts, and any other condition that
may affect the power tools operation. If damaged, have the power tool serviced before using. Many
accidents are caused by poorly maintained tools.
Do not force power tool. Use the correct power tool for your application. The correct power tool will
do the job better and safer at the rate for which it is designed.
Maintain tools with care. Keep tool clean. A properly maintained tool, reduces the risk of binding
and is easier to control.
Store idle power tools out of reach of children and other untrained persons. Power tools are
dangerous in the hands of untrained users.
Check operation of the tool before use. Do not use the tool if the workpiece contact mechanism is not
working correctly as accidental driving of a fastener may occur.
Do not use the power tool if switch does not turn it on or off. Any power tool that cannot be
controlled with the switch is dangerous and must be repaired.
Disconnect the plug from the power source and/or the battery pack from the power tool before
making any adjustments, changing accessories, or storing power tools. Such preventive safety
measures reduce the risk of starting the power tool accidentally.
Keep the tool and its handle dry, clean and free from oil and grease. Always use a clean cloth when
cleaning. Never use brake fluids, gasoline, petroleum-based products, or any strong solvents to clean
your tool.
Never use this tool in a manner that could cause a fastener to be directed toward anything other than
the workpiece.
Do not operate the tool if it does not contain a legible warning label.

8
Use the power tool, accessories and tool bits etc. in accordance with these instructions, taking into
account the working conditions and the work to be performed. Use of the power tool for operations
different from those intended could result in a hazardous situation.
Save these instructions. Refer to them frequently and use them to instruct others who may use this
tool. If you lend this tool to someone else, also lend them these instructions.
BATTERY TOOL USE AND CARE
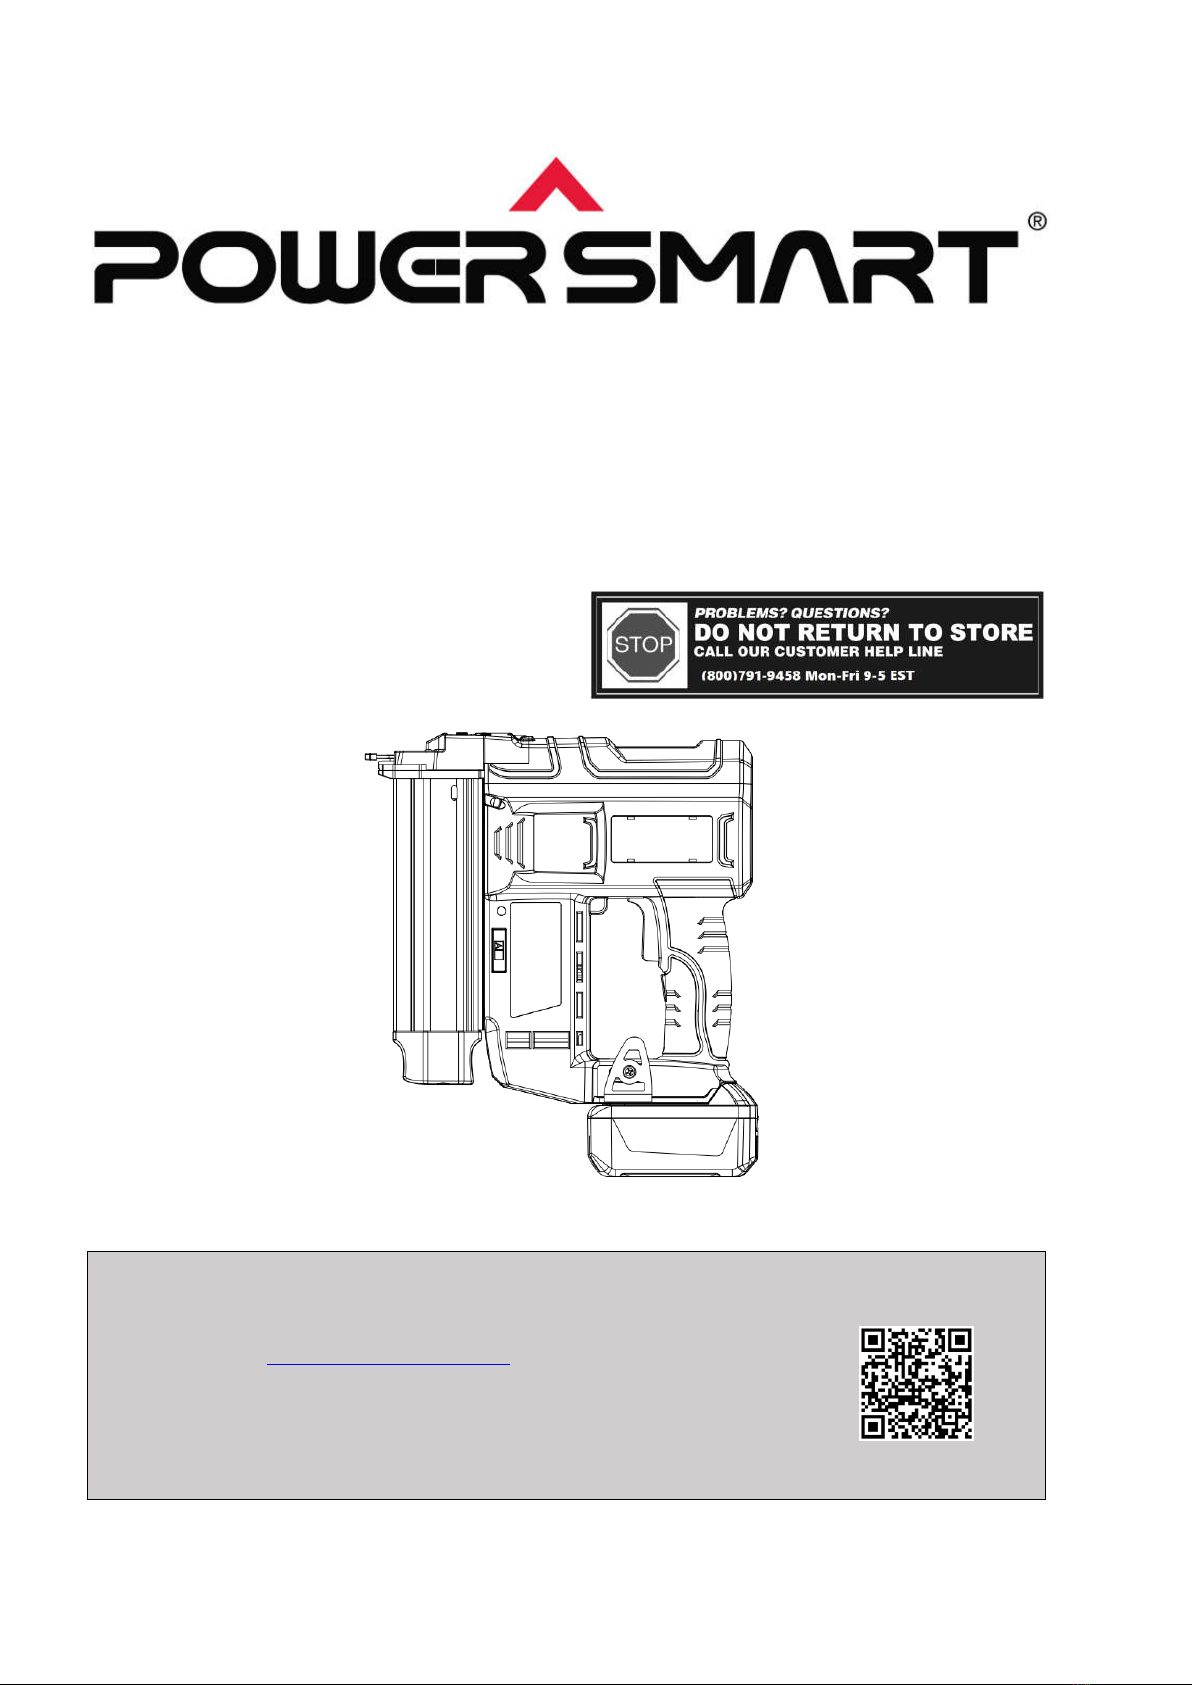
WARNING: USE ONLY POWERSMART APPROVED REPLACEMENT BATTERIES,
OTHER BATTERIES MAY CAUSE INJURY OR DAMAGE TO THE NAILER. Use with
POWERSMART 20V battery.
Battery safety rules
Battery tools do not have to be plugged into an electrical outlet; therefore, they are always in
operating condition. Be aware of possible hazards when not using your battery tool or when
changing accessories. Following this rule will reduce the risk of electric shock, fire, or serious
personal injury.
Do not place battery tools or their batteries near fire or heat. This will reduce the risk of explosion
and injury.
Do not crush, drop or damage battery pack. Do not use a battery pack or charger that has been
dropped or received a sharp blow. A damaged battery is subject to explosion. Properly dispose of a
dropped or damaged battery immediately.
Batteries can explode in the presence of a source of ignition, such as a pilot light. To reduce the risk
of serious personal injury, never use any cordless product in the presence of open flame. An
exploded battery can propel debris and chemicals. If exposed, flush with water immediately. Do not
charge battery tool in a damp or wet location. Following this rule will reduce the risk of electric
shock.
For best results, your battery tool should be charged in a location where the temperature is more than
45°F but less than 104°F. To reduce the risk of serious personal injury, do not store outside or in
vehicles.
Under extreme usage or temperature conditions, battery leakage may occur. If liquid comes in
contact with your skin, wash immediately with soap and water. If liquid gets into your eyes, flush
them with clean water for at least 10 minutes, then seek immediate medical attention. Following this
rule will reduce the risk of serious personal injury.
When battery pack is not in use, keep it away from other metal objects like: paper clips, coins, keys,
nails, screws, or other small metal objects that can make a connection from one terminal to another.
Shorting the battery terminals together may cause sparks, burns, or a fire.
Always remove battery pack from your tool when you are assembling parts, making adjustments,
cleaning, or when not in use. Removing battery pack will prevent accidental starting that could cause
serious personal injury.
Always remove battery pack before storing the device. When battery becomes fully charged, unplug
the charger from the power supply and remove the battery pack from the charger.
Always wear eye protection with side shields marked to comply with ANSI Z87.1, along with
hearing protection. Failure to do so could result in objects being thrown into your eyes and other
possible serious injuries.
Keep battery pack dry, clean, and free from oil and grease. Always use a clean cloth when cleaning.
Never use brake fluids, gasoline, petroleum-based products, or any solvents to clean battery pack.
Do not open or mutilate the battery. Released electrolyte is corrosive and may cause damage to the
eyes or skin. It may be toxic if swallowed.

9
Proper care for battery
Off-season storage
To obtain the longest possible battery life, we suggest the following:
Remove the battery pack from the charger once it is fully charged and ready for use.
For battery pack storage longer than 30 days:
Store the battery pack where the temperature is below 80°F and away from moisture.
Store battery packs in a fully charged condition.
Every two months of storage, charge the pack as normal.
Charger safety rules
Charge the battery in a dry area that is protected from the weather. Do not expose the string trimmer or
the charger to rain. Do not charge the battery in a wet location. Operate the battery charger in
temperatures between 45°F and 104°F. In order to reduce the risk of electric shock, use only the
charger that is provided by the manufacturer to charge the battery.
DO NOT ABUSE THE CHARGE CORD. Never carry the charger by the cord. Do not disconnect the
charger from the outlet by pulling the charger cord.
Do not use a damaged charger. Replace the charger cords or the charger immediately.
Keep the string trimmer and the charger away from water, heat sources (radiators, heaters, stoves,etc.),
flames, and chemicals.
Make sure the battery pack is secured in the charger before beginning operation.
The battery pack will become slightly warm to the touch while charging. This is normal and does not
indicate a problem.
Do not place the charger and battery pack in an area of extreme heat or cold. They will work best at
normal room temperature.
When batteries become fully charged, unplug the charger from the power supply and remove the
battery pack.
WARNING: When transporting or servicing unit, always remove the battery.
WARNING: Some dust created by power sanding, sawing, grinding, drilling and other
construction activities contains chemicals known to the state of California to cause cancer,
birth defects or other reproductive harm. Some examples of these chemicals are:
Lead from lead-based paints,
Crystalline silica from bricks and cement and other masonry products, and
Arsenic and chromium from chemically-treated lumber.
Your risk from these exposures varies, depending on how often you do this type of work. To reduce
your exposure to these chemical: work in a well ventilated area, and work with approved safety
equipment, such as those dust masks that are specially designed to filter out microscopic particles.
SERVICE
Tool service must be performed only by qualified repair personnel. Service or maintenance
performed by unqualified personnel could result in a risk of injury.
When servicing a tool, use only identical replacement parts. Follow instructions in the Maintenance
section of this manual. Use of unauthorized parts or failure to follow Maintenance Instructions may
create a risk of electric shock or injury.

10
SPECIFIC SAFETY RULES FOR BRAD NAILER
Always assume that the tool contains fasteners. Careless handling of the nailer can result in
unexpected firing of fasteners and personal injury.
Do not point the tool towards yourself or anyone nearby. Unexpected triggering will discharge a
fastener causing an injury.
Do not actuate the tool unless the tool is placed firmly against the workpiece. If the tool is not in
contact with the workpiece, the fastener may be deflected away from your target.
Disconnect the tool from the power source when the fastener jams in the tool. While removing a
jammed fastener, the tacker may be accidentally activated if it is plugged in.
Do not use this nailer for fastening electrical cables. It is not designed for electric cable installation
and may damage the insulation of electric cables thereby causing electric shock or fire hazards.
Disconnect battery pack from the tool when not in use. Always remove battery pack and remove
fasteners from magazine before leaving the area or passing the tool to another operator. Do not carry
tool to another work area in which changing location involves the use of scaffoldings, stairs, ladders,
and the like, with battery pack connected. Do not make adjustments, perform maintenance or clear
jammed fasteners while battery is in place.
Always wear safety goggles or safety glasses with side shield, and a full face shield when needed.
Keep hands and feet away from the ejection port area.
Follow instruction for lubricating and changing accessories.
Always remove the battery cartridge before loading the fasteners, adjustment, inspection,
maintenance or after operation is over.
Make sure no one is nearby before operation. Never attempt to drive fasteners from both the inside
and outside of wall at the same time. Fasteners may rip through and/or fly off, presenting a grave
danger.
Watch your footing and maintain your balance with the tool. Make sure there is no one below when
working in high locations.
Do not drive fasteners near edge of material. The workpiece may split causing the fastener or
ricochet, injuring you or people around.
Do not carry the tool from place to place holding the trigger. Accidental discharge could result.
Choice of triggering method is important.
During normal use the tool will recoil immediately after driving a fastener. This is a normal function
of the tool. Do not attempt to prevent the recoil by holding the tool against the work. Restriction to
the recoil can result in a second fastener being driven from the tool. Grip the handle firmly and let the
tool do the work. Failure to heed this warning can result in serious personal injury.
Do not drive fasteners on top of other fasteners or with the tool at an overly steep angle as this may
cause deflection of fasteners which could cause injury.
Always handle the tool with care:
Respect the tool as a working implement.
Never engage in horseplay.
Never pull the trigger unless nose is directed toward the work.
Keep others a safe distance from the tool while tool is in operation as accidental actuation may
occur. possibly causing injury.

11
LOADING TOOL
Do not load the tool with fasteners when any one of the operating controls is activated.
Never place a hand or any part of body in fastener discharge area of tool.
Never point tool at anyone.
Do not pull the trigger or depress the workpiece contact as accidental actuation may occur, possibly
causing injury.
SYMBOLS
Some of the following symbols may be used on this product. Please study them and learn their meaning.
Proper interpretation of these symbols will allow you to operate the product better and safer.
SYMBOL
NAME
DESIGNATION/EXPLANATION
V Volts Voltage
A
Amperes
Current
Hz
Hertz
Frequency (cycles per second)
W
Watts
Power
MIN
Minutes
Time
Safety Alert Precautions that involve your safety.
Read the user’s
manual
To reduce the risk of injury, user must read and understand user’s
manual before using this product.
Eye protection Operators and others in work area must wear safety glasses with
side shields.
Hearing protection Use proper hearing protection when operating this equipment.
Wet conditions alert Do not expose to rain or use in damp locations.
No Hands Symbol Keep fingers away from trigger when not driving fasteners to avoid
accidental discharge.
Environmental
protection
Waste electrical products should not be disposed of with household
waste. Please recycle where facilities exist. Check with your local
authority or retailer for recycling advice.

12
KNOWING YOUR BRAD NAILER
Unpacking
Unpack the power tool and all its parts, and compare against the list below. Do not discard the carton or
any packaging materials. Please call 1-800-791-9458 or E-mail us at support@amerisuninc.com if any
parts are damaged or missing.
Including: Nailer / 300pcs brad nails / 200pcs narrow crown staples / 2 x Hex wrenches : M4 (3mm),M5
(4mm) / Lubricant / Safety glasses / Battery and Charger / User manual
A
LED worklight grip switch
B
C
D
E
F
G
H
I
J
K
L
M
N
Trigger switch
LED worklight
Depth of drive adjustment wheel
No-mar pad
Contact trip
Low nail indicator window
Magazine
Indicator light
Mode selector
Belt hook
Battery
Magazine latch
Extra NO-mar pad
B
A
D
F
G
H
J
K
L
I
C
E
M
Fig.1
N

13
ASSEMBLY INSTRUCTION
WARNING:
Do not use this product if any parts on the packing list are already assembled to your product
when you unpack it. Parts on this list are not assembled to the product by the manufacturer
and require customer installation. Use of a product that may have been improperly assembled
could result in serious personal injury.
WARNING:
If any parts are damaged or missing do not operate this product until the parts are replaced.
Use of this product with damaged or missing parts could result in serious personal injury.
WARNING:
Do not attempt to modify this product or create accessories not recommended for use with
this product. Any such alteration or modification is misuse and could result in a hazardous
condition leading to possible serious personal injury.
WARNING:
Do not connect to power source until assembly is complete. Failure to comply could result in
accidental starting and possible serious personal injury.
INSTALLING AND REMOVING THE BELT HOOK
The belt hook (K) can be installed on the left or right side of the nailer, depending on operator preference.
If the hook is not desired at all, it can be removed from the tool.
Use a screw driver to loosen the belt hook bolt by rotating the bolt in a counter clockwise direction.
Rotate the belt hook to the desired position.
Use the screw driver to tighten the belt hook bolt and lock the belt hook into position.
LOADING THE TOOL
WARNING:Keep the tool pointed away from yourself and others. Serious personal injury
may result.
WARNING:Never load nails with the contact trip or trigger activated. Personal injury
may result.
WARNING:Always remove battery pack before loading or unloading nails. Serious
personal
injury may result.
When replacing nails in your model PS76170A, follow these guidelines:
Nail Type:
Brad nail: Ga18 (1.25×1.0mm) Nail length: 15-50mm (5/8"-2") Capacity: 100 pcs
Staples: Ga18 (1.25×1.05mm) Nail length: 16-40mm (5/8"-1-5/8") Capacity: 100 pcs

14
1. Press magazine latch (M) and open sliding magazine (H) .
2. Insert a stick of fasteners into the magazine channel.
●For brad nails, the pointed ends of the fasteners are
resting on the bottom edge of the magazine when loading.
●For staples, the head of the staples are resting on the top
of the magazine.
3. Close sliding magazine until the magazine latch clips
snuggly.
UNLOADING THE TOOL
WARNING: Always disconnect the power source before unloading.
1. Remove battery (L).
2. Press magazine latch (M) and open sliding magazine (H).
3. Remove all fasteners from the magazine channel.
4. Close sliding magazine until the magazine latch clips snuggly.
NO-MAR PAD
The no-mar pad attached to the nose of the tool helps prevent marring and denting when working with
softer woods.
WARNING: Disconnect the tool from the battery
before removing or replacing the no-mar pad. Failure
to do so could result in serious personal injury.
Remove the battery.
Remove the pad by pulling it down and away from the nose
(See fig.3).
To replace the pad, fit it into place over the nose and push up
to
reseat.
On-board storage for the pad is located on the magazine of the
tool.
An extra no-mar pad (N) is provided in the on-board storage area
(See fig.1).
CONNECTING AND REMOVING BATTERY
IMPORTANT!
The battery pack is not charged when it is purchased. Before using the power tool for the first time, place
the battery pack in the battery charger and charge. Make sure to read all safety precautions, and follow the
instructions in the battery charger section.
To install the battery pack
To install the battery pack into the bottom of the handle, align the rails of the battery pack with the rails in
the handle and push the battery into the handle. To connect the battery, slide the battery pack fully
forward. Until the latch locks into place.
Latch
NO-MAR PAD
Fig.2
Fig.3

15
To remove the battery pack
Press the battery release button ,Slide the battery pack backward, and then pull or lift the battery out of
the tool .
WARNING:
Follow these instructions in order to avoid injury and to reduce the risk of electric shock or
fire:
• Replace the battery pack or the charger immediately if the battery case or charger cord is damaged.
• Verify that the battery pack is removed before inspecting, adjusting, or performing maintenance on
any part of the power tool.
•Read, understand, and follow the instructions.
OPERATING INSTRUCTION
WARNING: Read and thoroughly understand all instructions and safety information
before operating this tool. Failure to do so may cause serious injury or death. Do not allow
anyone to operate this tool who has not read this manual. The tool can be dangerous if
assembled or used improperly. Do not operate this tool if you have doubts or questions concerning safe
operation. Call our customer service department at 1-800-791-9458 to address these concerns.
WARNING: Never point this nalier at yourself or another person! Always pay attention to
the direction this nailer is pointed to reduce the risk of serious injury.
ADJUSTING DEPTH
WARNING:It is advisable to test the depth of drive on a scrap workpiece to determine the
required depth for the application.
The driving depth of the fasteners is adjustable. To adjust the depth, use the drive depth adjustment
wheel(D) on the top of the tools nose.
Rotate the depth adjustment wheel in a clockwise direction when the nose of the tool is pointed away
from you to increase the fastener depth of drive.
Rotate the depth adjustment wheel in a counter-clockwise direction when the nose of the tool is
pointed away from you to decrease the depth of drive.
DRIVING NAILS
WARNING: Never wedge or hold back the workpiece contact mechanism during operation
of the tool. Doing so could result in possible serious injury.
WARNING: Always know the operational mode of the tool before use. Failure to know the
operational mode could result in death or serious personal injury.

16
Single sequential actuation mode
Single sequential actuation provides the most accurate nail placement.
1. Remove battery pack from the tool .
2. Slide the selector up to the single sequential actuation mode(See fig.4).
3. Reinstall the battery, reactivate tool.
4. Place the contact trip against the workpiece and pull the trigger to
drive a nail.
5. Release the trigger after each operation.
Contact actuation mode
Contact actuation allows very fast repetitive nail placement.
1. Remove battery pack from the tool.
2. Slide the selector down to the contact actuation mode (See fig.4).
3. Reinstall the battery, reactivate tool.
4. Pull the trigger first and then place the contact trip against the
workpiece.
NOTE: For the next actuation, you do not need to release the
trigger. Hold trigger until drive cycle is complete.
ANTI DRY FIRE MECHANISM
This tool is equipped with an anti dry fire mechanism. It automatically stops driving nails when the
remaining nails finish. To resume operation, reload the tool with nails.
LED WORKLIGHT
Press LED worklight grip switch (A) while firmly holding tool during operation.
There is a LED worklight on each side of the nailer. The worklights turn on upon activation of the trigger,
or depressing the contact trip. The lights will automatically shut off after 15 seconds unless tool remains
in use.
NOTE: These worklights are for lighting the immediate work surface and are not intended to be used
as flashlights.
INDICATOR LIGHT
Jammed nail indicator: LED red flashing.
Low battery: LED red
Overheat: LED green flashing
No nails: LED green
Mode selector
Fig.4

17
CLEARING JAMMED NAILS/STAPLES
WARNING: Remove the battery pack before removing nails or clearing a jammed nail.
Failure to do so could result in serious personal injury. A jammed nail must be cleared before
using the nailer again.
This Nailer is designed with the unjammed nails device, you can only open the magazine and then the
jammed nails/staples will be dropped out.
Occasionally, a fastener may be jammed in the firing mechanism of the tool, making the tool inoperable.
To remove a jammed fastener, follow the steps below:
1. Press magazine latch and open sliding magazine.
2. The jammed nails/staples will dropped out, if not, just use a nail or some sharp items to take out the
jammed nails.
MAINTENANCE
WARNING: Any time inspection, maintenance, and cleaning are done be sure to remove
the battery from the tool and empty all fasteners from the magazine.
WARNING: When servicing, use only identical replacement parts. Use of any other parts
could create a hazard or cause product damage.
WARNING: Avoid using solvents when cleaning plastic parts. Most plastics are
susceptible to damage from various types of solvents and may be damaged by them. Use
clean fabric or tissues to remove the dirt, dust, oil, grease, etc.
CLEANING THE NAIL CHANNEL
Problems with driving nails or cycling of nails while firing may be due to glue residue from the nail strips
If this is the case clean the area around the driving mechanism.
Remove the tool battery.
Slide magazine cover down to remove nails and expose the nail channel.
Use a small amount of air tool oil on a clean cloth to swab and wipe down the nail channel, until all of
glue are removed.
Reload nails in the magazine and close the magazine cover.
COLD WEATHER OPERATION
When operating tools at temperatures below freezing:
Keep tool as warm as possible prior to use.
Actuate the tool 5 or 6 times into scrap lumber before using.
HOT WEATHER OPERATION
Tool should operate normally. However, keep tool out of direct sunlight as excessive heat can deteriorate
bumpers and other rubber parts resulting in increased maintenance.

18
TROUBLE SHOOTING
The following form lists the common operating system with problem and solutions. Please read the form
carefully and follow it.
WARNING: If any of the following symptoms appears during your operating, stop using the
tool immediately, or serious personal injury could result. Only a qualified persons or an
authorized service center can perform repairs or replacement of tool.
Disconnect tool from air supply before attempting repair or adjustment. When replacing O-rings or
Cylinder, lubricate with air tool oil before assembly.
PROBLEMS
POSSIBLE CAUSES
REMEDIES
Work-contacting element
does not depress fully -
tool does not operate
Low nails
Work-contacting element is jammed
Replenish nails
Remove battery and clear debris
Tool jams. 1. Incorrect or damaged fasteners.
2. Damaged or worn driver guide.
3. Magazine or nose screw loose.
4. Magazine is dirty.
1. Change and use correct
fastener.
2. Check and replace the driver.
3. Tighten the magazine.
4. Clean the magazine.
LED red
LED red flash rapidly
LED green
LED green flash rapidly
Battery is low or has no charge
Tool jams
No nails
Tool is hot
Recharge battery
Clearing jammed nails
Replenish nails
Allow tool to cool
Tool will not drive a
fastener or cycles
without driving a fastener
Driving mechanism is dirty Clean the nail channel as
described in
the Maintenance section of the
manual
Note: Repairs should be carried out by a qualified person.

19
EXPLODED VIEW & PARTS LIST

20
Item Stock# Description Qty. Item Stock# Description Qty.
1 PS76170A-001 Bolt M4X8 2 35 PS76170A-035 O-ring 42.5X2.5 1
2 PS76170A-002 Washer 3 36 PS76170A-036 Cylinder Seat 1
3 PS76170A-003 Short Rod 1 37 PS76170A-037 O-ring 56X2.4 1
4 PS76170A-004 Nut 2 38 PS76170A-038 Big Cylinder 1
5 PS76170A-005 Bolt 1 39 PS76170A-039 Big Piston Ring 1
6 PS76170A-006 Spring 1 40 PS76170A-040 Big Piston 1
7 PS76170A-007 Connecting Pipe 1 41 PS76170A-041 Big Piston Pin 1
8 PS76170A-008 Cover 1 42 PS76170A-042 Bolt M4X6 4
9 PS76170A-009 Fixed Plate 1 43 PS76170A-043 Long shaft 1
10 PS76170A-010 Bolt M4X8 3 44 PS76170A-044 Magnet 2
11 PS76170A-011 Nut M4 1 45 PS76170A-045 Short Shaft Assembly 1
12 PS76170A-012 Copper Washer 1 46 PS76170A-046 Trigger Microswitch 1
13 PS76170A-013 Long Rod 1 47 PS76170A-047 Trigger Spring 1
14 PS76170A-014 Spring 1 48 PS76170A-048 Trigger 1
15 PS76170A-015 Nut M4X10 3 49 PS76170A-049 Indicator Light Switch 1
16 PS76170A-016 Buffer cover 1 50 PS76170A-050 Button Spring 1
17 PS76170A-017 Spacer 1 51 PS76170A-051 Indicator Light Button 1
18 PS76170A-018 Guide Sleeve 1 52 PS76170A-052 Bolt M4X35 1
19 PS76170A-019 Limit Board 1 53 PS76170A-053 Bolt M4X30 1
20 PS76170A-020 Spring Washer 19 54 PS76170A-054 Bolt M4X20 6
21 PS76170A-021 Bolt M4X50 1 55 PS76170A-055 Steel Wire 2
22 PS76170A-022 Guide Plate 1 56 PS76170A-056 Gear Box 1
23 PS76170A-023 O-ring 1 57 PS76170A-057 Bearing 2
24 PS76170A-024 Small Cylinder 1 58 PS76170A-058 Output Shaft Assembly 1
25 PS76170A-025 Rubber Ring 1 59 PS76170A-059 Gear 3 4
26 PS76170A-026 Small Piston Ring 1 60 PS76170A-060 Carrier 2 1
27 PS76170A-027 Piston Rubber
Ring
1 61 PS76170A-061 Gear 2 4
28 PS76170A-028 Magnet 1 62 PS76170A-062 Carrie 1 1
29 PS76170A-029 Piston 1 63 PS76170A-063 Gear 1 3
30 PS76170A-030 Hall Sensor Case 2 64 PS76170A-064 Gear Ring 36 1
31 PS76170A-031 Hall Controller2 1 65 PS76170A-065 Gear Ring 49 1
32 PS76170A-032 Bumper 1 66 PS76170A-066 Gear Washer 1
33 PS76170A-033 Bolt M4X16 6 67 PS76170A-067 Bolt M4x8 2
34 PS76170A-034 Cyliner Cover 1 68 PS76170A-068 Motor Fixed Seat 1
Table of contents
Other Powersmart Nail Gun manuals