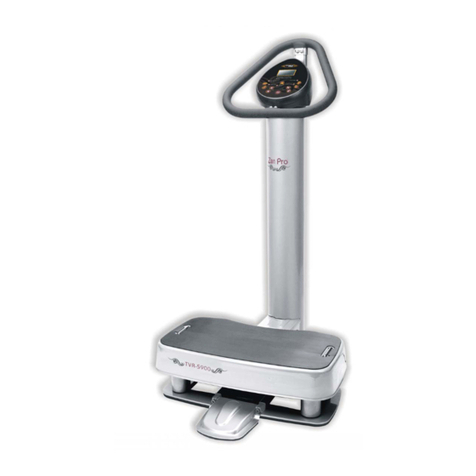
PowerVibe Zen Pro TVR?6920FE User manual

T
TV
VR
R‐
‐6
69
92
20
0F
FE
E
Usermanual

2
Contents:
SAFETY INSTRUCTIONS ‧‧‧‧‧‧‧‧‧‧‧‧‧‧‧‧‧‧‧‧‧‧‧‧‧‧3
1、Important Safety Instructions ‧‧‧‧‧‧‧‧‧‧‧‧‧‧‧‧‧‧‧‧‧‧‧‧3
2、Personal Safety Instructions ‧‧‧‧‧‧‧‧‧‧‧‧‧‧‧‧‧‧‧‧‧‧‧‧ 4
3、Grounding Instructions ‧‧‧‧‧‧‧‧‧‧‧‧‧‧‧‧‧‧‧‧‧‧‧‧‧‧5
PRODUCT INTRODUCTION ‧‧‧‧‧‧‧‧‧‧‧‧‧‧‧‧‧‧‧‧‧‧‧‧‧‧6
1、Origin - Vibration Training ‧‧‧‧‧‧‧‧‧‧‧‧‧‧‧‧‧‧‧‧‧‧‧‧‧‧6
2、Principle - Vibration Theory ‧‧‧‧‧‧‧‧‧‧‧‧‧‧‧‧‧‧‧‧‧‧‧‧6
3、Application of Vibration Training ‧‧‧‧‧‧‧‧‧‧‧‧‧‧‧‧‧‧‧‧‧‧‧6
FEATURES AND BENEFITS ‧‧‧‧‧‧‧‧‧‧‧‧‧‧‧‧‧‧‧‧‧‧‧‧‧8
PRODUCT SPECIFICATIONS ‧‧‧‧‧‧‧‧‧‧‧‧‧‧‧‧‧‧‧‧‧‧‧‧‧9
ASSEMBLY INSTRUCTIONS ‧‧‧‧‧‧‧‧‧‧‧‧‧‧‧‧‧‧‧‧‧‧‧‧‧10
1、Spare Parts List ‧‧‧‧‧‧‧‧‧‧‧‧‧‧‧‧‧‧‧‧‧‧‧‧‧‧‧‧‧‧10
2、Assembly Guide ‧‧‧‧‧‧‧‧‧‧‧‧‧‧‧‧‧‧‧‧‧‧‧‧‧‧‧‧‧‧12
OPERATING INSTRUCTION ‧‧‧‧‧‧‧‧‧‧‧‧‧‧‧‧‧‧‧‧‧‧‧‧‧16
1、Program Operation‧‧‧‧‧‧‧‧‧‧‧‧‧‧‧‧‧‧‧‧‧‧‧‧‧‧‧‧‧17
2、OPERATING INSTRUCTION ‧‧‧‧‧‧‧‧‧‧‧‧‧‧‧‧‧‧‧‧‧‧‧‧19
3、Exercise instruction ‧‧‧‧‧‧‧‧‧‧‧‧‧‧‧‧‧‧‧‧‧‧‧‧‧‧‧‧29
Machine Transportation ‧‧‧‧‧‧‧‧‧‧‧‧‧‧‧‧‧‧‧‧‧‧‧‧‧‧‧32
MAINTENANCE PROCEDURE ‧‧‧‧‧‧‧‧‧‧‧‧‧‧‧‧‧‧‧‧‧‧‧‧33
1、Maintenance Timing And Items‧‧‧‧‧‧‧‧‧‧‧‧‧‧‧‧‧‧‧‧‧‧‧‧33
2、Check List‧‧‧‧‧‧‧‧‧‧‧‧‧‧‧‧‧‧‧‧‧‧‧‧‧‧‧‧‧‧‧‧‧34
WARRANTY‧‧‧‧‧‧‧‧‧‧‧‧‧‧‧‧‧‧‧‧‧‧‧‧‧‧‧‧‧‧‧‧‧35
THE EFFORTS OF TONIC FITNESS WITH ACADEMIC RESEARCHES‧‧36
References‧‧‧‧‧‧‧‧‧‧‧‧‧‧‧‧‧‧‧‧‧‧‧‧‧‧‧‧‧‧‧‧38

3
SAFETY INSTRUCTIONS
Important Safety Instructions
Read all instructions before using your PowerVibe Whole Body Vibration machine.
DANGER- To reduce the risk of electric shock:
Always unplug this appliance from the electrical outlet when not in use and before cleaning.
WARNING- To reduce the risk of burns, fire, electric shock, or injury:
1. The machine should never be left unattended when plugged in. Unplug from outlet when not in
use, and before putting on or taking off parts.
2. Do not operate under any type of cover. Excessive heating can occur and cause fire, electric
shock, or injury.
3. Close supervision is necessary when this machine is used by, on, or near children, invalids, or
disabled people.
4. Use this machine only for its intended use as described in this manual. Do not use attachments
not recommended by the manufacturer.
5. Never operate this appliance if it has a damaged cord or plug, if it is not working properly, if it
has been dropped or damaged, or dropped into water. Return the appliance to a service center for
examination and repair.
6. Do not carry this appliance by supply cord or use cord as a handle.
7. Keep the cord away from heated surfaces.
8. Never operate the appliance with the air openings blocked. Keep the air openings free of lint,
hair, and the like.
9. Never drop or insert any object into any opening.
10. Do not use outdoors.
11. Do not operate where aerosol (spray) products are being used or where oxygen is being
administered.
12. To disconnect, turn all controls to the off position, then remove plug from outlet.

4
Personal Safety Instruction
2. Attention
Always consult with your physician FIRST before starting any exercise program.
Please do not use this product if you have any of the following conditions:
Acute arthritis & rheumatoid arthritis
Detached Retina
Cardiovascular disease
Epilepsy
Acute migraine
Pregnancy
Recent surgeries or open wounds
Other serious diseases
Keep children under age 12 and pets away from the vibration platform at all
times.
STOP use of this product immediately if you encounter any discomfort
or if the machine is not functioning properly

5
Grounding Instructions
This product must be grounded. If it should malfunction or breakdown, grounding provides a
path of least resistance for electric current to reduce the risk of electric shock. This product is
equipped with a cord having an equipment-grounding conductor and a grounding plug. The plug
must be plugged into an appropriate outlet that is properly installed and grounded in accordance with
all local codes and ordinances.
DANGER– Improper connection of the equipment-grounding conductor can result in a
risk of electric shock. Check with a qualified electrician or serviceman if you are in doubt as to
whether the product is properly grounded. Do not modify the plug provided with the product –
if it will not fit the outlet; have a proper outlet installed by a qualified electrician.
This product is for use on a nominal 120-volt circuit and has a grounding plug that looks
like the plug illustrated in the figure. Make sure that the product is connected to an outlet
having the same configuration as the plug. No adapter should be used with this product.

6
Operation Info
PRODUCTS INTRODUCTION
1. What is Whole Body Vibration Training?
‧Origin-Vibration Training
Humans experience the effects of externally applied forces constantly when exercising. When our
feet contact ground during locomotion or as we strike objects with sport implements and daily
activities, for example skiing, surfing, riding, dancing, public transportations, boat, aircraft and many
more. These contacts create vibrations within the tissues of the limbs, which gradually decline as soft
tissues dampen these oscillations, so that calls “vibration stimulus”. The body relies on a number of
factors to achieve this reduction in vibrations, primarily soft tissue structures, but also bone, synovial
fluids, specific joint positions, and muscle activity.
‧Principle-Vibration Theory
Whole Body Vibration training (WBV) is, that subject stands on a platform or plate that produces
sinusoidal oscillations either in a vertical up and down motion, or that rotates about a center fulcrum
producing up and down vertical motion on alternating sides of the fulcrum, applied to either muscle
tendons, or skeletal muscle indirectly to increases muscle activity and subsequently enhances muscle
performance in both acute and chronic conditions for training purpose and sports performance
enhancement. Through WBV to induce Tonic Vibration Reflex (TVR), which is a sustained
contraction of a muscle subjected to vibration caused by vibratory activation of muscle
spindles-muscle receptors sensitive to stretch, has significant improvements on strength and
explosive power. And today, vibration has been proven with significant positive effects on
neuromuscular, bone density, metabolism and many more by sports scientists and academic.
‧Application of Vibration Training
Since the early 1960s, vibration stimulation has been used in medical rehabilitation to stimulate and
induce the activation of the muscle proprioceptors. The contractions caused by this stimulation help
restore normal muscle function. In the field of rehabilitation vibration is being used on patients to
help relieve muscle stress, repair and restore range of motion, osteoporosis prevention, improve
blood circulation, metabolism and improve the autonomic nervous system.
Initially, the concept behind vibration training had its roots in East Germany with a technique called
Rhythmic Neuromuscular Stimulation (RNS). This science was later embraced and developed by
Russian scientists to combat the growing issue of osteoporosis.

7
Since osteoporosis and muscular atrophy were both noted in Russia’s cosmonauts the Russian space
agency used vibration training to combat the effects of the zero gravity environment of space.
(Because there is no gravitational force in space, muscles and bones are not loaded leading to bone
loss and muscle atrophy.) The results of vibration training on the cosmonauts were very significant
including improved muscular strength, increased bone density and preventing osteoporosis.
In 1970s Russia used vibration training on elite athletes to improve muscle strength and endurance.
The performance gains on these athletes had been significant through this new mode of training and
hence the beginning of vibration training in sports. Since than there have been continued studies on
the effects of vibration training. (Please refer to the documents and experiment data in the
addendum).

8
Operation Info
2、Features and Benefits
(1) Features
‧High intensity Tonic Vibration Reflex
‧High/Low adjustable vibration strength design to meet different demand.(Let user has chance to
choose Lower strength if he can not afford Higher strength)
‧High-definition TFT-LCD console display
‧Individual virtual coach makes exercise easier.
‧User-friendly 33 training programs with 8 body model,7 exercise models, 12 editing models
and 6 quick start models.
‧Non-slip grips design
‧Wide platform design provide variety motion space
‧Dual straps design enhances performance of upper body & upper arms.
‧Two sides convex massage design reduces stressed sole and improve blood circulation.
‧High flexible platform design improves balance effect.
(2) Benefits
‧Improve strength, explosive power, and flexibility
‧Enhances body control and balance
‧Improves stressed muscle and releases tension
‧Increases bone density and prevent osteoporosis
‧Increases blood circulation and enhances metabolism
‧Warm-up before exercise and after exercise to relive muscle

9
3、Product Specification
‧Product Name Zen Pro®TVR-6920FE
‧Voltage 120Vac / 60Hz and 230Vac / 50Hz
‧Frequency 25Hz~50Hz
‧Amplitudes HIGH: 2.5mm; LOW: 1.2mm
‧KN Value(Force) HIGH: 2.5KN; LOW: 1.8KN
‧Motor DC Motor 1HP (Heavy Duty)
‧Console Display 7” TFT touch panel
‧Column Display 7-segment LED on stem
‧Exercise Program
‧Quick Start:Manual mode and Auto mode
‧Body Area:
Upper Body/Strength or Relax
Lower Body/Strength or Relax
Core Training/Strength or Relax
Whole Body/Strength or Relax
‧Sports Specific:GOLF、RUN、TENNIS、GYMNASTICS、SKI、
SWIM、CYCLE
User Mode:12 Sets
‧Panel Key ‧Upper console:NA
‧Column Console:START/STOP
‧Dimension (L) 99 cm x (W) 97 cm x (H) 162 cm
(L) 39 in x (W) 38.3 in x (H) 63.8 in
‧Max. Loading 160 kgs / 350 lbs
‧Certificates CE、ETL (USAAnd Canada)、RoHS

10
Operation Info
ASSEMBLY DESCRIPTION
1、Spare parts list
Number Name Specification Amount
A Base assy 1
B Stem assy 1
C Console assy 1
D Handle Bar assy-Left 1
E Handle Bar assy-Right 1
F Strap 1
G L-wrench 6mm 1
H T-wrench Black crank with Red
PVC cover 1
I Hex socket flat head screw M8x25L 4
J Round Head Screw M5x15L 4
K M8 Screw Sets 7
K1 Inner Hex round head screw M8x25L 7
K2 Spring washer (SW8) SW8 7
K3 Flat washer M8 7
L Power cord 1
Please use below gauge to measure screw. For example, the diameter is 8mm and length is 20mm for
Screw M8 x 1.25 x20 L

11
A B
CD E
F
GIHJ
KL

12
2、Assembly instructions
Assembly steps:Assembling the right handlebar and left handlebar Assembling the console
Assembling the stem assy. and the platform assy. Assembling the straps and
connecting the power cord.
Step 1:Assembling the right handlebar and left handlebar
The tool:L-wrench (Cross-screwdriver)【G】or T-wrench【H】
1
G H I
Photo 1:Assembling the right handlebar and left handlebar【D】【E】:
Whirling the rubber coves【D1】【E1】on the right handlebar and left handlebar to cover the
screws,and then using the L-wrench (Cross-screwdriver)【G】or T-wrench【H】to fasten the bolts ,
M8【I】.Finally, you can assemble the right handlebar and the left handlebar 【D】【E】on the stem
assy.【B】。
Whirling the rubber coves 【D1】【E1】on the right handlebar and left handlebar【D】【E】to cover
the screws connected on the stem【B】,and trying your best to let the rubber covers close to the
stem assy.【B】。
~~Please check all the screws are fastened ~~

13
Step 2.:Assembling the console
The tool:L-wrench (Cross-screwdriver)【G】
Photo 2:Assembling the console assy.【C】and the stem assy.【B】:
Connecting two sets of console wires on the console assy.【C】with the wires in the stem assy.【B】.
Using the L-wrench (Cross-screwdriver)【G】to fasten 4pcs of cross-screws ,M5x15L【J】,and then
you can set the console【C】on the stem assy.【B】。
~~Please check all the screws are fastened ~~
2
G J

14
Step 3.:Assembling the stem assy. and the platform assy.
The tool:L-wrench (Cross-screwdriver)【G】or T-wrench【H】
Photo 3:Assembling the stem assy.【B】and the platform assy.【A】:
Connecting two sets of console wires on the stem assy.【B】with the console wires on the platform
assy.【A】.
Using the L-wrench (Cross-screwdriver)【G】or T-wrench【H】to fasten 7sets of screws, M8,【K】,
and then you can set the stem assy.【B】on the platform assy.【A】。
~~Please check all the screws are fastened ~~
3
K
G H

15
Step 4:left and right handlebarconsolestem and platform
strap and power cord
4
Photo 4:connect strap【F】and plug power cord【L】:
Refer the diagram to connect strap【F】(user depends on the their height to adjust the length)
and plug power cord【L】。

16
Operation Info
Complete Product Assembling.
OPERATING INSTRUCTION
-Console
-Stem
Minor Control Panel
Item Description Display
LED Display Time
Start/ Stop Start/ Stop the machine, back to‧exercise mode.
To get into Manual Mode‧

17
1. Programs operating
1.1 HOME
1.1.1 Press “HOME” to get back to (Home screen) when you are not in exercise
1.1.2 Press “HOME” when you are in exercise that screen show the inquiry menu﹐to
confirm it and get back to the Home Screen.
1.2 BACK
1.2.1 Press key to return to the previous screen.
1.2.2 Press “ ” when you are in exercise that screen show the inquiry menu﹐to
confirm it and get back to the previous Screen.
1.3 START/PAUSE
1.3.1 Press START/PAUSE one time then the motor is starting to work after the count
down.
1.3.2 Press START/PAUSE twice then the motor is pause.
1.4 STOP
1.4.1 To press STOP during the exercise﹐the programs is ending.
1.5 HIGH/LOW
1.5.1 Adjust the vibration strength to Press High or Low.
1.6 SKIP
1.6.1 During the Personal Coach and USER mode﹐press SKIP to dis-continue the current
programs and enter the next one.
1.7 OK
1.7.1 During the Personal Coach﹐to set the programs﹐types and level then press “OK” to
work out.

18
1.8 Time Adjustment
1.8.1 During the Manual mode, press to set the time. Pre-set the time with
“60sec” and you can adjust the range below:30s, 45s, 60s, 1m30s, 2m, 2m30s, 3m, 3m30s,
4m, 4m30s, 5m, 6m, 7m, 8m, 9m, 10m, 11m, 12m, 13m, 14m, 15m
1.8.2 During the User Edit﹐to press time adjustment to set the exercise period﹐the range
is setting from 30Sec to 90Sec. Pre-set the time with “30Sec”.
1.9 Frequency adjustment
1.9.1 During the Manual and USER Edit﹐the frequency range is setting from 25﹐30﹐35﹐
40﹐45﹐50Hz. Pre-Set with “25HZ”.
1.10 Minor control Panel
1.10.1 show the frequency during the work out.
1.10.2 show the ” - - “ if you are not in the exercise.

19
References
2. Operating Instructions
2.1 Power On & Home screen
2.1.1 Turn on the power by flipping the switch at the base. The Safety Warning disclaimer screen
will appear.
2.1.2 Confirm your understanding and acceptance of the Safety Warning disclaimer to advance to
the “Home screen” or “Main Menu”
2.1.3 Select a program category(Quick Start),(Body Area), (Sports Specific)or(User)
2.1.4 NOTE: When the system remains idle for 10 minutes, the system display will enter standby
mode. Simply touch the screen to wake the system up from the standby mode.

20
References
2.2 General operation
2.2.1 Press “Home” key to return to the “Home Screen” or “Main menu”
2.2.2 Press key to return to the previous screen.
2.2.3 Press High\Low key to adjust the vibration strength. The user can toggle
between H\L before starting the vibration, or while the vibration is on.
2.2.3.1 Most workouts are pre-set with“Low”
2.2.3.2 The screen displays the current selection.
2.3 Quick Start mode
2.3.1 One(Manual mode)and 5(Auto mode).
2.3.2 Manual mode
2.3.2.1 Enter“Manual mode”to set the time﹐frequency and vibration strength.
Table of contents
Other PowerVibe Fitness Equipment manuals
Popular Fitness Equipment manuals by other brands

Christopeit Sport
Christopeit Sport Cardiff Assembly and exercise instructions

Thane Fitness
Thane Fitness Total FLEX AB Developer user guide

Nasco
Nasco Life/form SmartScope LF01142U USER HELP GUIDE

BH
BH Tecnovita ACTIVEPOWER YV16 Instructions for assembly and use

Technogym
Technogym EXCITE+ VARIO Technical service guide

Align-Pilates
Align-Pilates C1 Assembly instructions