PPS PPS71 User manual

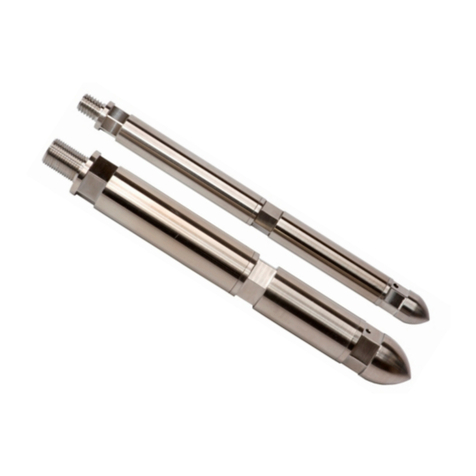
PPS71 Geothermal Memory Gauge with GRD
User Manual (Rev. 01)
Pioneer Petrotech Services Inc.
#1, 1431 - 40th Ave. NE
Calgary, AB T2E 8N6, Canada
Phone: 1-888-PP-GAUGE (774-2843)
E-mail: infopps@pioneerps.com
Website: www.pioneerps.com

PPS71 Geothermal Memory Gauge with GRD
User Manual
Pioneer Petrotech Services Inc.
infopps@pioneerps.com
1-888-PP-GAUGE (774-2843)
www.pioneerps.com
Page 1
REVISION HISTORY
Revision
Date
Comments
00
2011-12-13
Initial release
01
2012-07-06
Updated information about the spacer

PPS71 Geothermal Memory Gauge with GRD
User Manual
Pioneer Petrotech Services Inc.
infopps@pioneerps.com
1-888-PP-GAUGE (774-2843)
www.pioneerps.com
Page 2
REVISION HISTORY ................................................................................................................... 1
Scope ......................................................................................................................................... 3
1. Objective .............................................................................................................................. 3
2. Responsibilities ................................................................................................................... 3
2.1 Implementation ........................................................................................................................... 3
2.2 Supervision ................................................................................................................................... 3
2.3 Verification ................................................................................................................................... 3
2.4 Verification Method .................................................................................................................... 3
2.5 References..................................................................................................................................... 3
3. Introduction......................................................................................................................... 4
3.1 Overview ....................................................................................................................................... 4
3.2 Specifications................................................................................................................................ 4
4. Getting Started..................................................................................................................... 6
4.1 Inspecting the flask (Heat Shield Inner Tube)....................................................................... 6
4.2 Testing and Programming the Gauge ...................................................................................... 7
4.3 Activating and Testing Battery ............................................................................................... 11
4.4 Assembling Flask Housing ....................................................................................................... 12
4.5 Filling the spinner up with hydraulic oil............................................................................... 15
5. Maintenance and Troubleshooting.....................................................................................16
5.1 Field Maintenance ..................................................................................................................... 16
5.2 Manufacturer’s Maintenance .................................................................................................. 19
5.3 Troubleshooting ........................................................................................................................ 20
Appendix A: Gauge Accessories ...............................................................................................21
Appendix B: Maintenance Tool Kit ..........................................................................................21
Appendix C: Thermometer with RTD Probe ............................................................................21

PPS71 Geothermal Memory Gauge with GRD
User Manual
Pioneer Petrotech Services Inc.
infopps@pioneerps.com
1-888-PP-GAUGE (774-2843)
www.pioneerps.com
Page 3
Scope
This manual will apply to all operations that work with PPS71 GRD memory gauges.
1. Objective
This manual is in place to assist the testing personnel involved in field operations with the required
skills for programming, deployment, retrieval, and data extraction (downloading of data files from
the tools), when working with the PPS71 GRD gauges.
2. Responsibilities
All personnel involved in the process of running PPS71 GRD memory gauges, programming these
gauges, as well as downloading and processing files from them.
2.1 Implementation
The Field Service Manager and/or Location Manager will ensure that this procedure is implemented.
2.2 Supervision
The Field supervisor / Field Engineer / Field Specialist in charge of each operation will ensure this
procedure is followed.
2.3 Verification
The Testing Company Service Quality Coach, Field Service Manager and/or Location Manager will
verify that this procedure is implemented.
2.4 Verification Method
Verification is by periodic unscheduled audits of files created and sent to clients.
2.5 References
Gauge Programming, Deployment, Downloading, and File Creation Procedures
Gauges Control Sheet (PPS71)
Battery Record Form (used to record battery usage after a job)
This manual includes important information about operation of PPS71
gauges. Please read it carefully before operating the gauges.
FRAGILE!
This tool includes a flask tube - PLEASE HANDLE WITH CARE!

PPS71 Geothermal Memory Gauge with GRD
User Manual
Pioneer Petrotech Services Inc.
infopps@pioneerps.com
1-888-PP-GAUGE (774-2843)
www.pioneerps.com
Page 4
3. Introduction
3.1 Overview
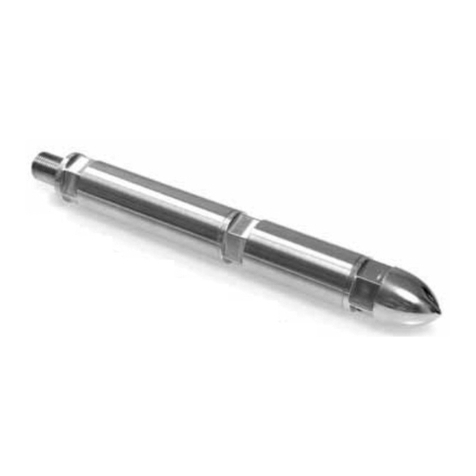
The PPS71 GRD (Gamma Ray Detector) Geothermal Memory Gauge measures pressure, RTD
temperature, CCL (casing collar locator), Gamma Ray and flow rate. The electronics of PPS71 are
packed in a flask (Heat Shield Inner Tube), which is suitable for extreme high temperature (up to
350°C) downhole application.
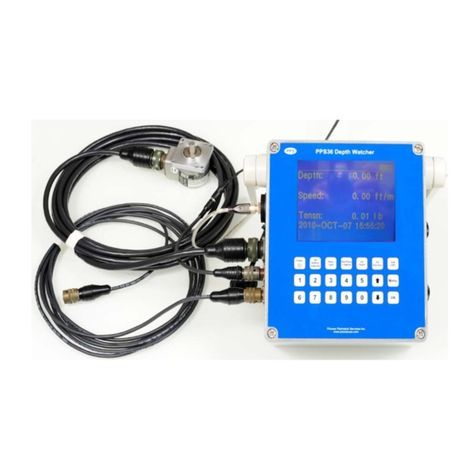
The PPS71 GRD Geothermal Memory Gauge can be run in the traditional mode (pressure and
temperature) or with a depth recorder (PPS36 DepthWatcher) to incorporate depth with downhole
data.
3.2 Specifications
Pressure Measurement
Sensor type Silicon-Sapphire
Pressure range Up to 18,000 psi
Accuracy ±0.03% FS
Resolution 0.0003% FS
Temperature Measurement
Sensor type RTD (Pt1000, 4-wire)
Temperature range 0 - 350°C
Accuracy ±0.5°C
Resolution 0.01°C
Flow Rate (Spinner)
Sensor Reed switch/magnetic
Flow rate range 5 – 7,000 RPM
Accuracy ±0.25 revolution
Resolution 0.04RPS
Impeller
Pitch
Speed
3
× 1.67
5
× 1
10
× 0.5
20
× 0.25
Gamma Ray
Crystal NaI
Sensitivity 1.0 counts per second/API
Maximum logging speed 66 ft/min (20 m/min)
Data Store
Sampling rate 0.1s – 1.8hrs/per sample
Datasets Time/Pressure/RTD/Flowrate/CCL /Gamma Ray
Memory capacity 1,000,000 datasets

PPS71 Geothermal Memory Gauge with GRD
User Manual
Pioneer Petrotech Services Inc.
infopps@pioneerps.com
1-888-PP-GAUGE (774-2843)
www.pioneerps.com
Page 5
Environmental
Gauge temperature rating Max. 350°C (with a flask)
Electronics rating 177°C
Max. downhole time 4 hours at 350°C; 6 hours at 300°C; 8 hours at 250°C;
10 hours at 200°C; 12 hours at 180°C
Power supply
Operation voltage 5.5 – 7.2VDC
Battery Two C size 180°C Li-battery (5Ahr/7.2V)
Power consumption Operation current (shutdown Gamma Ray module) 5mA,
Idle current: 3mA
Operation current (power on Gamma Ray module) 40mA,
Idle current: 35mA
Connector Lemo 4pin with locker
Communication
Interface USB
Rate 115200bits/s
Mechanical and material
Service H2S
Outside diameter 1.83” (46.5mm)
Overall length 82.5” (2095mm)

PPS71 Geothermal Memory Gauge with GRD
User Manual
Pioneer Petrotech Services Inc.
infopps@pioneerps.com
1-888-PP-GAUGE (774-2843)
www.pioneerps.com
Page 6
4. Getting Started
4.1 Inspecting the flask (Heat Shield Inner Tube)
To ensure heat shield performance of the flask, a regular inspection is necessary for the flask before
each operation.
Test instrument: RTD thermometer (0 – 100°C, Error < ±0.5°C, Resolution 0.1°C), Fig1.
Ambient temperature: 20 – 30°C
Fig. 1 Fig. 2
Step 1
Boil water (5L) to the boiling point (100°C)
Fill in the flask with the boiled water to the proper position (Fig.2)
Sink the RTD probe into the flask and seal it with the heat isolator (Fig. 3)
Fig. 3 Fig. 4
Step 2
Record temperature readings per minute from the thermometer
Calculate the temperature drop after 15 minutes
Step 3
Remove the RTD probe and the heat isolator
Spill the water from the flask
Dry the flask tube by air
The temperature should be holding a differential no greater
than (16°C/30ºF) after the first 15 minutes of the test. (Fig.4)
10cm
Water level
Elapsed Time (min.)
Temp.
degC
Temp.
degF
0
81.40
178.52
3
80.88
177.58
6
80.24
176.43
9
79.79
175.62
12
79.55
175.19
15
79.33
174.79
Temp. Difference @ 15 min
2.07
3.73

PPS71 Geothermal Memory Gauge with GRD
User Manual
Pioneer Petrotech Services Inc.
infopps@pioneerps.com
1-888-PP-GAUGE (774-2843)
www.pioneerps.com
Page 7
4.2 Testing and Programming the Gauge
PPS SmartView software can be used to test and program the gauge before a field operation.
For more information about the software, please refer to SmartView
Software Manual.
(1) Test the Gauge
Connect the PPS USB Download cable (7.2Vdc) to the gauge and a computer (Fig. 5, 6)
Run SmartView and use “Diagnostics” in Options Tab to test the gauge (Fig. 7)
Fig. 5
Fig. 6
Fig. 7

PPS71 Geothermal Memory Gauge with GRD
User Manual
Pioneer Petrotech Services Inc.
infopps@pioneerps.com
1-888-PP-GAUGE (774-2843)
www.pioneerps.com
Page 8
(2) Pressure and RTD temperature check
Click “Start” Button (Fig.8)
(3) CCL check
Use a metal tube to test CCL function (Fig. 9, 10)
Fig. 9
Fig. 8
Fig. 10

PPS71 Geothermal Memory Gauge with GRD
User Manual
Pioneer Petrotech Services Inc.
infopps@pioneerps.com
1-888-PP-GAUGE (774-2843)
www.pioneerps.com
Page 9
(4) Spinner check
Blow the spinner to see if the Flow Rate is greater than zero (Fig. 11,12)
Fig. 11 Fig. 12
(5) Gamma Ray check
Measure Gamma ray in the air (Fig. 13, 14)
Fig. 13 Fig. 14
Measure Gamma ray with gamma ray tester (Fig. 15, 16)
Fig. 15 Fig. 16

PPS71 Geothermal Memory Gauge with GRD
User Manual
Pioneer Petrotech Services Inc.
infopps@pioneerps.com
1-888-PP-GAUGE (774-2843)
www.pioneerps.com
Page 10
(6) Program the Gauge
Program the gauge in Program Tab (Fig. 17)
Fig. 17
For more information about programming, please refer to
SmartView Software Manual.
We recommend using 1s sampling rate for the first 30minutes, BUT if
CCL, Gamma Ray or/and Spinner data information are necessary,
0.1s sampling rate must be used.

PPS71 Geothermal Memory Gauge with GRD
User Manual
Pioneer Petrotech Services Inc.
infopps@pioneerps.com
1-888-PP-GAUGE (774-2843)
www.pioneerps.com
Page 11
4.3 Activating and Testing Battery
(1) Using a PPS Battery Tester(full scale 10VDC) to activate the battery (Fig. 18)
Plug-in the battery, the battery’s LED will turn on
Press the black button to apply load to the battery
Fig. 18
(2) Testing battery with the gauge
Plug-in the battery, the battery’s LED should flash 16 times (Fig. 19)
Fig. 19
It may take a few seconds for the LED on the battery pack to
start flashing after the battery pack is inserted into the gauge.
The voltage of battery MUST be greater than 6.5V.
We suggest using a new battery for each operation.

PPS71 Geothermal Memory Gauge with GRD
User Manual
Pioneer Petrotech Services Inc.
infopps@pioneerps.com
1-888-PP-GAUGE (774-2843)
www.pioneerps.com
Page 12
4.4 Assembling Flask Housing
Parts
Item
Part Name
Description
QTY.
1
Battery
PPS 180°C or 200°C C size battery pack
1
2
C-Ring
PARKER Seal, ECE-001385-07-14-6-SPC
1
3
O-Ring
KALRAZ 2-123
2
4
Spring
C100-L3-S17
1
5
Space Bar
PPS part, 1”×14.3”
1
Fig. 21
Step 1
Place the gauge as Fig. 20
Fig. 20
Step 2
Install the battery pack (Fig. 21)

PPS71 Geothermal Memory Gauge with GRD
User Manual
Pioneer Petrotech Services Inc.
infopps@pioneerps.com
1-888-PP-GAUGE (774-2843)
www.pioneerps.com
Page 13
Fig. 22
Fig. 23
Fig. 24
Step 3
Install a metal C-Ring (Fig. 22)
Step 4
Install two O-Rings (Fig. 23)
Apply o-ring grease on the O-Rings
Apply anti-seize compound to the threads
Step 5
Place the Space Bar (Fig. 24)

PPS71 Geothermal Memory Gauge with GRD
User Manual
Pioneer Petrotech Services Inc.
infopps@pioneerps.com
1-888-PP-GAUGE (774-2843)
www.pioneerps.com
Page 14
Fig. 25
Fig. 26
Fig. 27
Step 6
Place the Spring (Fig. 25)
Step 7
Install the Flask Housing (Fig. 26)
Step 8
Install the Flask Housing (Fig. 27)
Use a torque wrench to install the housing;
torque setting is 90 ft-Ibs

PPS71 Geothermal Memory Gauge with GRD
User Manual
Pioneer Petrotech Services Inc.
infopps@pioneerps.com
1-888-PP-GAUGE (774-2843)
www.pioneerps.com
Page 15
4.5 Filling the spinner up with hydraulic oil
If a spinner is available, filling it up with oil is necessary.
Fig. 28
Fig. 29
Now, your gauge is ready for an operation!
Step 1
Remove one of the plugs (Fig. 28)
using an Alan key (size 5/32” )
Step 2
Purge the spinner with hydraulic oil
using a handpump oiler (Fig. 29)
Step 3
Re-install the oil plug
Max. Downhole operation time (Flask tube is available):
4 hours at 350°C or
6 hours at 300°C or
8 hours at 250°C or
10 hours at 200°C or
12 hours at 180ºC
You MUST wait at least 30mins until the tool is cool enough to open the
battery housing. This will prevent damage to the threads.

PPS71 Geothermal Memory Gauge with GRD
User Manual
Pioneer Petrotech Services Inc.
infopps@pioneerps.com
1-888-PP-GAUGE (774-2843)
www.pioneerps.com
Page 16
5. Maintenance and Troubleshooting
The PPS71 GRD gauges must be well maintained in order to ensure successful operations. There are two
levels of maintenance should be implemented:
Field maintenance
Manufacturer’s maintenance
5.1 Field Maintenance
•IF the gauge is functional;
•IF the flask still keeps a good performance for heat shielding;
•IF the battery is new or has enough power for an operation;
•IF the C-Ring is new;
•IF the O-Rings need to be replaced;
•IF the pressure filter is clean.
(1) Cleaning or changing pressure filter
Fig. 30
Fig. 31
Before each operation, please inspect the gauge
Step 1
Use ½” socket wrench to remove the
pressure filter (Fig. 30)
Step 2
Clean or change the pressure filter,
then use ½” socket wrench to install
it (Fig. 31)

PPS71 Geothermal Memory Gauge with GRD
User Manual
Pioneer Petrotech Services Inc.
infopps@pioneerps.com
1-888-PP-GAUGE (774-2843)
www.pioneerps.com
Page 17
(2) Flowmeter Maintenance
Fig. 32 Spinner
•Step1 - Disassembly
1- Remove bullnose (#10) using the bullnose remover (#20) and two open wrenches (1-5/16”, 1-1/4”).
2- Remove magnet carrier (#1), shim (#16), and spacer shaft (#2). Using an Alan key size 5/64” loose 2
set screws (#9) side by side of the carrier and remove 1 set screw on the top of the carrier.
3- Loose 2 set screws (#9) on the impeller (#8), using an Alan key (size 5/64”) through a little hole on
the side of the shroud cage (#6).
4- Using the impeller puller tool to remove the impeller (to prevent excessive loads from being applied
to the bearings). Screw (left hand thread) puller onto the impeller, and while holding the puller body,
rotate the mandrel to the right to extract the impeller.
5- Remove the shroud cage (#6) from the bearing housing body (#3) by using 2 open wrenches.
6- Remove the Cap. Mixing chamber (#7) from the bearing housing body (#3), using a 9/16” open
wrench.
7- Remove both retainer rings (#14) 37-C using a retainer ring pliers. If you need to change the
magnets, you must remove the retainer ring (#15) 45-C.
8- By pushing the shaft (#5) you will be able to get the bottom bearings (#13) out and use the shaft
again to push the top bearing out.
9- Use the proper solvent to clean thoroughly all the parts.
After each operation, please clean the spinner

PPS71 Geothermal Memory Gauge with GRD
User Manual
Pioneer Petrotech Services Inc.
infopps@pioneerps.com
1-888-PP-GAUGE (774-2843)
www.pioneerps.com
Page 18
•Step 2 - Assembly
1- Before you put back the bearings make sure they are functional and there is no damage to the
housing. Insert the top bearing first (#13).
2- Install the retainer ring (#14) 37-C using the pliers.
3- Insert the shaft (#5).
4- Install the bottom bearing (#13), and the retainer ring (#14) 37-C using the pliers.
5- Install the cap mixing chamber (#7), and tighten them using a 9/16” open wrench.
6- Install the shroud cage (#6), and tighten them to the body (#3) using open wrenches.
7- Insert the impeller (#8).
8- Tight the 2 set screws (#9) after orienting the set screws with the flats on the shaft but make sure the
top of the impeller (#8) is flat to the top of the shaft (#5). Apply Loctite on the set screws.
9- Insert the spacer (#2).
10-Insert Shim spacer (#16) as required to achieve 0.003/0.007 of shaft end play with inner race of
bearing.
11-Insert the magnet carrier and make sure the setscrews are oriented with the flats on the shaft.
12-Insert setscrew #17 on top the magnet carrier, apply Loctite on the set screws and then tighten them.
13-Install the bullnose to the body and tighten them with the bullnose remover (#20) and an open
wrench (1-5/16”).
14-Connect the flowmeter to the tool.
15-Remove one of the plugs (#4) and using a oil can filled with High Temperature oil pump until the
fluid comes out the impeller, this way we all know is lubricated before the running into the whole.

PPS71 Geothermal Memory Gauge with GRD
User Manual
Pioneer Petrotech Services Inc.
infopps@pioneerps.com
1-888-PP-GAUGE (774-2843)
www.pioneerps.com
Page 19
5.2 Manufacturer’s Maintenance
The manufacturer’s maintenance is implemented at PPS manufacturing facility or the authorized
representative locations. The following maintenance services are performed:
Full function check and test
Failed components and parts replacement
Calibration and verification.
Failure analysis and report
It is recommended that PPS71 GRD gauges should be recalibrated at least once
a year to keep its normal operating condition and performance.
Other manuals for PPS71
1
Table of contents
Other PPS Measuring Instrument manuals
Popular Measuring Instrument manuals by other brands
LTH Electronics
LTH Electronics MXD70 Series User Interface Guide
Keysight Technologies
Keysight Technologies 16861A Service guide

Hioki
Hioki 9014 instruction manual

Mobile Solutions
Mobile Solutions PT-9A user manual
M & I Instruments
M & I Instruments DT-86 instruction manual

Jenoptik
Jenoptik JenLas D2 Series installation instructions

