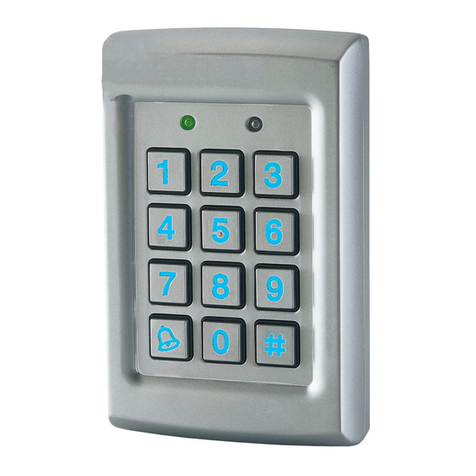
PRASTEL EASYBKW User manual

EASYBKW
FRANÇAIS
ISEASYBKW_06_17
.docx
1
1. GENERALITES
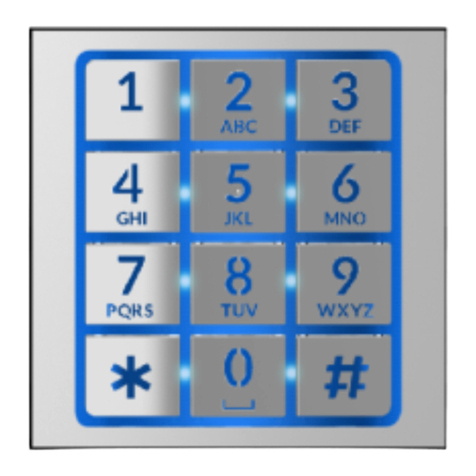
EASYBKW est un lecteur à clavier programmable antivandale. La
sortie au standard Wiegand permet d’être relier à la plupart des
appareils de contrôle d'accès qui se trouvent sur le marché.
La version EASYBKW est équipée de rétroéclairage.
2. CARACTERISTIQUES TECHNIQUES
PRINCIPALES
Tension d'alimentation: 5 – 16 Vcc
Courant absorbé: 20mA en veille (60mA max.)
Avec rétroéclairage
(seulement EASYBKW): 50mA en veille (90mA max.)
Formats de transmission:
de 1 à 5 chiffres + code site, 26-bit Wiegand
30-bit Wiegand
data clock
Température de fonctionnement:de -31 °C à 63 °C
Fonctionnement avec humidité : 0 à 95% (sans condensation)
Degré de protection IP: IP67
Dimensions: 120mm x 76mm x 27mm
Poids: 485 g
3. INSTALLATION
Avant de procéder à l'installation, choisir
l'emplacement
pour le montage
du clavier
EASYBKW. Celui-ci devrait être placé à
hauteur d'épaule et sur le même côté que la
poignée de la porte. Pour fixer le clavier,
percer aux 4 endroits repérés par la lettre B.
Relier le câble de liaison du lecteur au
contrôleur. Fixer le fond de l'appareil dans la
position désirée et remonter la façade à l'aide
des vis et de la clé en L contenues dans le kit.
A
A
B
B
B
B
C
ATTENTION!
NE PAS PERCER
Lentille antivandale

EASYBKW
FRANÇAIS
ISEASYBKW_06_17
.docx
2
4. RACCORDEMENTS
Le lecteur est équipé d'un câble 6 broches d'environ 40 cm; pour
effectuer la liaison, procéder comme suit:
1) Préparer le câble du lecteur en découvrant le bas d'environ 3 cm
et en le dénudant d'environ 1,5 cm. Préparer également de la
même façon le câble du contrôleur.
2) Relier les câbles du lecteur aux câbles correspondants du
contrôleur et couvrir chaque connexion.
COULEUR
SORTIES
ROUGE +VDC
NOIR GND
BLANC DATA1 / CLOCK
VERT DATA0 / DATA
MARRON LED CONTROL
VIOLET TAMPER
3) Si l'on désire utiliser la protection antivandale (tamper), relier le
fil violet à la bonne entrée du contrôleur.
4) Couvrir les câbles non utilisés.
5. MODE DE TRANSMISSION
Quand le lecteur EASYBKW est en mode transmission, il est prêt à
recevoir un code numérique.
Dans ce mode de fonctionnement, la
LED ‘Transmit’ est rouge et la LED
‘Program’ est éteinte.
Pendant la transmission d'un code, la LED ‘Transmit’ clignote au vert.
Les données peuvent être transmises selon différents protocoles (voir
paragraphe 6.3).
ROUGE

EASYBKW
FRANÇAIS
ISEASYBKW_06_17
.docx
3
6. PROGRAMMATION DU LECTEUR EASYBKW
La programmation du lecteur EASYBKW s'effectue uniquement par le
système menus du clavier auquel on accède en entrant en mode
programmation (voir paragraphe 6.1)
A l'achat, le produit contient déjà des codes et des paramètres
prédéfinis, qu'on appelle “Paramètres par défaut”.
Le tableau ci-après indique les noms de tous les menus du clavier.
Description du menu
N.ro menu
Sélection format transmission clavier 1
Programmation du code de programmation 3
Programmation du code site 4
Sélection du mode rétroéclairage et LED 6
Rétablissement des paramétrages d'usine 0
6.1 Mode de programmation
1) Appuyer sur la touche “#” 4 fois. La LED ‘Transmit’ s'éteint et la
LED ‘Pro gram’ devient rouge.
2) Taper les 4 chiffres du
code de programmation.
Si le code est correct, la
LED ‘Program’ devient
verte et EASYBKW sera
en mode programmation.
Note: le code de
programmation par défaut est
1234. Si l'on n'introduit pas le
code de programmation dans
les 30 sec, le clavier retourne au
mode transmission.
ROUGE
VERT

EASYBKW
FRANÇAIS
ISEASYBKW_06_17
.docx
4
6.2 Quitter le mode de programmation
1) Pour quitter le mode de programmation à tout moment: appuyer
sur la touche “#”, on entend un "bip", la LED ‘Program’ s'éteint et
la LED ‘Transmit’ devient rouge. Ceci indique que EASYBKW
est retourné au
mode transmission.
2) Toute erreur de
frappe provoque le
retour du lecteur au mode transmission.
3) Par contre, si l'on est en mode programmation et que l'on ne
presse aucune touche pendant 30 sec, le lecteur quitte le mode
de programmation et retourne au mode transmission.
6.3 Sélection du protocole de transmission
EASYBKW possède 3 protocoles
de transmission. Procéder comme
suit pour choisir le mode de
transmission approprié
.
1) Entrer en programmation.
2) Presser “1” pour entrer dans
le menu 1, la LED ‘Transmit’
devient rouge.
3) Taper le numéro de
protocole de transmission
que l'on veut sélectionner
(voir tableau ci-après). Si
l'on tape un mauvais
numéro, le lecteur retourne au mode transmission et le format
de transmission du clavier reste inchangé.
4) Le système retourne au mode émetteur, on entend un “bip”, la
LED ‘Program’ s'éteint et la LED ‘Transmit’ devient rouge.
Note: Il n'est possible d'activer qu'un seul protocole de transmission à
la fois.
Le tableau ci-après indique le code à introduire pour sélectionner le
protocole désiré.
VERT
VERT
VERT
ROUGE

EASYBKW
FRANÇAIS
ISEASYBKW_06_17
.docx
5
Format de transmission du clavier
Numéro
protocole
1 à 5 chiffres + code site, 26-bit Wiegand 5
de 1 à 8 chiffres, DataClock 8 + n.
chiffres
30-bit Wiegand 9
6.3.1 Option 5 - de 1 à 5 chiffres + code site, 26-bit Wiegand
Mémorise jusqu'à 5 chiffres et transmet les données en ajoutant le
code site comme une carte 26 bits. Le code site est sélectionné dans
le menu de programmation numéro 4 et est compris entre 000 et 254.
La programmation d'usine du code site est 000 (voir paragraphe 8 pour
la variation du code site).
Le code numérique contient 1 à 5 chiffres et est compris entre 1 et
65.535. Quand on introduit un code numérique contenant un nombre
de chiffres inférieur à 5, il est nécessaire de presser la touche “#” pour
indiquer la fin du code. Pour les codes de 5 chiffres, quand on tape le
cinquième chiffre, les données sont automatiquement envoyées
comme données binaires au même format que celui d'une carte 26
bits.
Pendant l'introduction du code numérique, si l'on presse les touches “*”
ou “#” ou que le code est supérieur à 65.535, le clavier supprime le
code de la mémoire et génère un signal sonore indiquant qu'il est prêt
à recevoir un nouveau code.
Si l'on interrompt l'introduction du code numérique et que l'on
n'introduit pas d'autres chiffres pendant 5 secondes, le clavier
réinitialise le code en mémoire et génère un signal sonore indiquant
qu'il est prêt à recevoir un nouveau code PIN à 5 chiffres.
(EP) FFFF FFFF AAAA AAAA AAAA AAAA (OP)
où: EP = parité paire pour les 12 premiers bits.
OP = parité impaire pour les 12 derniers bits.
F = 8 bits code site
A = 16 bits code généré par le clavier

EASYBKW
FRANÇAIS
ISEASYBKW_06_17
.docx
6
6.3.2 Option 8 – de 1 à 8 chiffres, DataClock
Le clavier mémorise jusqu'à 8 chiffres et transmet les données sans le
code du site au format Dataclock standard, typique des cartes à bande
magnétique. La longueur du code peut être de 1 à 8, et est
programmée lors de la sélection du protocole de transmission, après
avoir paramétré l'option 8 (voir paragraphe 6.3). Le clavier transmet les
données après la pression de la dernière touche du code.
Si, pendant la saisie du code, on enfonce la touche “ * “ ou la touche
“#”, le clavier efface les chiffres saisis, émet un signal sonore et est
prêt à recevoir un nouveau code.
Si la saisie du code est interrompue et qu'aucun chiffre n'est saisi ou que la
touche “#” n'est enfoncée dans 5 secondes, le clavier efface les chiffres
saisis, émet un signal sonore et est prêt à recevoir un nouveau code.
6.3.3 Option 9 – de 1 à 8 chiffres, 30-bit Wiegand
Le code numérique contient 1 à 8 chiffres et est compris entre 1
et 16.777.215. Quand on introduit un code numérique contenant un
nombre de chiffres inférieur à 8, il est nécessaire de presser la touche
"#" pour indiquer la fin du code. Pour les codes de 8 chiffres, quand on
tape le huitième chiffre, les données sont automatiquement envoyées
comme données binaires au même format que celui d'une carte 30 bits.
Pendant l'introduction du code numérique, si l'on presse les touches "*"
ou "#" ou que le code est supérieur à 16.777.215, le clavier supprime
le code de la mémoire et génère un signal sonore indiquant qu'il est
prêt à recevoir un nouveau code.
Si l'on interrompt l'introduction du code numérique et que l'on
n'introduit pas d'autres chiffres pendant 5 secondes, le clavier
réinitialise le code en mémoire et génère un signal sonore indiquant
qu'il est prêt à recevoir un nouveau code PIN à 8 chiffres.
(EP) RRRR AAAA AAAA AAAA AAAA AAAA AAAA (OP)
où: EP = parité paire pour les 14 premiers bits.
OP = parité impaire pour les 14 derniers bits.
R = 4 bits réservés (toujours 0)
A = 24 bits code généré par le clavier

EASYBKW
FRANÇAIS
ISEASYBKW_06_17
.docx
7
7. Sélection du code de programmation
1) Entrer en programmation
2) Presser “3” pour entrer dans le
menu 3, la LED ‘Transmit’
devient rouge.
3) Introduire les 4 chiffres du
nouveau code de
programmation.
On entend un ‘bip’
La LED ‘Program’ s'éteint.
La LED ‘Transmit’ devient
rouge.
NOTE: Le code de programmation
ne peut pas être supprimé, le code
0000 n'est pas correct.
8. Sélection du code site
1) Entrer en programmation
2) Presser “4” pour entrer dans
le menu 4, la LED ‘Transmit’
devient rouge.
3) Introduire les 3 chiffres du
nouveau code site
4) Le système retourne au
mode transmission
On entend un ‘bip’
La LED ‘Program’
s'éteint
La LED ‘Transmit’
devient rouge
NOTE: Le code site peut être
compris entre 000 et 254.
ROUGE
ROUGE
VERT
VERT
VERT
VERT
ROUGE
ROUGE

EASYBKW
FRANÇAIS
ISEASYBKW_06_17
.docx
8
9. Sélection du mode rétroéclairage et LED
1) Entrer en programmation.
2) Presser “6” pour entrer dans
le menu 6, la LED ‘Transmit’
devient rouge.
3) Taper le numéro du mode
rétroéclairage et LED que
l'on veut sélectionner (voir
tableau ci-après). Si l'on tape
un mauvais numéro, le
lecteur retourne au mode
transmission et le format de
transmission du clavier reste
inchangé.
4) Le système retourne au
mode émetteur, on entend un “bip”, la LED ‘Program’ s'éteint et
la LED ‘Transmit’ devient rouge.
ATTENTION: Dans les modes 2 et 3, le rétroéclairage s’éteint ou
s’atténue effectivement 10 secondes après la programmation.
Mode rétroéclairage et LED
Numéro du
mode
LED active, rétroéclairage OFF 0
LED active, rétroéclairage ON (default) 1
LED et rétroéclairage OFF, tous les deux activés
pendant dix secondes à chaque pression d'un
bouton.
2
LED active / rétroéclairage faible, rétroéclairage
activé pendant dix secondes à chaque pression
d'un bouton.
3
VERT
ROUGE
6
VERT

EASYBKW
FRANÇAIS
ISEASYBKW_06_17
.docx
9
10. Rétablissement des paramétrages d'usine
Attention! Il est nécessaire de faire très attention avant d'utiliser
cette commande. En effet, elle efface toute la mémoire, y compris
les codes utilisateur, et ramène tous les paramétrages aux
valeurs par défaut.
1) Entrer en programmation
2) Presser “0” pour entrer dans le
menu 0
la LED ‘Transmit’ clignote au rouge
la LED ‘Program’ clignote au rouge
3) Introduire les 4 chiffres du code de programmation
Si le code est correct, la mémoire
sera entièrement effacée, on
entendra trois ‘bips’ et le lecteur
quittera le mode programmation
Si le code n'est pas correct, on entendra un long ‘bip’ et le
lecteur quittera le mode programmation sans effacer la
mémoire.
11. Perte du code de programmation
Si vous avez oublié le code de programmation, il est possible de
reprogrammer EASYBKW comme suit:
1) Coupez l'alimentation
2) Activez la protection antivandale en enlevant le lecteur du mur
ou en ouvrant la boîte du lecteur
3) Rallumez l'alimentation
4) Vous avez alors 10 secondes pour entrer en mode
programmation en utilisant le code d'usine 1234.
VERT

EASYBKW
ENGLISH
ISEASYBKW_06_17
.docx
10
1. INTRODUCTION
The EASYBKW is a vandal resistant programmable keypad reader.
The Wiegand output allows the connection to a large number of
access control devices.
Model EASYBKW is provided with LED backlight.
2. MAIN TECHNICAL FEATURES
Operating Voltage Range: 5 – 16 Vcc
Maximum Input Current: 20mA in standby (60mA max.)
With backlight
(EASYBKW only): 50mA in standby (90mA max.)
Transmission formats:
1 to 5 keys + Facility Code, 26-Bit Wiegand
30-bit Wiegand
clock & data
Operating Temperature: -31°C to 63°C
Umidity operating : 0 a 95% (Non-Condensing)
IP protection degree: IP67
Dimensions: 120mm x 76mm x 27mm
Weight: 485 g
3. MOUNTING
Before starting, select the location to mount
the EASYBKW reader. This location should
be at shoulder height. For fixing, drill four
holes, in
correspondenc
e of the four
points marked as B.
Route the interface cable from the Reader to
the Controller. Fix the EASYBKW back cover
to its mounting location and return the front
cover
by using the supplied security screw
and the L-Shaped tool provides in the
controllers accessories kit.
A
A
B
B
B
B
C
CAUTION! DO NOT DRILL
This is the Tamper Lens

EASYBKW
ENGLISH
ISEASYBKW_06_17
.docx
11
4. WIRING
The reader is supplied with a 6-conductor cable about 40 cm., to
connect the Reader, perform the following steps:
1) Prepare the Reader cable by cutting the cable jacket back 3 cm
and strip the wire 1,5 cm. Prepare the Controller cable at the
same way.
2) Splice the Reader pigtail wires to the corresponding Controller
wires and cover each connection.
COLOR
OUTPUT
RED +VDC
BLACK GND
WHITE DATA1 / CLOCK
GREEN DATA0 / DATA
BROWN LED CONTROL
PURPLE TAMPER
3) If the tamper output is being utilized, connect the purple wire to
the correct input on the Controller.
4) Trim and cover all conductors that are not used.
5. TRANSMIT MODE
When the EASYBKW is in Transmit Mode, it is ready to receive data
from an entered PIN code.
In this mode the Transmit LED is red
and the Program LED is off.
During a code transmission the
Transmit LED will flash green. Keyboard data can be sent via one of
different Keypad Transmission Formats (see par. 6.3)
RED

EASYBKW
ENGLISH
ISEASYBKW_06_17
.docx
12
6. PROGRAMMING THE EASYBKW
Programming the EASYBKW is done solely via the unit's keypad
driven Programming Menu System (see par. 6.1).
During the EASYBKW's manufacturing process certain codes and
settings are pre-programmed. These settings are the called the
"Default Factory Settings".
The table below shows the names of all the EASYBKW Menus.
Menu Description
Menu
number
Selecting keypad transmission format 1
Changing the programming code 3
Changing the facility code 4
Changing the backlight and LED behavior 6
Return to Factory Default Settings 0
6.1 Entering Programming Mode
1) Press the "#" key 4 times. Transmit LED will turn off and
Program LED will turn red.
2) Enter your 4-digit
Programming Code.
3) If the Programming Code
is valid the door LED will
turn green and the
EASYBKW will be in
Programming Mode.
Note: The factory default
Programming Code is 1234. If a
Programming Code is not
entered within 30 sec., the
keypad will return to Transmit Mode.
RED
GREEN

EASYBKW
ENGLISH
ISEASYBKW_06_17
.docx
13
6.2 Exiting Programming Mode
1) To exit the Programming Mode at any time: Press the "#" key,
You will hear a beep, the Program LED will be off, the Transmit
LED will turn red. This indicates that the EASYBKW has
returned to Transmit
Mode.
2) Wrong entries may
reset the reader
back to Transmit Mode.
3) While in Programming Mode if no key is pressed for 30 seconds
the EASYBKW will exit Programming Mode and return to
Transmit Mode.
6.3
Selecting Keypad Transmission Format
The EASYBKW has three different
keypad transmission formats to
select from. Follow the steps below
to select the appropriate keypad
transmission format that you wish
to use
.
1) Enter Programming Mode
2) Press "1" to enter Menu 1,
the Transmit LED will turn
red.
3) Enter the appropriate option
number for the keypad
transmission format that you
wish to select (see the following table). If an incorrect option
number is entered the reader will return to Transmit Mode and
the keypad transmission format will remain unchanged.
4) System returns to Transmit Mode, you will hear one beep, the
Program LED will turn off the Transmit LED will turn red.
Note: Only one keypad transmission format can be active at any one
time.
See the table below to determine the Option Number for the Keypad
Transmission Format you wish to select.
GREEN
GREEN
RED GREEN

EASYBKW
ENGLISH
ISEASYBKW_06_17
.docx
14
Keypad Transmission Format
Option
Number
1 to 5 keys + Facility Code, 26-bit Wiegand 5
1 to 8 Keys , Clock & Data 8 + n. digit
30-bit Wiegand 9
6.3.1 OPTION 5 -- 1 to 5 Keys + Facility Code, 26-Bit Wiegand
Buffers up to 5 keys and outputs keypad data with a facility code like a
26-Bit card output. The facility code is set in Programming Menu
number four and can be in the range 000 to 254. The factory default
setting for the facility code is 000 (see par. 8 for Setting the Facility
Code).
The keypad PIN code can be one to five digits long and can range
between 1 and 65,535. When entering a keypad PIN code that is less
than 5 digits long, the “#” key must be pressed to signify the end of PIN
code entry. For keypad PIN codes that are 5 digits long, on the fifth
key press of the 5 digit PIN code, the data is sent across the Wiegand
Data lines as binary data in the same format as a 26-Bit Card.
If the “ * “ key or the “#“ key are pressed during PIN code entry or a
PIN code greater than 65,535 is entered, the keypad will clear the PIN
code entry buffer, generate a beep and is ready to receive a new 4
digit keypad PIN code.
If the entry of the 1 to 5 digit keypad PIN code is disrupted and no
number key or “#” key is pressed within 5 seconds, the keypad will
clear the PIN code entry buffer, generate a medium length beep and is
ready to receive a new 1 to 5 digit keypad PIN code.
(EP) FFFF FFFF AAAA AAAA AAAA AAAA (OP)
where: EP = Even parity for first 12 bits.
OP = Odd parity for last 12 bits.
F = 8-Bit Facility Code
A = 16-Bit code generated from keyboard

EASYBKW
ENGLISH
ISEASYBKW_06_17
.docx
15
6.3.2 OPTION 8 -- 1 to 8 Keys , Clock & Data
Buffers up to 8 keys and outputs keypad data without a facility code
like standard Clock and Data card output. The keypad PIN code can be
one to eight digits long. The PIN code length is selected while
programming the reader for Option 8. The reader will transmit the data
when it receives the last key press of the PIN code. The data is sent
across the two data output lines as binary data in Clock & Data format.
If the “ “ key or the “#“ key are pressed during PIN code entry, the
keypad will clear the PIN code entry buffer, generate a beep and is
ready to receive a new keypad PIN code.
If the entry of the digit keypad PIN code is disrupted and no number
key or “#” key is pressed within 5 seconds, the keypad will clear the
PIN code entry buffer, generate a medium length beep and is ready to
receive a new keypad PIN code.
6.3.3 OPTION 9 -- 1 to 8 Keys , 30-Bit Wiegand
The keypad PIN code can be one to five digits long and can range
between 1 and 16.777.215. When entering a keypad PIN code that is
less than 8 digits long, the “#” key must be pressed to signify the end of
PIN code entry. For keypad PIN codes that are 8 digits long, on the
eighth key press, the data is sent across the Wiegand Data lines as
binary data in the same format as a 30-Bit Card.
If the “*“ key or the “#“ key are pressed during PIN code entry or a PIN code
greater than 16.777.215 is entered, the keypad will clear the PIN code
entry buffer, generate a beep and is ready to receive a new PIN code.
If the entry of the PIN code is disrupted and no number key or “#” key
is pressed within 5 seconds, the keypad will clear the PIN code entry
buffer, generate a medium length beep and is ready to receive a new 1
to 8 digit keypad PIN code.
(EP) RRRR AAAA AAAA AAAA AAAA AAAA AAAA (OP)
where: EP = Even parity for first 14 bits.
OP = Odd parity for last 14 bits.
R = 4-Bit reserved (always 0)
A = 24-Bit code generated from keyboard

EASYBKW
ENGLISH
ISEASYBKW_06_17
.docx
16
7. Changing the Programming Code
1) Enter Programming Mode.
2) Press "3" to enter Menu 3: the
Transmit LED will turn red.
3) Enter the new 4-digit code
you wish to set as the
Programming Code.
You will hear one beep
The Program LED will
turn off
The Transmit LED will
turn red
NOTE: Programming Code can not
be erased, i.e. the code 0000 is not
valid and will not erase the
Programming Code.
8. Changing the Facility Code
4) Enter Programming Mode.
5) Press "4" to enter Menu 4:
the Transmit LED will turn
red.
6) Enter the new 3-digit code
you wish to set as Facility
Code.
7) System returns to Transmit
Mode
You will hear one beep
The Program LED will
turn off
The Transmit LED will
turn red
NOTE: Facility codes can be in the
range of 000 to 254.
RED GREEN
RED
GREEN
RED GREEN
RED
GREEN

EASYBKW
ENGLISH
ISEASYBKW_06_17
.docx
17
9. Changing the backlight and LED behavior
1) Enter Programming Mode
2) Press "6" to enter Menu 6,
the Transmit LED will turn
red.
3) Enter the appropriate option
number for the backlight
mode that you wish to select
(see the following table). If
an incorrect option number
is entered the reader will
return to Transmit Mode and
the keypad transmission
format will remain
unchanged.
4) System returns to Transmit Mode, you will hear one beep, the
Program LED will turn off the Transmit LED will turn red.
WARNING: In modes 2 and 3, backlight is actually turned off or
dimmed 10 seconds after programming.
Backlight and LED mode
Option number
LED active, backlight OFF 0
LED active, backlight ON (default) 1
LED and backlight OFF, both activated on any key
press for ten seconds.
2
LED active / backlight Dimmed, backlight
activated on any key press for ten seconds.
3
RED GREEN
GREEN
6

EASYBKW
ENGLISH
ISEASYBKW_06_17
.docx
18
10. Return to Factory Default Settings
Warning:You must be very careful before using this command!
Doing so will erase the entire memory which includes all User and
Special Codes, and return all codes to their factory default
settings.
1) Enter Programming Mode.
2) Press "0" to enter Menu 0
The Transmit LED will
flash red
The Program LED will flash red
3) Enter your 4-digit Programming Code
If the Programming Code is
valid, all memory will be
erased, you will hear three
beeps and the controller will
return to Normal Mode.
If the Programming Code is invalid you will hear a long
beep and the controller will return to Normal Mode
without erasing the memory of the controller.
11. Replacing a lost Programming Code
In the event that the Programming Code is forgotten, the EASYBKW
may be reprogrammed in the field using the following instructions:
1) Remove power from the reader
2) Activate tamper by removing the reader from the wall or
removing the reader’s case.
3) Apply power to the reader
4) You now have 10 seconds to enter Programming Mode using
the factory default Programming Code 1234.
GREEN

EASYBKW
ITALIANO
ISEASYBKW_06_17
.docx
19
1. GENERALI
L’EASYBKW è un lettore a tastiera programmabile antivandalica.
L’uscita in standard Wiegand ne permette il collegamento alla maggior
parte delle apparecchiature di controllo accessi presenti sul mercato.
Il modello EASYBKW è dotato di retroilluminazione a LED.
2. CARATTERISTICHE TECNICHE PRINCIPALI
Tensione di alimentazione: 5 – 16 Vcc
Corrente assorbita: 20mA in standby (60mA max.)
Con retroilluminazione
(solo EASYBKW): 50mA in standby (90mA max.)
Formati di trasmissione:
da 1 a 5 cifre + codice sito, 26-bit Wiegand
30-bit Wiegand
data clock
Temperatura di funzionamento: da -31°C a 63°C
Funzionamento con umidità : 0 a 95% (senza condensa)
Grado di protezione IP: IP67
Dimensioni: 120mm x 76mm x 27mm
Peso: 485 g
3. INSTALLAZIONE
Prima di procedere all’installazione,
selezionare l’ubicazione per il montaggio
della
tastiera
EASYBKW.
Tale posizione dovrebbe essere ad altezza
spalla e sullo stesso lato della maniglia della
porta. Per il fissaggio forare nei 4 punti
indicati con la lettera B.
Collegare il cavo di interfacciamento dal
lettore al controllore. Fissare il fondo
dell’apparecchiatura nella posizione
desiderata e rimontare il frontale utilizzando
le viti e la chiave ad L fornite dal kit.
A
A
B
B
B
B
C
ATTENZIONE! NON FORARE
Lente del tamper

EASYBKW
ITALIANO
ISEASYBKW_06_17
.docx
20
4. COLLEGAMENTI
Il lettore è fornito di un cavo a 6 poli di circa 40 cm., per effettuare il
collegamento, compiere i seguenti passi:
1) Preparare il cavo del lettore scoprendo il cavo in fondo di circa 3
cm e spellandolo di circa 1,5 cm. Preparare allo stesso modo
anche il cavo del controllore.
2) Collegare i cavi del lettore a quelli corrispondenti del controllore
e coprire ogni connessione.
COLORE
USCITE
ROSSO +VDC
NERO GND
BIANCO DATA1 / CLOCK
VERDE DATA0 / DATA
MARRONE LED CONTROL
VIOLA TAMPER
3) Se si desidera utilizzare il tamper collegare il filo viola al corretto
ingresso del controllore.
4) Coprire i cavi non utilizzati.
5. MODALITÀ DI TRASMISSIONE
Quando l’EASYBKW è in modalità trasmissione, è pronto per ricevere
un codice numerico.
In questa modalità il LED ‘Transmit’
è rosso mentre il LED ‘Program’ è
spento.
Durante la trasmissione di un codice il LED ‘Transmit’ lampeggia
verde. I dati possono essere trasmessi secondo diversi protocolli (vedi
paragrafo 6.3)
6. PROGRAMMAZIONE DELLA EASYBKW
La programmazione della EASYBKW viene fatta esclusivamente
tramite il sistema a menù della tastiera stessa cui si accede entrando
in modalità programmazione (vedi paragrafo 6.1)
Table of contents
Languages:
Other PRASTEL Keypad manuals
Popular Keypad manuals by other brands

iPazzPort
iPazzPort KP-810-18BV user manual
DMP Electronics
DMP Electronics Thinline Series Installation and programming guide

GARDINER TECHNOLOGY
GARDINER TECHNOLOGY Gardtec 800 User instructions
Cytech
Cytech KP04AE manual
Normstahl
Normstahl 400903000000 operating instructions
rako
rako WCM-103 instruction manual
