PRASTEL EASYKW User manual

EASYKW - EASYBKW ITALIANO ISEASYKW_02_06.doc
1. INFORMAZIONI GENERALI
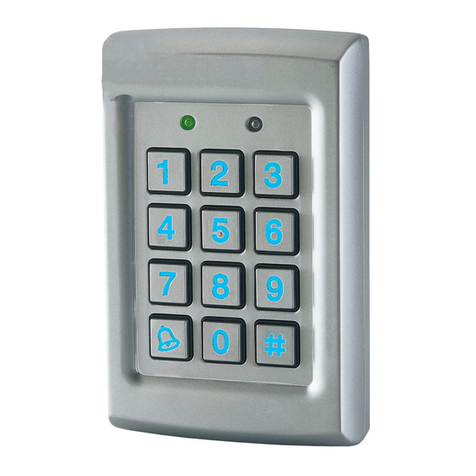
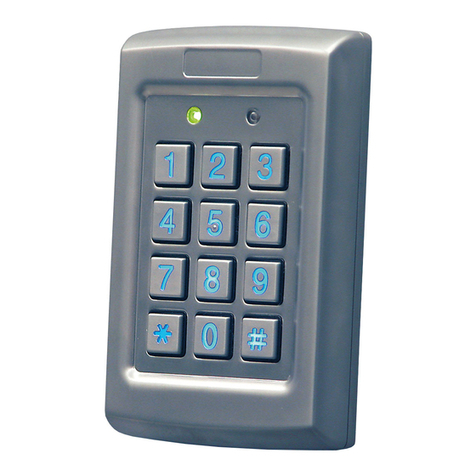
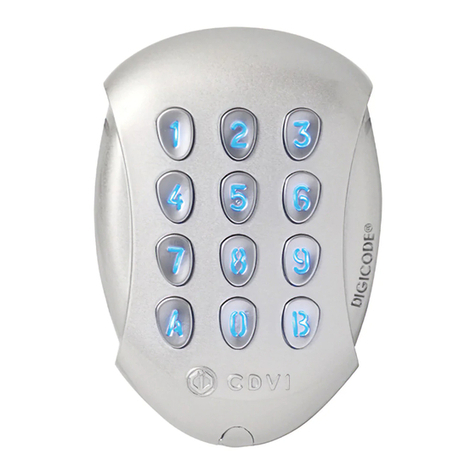
L’EASYKW è un lettore a tastiera programmabile antivandalica.
L’uscita in standard Wiegand ne permette il collegamento alla maggior
parte delle apparecchiature di controllo accessi presenti sul mercato.
Il modello EASYBKW è dotato di retroilluminazione a LED.
2. CARATTERISTICHE TECNICHE PRINCIPALI
Tensione di alimentazione: 5 – 16 Vcc
Corrente assorbita: 20mA in standby (60mA max.)
Con retroilluminazione
(solo EASYBKW): 50mA in standby (90mA max.)
Formati di trasmissione:
da 1 a 5 cifre + codice sito, 26-bit Wiegand
30-bit Wiegand
data clock
Temperatura di funzionamento: da -31°C a 63°C
Funzionamento con umidità : 0 a 95% (senza condensa)
Grado di protezione IP: IP67
Dimensioni: 120mm x 76mm x 27mm
Peso: 485 g
3. INSTALLAZIONE
Prima di procedere all’installazione,
selezionare l’ubicazione per il montaggio
della
tastiera
EASYKW.
Tale
posizione dovrebbe essere ad altezza spalla
e sullo stesso lato della maniglia della porta.
Per il fissaggio forare nei 4 punti indicati con
la lettera B.
Collegare il cavo di interfacciamento dal
lettore al controllore. Fissare il fondo
dell’apparecchiatura nella posizione
C
B
B
A
A
B
B
ATTENZIONE! NON FORARE
Lente del tam
p
e
r
1

EASYKW - EASYBKW ITALIANO ISEASYKW_02_06.doc
desiderata e rimontare il frontale utilizzando le viti e la chiave ad L
fornite dal kit.
4. COLLEGAMENTI
Il lettore è fornito di un cavo a 6 poli di circa 40 cm., per effettuare il
collegamento, compiere i seguenti passi:
1) Preparare il cavo del lettore scoprendo il cavo in fondo di circa 3
cm e spellandolo di circa 1,5 cm. Preparare allo stesso modo
anche il cavo del controllore.
2) Collegare i cavi del lettore a quelli corrispondenti del controllore
e coprire ogni connessione.
COLORE USCITE
ROSSO +VDC
NERO GND
BIANCO DATA1 / CLOCK
VERDE DATA0 / DATA
MARRONE LED CONTROL
VIOLA TAMPER
3) Se si desidera utilizzare il tamper collegare il filo viola al corretto
ingresso del controllore.
4) Coprire i cavi non utilizzati.
5. MODALITÀ DI TRASMISSIONE
Quando l’EASYKW è in modalità trasmissione, è pronto per ricevere
un codice numerico.
In questa modalità il LED ‘Transmit’ è
rosso mentre il LED ‘Program’ è
spento.
Durante la trasmissione di un codice il LED ‘Transmit’ lampeggia
verde. I dati possono essere trasmessi secondo diversi protocolli (vedi
paragrafo 6.3)
2

EASYKW - EASYBKW ITALIANO ISEASYKW_02_06.doc
6. PROGRAMMAZIONE DELLA EASYKW
La programmazione della EASYKW viene fatta esclusivamente tramite
il sistema a menù della tastiera stessa cui si accede entrando in
modalità programmazione (vedi paragrafo 6.1)
Quando il prodotto viene acquistato contiene già alcuni codici e
settaggi pre-definiti, che vengono chiamati “Settaggi di default”.
La tabella seguente indica i nomi di tutti i menu della tastiera.
Decrizione menu N.ro menu
Selezione formato trasmissione tastiera 1
Impostazione del codice di programmazione 3
Impostazione del codice sito 4
Impostazione della modalità di retroilluminazione 6
Ripristino delle impostazioni di fabbrica 0
6.1 Modalità di programmazione
1) Premere il tasto “#” per 4 volte. Il LED ‘Transmit’ si spegne ed il
LED ‘Program’ diventa rosso.
2) Digitare le 4 cifre del codice
di programmazione. Se il
codice è valido, il LED
‘Program’ diventa verde e la
EASYKW sarà in modalità
programmazione.
Nota: il codice programmazione di
default è 1234. Se il codice
programmazione non è inserito
entro 30 sec., la tastiera ritorna in
modalità trasmissione.
3

EASYKW - EASYBKW ITALIANO ISEASYKW_02_06.doc
6.2 Uscita dalla modalità di programmazione
1) Per uscire dalla
programmazione in
qualsiasi momento:
premere il tasto “#”, si
sente un ‘beep’, il
LED ‘Program’ si spegne e il LED ‘Transmit’ diventa rosso.
Questo indica che la EASYKW è ritornata in modalità
trasmissione.
2) Digitazioni errate riportano il lettore in modalità trasmissione.
3) Mentre si è in modalità programmazione, se non viene premuto
nessun tasto per 30 sec. il lettore uscirà dalla programmazione e
ritornerà alla modalità trasmissione.
6.3 Selezione del protocollo di trasmissione
La EASYKW possiede 3 diversi
protocolli di trasmissione. Seguire i
passi seguenti per scegliere la
modalità di trasmissione
appropriata.
4
1) Entrare in programmazione
2) Premere “1” per entrare nel
menu 1, il LED ‘Transmit’
diventa rosso.
3) Digitare il numero del
protocollo di trasmissione
che si desidera selezionare
(vedi tabella seguente). Se
viene digitato un numero errato, il lettore tornerà in modalità
trasmissione e il formato di trasmissione della tastiera resterà
invariato.
4) Il sistema ritorna in modalità trasmettitore, si sentirà un “beep”, il
LED ‘Program’ si spegne e il LED ‘Transmit’ diventa rosso.
Note: Può essere attivo un solo protocollo di trasmissione alla volta.

EASYKW - EASYBKW ITALIANO ISEASYKW_02_06.doc
5
La tabella seguente evidenzia il codice da inserire per selezionare il
protocollo desiderato.
Formato di trasmissione della tastiera Numero
protocollo
da 1 a 5 cifre + codice sito, 26-bit Wiegand 5
da 1 a 8 cifre, DataClock 8 + n. cifre
30-bit Wiegand 9
6.3.1 Opzione 5 - da 1 a 5 cifre + codice sito, 26-bit Wiegand
Memorizza fino a 5 cifre e trasmette i dati aggiungendo il codice sito
come una carta a 26 bit. Il codice sito è impostato nel menu di
programmazione numero 4 ed è compreso tra 000 e 254.
L’impostazione di fabbrica per il codice sito è 000 (vedi paragrafo 8 per
la variazione del codice sito).
Il codice numerico ha un numero di cifre che va da 1 a 5 ed è
compreso fra 1 e 65.535. Quando si inserisce un codice numerico di
lunghezza inferiore alle 5 cifre è necessario premere il tasto “#” per
indicare il termine del codice. Per i codici di 5 cifre alla digitazione della
quinta cifra, i dati sono automaticamente inviati come dati binari nello
stesso formato di una carta a 26 bit.
Se durante l’inserimento del codice numerico vengono premuti i tasti
“*” o “#” o il codice risultasse maggiore di 65,535, la tastiera cancellerà
il codice dalla memoria, generando un segnale acustico che indicherà
la disponibilità a ricevere un nuovo codice.
Se l’inserimento del codice numerico è interrotto e non vengono
inserite ulteriori cifre per 5 secondi, la tastiera resetterà il codice in
memoria, provocando un segnale acustico che indicherà la
disponibilità a ricevere un nuovo codice PIN a 5 cifre.
(EP) FFFF FFFF AAAA AAAA AAAA AAAA (OP)
dove: EP = parità pari per i primi 12 bit.
OP = parità dispari per gli ultimi 12 bit.
F = 8 bit codice sito
A = 24 bit codice generato dalla tastiera

EASYKW - EASYBKW ITALIANO ISEASYKW_02_06.doc
6
6.3.2 Opzione 8 - da 1 a 8 cifre, DataClock
La tastiera memorizza fino a 8 cifre e trasmette i dati senza codice sito
nel formato Dataclock standard, tipico delle carte a banda magnetica.
La lunghezza del codice può essere da 1 a 8, e viene programmata al
momento della selezione del protocollo di trasmissione, dopo aver
impostato l’opzione 8 (v. paragrafo 6.3). La tastiera trasmette i dati
dopo la pressione dell’ultimo tasto del codice.
Se durante la digitazione del codice viene premuto il tasto “*“ o il tasto
“#”, la tastiera cancella le cifre digitate, emette un beep ed è pronta a
ricevere un nuovo codice.
Se la digitazione del codice è interrotta e nessuna cifra o il tasto “#”
sono premuti entro 5 secondi, la tastiera cancella le cifre digitate,
genera un beep di durata media ed è pronta a ricevere un nuovo
codice.
6.3.3 Opzione 9 – da 1 a 8 cifre, 30-bit Wiegand
Il codice numerico ha un numero di cifre che va da 1 a 8 ed è
compreso fra 1 e 16.777.215. Quando si inserisce un codice numerico
di lunghezza inferiore alle 8 cifre è necessario premere il tasto "#" per
indicare il termine del codice. Per i codici di 8 cifre alla digitazione della
ottava cifra, i dati sono automaticamente inviati come dati binari nello
stesso formato di una carta a 30 bit.
Se durante l'inserimento del codice numerico vengono premuti i tasti
"*" o "#" o il codice risultasse maggiore di 16.777.215, la tastiera
cancellerà il codice dalla memoria, generando un segnale acustico che
indicherà la disponibilità a ricevere un nuovo codice.
Se l'inserimento del codice numerico è interrotto e non vengono
inserite ulteriori cifre per 5 secondi, la tastiera resetterà il codice in
memoria, provocando un segnale acustico che indicherà la
disponibilità a ricevere un nuovo codice PIN a 8 cifre.
(EP) RRRR AAAA AAAA AAAA AAAA AAAA AAAA (OP)
dove: EP = parità pari per i primi 14 bit.
OP = parità dispari per gli ultimi 14 bit.
R = 4 bit riservati (sempre 0)
A = 24 bit codice generato dalla tastiera

EASYKW - EASYBKW ITALIANO ISEASYKW_02_06.doc
7. Impostazione del codice di programmazione
1) Entrare in programmazione
2) Premere “3” per entrare nel
menu 3, il LED ‘Transmit’
diventa rosso
3) Inserire le 4 cifre del nuovo
codice di programmazione
4) Il sistema torna in modalità
trasmissione
Si sente un ‘beep’
Il LED ‘Program’ si
spegne
Il LED ‘Transmit’ diventa
rosso
NOTA: Il codice di programmazione
non può essere cancellato, il codice
0000 non è valido.
8. Impostazione del codice sito
1) Entrare in programmazione
2) Premere “4” per entrare nel
menu 4, il LED ‘Transmit’
diventa rosso
3) Inserire le 3 cifre del nuovo
codice sito
4) Il sistema torna in modalità
trasmissione
Si sente un ‘beep’
Il LED ‘Program’ si
spegne
Il LED ‘Transmit’
diventa rosso
NOTA: Il codice sito può essere
compreso fra 000 e 254.
7

EASYKW - EASYBKW ITALIANO ISEASYKW_02_06.doc
9. Selezione della modalità di illuminazione
1) Entrare in programmazione
8
2) Premere “6” per entrare nel
menu 6, il LED ‘Transmit’
diventa rosso.
3) Digitare il numero della
modalità di illuminazione
che si desidera selezionare
(vedi tabella seguente). Se
viene digitato un numero
errato, il lettore tornerà in
modalità trasmissione e il
formato di trasmissione
della tastiera resterà
invariato.
6
4) Il sistema ritorna in modalità trasmettitore, si sentirà un “beep”, il
LED ‘Program’ si spegne e il LED ‘Transmit’ diventa rosso.
ATTENZIONE: Nelle modalità 2 e 3 lo spegnimento o
l’attenuazione della retroilluminazione hanno effetto 10 secondi
dopo la programmazione.
Modalità illuminazione Numero da
selezionare
LED attivi, retroilluminazione spenta 0
LED attivi, retroilluminazione accesa (default) 1
LED spenti, retroilluminazione spenta. Si attivano
entrambi per 10 secondi a seguito della pressione
di un tasto qualsiasi
2
LED attivi, retroilluminazione attenuata. La
retroilluminazione si attiva per 10 secondi a
seguito della pressione di un tasto qualsiasi
3

EASYKW - EASYBKW ITALIANO ISEASYKW_02_06.doc
10. Ripristino delle impostazioni di fabbrica
Attenzione! E’ necessario fare molta attenzione prima di utilizzare
questo comando. Esso infatti cancella tutta la memoria, compresi
i codici utente, e riporta tutte le impostazioni ai valori di default.
1) Entrare in programmazione
2) Premere “0” per entrare nel
menu 0
il LED ‘Transmit’ lampeggia rosso
il LED ‘Program’ lampeggia rosso
3) Inserire le 4 cifre del codice di programmazione
Se il codice è valido la
memoria verrà completamente
cancellata, si udiranno tre
‘beep’ ed il lettore uscirà dalla
programmazione
Se il codice non è valido si udirà un lungo ‘beep’ ed il
lettore uscirà dalla programmazione senza cancellare la
memoria
11. Smarrimento del codice di programmazione
Nel caso che il codice di programmazione venga dimenticato, la
EASYKW può essere riprogrammata nel modo seguente:
1) Togliere alimentazione
2) Attivare la protezione antivandalica rimuovendo la tastiera dal
muro o aprendo il contenitore
3) Ridare alimentazione
4) Vi sono ora 10 secondi di tempo per entrare in programmazione
utilizzando il codice di fabbrica 1234
9

EASYKW - EASYBKW ENGLISH ISEASYKW_02_06.doc
1. INTRODUCTION
The EASYKW is a vandal resistant programmable keypad reader. The
Wiegand output allows the connection to a large number of access
control devices.
Model EASYBKW is provided with LED backlight.
2. MAIN TECHNICAL FEATURES
Operating Voltage Range: 5 – 16 Vcc
Maximum Input Current: 20mA in standby (60mA max.)
With backlight
(EASYBKW only): 50mA in standby (90mA max.)
Transmission formats:
1 to 5 keys + Facility Code, 26-Bit Wiegand
30-bit Wiegand
clock & data
Operating Temperature: -31°C to 63°C
Umidity operating : 0 a 95% (Non-Condensing)
IP protection degree: IP67
Dimensions: 120mm x 76mm x 27mm
Weight: 485 g
3. MOUNTING
1
ulder
d security screw
and the L-Shaped tool provides in the controllers accessories kit.
Before starting, select the location to mount
the EASYKW reader. This location should be
at
sho
height. For
fixing, drill
four holes,
in correspondence of the four points marked
as B.
Route the interface cable from the Reader to
the Controller. Fix the EASYKW back cover
to its mounting location and return the front
cover by using the supplie
CAUTION! DO NOT DRILL
This is the Tam
p
er Lens
C
B
B
B
A
A
B

EASYKW - EASYBKW ENGLISH ISEASYKW_02_06.doc
4. WIRING
The reader is supplied with a 6-conductor cable about 40 cm., to
connect the Reader, perform the following steps:
1) Prepare the Reader cable by cutting the cable jacket back 3 cm
and strip the wire 1,5 cm. Prepare the Controller cable at the
same way.
2) Splice the Reader pigtail wires to the corresponding Controller
wires and cover each connection.
COLOR OUTPUT
RED +VDC
BLACK GND
WHITE DATA1 / CLOCK
GREEN DATA0 / DATA
BROWN LED CONTROL
PURPLE TAMPER
3) If the tamper output is being utilized, connect the purple wire to
the correct input on the Controller.
4) Trim and cover all conductors that are not used.
5. TRANSMIT MODE
When the EASYKW is in Transmit Mode, it is ready to receive data
from an entered PIN code.
In this mode the Transmit LED is red
and the Program LED is off.
During a code transmission the
Transmit LED will flash green. Keyboard data can be sent via one of
different Keypad Transmission Formats (see par. 6.3)
RED
2

EASYKW - EASYBKW ENGLISH ISEASYKW_02_06.doc
6. PROGRAMMING THE EASYKW
Programming the EASYKW is done solely via the unit's keypad driven
Programming Menu System (see par. 6.1).
During the EASYKW's manufacturing process certain codes and
settings are pre-programmed. These settings are the called the
"Default Factory Settings".
The table below shows the names of all the EASYKW Menus.
Menu Description Menu
number
Selecting keypad transmission format 1
Changing the programming code 3
Changing the facility code 4
Changing the backlight and LED behavior 6
Return to Factory Default Settings 0
6.1 Entering Programming Mode
1) Press the "#" key 4 times. Transmit LED will turn off and
Program LED will turn red.
2) Enter your 4-digit
Programming Code.
3) If the Programming Code
is valid the door LED will
turn green and the
EASYKW will be in
Programming Mode.
Note: The factory default
Programming Code is 1234. If a
Programming Code is not
entered within 30 sec., the
keypad will return to Transmit Mode
GREEN
RED
.
3

EASYKW - EASYBKW ENGLISH ISEASYKW_02_06.doc
6.2 Exiting Programming Mode
4
2)
mit Mode.
ode if no key is pressed for 30 seconds
nd return to Transmit
6.3 ting Keypad Transm
ress "1" to enter Menu 1,
rn
3)
er for the keypad
g table). If an incorrect option
will return to Transmit Mode and
4)
N :
time.
ission Format you wish to select.
1) To exit the Programming Mode at any time: Press the "#" key,
You will hear a beep, the Program LED will be off, the Transmit
LED will turn red. This i
to Transmit Mode.
Wrong entries may
reset the reader back
to Trans
ndicates that the EASYKW has returned
GREEN
3) While in Programming M
the EASYKW will exit Programming Mode a
Mode.
Selec ission Format
GREEN
RED GREEN
The EASYKW has three different
keypad transmission formats to
select from. Follow the steps below
to select the appropriate keypad
transmission format that you wish
to use.
1) Enter Programming Mode
2) P
the Transmit LED will tu
red.
Enter the appropriate option
numb
transmission format that you
wish to select (see the followin
number is entered the reader
the keypad transmission format will remain unchanged.
System returns to Transmit Mode, you will hear one beep, the
Program LED will turn off the Transmit LED will turn red.
ote Only one keypad transmission format can be active at any one
See the table below to determine the Option Number for the Keypad
Transm

EASYKW - EASYBKW ENGLISH ISEASYKW_02_06.doc
5
Number
Keypad Transmission Format Option
1 to 5 keys + Facility Code, 26-bit Wiegand 5
1 to 8 8Keys , Clock & Data + n. digit
30-bit Wiegand 9
6.3.1 to 5 Keys + Facility Code, 26-B dOPTION 5 -- 1 it Wiegan
Buffers up to 5 keys and outputs keypad data with a facility code like a
new 4
keyboard
.3.2 TION
26-Bit card output. The facility code is set in Programming Menu
number four and can be in the range 000 to 254. The factory default
setting for the facility code is 000 (see par. 8 for Setting the Facility
Code).
The keypad PIN code can be one to five digits long and can range
between 1 and 65,535. When entering a keypad PIN code that is less
than 5 digits long, the “#” key must be pressed to signify the end of PIN
code entry. For keypad PIN codes that are 5 digits long, on the fifth
key press of the 5 digit PIN code, the data is sent across the Wiegand
Data lines as binary data in the same format as a 26-Bit Card.
If the “ * “ key or the “#“ key are pressed during PIN code entry or a
PIN code greater than 65,535 is entered, the keypad will clear the PIN
code entry buffer, generate a beep and is ready to receive a
digit keypad PIN code.
If the entry of the 1 to 5 digit keypad PIN code is disrupted and no
number key or “#” key is pressed within 5 seconds, the keypad will
clear the PIN code entry buffer, generate a medium length beep and is
ready to receive a new 1 to 5 digit keypad PIN code.
(EP) FFFF FFFF AAAA AAAA AAAA AAAA (OP)
where: EP = Even parity for first 12 bits.
OP = Odd parity for last 12 bits.
F = 8-Bit Facility Code
A = 24-Bit code generated from
6 OP 8 -- 1 to 8 Keys , Clock & Data
Buffers up to 8 keys and outputs keypad data without a facility code
like standard Clock and Data card output. The keypad PIN code can be

EASYKW - EASYBKW ENGLISH ISEASYKW_02_06.doc
6
is selected while
one to eight digits long. The PIN code length
programming the reader for Option 8. The reader will transmit the data
when it receives the last key press of the PIN code. The data is sent
across the two data output lines as binary data in Clock & Data format.
If the “ “ key or the “#“ key are pressed during PIN code entry, the
keypad will clear the PIN code entry buffer, generate a beep and is
ready to receive a new keypad PIN code.
If the entry of the digit keypad PIN code is disrupted and no number
key or “#” key is pressed within 5 seconds, the keypad will clear the
PIN code entry buffer, generate a medium length beep and is ready to
receive a new keypad PIN code.
6.3.3 OPTION 9 -- 1 to 8 Keys , 30-Bit Wiegand
The keypad PIN code can be one to five digits long and can range
between 1 and 16.777.215. When entering a keypad PIN code that is
ignify the end of
a new PIN code.
y for first 14 bits.
R = 4-Bit reserved (always 0)
keyboard
less than 8 digits long, the “#” key must be pressed to s
PIN code entry. For keypad PIN codes that are 8 digits long, on the
eighth key press, the data is sent across the Wiegand Data lines as
binary data in the same format as a 30-Bit Card.
If the “*“ key or the “#“ key are pressed during PIN code entry or a PIN code
greater than 16.777.215 is entered, the keypad will clear the PIN code
entry buffer, generate a beep and is ready to receive
If the entry of the PIN code is disrupted and no number key or “#” key
is pressed within 5 seconds, the keypad will clear the PIN code entry
buffer, generate a medium length beep and is ready to receive a new 1
to 8 digit keypad PIN code.
(EP) RRRR AAAA AAAA AAAA AAAA AAAA AAAA (OP)
where: EP = Even parit
OP = Odd parity for last 14 bits.
A = 24-Bit code generated from

EASYKW - EASYBKW ENGLISH ISEASYKW_02_06.doc
7. Changing the Programming Code
1) Enter Programming Mode.
7
2) Press "3" to enter Menu 3: the
Transmit LED will turn red.
3) Enter the new 4-digit code
you wish to set as the
Programming Code.
You will hear one beep
The Program LED will
turn off
The Transmit LED will
turn red
NOTE: Programming Code can not
be erased, i.e. the code 0000 is not
valid and will not erase the
Programming Code.
8. Changing the Facility Code
GREEN
RED GREEN
RED
GREEN
RED
GREEN
RED
4) Enter Programming Mode.
5) Press "4" to enter Menu 4:
the Transmit LED will turn
red.
6) Enter the new 3-digit code
you wish to set as Facility
Code.
7) System returns to Transmit
Mode
You will hear one beep
The Program LED will
turn off
The Transmit LED will
turn red
NOTE: Facility codes can be in the
range of 000 to 254.

EASYKW - EASYBKW ENGLISH ISEASYKW_02_06.doc
9. Changing the backlight and LED behavior
1) Enter Programming Mode
2) Press "6" to enter Menu 6,
the Transmit LED will turn
red.
8
3) Enter the appropriate option
number for the backlight
mode that you wish to select
(see the following table). If
an incorrect option number is
entered the reader will return
to Transmit Mode and the
keypad transmission format
will remain unchanged.
4) System returns to Transmit
Mode, you will hear one beep, the Program LED will turn off the
Transmit LED will turn red.
6
GREEN
GREENRED
WARNING: In modes 2 and 3, backlight is actually turned off or
dimmed 10 seconds after programming.
Backlight and LED mode Option number
LED active, backlight OFF 0
LED active, backlight ON (default) 1
LED and backlight OFF, both activated on any key
press for ten seconds.
2
LED active / backlight Dimmed, backlight
activated on any key press for ten seconds.
3

EASYKW - EASYBKW ENGLISH ISEASYKW_02_06.doc
10. Return to Factory Default Settings
Warning:You must be very careful before using this command!
Doing so will erase the entire memory which includes all User and
Special Codes, and return all codes to their factory default
settings.
1) Enter Programming Mode.
GREEN
2) Press "0" to enter Menu 0
The Transmit LED will
flash red
The Program LED will flash red
3) Enter your 4-digit Programming Code
If the Programming Code is
valid, all memory will be
erased, you will hear three
beeps and the controller will
return to Normal Mode.
If the Programming Code is invalid you will hear a long
beep and the controller will return to Normal Mode
without erasing the memory of the controller.
11. Replacing a lost Programming Code
In the event that the Programming Code is forgotten, the EASYKW
may be reprogrammed in the field using the following instructions:
1) Remove power from the reader
2) Activate tamper by removing the reader from the wall or
removing the reader’s case.
3) Apply power to the reader
4) You now have 10 seconds to enter Programming Mode using
the factory default Programming Code 1234.
9

EASYKW - EASYBKW FRANÇAIS ISEASYKW_02_06.doc
1. GENERALITES
EASYKW est un lecteur à clavier programmable antivandale. La sortie
au standard Wiegand permet d’être relier à la plupart des appareils de
contrôle d'accès qui se trouvent sur le marché.
La version EASYBKW est équipée de rétroéclairage.
2. CARACTERISTIQUES TECHNIQUES
PRINCIPALES
Tension d'alimentation: 5 – 16 Vcc
Courant absorbé: 20mA en veille (60mA max.)
Avec rétroéclairage
(seulement EASYBKW): 50mA en veille (90mA max.)
Formats de transmission:
de 1 à 5 chiffres + code site, 26-bit Wiegand
30-bit Wiegand
data clock
Température de fonctionnement: de -31 °C à 63 °C
Fonctionnement avec humidité : 0 à 95% (sans condensation)
Degré de protection IP: IP67
Dimensions: 120mm x 76mm x 27mm
Poids: 485 g
3. INSTALLATION
1
vier
Avant de procéder à l'installation, choisir
l'emplacem
ent pour le
montage
du cla
EASYKW. Celui-ci devrait être placé à
hauteur d'épaule et sur le même côté que la
poignée de la porte. Pour fixer le clavier,
percer aux 4 endroits repérés par la lettre B.
Relier le câble de liaison du lecteur au
contrôleur. Fixer le fond de l'appareil dans la
B
ATTENTION! NE PAS PERCER
Lentille antivandale
C
A
B
B
B
A

EASYKW - EASYBKW FRANÇAIS ISEASYKW_02_06.doc
position désirée et remonter la façade à l'aide des vis et de la clé en L
contenues dans le kit.
4. RACCORDEMENTS
Le lecteur est équipé d'un câble 6 broches d'environ 40 cm; pour
effectuer la liaison, procéder comme suit:
1) Préparer le câble du lecteur en découvrant le bas d'environ 3
cm et en le dénudant d'environ 1,5 cm. Préparer également de
la même façon le câble du contrôleur.
2) Relier les câbles du lecteur aux câbles correspondants du
contrôleur et couvrir chaque connexion.
COULEUR SORTIES
ROUGE +VDC
NOIR GND
BLANC DATA1 / CLOCK
VERT DATA0 / DATA
MARRON LED CONTROL
VIOLET TAMPER
3) Si l'on désire utiliser la protection antivandale (tamper), relier le
fil violet à la bonne entrée du contrôleur.
4) Couvrir les câbles non utilisés.
5. MODE DE TRANSMISSION
Quand le lecteur EASYKW est en mode transmission, il est prêt à
recevoir un code numérique.
Dans ce mode de fonctionnement, la
LED ‘Transmit’ est rouge et la LED
‘Program’ est éteinte. ROUGE
Pendant la transmission d'un code, la LED ‘Transmit’ clignote au vert.
Les données peuvent être transmises selon différents protocoles (voir
paragraphe 6.3).
2
Other manuals for EASYKW
1
This manual suits for next models
1
Table of contents
Languages:
Other PRASTEL Keypad manuals
