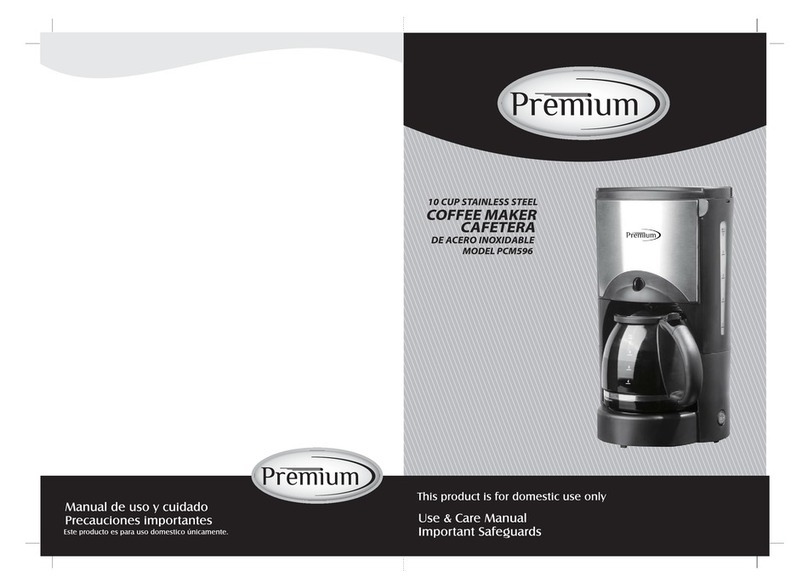
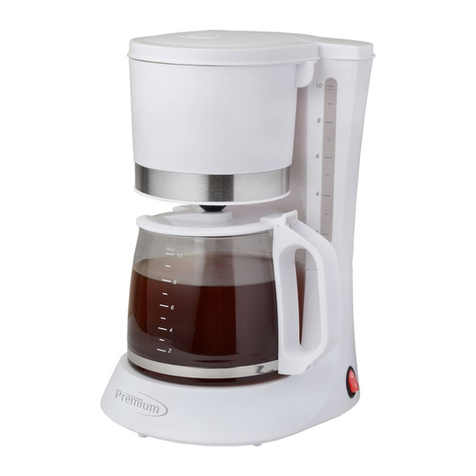
Premium PCM5970D User manual


IMPORTANT SAFEGUARDS
When using electrical appliances, basic safety precautions should always be followed,
including the following:
1. Read all instructions and save them for future reference.
2. Make sure that your electric outlet voltage corresponds to the stated on the rating label of
the coffee maker.
3. To protect against risk of electrical shock and injury to persons, do not immerse cord or
plug in water or any other liquid.
4. Close supervision is necessary when any appliance is used by or near children.
5. Unplug from outlet when not in use and before cleaning. Allow cooling before putting on
or taking off parts, and before cleaning the appliance.
6. Do not operate any appliance with a damaged cord or plug, or after the appliance
malfunctions, or has been damaged in any manner. Return appliance to an authorized
service facility for examination, repair or adjustment.
7. The use of accessories not recommended by the appliance manufacturer may result in
fire, electric shock or injury to persons.
8. Do not use outdoors.
9. Do not let the cord hang over the edge of the table or counter, or touch hot surfaces.
10. Do not place on or near a hot gas or electric burner, or in a heated oven.
11. Do not use the appliance for other than intended use.
12. Do not clean the containers with harsh cleaners, steel wool pads, or other abrasive
materials.
13. To disconnect, turn any control to “OFF”, and then remove the plug from the wall outlet.
Always hold and pull the plug. Never pull the cord.
14. Scalding may occur if the cover is removed during the brewing cycles. Be careful not to
get burned by the steam.
15. Some parts of the appliance are hot when the coffee maker is working. Do not touch it
with your bare hands. Always use handles or knobs.
16. Never fill the appliance with hot liquids or run the unit if the water tank is empty.
1

17. Never leave the empty carafe on the warming plate; otherwise the carafe may crack.
18. Never use the appliance if the carafe shows any signs of cracks or having a loose or
weakened handle. Only use the carafe that comes with this appliance. Use it carefully as
the carafe is very fragile.
19. Do not set a hot container on a wet or cold surface.
20. Do not let the coffee maker operate without water.
21. The carafe is designed for use with this appliance. It must never be used on a range top.
SAVE THESE INSTRUCTIONS
HOUSEHOLD USE ONLY
SPECIAL NOTES ON THE CORD PLUG
This appliance has a polarized plug (one blade is wider than the other). To reduce the risk of
electric shock, the plug can fit into a polarized socket only one way. If the plug does not fit fully
into the outlet, reverse the plug. If it still does not fit, contact a qualified electrician. Do not
modify the plug in any way.
NOTES ON THE CORD
1. A short power-supply cord is provided to reduce the hazard resulting from
entanglement or tripping over a long cord.
2. Extension cords may be used if care is exercised. If it is necessary to use an extension
cord, it should be positioned so that it does not drape over the counter or tabletop
where it can be pulled on by children or tripped over unintentionally.
3. The electrical rating of the extension cord must be the same or higher than the wattage
of the appliance (the wattage is shown on the rating label located on the underside or
back of the appliance).
4. Avoid pulling or straining the power cord at outlet or appliance connections.
2

“ ”
“ ”
3

switched on and the carafe on the heating plate, the coffee maker will keep the coffee
warm at above 70oC for two hours. After this time, the Auto Shut Off feature will
automatically shut off the coffee maker.
NOTE: remember to turn off the coffee maker as soon as the
carafe is empty.
HOW TO PROGRAM THE COFFEE MAKER TO BREW COFFEE
LATER
To program the coffee maker to start brewing coffee at a specific time, do the following:
a) Press the button and then press the HOUR and MIN buttons to set the
current time. While you set the current time, the display will show “CLOCK”.
b) Press the button again and then press the HOUR and MIN buttons to set the
brewing time. While you set the brewing time, the display will show “TIMER”. This is
the time the coffee maker will start brewing the coffee automatically.
c) Press the button twice, and the green indicator of AUTO will light up.
d) When the time you have set for brewing arrives, the coffee maker will switch on
automatically and start brewing. The red indicator of RUN will light up and the green
indicator of AUTO will go off at the same time.
TECHNICAL SPECIFICATIONS
Input voltage: 120VAC
Power: 900W
Capacity: 1.8L
“ ”
“ ”
“ ”
4

CLEANING
1. Always remove the plug from the socket before cleaning the appliance.
2. Wipe outside of the appliance with a soft dry cloth. Never use metal sponges or harsh
cleaners.
3. The removable items can be washed in hot soapy water. Rinse and dry them
before putting them back on the appliance.
4. Never put the carafe in a dishwasher.
5. The appliance must not be immersed in water for cleaning.
DISPOSAL: Do not dispose this product as unsorted municipal waste. Collect electric
appliances waste separately for special treatment is necessary.
5

MEDIDAS IMPORTANTES DE SEGURIDAD
Cuando utilice aparatos eléctricos, siga siempre las precauciones básicas de seguridad,
incluyendo las siguientes:
1. Lea todas las instrucciones y guárdelas para futuras referencias.
2. Asegúrese de que el voltaje de la toma eléctrica corresponde al que se indica en la
etiqueta de clasificación eléctrica de la cafetera.
3. Para protegerse contra el riesgo de descarga eléctrica y lesiones a personas, no sumerja
el cable ni el enchufe en agua ni en ningún otro líquido.
4. Se requiere supervisión cuando el aparato es usado por o cerca de niños.
5. Desenchufe del tomacorriente cuando no esté en uso y antes de limpiar. Deje que se
enfríe antes de poner o quitar piezas, y antes de limpiar el aparato.
6. No opere ningún aparato con un cable o enchufe dañado, después de un mal
funcionamiento o si se ha dañado de alguna manera. Lleve el aparato a un centro de
servicio autorizado para su revisión, reparación o ajuste.
7. El uso de accesorios no recomendados por el fabricante del aparato puede provocar un
incendio, descargas eléctricas o lesiones a las personas.
8. No utilice al aire libre.
9. No permita que el cable cuelgue sobre el borde de la mesa o mostrador, o que toque
superficies calientes.
10. No lo coloque sobre o cerca de una hornilla de gas o eléctrica, o en un horno caliente.
11. No utilice el aparato para otro uso que no sea el uso para el cual fue diseñado.
12. No limpie los contenedores con productos de limpieza abrasivos, esponjas de acero u
otros materiales abrasivos.
13. Para desconectar, ajuste todo control a "OFF", y luego retire el enchufe de la toma de
corriente. Siempre sujete y tire del enchufe. Nunca tire del cable.
14. Pueden ocurrir quemaduras si se retira la tapa durante los ciclos de preparación de café.
Tenga cuidado de no quemarse con el vapor.
15. Algunas partes del aparato estarán calientes cuando la cafetera está funcionando. No las
toque con las manos desnudas. Siempre utilice las asas o perillas.
6


16. Nunca llene el aparato con líquidos calientes o haga funcionar la unidad si el tanque de
agua está vacío.
17. Nunca deje la jarra vacía sobre la placa de calentamiento; de lo contrario la jarra puede
agrietarse.
18. No utilice el aparato si la jarra muestra signos de grietas o si tiene el asa floja o debilitada.
Sólo utilice la jarra que viene con este aparato. Utilícela con cuidado ya que la jarra es
muy frágil.
19. No coloque un recipiente caliente sobre una superficie húmeda o fría.
20. No deje que la cafetera funcione sin agua.
21. La jarra está diseñada para ser usada con este aparato. Nunca debe usarse en una
estufa.
GUARDE ESTAS INSTRUCCIONES
SOLO PARA USO DOMESTICO
NOTAS SOBRE EL CABLE Y ENCHUFE POLARIZADO
Este aparato tiene un enchufe polarizado (una pata es más ancha que la otra). Para reducir el
riesgo de descarga eléctrica, el enchufe puede encajar en una toma de corriente polarizada
de una manera. Si el enchufe no entra completamente en el tomacorriente, invierta el
enchufe. Si aún así no encaja llame a un electricista calificado. No modifique el enchufe de
ninguna manera.
NOTAS SOBRE EL CABLE
1. Se proporciona un cable eléctrico corto para reducir el peligro resultante del enredo o
de tropezar con un cable largo.
2. Los cables de extensión pueden ser utilizados si se ejerce cuidado. Si es necesario
utilizar un cable de extensión, que debe colocarse de manera que no cuelgue sobre el
mostrador o mesa donde pueda ser jalado por niños o causar tropiezos accidentales.
7

8

para el filtro.
5. Cierre la cubierta superior.
6. Pulse el botón de encendido ON/OFF una vez, la cafetera comienza a colar el café y la
luz roja del indicador de encendido se iluminará. Pulse el botón de encendido dos veces,
y la cafetera dejará de colar café.
7. Después de colar todo el café, cuando no queda ya agua en el depósito de agua, si se
mantiene el aparato encendido y la jarra sobre la placa de calentamiento, la cafetera
mantendrá el café caliente por encima de 70°C durante dos horas. Después de este
tiempo, la función de apagado automático apagará automáticamente la cafetera.
NOTA: recuerde apagar la cafetera apenas la jarra esté vacía.
COMO PROGRAMAR LA CAFETERA PARA COLAR CAFÉ MAS
TARDE
Si desea programar la cafetera para que comience a colar el café a una hora especifica, haga
lo siguiente:
a) Pulse la tecla y luego presione los botones HOUR y MIN para ajustar la hora actual.
Durante el ajuste de la hora actual, la pantalla mostrará "CLOCK".
b) Pulse el botón de nuevo y luego pulse los botones HOUR y MIN para ajustar la hora
del comienzo de la preparación del café. Mientras se programa la hora de preparación, la
pantalla mostrará "TIMER". Esta es la hora en que la cafetera comenzará la elaboración de
café automáticamente.
c) Pulse el de encendido dos veces, y el indicador verde de AUTO se iluminará.
d) Cuando llegue la hora establecida para la elaboración del café, la cafetera se encenderá
automáticamente y comenzará a hacer el café. El indicador rojo de encendido se iluminará y
el indicador verde de AUTO se apagará al mismo tiempo.
ESPECIFICACIONES TECNICAS
Voltaje: 120VAC
“ ”
“ ”
“ ”
9

Poder: 900W
Capacidad: 1.8L
LIMPIEZA
1. Siempre retire el enchufe de la toma de corriente antes de limpiar el aparato.
2. Limpie el exterior del aparato con un paño suave y seco. Nunca use esponjas metálicas ni
limpiadores abrasivos.
3. Los elementos desmontables se pueden lavar con agua caliente y jabón. Enjuague y seque
bien antes de ponerlos de nuevo en el aparato.
4. Nunca coloque la jarra en el lavavajillas.
5. El aparato no debe ser sumergido en agua para la limpieza.
ELIMINACIÓN: No deseche este producto como residuo municipal sin clasificar. Los
desechos de aparatos eléctricos deben recogerse por separado para tratamiento
especial.
10
Table of contents
Languages:
Other Premium Coffee Maker manuals

Premium
Premium PCM59r6 User manual

Premium
Premium PCM512B User manual

Premium
Premium PCM511 User manual

Premium
Premium PCM115 User manual

Premium
Premium PCM5423B User manual

Premium
Premium pem350 User manual

Premium
Premium PCM5416 User manual

Premium
Premium PCTM125B User manual

Premium
Premium PCM508 User manual

Premium
Premium PEM615P User manual
Popular Coffee Maker manuals by other brands

LAVAZZA
LAVAZZA CLASSY Pro LB 1200 USA instructions

Iluv
Iluv VIVA 1 user manual

Keurig
Keurig B50 Use & care guide

Gaggia
Gaggia Baby Dose Series operating instructions

Gastroback
Gastroback DESIGN ESPRESSO MASCHINE ADVANCED CONTROL operating instructions

SEB
SEB ARNO KRUPS Nescafe Dolce Gusto KP10 Series Service manual