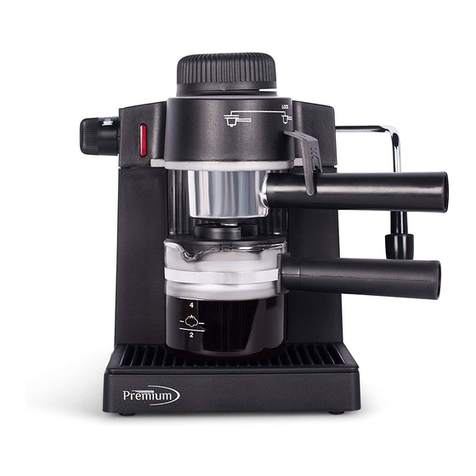
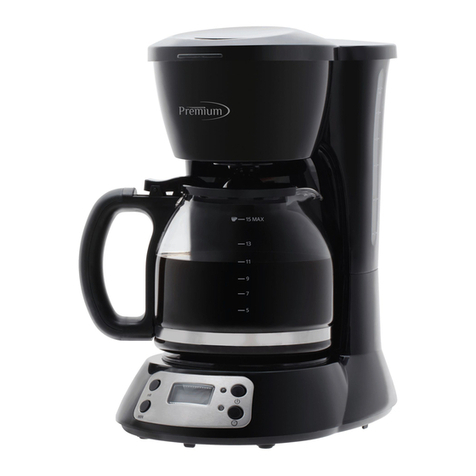
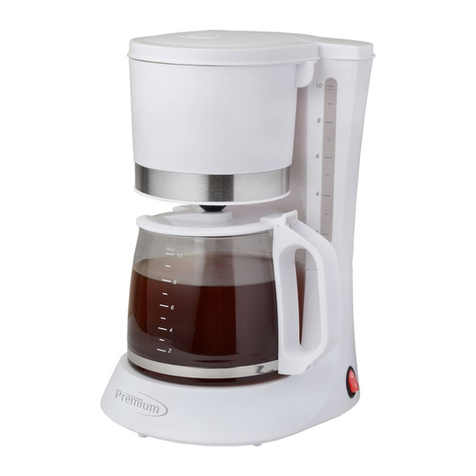
Premium PCTM125B User manual

MULTIFUNCTIONAL COFFEE MAKER
CAFETERA MULTIFUNCIONAL
MODEL: PCTM125B
MODELO: PCTM125B

1
Read this booklet thoroughly before using and save it for future reference
IMPORTANT SAFEGUARDS
When using electrical appliances, basic safety precautions
should always be followed, including the following
1. Please read these instructions carefully before using the
appliance.
2. Check that your mains voltage coincides with the
voltage shown on the nameplate on the appliance.
3. Never leave the appliance unsupervised when in use.
Keep out of reach of children or inexperienced persons.
4. Only use the appliance for domestic purposes and in the
way indicated in these instructions. Do not use
appliance for other than its intended use.
5. Never use the appliance on or near hot surfaces.
6. Unplug unit from outlet when not in use and before
cleaning. Allow to cool before putting on or taking off
parts, and before cleaning the appliance.
7. Do not operate any appliance with a damaged cord or
plug, or after the appliance malfunctions, or has been
damaged in any manner; return appliance to the nearest
authorized service agent, for examination, repair or
adjustment.

2
8. Never use the appliance outside and always place it in a
dry environment.
9. Never use accessories which are not recommended by
the producer. They could constitute a danger to the user
and risk to damage the appliance.
10. Never unplug the appliance by pulling the cord. Make
sure the cord cannot get caught in any way. Do not wind
the cord around the appliance and do not bend it. Do not
let cord hang over the edge of the table or counter, or to
touch hot surfaces.
11. Place the appliance on a table or flat surface.
12. Only use fresh (potable) and cold (moderate) water.
Do not use water contained in bathtubs, washbasins or
other containers.
13. Make sure the cord never comes into contact with the
hot parts of the appliance.
14. Never touch the hot parts of the appliance. Only
touch the plastic parts and the carafe by the handle or
knobs.
15. Be careful not to get scalded by the steam
evaporating from the coffee filter.
16. Never use the appliance if the carafe shows any

3
signs of cracks. Only use the carafe that was supplied
with this appliance. Handle with care as the glass is very
fragile.
17. Never use your machine without water in the
reservoir.
18. Always attach the plug to the appliance first, and then
plug the cord into the wall outlet. To disconnect, turn any
control to “off”, and then remove the plug from the wall
outlet.
19. Do not use the machine with a damaged outlet.
20. Do not forget that the temperature of the
coffee/tea/water prepared is high. Handle with care your
coffeepot to avoid any risk of splashes.
21. Any examination, repair, or adjustment for the
appliance should be made by an authorized service
agent.
22. Save these instructions for future use.
23. To protect against fire, electrical shock and injury to
persons, never immerse cord, plug or the appliance in
water or any other liquid.
24. This appliance is not intended for use by persons
(including children) with reduced physical, sensory or

4
mental capabilities, or lack of experience and
knowledge, unless they have been given supervision or
instruction concerning the use of the appliance by a
person responsible for their safety.
25. Children should be supervised to ensure that they do
not play with the appliance.
26. If the supply cord is damaged, it must be replaced by
the manufacturer, its service agent or a similarly
qualified person in order to avoid a hazard.
27. The appliance must not be immersed.
28. Do not use outdoors.
29. Do not place on or near a hot gas or electric burner,
or in a heated oven.
30. Scalding may occur if the lid is removed during the
brewing cycles.
31. The appliance is intended to be used in household
and similar applications such as:
Staff kitchen areas in shops, offices and other working
environments.
Farm houses.
By clients in hotels, motels and other residential type
environments.

5
Bed and breakfast type environments.
32. The carafe is designed for use with this appliance. It
must never be used on a range top.
33. Do not set a hot container on a wet or cold surface.
34. Do not use a cracked carafe or a carafe having a
loose or weakened handle.
35. Do not clean the carafe with harsh cleaners, steel
wool pads, or any other abrasive material.
SAVE THESE INSTRUCTIONS
HOUSEHOLD USE ONLY
POLARIZED PLUG
This appliance has a polarized plug (one blade is wider
than the other). To reduce the risk of electric shock, this
plug is intended to fit into a polarized outlet only one way.
If the plug does not fit fully into the outlet, reverse the plug.
If it still does not fit, contact a qualified electrician. Do not
attempt to modify the plug in any way.

6
SHORT CORD INSTRUCTIONS
a) A short power-supply cord is provided to reduce the
risks of becoming entangled in or tripping over a longer
cord.
b) Longer detachable power-supply cords or extension
cords are available and may be used if care is exercised in
their use.
c) If a long detachable power-supply cord or extension
cord is used:
1) The marked electrical rating of the detachable
power-supply cord or extension cord should be at
least as high as the electrical rating of the appliance.
2) The longer cord should be arranged so that it will
not drape over the countertop or tabletop where it
can be pulled on by children or tripped over.
WARNING: Improper use of the power cord may result
in electric shock. Consult a qualified electrician if
necessary.
Before the First Use
Carefully unpack the 3-in-1 Coffee Maker, Tea Steeper &
Hot Water Dispenser and remove all packaging materials.
You may wipe the warming plate with a clean, damp cloth.

7
Do not immerse the warming plate in water or any other
liquid.
To remove any dust that may have accumulated on the
removable parts during packaging, wash the carafe, lid,
filter basket and tea infuser with warm, soapy water. Rinse
and dry. Do not use harsh or abrasive cleansers.
NOTE: We recommend that prior to brewing your first pot
of coffee, tea or hot water, you “brew” cold water only,
without ground coffee or tea. This will remove any dust
that may have settled inside the appliance.
IMPORTANT: Use only cold water – the automatic
brewing system has been designed to work only with
cold water.

8
Know the Parts of Your 3-in-1 Coffee Maker, Tea
Steeper & Hot Water Dispenser
Hinged Reservoir Lid
Illuminated
On/Off Power
Switch
Tea Infuser
Scoop (1 tablespoon)
Interior
Water
Level
Indicator
Carafe Cover
Permanent
Coffee Filter
Locking Tab
Removable
Filter Basket
Carafe
Locking Tab
Carafe

9
Using Your 3-in-1 as a Coffee Maker
1. Place your 3-in-1 on a flat, dry, level surface, such as a
countertop. Plug the unit into a 120 volt 60 Hz AC-only
outlet.
2. Insert a paper cone shape filter (No. 2) into the
removable filter basket or use the included permanent
mesh coffee filter. You can use this filter in place of a
paper filter. To clean the mesh filter, rinse it under warm
water.
3. Place the desired amount of ground coffee into the filter.
See the chart below to determine the amount of coffee to
use. Your 3-in-1 includes a bonus 1 tablespoon scoop to
assist in scooping the perfect amount of coffee.
NOTE: We recommend using coffee ground specifically
for automatic drip coffee makers. After using your 3-in-1
as a coffee maker a few times you may adjust the amount
of coffee to suit your own taste.

10
Recommended Amounts of Coffee
NUMBER OF
CUPS
RECOMMENDED
GROUND COFFEE
4 60 mL (4 tablespoons)
6 90 mL (6 tablespoons)
8 120 mL (8 tablespoons)
4. Fill the carafe with cold water up to the marked level for
the desired amount of coffee.
IMPORTANT: Use only cold water. The automatic
brewing system has been designed to work only with
cold water.
5. Empty the water from the carafe into the water reservoir.
Close the hinged lid.
6. Once water is emptied from the carafe, place the
removable filter basket into the carafe. Ensure the locking
tab on the filter basket is to the right of the carafe locking
tab, see fig. 1. Slide the filter basket locking tab to the left
until locked into place, see fig 2.

11
7. Place carafe cover onto the filter basket. Align the
locking tab from the carafe cover tothe locking tab on the
filter basket. The 2 locking tabs link together as shown in
fig. 3
8. Place the carafe with the carafe cover and filter basket
in place on the warming plate.
9. Press the power switch button to “ON” ( I ). The
Power-on light will illuminate, indicating that your 3-in-1
has begun the brewing cycle.
10. Once the brewing cycle has completed, please ensure
you manuallyturn the 3-in-1 to the “OFF” (O) position.
NOTE: THIS UNIT IS NOT EQUIPPED WITH AN
AUTOMATIC SHUT-OFF FEATURE, SO YOU MUST
fig. 1fig. 2
fig. 3

12
MANUALLY TURN THE UNIT “OFF” (O).
CAUTION: Do not remove the carafe until the brewing
cycle has been completed. Never leave an empty
carafe on the warming plate while still hot.
WARNING: Do not remove the filter basket from the
carafe until the filter basket has fully cooled.
Using Your 3-in-1 as a Tea Steeper
1. Place your 3-in-1 on a flat, dry, level surface, such as a
countertop. Plug the unit into a 120 volt 60 Hz AC-only
outlet.
2. Place the desired amount of loose leaf tea or tea bags
into the tea infuser. See the chart below to determine the
amount of loose leaf tea to use. Your 3-in-1 includes a
bonus 1 tablespoon scoop to assist in scooping the
perfect amount of tea. To clean your tea infuser, rinse it
under warm water.
NOTE: After using your 3-in-1 as a tea steeper a few times
you may adjust the amount of tea to suit your own taste
or use the instructions on tea packaging. The amount of
tea used also depends on how strong is the blend of tea

13
used.
Recommended Amounts of Tea
NUMBER OF
CUPS
RECOMMENDED TEA
QUANTITY
4 60 mL (1 tablespoon)
6 90 mL (2 tablespoons)
8 120 mL (4 tablespoons)
3. Fill the carafe with cold water up to the marked level for
the desired amount of tea. The quality of water affects
taste. For optimal tea steeping results, use filtered water.
IMPORTANT: Use only cold water. The automatic
brewing system has been designed to work only with
cold water.
4. Empty the water from the carafe into the water reservoir.
Close the hinged lid.
5. Once water is emptied from the carafe, place the tea
infuser into the carafe. Ensure the locking tab on the tea
infuser is to the right of the carafe locking tab, see fig. 4.

14
Slide the tea infuser locking tab to the left until locked into
place, see fig 5.
6. Place carafe cover onto the tea infuser. Align the
locking tab from the carafe cover to the locking tab on the
tea infuser. The 2 locking tabs link together as shown in
fig. 6.
7. Place the glass carafe with the carafe cover and tea
infuser in place on the warming plate.
8. Press the power switch button to “ON”( I ). The
Power-on light will illuminate, indicating that your 3-in-1
has begun the brewing cycle. If you enjoy the taste of a
strongertea allow the tea to sit in the carafe for a few
minutes longer, after the water has emptied from the
water tank. Teas which have finer particles will steep
fig. 4fig. 5
fig. 6

15
quicker and will require less time to steep.
9. Once the steeping cycle has completed, please ensure
you manually turn the3-in-1 to the “OFF” ( 0 ) position.
NOTE: THIS UNIT IS NOT EQUIPPED WITH AN
AUTOMATIC SHUT-OFF FEATURE, SO YOU MUST
MANUALLY TURN THE UNIT “OFF” (O).
CAUTION: Do not remove the carafe until the brewing
cycle has been completed. Never leave an empty
carafe on the warming plate while still hot.
WARNING: Do not remove the tea infuser from the carafe
until the tea infuser has fully cooled.
Using Your 3-in-1 as a Hot Water Dispenser
1. Place your 3-in-1 on a flat, dry, level surface, such as a
countertop. Plug the unit into a 120 volt 60 Hz AC-only
outlet.
2. Fill the carafe with cold water up to the marked level for
desired amount of hot water.

16
IMPORTANT: Use only cold water. The automatic
brewing system has been designed to work only with
cold water.
3. Empty the water from the carafe into the water reservoir.
Close the hinged lid.
4. Place the empty carafe on the warming plate.
5. Press the power switch button to “ON” ( I ). The
Power-on light will illuminate, indicating that your 3-in-1
has begun the hot water dispensing cycle.
6. Once the dispensing cycle has completed, please
ensure you manually turn the 3-in-1 to the “OFF” ( 0 )
position.
NOTE: THIS UNIT IS NOT EQUIPPED WITH AN
AUTOMATIC SHUT-OFF FEATURE, SO YOU MUST
MANUALLY TURN THE UNIT “OFF” (O).
CAUTION: Do not remove the carafe until the brewing
cycle has been completed. Never leave an empty
carafe on the warming plate while still hot.

17
Decalcifying
Mineral deposits left by hard water can clog your
3-in-1.Your drip 3-in-1 will require cleaning with vinegar to
remove any calcium or mineral deposits that may form
over time and will affect the performance of the unit. You
will know when your 3-in-1 requires decalcifying when you
notice an obvious slow down in brewing time and
excessive steam.
We recommend decalcifying your drip 3-in-1 every two
months or at any time the brewing time slows down.
Fill the carafe up to the 8-cup (max) with a mixture of one
part white vinegar and two parts water.
Pour the solution into the water reservoir, then close the
hinged lid and put the empty carafe onto the warming
plate.
Switch the 3-in-1 ON “I”, and allow the 3-in-1 to “brew” the
vinegar solution. When the vinegar solution has finished
brewing, empty the carafe and rinse it out with clean water.
The 3-in-1 must be left to cool down for approximately 15
minutes before adding more water.
Refill the water reservoir with a carafe of cold water only,
and run another “brew” cycle. This will rinse out any

18
remaining vinegar solution.
If necessary, a second “brew” of cold water can be
performed.
NOTE: THIS UNIT IS NOT EQUIPPED WITH AN
AUTOMATIC SHUT-OFF FEATURE, SO YOU MUST
MANUALLY TURN THE UNIT “OFF” (O).
CAUTION: Do not remove the carafe until the brewing
cycle has been completed. Never leave an empty
carafe on the warming plate while still hot.
Cleaning Your 3-in-1 Coffee Maker, Tea Steeper & Hot
Water Dispenser
CAUTION: Be sure to unplug this appliance before
cleaning. To protect against electric shock, do not
immerse cord, plug or unit in water or other liquid.
The carafe, carafe, cover, tea infuser, and permanent
filter may be washed with warm soapy water. The

19
removable filter basket may be washed with warm, soapy
water, or placed in the top rack of the dishwasher. Do not
place any other part of your 3-in-1 in the dishwasher.
Never use harsh or abrasive cleaners on any part of your
3-in-1.
Do not try to clean the inside of the water reservoir with a
cloth because this will leave a residue of lint and may
clog your 3-in-1. Just rinse with cold water periodically.
To clean the surface of your 3-in-1, rinse a soft cloth in
warm water and squeeze out excess water. Wipe the
surface, dry thoroughly and polish with a dry soft cloth.
TECHNICAL INFORMATION
Input voltage: 120 VAC
Rated frequency: 60Hz
Power: 700 W
Capacity: 1.25L
Environment friendly disposal
You can help protect the environment!
Please remember to respect the local regulations:
hand in the non-working electrical equipments to
an appropriate waste disposal center
Table of contents
Languages:
Other Premium Coffee Maker manuals

Premium
Premium PCM59r6 User manual

Premium
Premium PCM5970D User manual

Premium
Premium PCM5423B User manual

Premium
Premium PCM5417 User manual

Premium
Premium PCM508 User manual

Premium
Premium PCM115 User manual

Premium
Premium PCM512B User manual

Premium
Premium PCM511 User manual

Premium
Premium PCM5416 User manual

Premium
Premium pem350 User manual