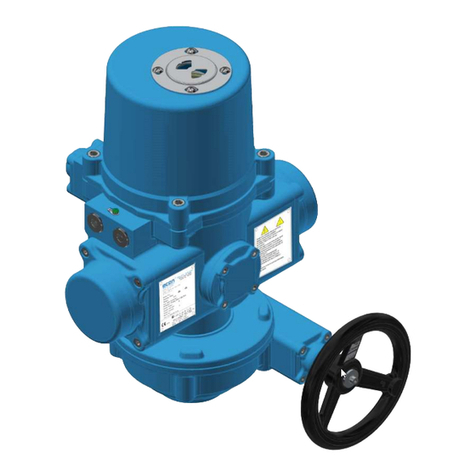
Pressure Tech LF-540 Series Service manual

1
THE LF-540 SERIES
Operating and Service Manual
Series includes all variants of LF-540
Issue B
July 2016

2
TABLE OF CONTENTS
1. Description .............................................................................................................................3
2. Installation .............................................................................................................................3
3. Operation ...............................................................................................................................3
4. Special Conditions for Safe Use .............................................................................................4
5. Hazardous Location Usage.....................................................................................................4
6. Servicing and Maintenance....................................................................................................4
6.1. Servicing the LF-540 –Cv 0.2 Self Venting..............................................................4
6.1.1. Accessing the Main Valve Assembly ........................................................5
6.1.2. Accessing the Vent Seat...........................................................................5
6.1.3. Reassembly –Sensor Assembly ...............................................................6
6.1.4. Reassembly –Regulator...........................................................................7
6.1.5. Figure 1 –Sectional View of the LF-540 –Self Venting ...........................8
7. Technical Data........................................................................................................................9
8. Warranty Statement ..............................................................................................................9

3
1. Description
The LF-540 series are compact and economical high pressure regulators with precision
machined sensing elements to allow fine pressure control on pressures up to 414bar. The
LF-540 can be supplied as either non-venting or self venting (non captured / non
adjustable).
2. Installation
Before system start-up, it is recommended that all systems be pressure tested, leak tested
and purged with an inert gas such as nitrogen.
Prior to placing into service ensure that the regulator is in the fully closed position, with the
adjusting mechanism turned completely anti-clockwise.
Check the model number reference to ensure that the pressure range complies with the
installation requirements.
Visually inspect the regulator for any signs of damage or contamination. If any foreign
materials are present and cannot be removed from the regulator, or if the threads on the
regulator appear to be damaged, please contact the office immediately to arrange for the
regulator to be returned for service.
The Inlet and Outlet ports are clearly marked. Select the correct size and type of connection
fittings for these ports which are indicated in the regulators part number. Both British
Standard Pipe (BSPP) ‘B’ and National Pipe Thread (NPT) ‘N’ options are available on this
regulator. Use the correct dowty or bonded seal for BSPP connections, self centering seals
are recommended. For NPT threads, ensure that PTFE tape is applied correctly to the
fittings, applying two overlapping layers in the direction of the thread, taking care that the
tape does not come into contact with the first thread. Any gauge ports on the regulator will
be 1/4” NPT unless otherwise stated. If any gauge port is not required, ensure that the port
is plugged prior to installation.
The media supplied to the regulator must be clean. Contamination can damage the seat
which may cause the regulator to fail. Filtration suited to the application is recommended
upstream of the regulator. Should further assistance or information be required in relation
to installation of any Pressure Tech regulator please contact the office, giving reference to
the regulators part number and/or serial number.
3. Operation
Turning the adjusting mechanism clockwise compresses the spring, which in turn opens the
main valve and allows the inlet pressure to pass through the seat orifice until the outlet
pressure is equivalent to the loading forces set by the compressed spring. Increase the
outlet pressure in this way until the desired pressure is achieved. The desired outlet
pressure should be set whilst increasing the pressure. Do not exceed the maximum inlet and
outlet pressures of the regulator which are indicated on the regulator label.

4
Self venting regulators can reduce the outlet pressure, by turning the hand wheel anti-
clockwise, thereby venting the excess pressure through the vent port on the regulator. The
vent on the LF540 exhausts to atmosphere.
4. Special Conditions for Safe Use
Turning the hand wheel anti-clockwise (with pressure on the outlet) should be refrained on
non-venting regulators. Pressure should be reduced in this case by venting downstream of
the regulator, and turning the hand wheel simultaneously anti-clockwise.
For safety and to avoid the risk of venting unwanted fluids to atmosphere, the LF540 self
venting option should not be used on toxic o-2(/sr668.1439(.)] TJETB(d)-4( )6(n)-4(o)7(t)-3.86 Tm[(ven)md)-4(u)5(iaTJETBT1 0 0 1 428.359.59.86 Tm[(ven)TJET EMC /P <</MCID 6>> 7DC BT1 0 0 1 72.024 668.544 m[( )] TJET EMC /P <</MCID 1>> 8DC BT/F3 14.04 Tf1 0 0 1 72.024 698.564 Tm[( )] 5JETBT1 0 0 1 79.104 698.564 Tm[( ) -336287( )] .TJETBT1 0 0 1 85.944 698.564 Tm[( ) [( )] Hax)3(za)] TJ(/so)7(du)-4(so)7( )] Lcaun Ul Cogssp134(h)-4(e )-er

5
6.1.1. Accessing the Main Valve Assembly
To access the Main Valve Assembly (MVA):
i. Remove the securing M3 grub screw (26) from the regulator body (22).
ii. Unscrew the M3 button screw (27) and remove the name plate (4) from the hand
wheel (5).
iii. Unscrew the locknut (2) using a 24mm socket and remove the hand wheel (5)
from the adjusting screw (8).
iv. With the regulator secured up-right in a vice, remove the bonnet (10) by using a
torque wrench or equivalent with 47mm open end.
v. Un-screw and lift the top works from the assembly, inclusive of the bonnet (10),
load spring (9) and adjusting mechanism (6, 7, 8, 30).
vi. The sensor assembly can be removed from the body by using pliers or mole grips
against the flats of the spring rest (11).
vii. Use a 17mm open ended spanner to locate vertically over the seat nut (21), then
use an adjustable spanner to grip the 17mm spanner and loosen the seat nut (21)
until removed.
viii. The connector pin (20) can be removed after taking the wire retaining clip (19)
from the seat nut (21).
ix. Remove the soft seat (18), main valve (17) and main valve spring (16) from the
regulator body (22). It may be required to turn the body over and tap the base to
remove these parts.
NOTE: Cv 0.1 and Cv 0.3 models will contain a 9x1mm o-ring (not shown) below
the soft seat.
x. Inspect the main valve (17) and soft seat (18) for damage and replace as
required.
6.1.2. Accessing the Vent Seat
It is recommended that the vent seat is only accessed in the event of failure or suspected
failure. This is often noticed as a leak to atmosphere whilst controlling downstream
pressure.
IMPORTANT: Due to its compression securing method, the vent seat will require replacing if
removed from the sensor. Ensure that all required parts are available prior to removal.
i. To access the vent seat (13), secure the spring rest (11) in a vice and unscrew the
sensor (14) using a slotted screwdriver. Alternatively, a steel rule (or equivalent)
may be secured in a vice and used to accommodate the slot in the sensor (14).
ii. A 17mm open ended spanner or adjustable can then be used to remove the
spring rest (11).
iii. Remove the sensor (14) from the sensor holder (15).
iv. Remove all o-rings (1, 3, 23, 24) from the sensor assembly and replace as
required.
v. The vent seat (13) can be removed from the sensor using a 4mm drift punch. To
do so, secure the sensor (14) with the slotted side up and place the drift in the
4mm bore. Then lightly tap until the vent is released.
vi. The o-ring (25) and vent seat (14) can then be replaced.

6
6.1.3. Reassembly –Sensor Assembly
i. Place the o-ring (25) into the sensor (14) and position to the lower face below
the thread.
ii. Then, place the vent seat (13) into the sensor (14) with the o-ring groove facing
downwards.
iii. Place the respective o-ring (23, 24) and back up (1, 3) over the sensor holder (15)
and sensor (14).
NOTE: Back up (1) may need to be cut.
iv. Ensuring that the o-ring (24) around the sensor (14) is well lubricated, push the
sensor (14) into the sensor holder (15).
NOTE: The outer diameter of the sensor should locate into the lower bore of the
sensor holder.
v. Screw the spring rest (11) into the sensor (14).
vi. The assembly can be secured by gripping the flats of the spring rest (11) in a vice
and using a slotted screwdriver to tighten the sensor (14). Alternatively, a steel
rule (or equivalent may be secured in a vice and used to accommodate the slot in
the sensor whilst the spring rest is tightened using a 17mm open ended spanner
or adjustable.
IMPORTANT: Do not over compress the vent seat when tightening. A visible gap of ~1mm
should be left between the sensor and spring rest. Half a turn past the point at which the
spring rest comes into contact with the vent seat should be sufficient. It is also
recommended to use Loctite to prevent the spring rest from working loose in operation.

7
6.1.4. Reassembly –Regulator
Ensure that the sensor assembly has been correctly assembled as per 6.1.3 prior to
following the instruction below.
i. With the regulator body (22) upright and secured in a vice, place the main valve
spring (16) and main valve (17) into the lower bore.
ii. Place the soft seat (18) into the bore, with the outer edge chamfer facing
downwards.
NOTE: on Cv 0.1 and Cv 0.3 models, ensure that the 9x1mm o-ring (not shown) is
placed into the body and the soft seat is placed with outer o-ring groove is facing
down.
iii. Place the connector pin (20) into the seat nut (21), ensuring that the chamfered
sealing face is facing upwards.
iv. Locate the wire retaining clip (19) into the seat nut (21) and push firmly in place.
v. Screw the seat nut (21) into the regulator body (22).
vi. Use a 17mm open ended spanner to locate vertically over the seat nut (21), then
use an adjustable spanner to grip the 17mm spanner and tighten the seat nut
(21) securely to compress the soft seat (18).
vii. The sensor assembly may then be placed into the regulator body (22).
viii. Place the load spring (9) onto the spring rest (11) and locate the adjusting
mechanism (6, 7, 8, 30) into the load spring and screw the bonnet (10) onto the
body (22).
ix. Torque the bonnet to approximately 90 –100 Nm and secure by tightening the
M3 grub screw (26) located at the top of the regulator body (22).
x. Place the hand wheel (5) onto the adjusting screw (8) and tighten the lock nut
(25).
xi. Secure the nameplate (4) with the M3 pan screw (27).
It is recommended that all parts in the repair kits are used. Any defect parts removed during
the service should be disposed of. Parts should be kept clean in line with media
requirements. Following re-assembly of the regulator, pressure tests should be made to
both the inlet and outlet side of the regulator, to ensure there is no internal or external
leakage across the regulator.
To ensure that the main valve assembly has been correctly and effectively installed it may
be required to perform the appropriate seat leak test as per ANSI/FCI 70-2.

8
6.1.5. Figure 1 –Sectional View of the LF-540 –Self Venting
© Copyright of Pressure Tech Ltd
PARTS LIST
ITEM
PART NUMBER
DESCRIPTION
1
ORB-PT-C-178
PTFE BACK UP
2
PT-C-132
LOCK NUT
3
ORB-PT-C-052
PTFE BACK UP
4
PT-C-049
NAMEPLATE
5
PT-C-048-001
LARGE HAND WHEEL
6
PT-C-046
SLOT SCREW
7
PT-C-045
ADJUSTING NUT
8
PT-C-043-004
ADJUSTING SCREW
9
PT-C-042
LOAD SPRING (500KG)
10
PT-C-040-002
BONNET
11
PT-C-039
SPRING REST
12
PT-C-038
SLIDE RING
13
PT-C-036
VENT SEAT
14
PT-C-035
25MM SENSOR
15
PT-C-033-003
SENSOR HOLDER
16
PT-C-031
MAIN VALVE SPRING
17
PT-C-030
MAIN VALVE
18
PT-C-029
PEEK SEAT Cv 0.2
19
PT-550-009
RETAINING WIRE CLIP
20
PT-550-008-001
CONNECTOR PIN
21
PT-550-006
SEAT NUT
22
PT-540-A-LF
BODY ‘A’ PORTING
23
OR-0360-20
O’RING STD
24
OR-0250-20
O’RING STD
25
OR-0050-10
O’RING STD
26
FIT-M3x4MM-SS-316-GRUBSCRW
M3 GRUB SCREW
27
FIT-M3-08-A4-70.0-SKT-BTN
M3 BUTTON SCREW
28
FILT-SCRM31040405-A
10MM SCREEN FILTER
29
FIT-472011-SS-CIRCLIP
11MM CIRCLIP
30
BEAR-51103-SS
SS BEARING

9
7. Technical Data
Fluid Media: All gases and liquids compatible with materials of
construction
Max Inlet Pressure*: 550 bar (8000 Psi)
Outlet Pressure Range: 0-414 bar (6000 Psi)
Operating Temperature: -20°C to +80°C (Nominal)
Materials: Body and Trim: 316 SS
Seat: PCTFE / PEEK® / Ceramic
Flow Capacity (Cv): 0.1 / 0.2 / 0.3
Leakage: Gas: Bubble tight
Liquid: Zero drops of water at max inlet
*Max Inlet Pressure determined by seat material and Cv of regulator.
8. Warranty Statement
Pressure Tech Ltd guarantee all products correspond with their specification at the time of
delivery and, with exception to wear and tear, wilful damage, negligence, and abnormal
working conditions, will be free from defects for a period of 12 months from date of
delivery.
Table of contents
Other Pressure Tech Controllers manuals

Pressure Tech
Pressure Tech SS-231 Series Service manual

Pressure Tech
Pressure Tech MF-414 Series Service manual

Pressure Tech
Pressure Tech THE SS-414 Series Service manual

Pressure Tech
Pressure Tech LF-301 SERIES Service manual
Pressure Tech
Pressure Tech LF-792 Series Service manual
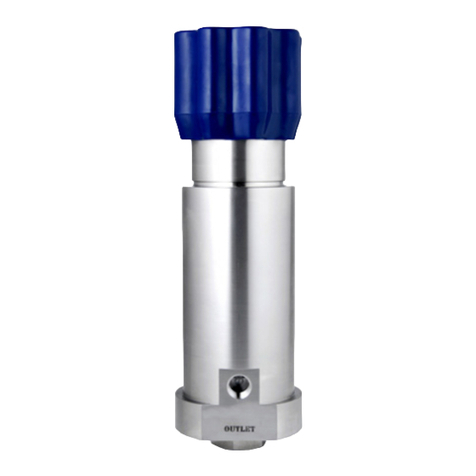
Pressure Tech
Pressure Tech LF-690 Service manual
Popular Controllers manuals by other brands

Adaptec
Adaptec 29160LP - SCSI Card Storage Controller U160 160... installation guide
ILX Lightwave
ILX Lightwave LDC-3700C Series user guide

Contest
Contest PILOT-192PRO user guide

SKAARHOJ
SKAARHOJ PTZ Pro v2B user guide
Festo
Festo VIFB16 Series manual

Guangdong Schen Investment
Guangdong Schen Investment RC-M2 user manual
