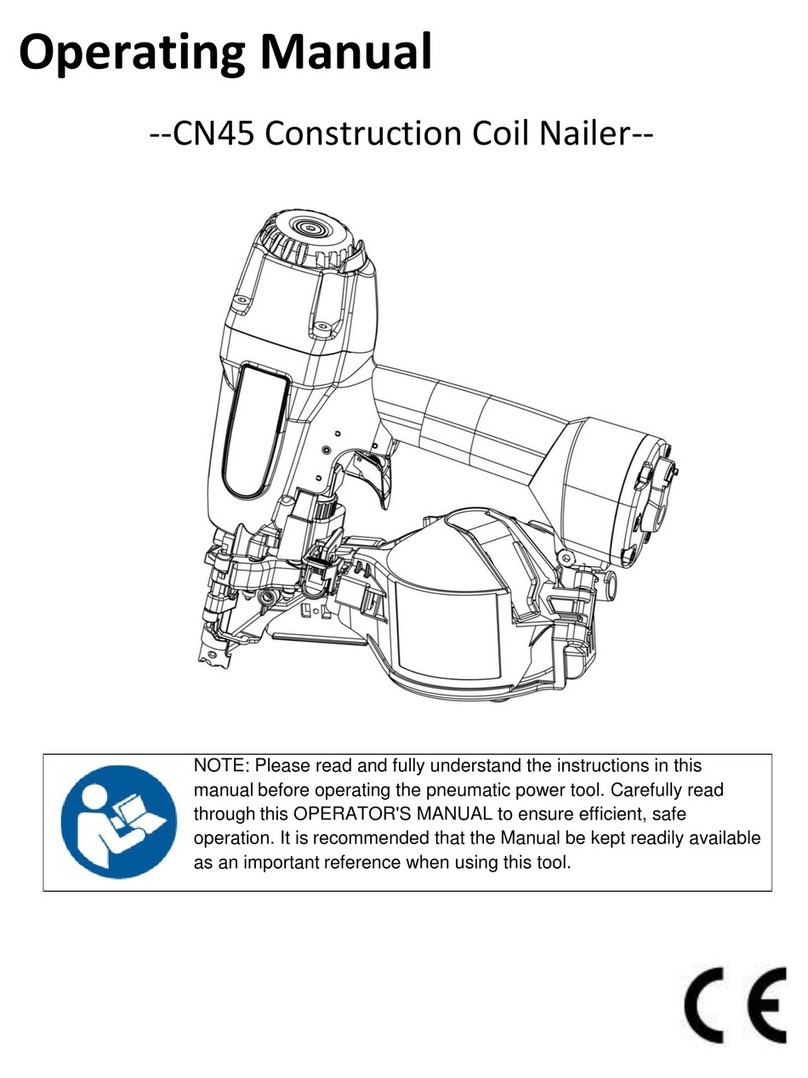
primatech P240 User manual

Revision 06/05 Printed inCanada
PNEUMATICFLOORINGNAILER
P240
OPERATINGINSTRUCTIONS
WARNING
Read theseinstructionsthoroughlybeforeusingthistooland keep it
handyforreference.

PRIMATECH PNEUMATIC NAILER P240
isaheavydutyprecision toolspeciallydeveloped forthe installation
ofhardwood flooring.Weighting only11 pounds (5kg), thisergono-
micallydesigned tool makes the installation ofhardwood floor very
easy,allowing the operatortosetand nail the boards inthe standing
position.It uses standard"L"type cleatsavailableinlengths of1½"
(38 mm), 1¾" (44 mm)or2"(50 mm)cleats;oroptionallythe 1½"
(38 mm)or2"(50 mm)"T"type cleats.Forbestresult, only
PRIMATECH cleatsshouldbe used. For maximumperformance,the
manufacturerguidelines shouldbe followed.Read carefullythese
instructions beforeoperating thistool. It isimportant tounderstand
warnings/cautions and the safetymeasures toensuresafeuse of
thistool.
Additional information isavailabledirectlyfromthe manufacturer:
1135 de Lorraine, Québec, QC
Canada, G1J 1R8
Phone: 1 (800) 363-1962, 1(418) 522-7744
Fax: 1(418) 522-7466
email: support@primatech.ca
web: www.primatech.ca/support
SAFETYMEASURES
These importantguidelines shouldalwaysbe followed toworksafely
withthe PRIMATECH pneumaticnailer model P240:
1. Read these instructions thoroughlybeforeusing thistooland
keep it handyfor reference ifnecessary.
2. Alwayskeep hands,feetorotherbodypartsawayfromthe nail
ejection area.
3. Neveraimthe toolinanydirection otherthan the working area.
4. Alwayscarryormanipulatethe toolbyitshandlewhilethe air
supplyhose isconnected.
5. Neverhit the head cap ofthe actuatorifthe plasticbase isnot
sitting perfectlyon the working surface.
6. Neverleave the toollaying down on itsside whilethe air supply
hose isconnected;the toolshouldalwaysbe lefton the floor,
standing on itsplasticbase.
7. Do not alter or remove safety.
8. Alwaysdisconnectthe air supplyhose when the toolisnotin
use or when move toanother workarea.
9. Neverservice orrepair the tool, clearobstructions ormake
adjustmentswhilethe air supplyhose isconnected.
10.Onlycompressed air shouldbe used topowerthistool(110 psi,
7.6bar maximum).
11.Neveruseoxygen oranyothercompressed gas as apower
source for thistool.
12.AlwayswearOSHA-required Z-87 safetyglasses withside
shields.
13.Alwayswearproperearand feetprotection whilethe air supply
hose isconnected.
DO NOTREMOVE OR ALTER SAFETY.NEVER
DEPRESS THESAFETYCONTACTWITH YOUR HANDS
WHEN TOOLISCONNECTED TO AIR SUPPLY.EXTREME
CAUTION ISADVISED WHEN USING THISTOOL.
CONNECTION&AIRSUPPLYSYSTEM
To ensuremaximumperformance and efficiency,and also a
minimumofcare,the PRIMATECH pneumaticnailerrequires clean,
dryair. It isnecessarytouse afilter and apressureregulator.
Thistoolneeds adetachablemalecouplerwith3/8"NPT male
treads.Use a3/8"(1cm)minimumdiameterair supplyhose.A
smallerhose orahose longerthan 50'(15 m)couldcause a
pressuredrop when the tool isactivated repeatedly.
ALWAYSUSE AFREE-FLOWCONNECTION FOR THE
COMPRESSED AIR SUPPLYTO PREVENTTHATTHE
TOOLSTAYSCHARGED AFTER DISCONNECTING THE
AIR SUPPLYHOSE.
UNLOAD TOOLBEFORECONNECTING AIR TO
PREVENTACCIDENTALDISCHARGE.
AFTER MOVING TOOLTO ADIFFERENTWORK AREA,
OR AFTER ANYMAINTENANCETO THETOOL,ALWAYS
ENSUREPROPER OPERATION BYACTUATING TOOL
SEVERALTIMES WITHOUTCLEATS OVER THE
SUBFLOORING .
Dirt, dust, and otherparticles inthe air supplycan cause sluggish
operation orprematurewearofmanycomponentsofthe tool. Drain
waterfromthe compressortank regularly.The compressorstart-stop
limitsshouldbe settodeliveran air pressureofatleast100 psi
(7bar) atall time.Consult the compressormanualordealerfor
instructions on how tomake thisadjustment.

At80 psi(5.5bar) and 100 hitsperminute,the toolconsumes
approximately4.5cu.ft(125 )ofair perminuteat70°F(21°C).
Higherair pressurewillincrease the consumption ofcompressed air.
The toolisdesigned tobe operated withacompressed air pressure
of80 psi(5.5bar). Occasionally,ahigherpressurecouldbe
necessary,forexampletouse the toolwithdifferentspecies of
harderwood.Inthese moredifficult cases,the compressed air
pressurecan be increased up to110 psi(7.6bar). It isvery
importantnottoexceed thismaximumpressuretopreventleaks and
risk ofdamage tothe tool.
The toolmaybe fitted withthe optionalP-055 pressurerelease
valve.thisvalve will produce aloud noise ifthe maximumair
pressureisexceeded.
Check the compressed air supplyhose beforeconnecting toensure
thattheyarefree fromdirt orparticles thatcan alterthe performance
ofthe tool. Payspecialattention toanyair leaks.Do notuse a
compressed air pressurehigherthan 110 psi(7.6bar). Higher
pressurecan cause prematurewearordamage tocertain
components.Afterassembly,check allthe connections toprevent
the leaks and tohave maximumefficiency.
TO PREVENTACCIDENTALDAMAGETO THEFINISHED
SURFACEOFTHEINSTALLED FLOOR,RESTTHETOOL
ONTO THESUBFLOORING WHEN CONNECTING AIR,
LOADING TOOLOR PERFORMING ANYMAINTENANCE
TO THETOOL.
LOADING THE TOOL
Insert arow ofPRIMATECH'scleatsinside the feederchanneland pull
back on the plastictab gentlyuntil it engages behind the cleats.To
release,simplysqueezethe tab withyourthumband indexand
allow the spring torecoil slowly.The clipmustbe released slowlyto
preventdamage.For MAXIMUMPERFORMANCE,alwaysuse P RIMATECH
cleats.The PRIMATECH modelP240 comes standardwiththe P-148
feederchanneltoaccommodate1½" (38 mm), 1¾" (44 mm)or2"
(50 mm)L-type cleats.It maybe ordered orconverted withthe
P-951 kit toaccommodate2"or1½" T-type cleats.Longerfeeder
channelsforthe L-type cleatsarealso available.Make surethatthe
proper type ofcleatsisused.
USE ONLY THETYPE OFCLEATSIDENTIFIED ON THE
FEEDER CHANNEL.THEUSE OFANYOTHER TYPE OF
CLEATSWILL DAMAGETHETOOL.
Alwaysoperatethe toolwithcleatsinfeederchannel. Damage may
occur ifthe tool isoperated without cleats.
OPERATION
Place the toolontothe subflooring,unload tooland connectthe
hose.Afterloading the toolwithPRIMATECH cleats,the PNEUMATIC
NAILER model P240 isreadyfor use.
A2.5lbs (1.1kg)hammerissupplied withthe tool.
Use the rubberface tohelpposition
the boards.Use the steelwith
caution topreventdamage tothe
boards.
Press the flooring firmlyinplace.The
lipofthe plasticbaseP-433 should
restsnuglyagainstthe tongueofthe flooring.
Downwardpressureshouldbe applied toensure
properseating ofthe cleat. To activatethe tool,
strike lightlythe head cap P-501 withthe RUBBER
FACE ofthe 2.5lbs (1.1kg)hammersupplied withthe tool. Never
strike the toolwiththe metalend ofthe hammer.Ifwood is
slightlytwisted,hitting the toolwithmoreforce will assistinpulling
the boardup snugly. NEVER strike the head cap when the toolisnot
sitting on the working surface.
USE ONLYTHE RUBBER FACE OFTHEHAMMER.
USING THESTEELEND WILL DAMAGETHETOOLAND
VOID THEWARRANTY.
OPERATING THETOOLWHEN THESAFETYCONTACT
ISNOTFULLYDEPRESSED WILL CAUSE PREMATURE
WEAR OR DAMAGETO THEDRIVING BLADE,PISTON
AND CYLINDER.
Eyeprotection isrecommended and shouldbe
wornbythe operatorand otherinworking area.
Accidentalejection ofnailsorwood debriscould
cause severeeyeinjury.
Insomeenvironments, ear protection might be
required, as working condition mayinclude
exposuretohigh noise levelswhich lead to
hearing damage.
Wearing safetybootsand safetyhatisalso highly
recommended.
NOTE:All the personalprotection equipmentsmust
meet national standards.

ADJUSTING FORHARDWOODTHICKNESS
To fasten 3/4"or25/32"
flooring,no adjustmenttothe
toolisrequired.Use the
standardP-433 plasticbase
supplied withthe tool.
To fasten 1/2"flooring,install
optionaladapterkit P-188.If
necessary,useone ortwo
shims(supplied)toinsurethat
thegate/footdo notsit on the
tongue.Insert shimsbetween
mainbodyand plasticbase as
shown.
To fasten 33/32"flooring,
remove plasticbase as shown.
You mayapplythe optional
self-adhesivebase P-986 to
protectthe finished surface of
the flooring.
BEFORESTARTING AN INSTALLATION,NAILDOWN
FEW BOARDSTO ASCERTAIN THATYOU AREUSING
THERIGHTTOOLAND FASTENER.
PREVENTIVE MAINTENANCE
Thistoolrequires minimallubrication.Use only
detergent-free oil such as Primatech P-090.Few drops
ofoil weeklyinthe air inletissufficient. Othertypes of
lubricant maydegrade the seals.
Check periodicallytomake surethatall screws aretight. Pay
particularattention tothe two screws holding the feederchannelas
well as the screws and nutson the feederchannelassemblywho
might loosen up overtime.Be carefulnottostripthe threads when
tightening.The use ofan mediumstrengthadhesive sealantsuch as
the Loctite242 isrecommended for those screws and nuts.
MAINTENANCE &REPAIR
Disassemblyofthe toolmustbe done inaclean environment. Some
partscan be easilydamaged ifdisassembled withimpropertoolsor
byinadequatemethods.Maintenance shouldonlybe performed by
trained personnel. Use onlygenuine PRIMATECH replacementparts.
TO PREVENTINJURY,ALWAYS DISCONNECTTHE
AIR SUPPLYHOSE WHEN SERVICING OR
DISASSEMBLING THETOOL.
When assembling the tool, make surethatall hexcap screws P-005
holding the casing on the base aretight.Inspectthese screws
regularly. Do not use anysubstitutetogasket P-107.
When servicing the tool, do nottwistorforce anyparts.Damage
mayresult fromsuch abuse.Ifpartsdo notcomeloose easily,
contact your PRIMATECH distributor for moreinformation.
When opening the toolformaintenance,alwaysclean all
componentsofdirt, grit, orparticles.Inspectthe toolcarefullyfor
broken partsorexcessive wear, and replace ifnecessary.When
ordering parts,be suretospecifythe rightpart number, and also the
tool serial number.
AFTER ANYMAINTENANCETO THETOOL,REMOVE
ALL CLEATS BEFORECONNECTING AIR AND
ACTUATETHETOOLREPEATEDLYOVER APIECEOF
WOOD OR SUBFLOORING TO INSUREPROPER
OPERATION.
CLEANING THE VALVE
Ifthe tool becomes sluggish, does notsetthe cleat, it mayindicate
excessive dirt inthe head of thetool, therebyimpeding the cycling
ofthe valve P-543.Thismaybe caused bydirt,dustorother
particles,oreven waterinthe compressed air. Insuch case,remove
the six(6)screws P-015 and take the head assemblyoff the tool.
Remove the valve mainscrew P-544B withan 3/16"Allen keyand
take outboththe valve P-543 and the actuatorP-542.It isgenerally
notnecessarytoremove the head cap P-501. Check all sealsand
replace ifnecessary.Clean the interiorand lightlylubricatewithnon-
detergentoil P-090.Othertypes oflubricantmaydegrade the seals.
Ifcareistaken,the gasketP-107 shouldrequireonlyinfrequent
replacement.
ASSEMBLING THE VALVE
1. First, make surethatall assemblies have all their seals
installed.
2. Holdthe actuatorhead assemblyP-541 inplace.It isnot
necessarytoremove head cap P-501 ifalreadyinstalled.

3. Insert actuator assemblyP-542. It shouldslide smoothly.
4. Insert mainvalve assemblyP-543 .
5. Carefullyput actuator cap assemblyP-544 inplace.
6. Assemblewithscrew P-544B, using a3/16"Allen key.
7. Snap head cap P-501 inplace.
8. IMPORTANT -Pull outthe valve P-543 downwardbeforeclosing
the head assembly.
ALWAYSPULL OUTTHEVALVE ASSEMBLYTO ITS
EXTENDED POSITION BEFORECLOSING THEHEAD
ASSEMBLY.AFTER REASSEMBLY,ALWAYSACTUATE
THETOOLREPEATEDLY WITHOUT CLEATS
AGAINSTAPIECEOFWOOD TO INSUREPROPER
OPERATION.
REPLACING THE DRIVING BLADE
1. Remove the plasticbase P-433 byremoving the (4)screws and
washersP-034.
2. Remove the fourhexcap screws P-005 holdingthe casing to
the base P-235 and remove it.
3. Remove the reinforcement plateP-226.
4. Pull outthe bumperP-125;remove anydebrisfrombumperand
re-use.
5. Pull outthe mainpiston P-522 bypulling the driving blade
P-223.
6. Remove anydebrisand dispose ofthe broken driving blade
and screw.Atthistimeassess condition ofcylinderP-518.If
marked orgrouged,use arat-tail filetosmoothoutwalls.The
piston P-522 must be allowed tomove without restriction.
7. Lock the piston inavise,using arag topreventscoring.Open
the split ring and use along 3/16"Allen wrench toremove the
broken blade. Discardthe oldscrew.
8. Install the new driving blade firmlyinposition,using the new
screw supplied. It isimportant that the blade be perpendicular
tothe piston.Use ofamediumstrengthadhesive sealantsuch
as Loctite242 and tighten withas much force as possible.
Follow the instructions supplied withthe new driving blade.
9. Reverse the order ofinstructions toreassemble.
TROUBLESHOOTING
Thissection will helptodiagnose problemsthatmightalterthe
qualityofworkdone bythe operator, orthe tool, and will give
suggestions on how tosolve them.Follow the orderofthese
instructions.
TO PREVENTINJURY,ALWAYS DISCONNECT
THE AIR SUPPLY HOSE WHEN ADJUSTING,
SERVICING OR DISASSEMBLING THETOOL.
(1) FIRST:CHECKTHE COMPRESSED AIR SUPPLY
Manyofproblemscomefromafaultyorinadequate
compressed air supplysystem.Beforeattempting torepair the
tool, the following pointsshouldbe checked:
a)check the pressureat the output ofthe compressor; adjust
to80-110 psi (5.5-7.6bar) as required
b)checkthe tank pressureofthe compressor&adjustthe
start/stop limits
c)check the air deliverysystem, use ahose ofat least 3/8"
d)use fewertoolssimultaneously;do notexceed the capacity
ofthe compressor or ofthe deliverysystem
e)drainwater fromthe compressor
(2) SECOND:CHECKFOR AIR LEAKS
Atrest, thistoolshouldnothave anyair leak.Beforeattempting
torepair the tool and replace parts, check the following:
a)Tighten screws P-015 or replace gasket P-107
b)Check rectangularrings P-009 &P-543A;replace if
necessary
c)Check sealP-543D;replace ifnecessary;the topedge of
maincylinder P-518 shouldbe free ofdents.
d)Check seal P-516B
e)Clean &lubricatethe head assembly;re-assemblethe head
assemblycarefully
f) Check interior ofhead P-506 for scratches
g)Check top ring P-014; replace ifnecessary
(3) TOOLDOES NOTDRIVE CLEATS
a)Check that therearecleatsinthe feeder channel
b)Make surethe feeder clipisengaged behind the cleats
c)Check the frontend ofthe feederchannelforburrsor
damages
d)Check the safetyelement
e)Check ifthe driver isstuck indown position (see 6below)
f) Check for obstruction inthe cleat ejection area
(4) CLEATSARENOTSETCOMPLETELY
a)First, verifyair supply(see 1above)

b)Clean tooland lubricatetool; particularlythe head assembly
c)Increase air pressurewhen working withharderwoods;
never exceed 110 psi (7.6bar)
d)Check the driving blade for broken end
e)Ensurethe tool iswell seated on the floor whileejecting
(5) TOOLDOES NOTACTIVATE
a)Check the air supply
b)Inspectthe head assemblyand check all seals;reassemble
carefully
(6) DRIVING BLADEDOES NOTRETURN
a)Check for jammed cleat or obstruction
b)Check gate/footand end offeederchannelfordamages or
burrs.
c)Check the driving blade P-223
d)Inspectthe head assemblyand check all seals;clean &
lubricate
e)Check for damaged or missing bottomO-ring P-014
f) Tighten reinforcement plate
g)Check that the bumper isinplace.
(7) BROKEN OR WORN DRIVING BLADE
Replace the driving blade P-223.Failuretofollow the
instructions carefullywill result inrepeated breakage ofthe
driving blade.
(8) POOR FEED OR TOOLJAMMING
a)Make surethe feeder clipengages behind the cleats
b)Check the gateand foot for damages or wear
c)Check the frontend ofthe feederchannelforburrsor
damages
(9) OTHER PROBLEMS
Contact Primatech:
byphone 1 (800) 363-1962
1(418) 522-7744
byemail support@primatech.ca
consult our on-line Technical Support siteat
http://www.primatech.ca/support
ACCESSORIES
P-149 18"(45 cm) "L"feeder channel
P-951 "T"type cleatsconversion kit
P-080 Hammer
H-082 Double-head hammer
P-084 Whiterubber cap
P-188 Adapter for 1/2"to5/8"(13 to17mm) solid
P-288 Adapter for 3/4"to33/32"(19 to26mm)
P-090 Non detergent oil
TrakEdge
Adapter plates for factoryfinished floorings.
A-001 for standard3/4"floorings
A-004 for 9/16"&5/8"floorings
Customfitstoflooring manufacturersspecifications also
available. Contact us for moreinformation.
A-800 Extension Handle
The A-800 extension handleallows tooperatethetoolata
higherorlowerposition.Il provides abettertoolcontrol,
improve ease and stabilitywhen sliding the tool sideways.
OTHER PRIMATECH NAILERS
PRIMATECH offersafull line of professionaltoolsforthe installation
ofhardwood flooring:
H300 standardmodel, manual operation
H330 standardmodel, 'Multiple-Hits'manual operation
Q500 manualoperation,forsolidwood 1/2"(1.25 cm)or3/8"
(1cm) thick
R610 manual operation, for engineered flooring
PRIMATECH CLEATS
For best results, alwaysuse PRIMATECH cleats:
2"(50 mm) "L"or "T"type
1¾" (44 mm) "L"type
1½" (38 mm) "L"or “T” type
Table of contents
Other primatech Nail Gun manuals
Popular Nail Gun manuals by other brands
Hitachi
Hitachi NT65M2 - to 2-1 16 Gauge Finish Nailer Instruction and safety manual
Campbell Hausfeld
Campbell Hausfeld SB323200 operating instructions

Grizzly
Grizzly H5527 owner's manual
Rapid
Rapid Airtac PB131 Operating instructions - Original

Milwaukee
Milwaukee 7100-20 Operator's manual

Numax
Numax SFN64 manual
