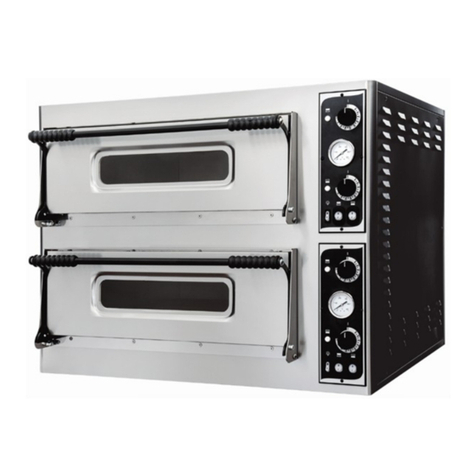
Prismafood VISIOME Service manual

ENGLISH
INSTALLATION, USE AND MAINTENANCE MANUAL
VISIOME
Rev.03


3
CONTENT
1–SERIAL NUMBER
1.1 –Serial number label........................................................................p. 5
2–GENERAL INFORMATION
2.1 - Importance of the manual ...............................................................p. 5
2.2 -“Oven off” status ...........................................................................p. 5
2.3 -Warranty.......................................................................................p. 5
3–TECHNICAL DATA
3.1 –Technical data sheet ......................................................................p. 6
3.2 - Intended use .................................................................................p. 7
3.3 –Use limitations ..............................................................................p. 7
4- INSTALLATION
4.1 –Provisions under the user’s responsibility .........................................p. 7
4.2 –Movement ....................................................................................p. 8
4.3 –Electrical connection ......................................................................p. 9
4.4 –Equipotential.................................................................................p. 9
5–USE AND OPERATION
5.1 - Oven switching on .........................................................................p.11
5.2 - General Settings ...........................................................................p.12
5.3 - Set temperature control parameters ................................................p.13
5.4 - Programmed switching on/off ........................................................p.14
5.5 - Cooking Settings ...........................................................................p.16
5.6 - Timer .......................................................................................... p.20
5.7 - Chimney / Exhaust ........................................................................p.21
5.8 - Steamer .......................................................................................p.22
5.9 - Eco Mode .....................................................................................p.23
5.10 - Oven switching off .......................................................................p.24
5.11 - Maintenance Menu.......................................................................p.25
6- MAINTENANCE
6.1 –Cleaning ..................................................................................... p. 26
7- DEMOLITION
7.1 - General warnings ......................................................................... p. 26

4
CONTENT
8–SPARE PARTS
8.1 –VISIOME oven spare parts ............................................................ p. 27
8.2 –Exploded VISIOME oven .............................................................. p. 28
9–ELECTRICAL PART
9.1–Wiring diagram............................................................................. p. 29
10–LEAVENING CELL INSTRUCTIONS
10.1–Control unit switch on ................................................................. p. 30
10.2–Key locking and unlocking............................................................ p. 30
10.3–Tins chamber lights switch on ...................................................... p. 30
10.4–Temperature adjustment ............................................................. p. 30
10.5–Control unit switch off ................................................................ p. 30
11–HOOD WITH CONDENSATION IINSTRUCTIONS
11.1–Control unit switch on ................................................................. p. 30
11.2–Key locking and unlocking............................................................ p. 30
11.3–Hood aspiration swith on ............................................................. p. 30
11.4–Condensation system .................................................................. p. 30
11.5–Control unit switch off ................................................................ p. 30
11.7-.Hood lights swith on .................................................................... p. 31

5
1.1 –SERIAL NUMBER LABEL
The serial number is composed of a screen-printed adhesive, grey label applied on the back of the
oven.
The plate also indicates the following data in a legible and indelible manner:
- Name of manufacturer; - Serial no.;
- Electrical power (kW/A); - Voltage and electrical frequency (Volt/Hz);
- Model ; - Year of manufacture
- “Made in Italy” writing - Weight of oven
2
—
GENERAL INFORMATION
2.1 - IMPORTANCE OF THE MANUAL
Before using the oven in question, it is compulsory to read and understand all the parts of this
manual.
This manual is an integral part of the oven and must be kept up to its final disposal.
The manufacturer cannot be held in any way liable for any damage to people, animals or property
due to non-compliance with the standards described in this manual.
This manual must always be available to “authorised operators” and be near the oven, safe and in
good condition.
“Authorised operators” must only conduct the operations on the oven within their competence.
1
—
SERIAL NUMBER
2.2 - “OVEN OFF” STATUS
Before carrying out any type of maintenance and/or adjustment intervention on the oven, it is
compulsory to section the source of electrical energy, disconnecting the plug from the mains,
ensuring the oven is actually off and cooled.
2.3 - WARRANTY
The manufacturer guarantees the ovens in question were tested on site. The warranty for the oven
is twelve months.
TAMPERING AND/OR REPLACEMENT OF PARTS WITH NON-ORIGINAL SPARE
PARTS CAUSES THE WARRANTY TO BECOME NULL AND VOID AND EXONERATES
THE MANUFACTURER OF ANY LIABILITY.

6
3.1 - TECHNICAL DATA SHEET
3
—
TECHNICAL DATA
Working temperature °C 50/400
Power supply Volt 400
Chambers no. 1
Power kW
18.6
19.8 (WITH
STEAMER)
Top resistor power W 1100x9
Bottom resistor power W 900x9
External dimensions cm
L 182.5
D 146.5
H 40.4
Internal dimensions cm
L 124.0
D 108.0
H 17.5
Net weight kg
411
421 (WITH
STEAMER)

7
PLANNED USE: BAKING OF PIZZA, BREAD, FOCACCIA, GRATIN OF FOODSTUFF
PRODUCTS AND HEATING FOOD ON TRAYS.
3.3 - USE LIMITATIONS
The oven in question was designed and manufactured for the intended use described in Par.3.2
therefore any other use is strictly forbidden to guarantee, an any time, authorised operator safety
and the efficiency of the oven.
THE OVEN CAN ONLY BE USED BY A RESPONSIBLE OPERATOR (USER).
3.2 - INTENDED USE
The use for which the oven was designed and manufactured is as follows:
3
—
TECHNICAL DATA
4
—
INSTALLATION
THE OVEN MUST NOT BE INSTALLED NEAR FLAMMABLE MATERIALS (WOOD,
PLASTIC, FUEL, GAS, ETC.) TO STRICTLY AVOID CONTACT BETWEEN
FLAMMABLE OBJECTS AND THE HOT SURFACES OF THE OVEN. ALWAYS ENSURE
FIRE-PREVENTION SAFETY CONDITIONS. MAINTAIN A FREE SPACE AROUND
THE OVEN OF AT LEAST 30 CM.
Check the power supply voltage, the frequency and the power of the system are compatible with the
values outlined in the technical characteristics (3.1) and on the plate affixed to the back of the oven.
The characteristics of the electrical power supply socket must be compatible with the plug installed
on the cable.
The location where the oven is installed must have the following environmental characteristics:
be dry, the temperature and relative humidity of the premises in which it must be installed
must not exceed the values indicated in table 3.1;
adequately distanced hydraulic sources;
ventilation and lighting suitable and compliant with the safety and hygiene standards outlined
by legislation in force.
4.1 –PROVISIONS UNDER THE USER’S RESPONSABILITY
THIS APPLIANCE CANNOT BE USED BY PEOPLE (INCLUDING CHILDREN) WITH
REDUCED PHYSICAL, SENSORY OR MENTAL CAPACITY, OR WITHOUT EXPERIENCE
AND KNOW-HOW, UNLESS THEY HAVE RECEIVED SUPPORT OR INSTRUCTIONS ON
USE OF THE APPLIANCE BY A PERSON RESPONSABLE FOR THIER SAFETY.
CHILDREN MUST BE SUPERVISED TO AVOID THEM PLAYING WITH THE APPLIANCE.

8
Use a forklift or a pallet truck of adequate capacity.
4.2 –MOVEMENT
4
—
INSTALLATION
1 2 3
4 5
76
* WARNING!! DO NOT GO BEYOND 1250MM WITH FORKS,
FRONTAL DAMAGE RISK!!
*

9
WHEN ELECTRICAL CONNECTION IS COMPLETE, THE AUTHORISED TECHNICIAN
(ELECTRICIAN) MUST RELEASE A DECLARATION THAT CERTIFIES THE
CONTINUITY MEASUREMENT ON THE EQUIPOTENT SAFETY CIRCUIT.
4.3 - ELECTRICAL CONNECTION
THE ELECTRICAL CONNECTION OF THE OVEN TO THE ELECTRICITY MAINS MUST
ONLY AND EXCLUSIVELY BE CARRIED OUT BY AN AUTHORISED TECHNICIAN
(ELECTRICIAN) WITH THE TECHNICAL-PROFESSIONAL REQUIREMENTS
REQUIRED BY LEGISLATION IN FORCE IN THE COUNTRY OF OVEN INTENDED
USE. ASK FOR A DECLARATION OF CONFORMITY TO BE ISSUED WHEN THE
WORK IS COMPLETE.
FOR DIRECT CONNECTION TO THE MAINS YOU NEED TO INSTALL A DEVICE
WITH OPENING BETWEEN THE CONTACTS TO ENSURE COMPLETE
DISCONNECTION IN CONDITIONS CLASSED AS OVER-VOLTAGE CATEGORY III,
IN COMPLIANCE WITH THE INSTALLATION RULES.
To connect the machine to the electrical mains, proceed as follows:
1) Connect the conductors L1—L2—L3—N —of a power supply cable to the terminal board
unsheathed with end sleeves, as in the type indicated in table 3.1.
2) Assemble the standard, polarised cable on the other end (distinction between the phase and
neutral must be unambiguous).
4
—
INSTALLATION
THE APPLIANCE MUST BE CONNECTED USING A DIFFERENTIAL SWITCH (RCD)
WITH A MINIMUM NOMINAL INTERVENTION CURRENT NOT OVER 30 MA.
4.4 –EQUIPOTENTIAL
The appliance must be inserted on an equipotent system. The connection terminal is found near the
terminal board of the oven power supply. The equipotent wire must have a minimum section of 10
mm ².

10
5 - USE AND OPERATION
CONTROL BOARD INDEX
5.1 Oven switching on pag.11
5.2 General Settings pag.12
5.2.1 Settings and Customization pag.12
5.3 Set temperature control parameters pag.13
5.3.1 Set temperature parameters pag.13
5.4 Programmed switching on/off pag.14
5.4.1 Manual switching on/off pag.14
5.4.2 Daily switching on/off pag.15
5.4.3 Weekly switching on/off pag.15
5.5 Cooking Settings pag.16
5.5.1 Cooking Programs setting pag.17
5.5.2 Selecting coking Program pag.18
5.5.3 Manual Functioning pag.19
5.6 Timer pag.20
5.6.1 Timer during manual cooking (M) pag.20
5.6.2 Count-Down pag.20
5.7 Chimney / Exhaust pag.21
5.7.1 Chimney / Exhaust during manual cooking (M) pag.21
5.7.2 Chimney / Exhaust during programmed coking pag.21
5.8 Steamer pag.22
5.8.1 Steamer switching on/off pag.22
5.8.2 Allarms pag.22
5.8.3 Suggestions pag.22
5.9 Eco Mode pag.23
5.9.1 Eco Mode On pag.23
5.10 Oven switching off pag.24
5.11 Maintenance Menu pag.25

11
5.1 - OVEN SWITCHING ON
Press to switch the oven on.
Light
Steam Inlet
Chimney:
ON= Chimney OPENED
OFF= Chimney CLOSED
Menu
Exit
ON / OFF Confirm

12
5.2 - GENERAL SETTINGS
At the first use, please set the oven as follows:.
Press MENU
A - COOKING PROGRAMS
B - SWITCHING ON AND OFF
C - GENERAL SETTINGS
D - TEMPERATURE SETTINGS
E - MAINTENANCE SETTINGS
Use the arrows to reach “ GENERAL SETTINGS”
PRESS to enter the Menu
Press to exit
5.2.1 - SETTINGS AND CUSTOMIZATIONS
Here you can set:
Interface type:
- Dashboard
- Simple
- Heating Element
Language
- Italian
- English
- Deutsch
- Francais
Brightness
Date:
- Year
- Month
- Day
Time
- Hours
- Minutes
- Seconds
Press “SAVE” to save the parameters
Press to exit settings
A
B
C
D
E

13
5.3 - SET TEMPERATURE CONTROL PARAMETERS
This menu is protected by a PSW because the
temperature setting points have been set by the
producer as a default
5.3.1 - TEMPERATURE SETTING
TEMPERATURE SETTINGS
Password: to be supplied by the manufacturer
A - Maximum Top Temperature
B- Maximum Bottom Temperature
C- Top power
D- Bottom power
E - Hysteresis adjustment
F - Power Modulation Period
G - Temperature measuring unit
H - Temperature Probe type
I - Fan OFF temperature
Press “SAVE” to save the parameters
Press to exit settings
A
B
C
D
E
F
G
H
I

14
5.4 - PROGRAMMED SWITCHING ON/OFF
Press menu
Select “SWITCHING ON AND OFF THE OVEN” press
Here you can set the Switching mode
Manual
Daily
Weekly
MANUAL: the operator can switch the oven on and off by
pressing
DAILY: the oven switches on and off every day at the set
time. (paragr. 5.4.2).
WEEKLY: the oven switches on and off every day at
following a set calendar. (par. 5.4.3).
See the instructions at paragraphs: 5.4.1, 5.4.2, 5.4.3.
5.4.1 - MANUAL SWITCHING ON/OFF
Press menu
Select “SWITCHING ON AND OFF THE OVEN” press
Press Manual
Press Save
Press

15
5.4.2 - DAILY SWITCHING ON
SWITCHING ON AND OFF THE OVEN
Switching mode: Daily
Use the the arrows to set
hh mm ena
On time
Off time
Press Save
Press to exit settings
5.4.3 - WEEKLY SWITCHING ON
SWITCHING ON AND OFF THE OVEN
Switching mode: Weekly
Use the the arrows to set
Day
hh mm ena
On time
Off time
Use the the arrows to step forward
When completed
Press Save
Press to exit settings

16
5.5 - COOKING SETTINGS
Press menu
Select “COOKING PROGRAM” and press .
Follow the instructions at paragraph 5.5.1
Here you can set up to 4 coking programms with 3
coking phases each.

17
5.5.1 - COOKING PROGRAM SETTING
Select the program you want to set
COOKING PROGRAM
Number of phases in total
Phase 1—Phase 2—Phase 3
Top Temperatue
Bottom Temperature
Total time (m) - Total Program Duration
OFF Vent t. (m) - Chimney opened duration
ON Vent t. (m) - Chimney closed duration
ON Steam t. (s) - Steam on duration
OFF Steam t. (m) - Steam off duration
N. Steam cycles
Press Save
Press to exit settings
= SELECTION
= INCREASE/DECREASE VALUE
A
B
C
D
E
F
G
H
I

18
Example of how to set 1 phase—phase duration 30 minutes
Numero Fasi: 1
Durata: 30
T. sfiato OFF: 5
T. sfiato On: 10
T. vapore OFF: 20
T. vapore on: 5
N. cicli vapore: 1
5.5.2 - SELECTION OF COKING PROGRAMS
To swap coking program or to pass to the manual functioning, use the following
procedure:
Using the arrows Select / P1 / P2 / P3 /P4
Press to enter the program
Press again to start the program
Steam
ON
Steam
OFF
Chimney
Opened
Chimney
Closed
Duration

19
5.5.3 - MANUAL FUNCTIONING
In the case of manual mode (M) to set the top/
bottom temperature and timer, if necessary, move
with the keys,
the field to be changed will be marked in white.
Change the value with the keys
and press
CAUTION
If you do not press within 5 seconds the
settings will not be saved.

20
5.6.1 TIMER DURING MANUAL COOKING
Select time value with the arrows , set the destre time and press
5.6.2 TIMER DURING COOKING PROGRAM:
the timer status bar will be divided into as many equal parts as the phases of the
program are. At the top you will see the total phase duration. The bottom will display the
temperature top and bottom set
.
The timer status bar will display the total phase duration, tand the set top/bottom
temperature.
To activate the countdown timer, press
The timer will start counting down. A beep will signal the end of the countdown. To stop
the buzzer press.
The timer will reset itself waiting for a new keypress
CAUTION
At the end of the countdown the heating elements will remain always on. In this mode
the timer has only the function of acoustically notify the end of a set time.
5.6 - TIMER
This manual suits for next models
1
Table of contents
Other Prismafood Kitchen Appliance manuals