Caution:
Electrical Hazard
9 10
11 12
This feature controls the number
of stages in Emergency Heat
mode. It only appears if the
Technician Setup Step for HEAT
PUMP is ON.
Use the or key to
select 1-stage or 2-stage
operation. 1
Tech Setup Steps Adjustment Options Default
LCD Will Show
This feature allows the thermostat
to keep multiple stages of heat
energized until setpoint is
satised.
Use the or key to
turn ON or OFF.
Satisfy
Setpoint OFF
This feature allows a delay to occur
when a second stage is needed.
This allows the previous stage
extra time to satisfy setpoint.
Use the or key to
select OFF, 5, 10, 15, 30, 45,
60, or 90 minutes.
Staging
Delay OFF
For Dual Fuel applications (Gas/
Fossil fuel Auxiliary Heat), turn
this setting ON to LOCKOUT the
Heat Pump (Y) when Auxiliary
Heat (W2) is on. If desired- This can
also be used with Electric Auxiliary.
OFF will allow Y(1st stage of
Heat) andW2 (Aux Heat) to run
together if called for.
ON Will de-energize Y terminal
45 seconds after a call for
Auxiliary Heat (W2).
OFF
This feature allows you to set a
maximum heat setpoint value. The
setpoint temperature cannot be raised
above this value.
Heating
Setpoint
Limit HEAT LIMIT
90
COOL LIMIT
50
Cooling
Setpoint
Limit
This feature allows you to set a
minimum cool setpoint value. The
setpoint temperature cannot be raised
above this value.
1
DUAL FUEL
OF
SATISFY SP
OF
STG DELAY
OF
90
50
Emergency
Heat Stages
Dual Fuel
Auxiliary for
Heat Pump
(Only displayed if Emergency
Heat is set to ON)
(Only displayed if Heat Pump
is set to ON)
Use the + and - buttons to select
the minimum cool setpoint.
Use the + and - buttons to select
the maximum heat setpoint.
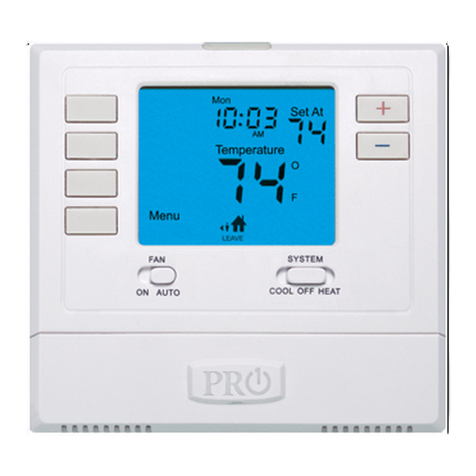
Operation of the FAN & SYSTEM button when connected to
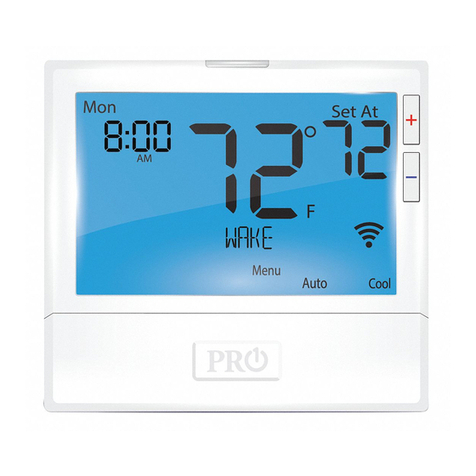
WIFI and running a programmable schedule from the app:
When the set at temperature is changed while an app schedule is
running, the thermostat will enter a temporary hold, and the Fan and
System buttons change to RUN and HOLD for 15 seconds. If you wish to
enter PERMANENT HOLD press the HOLD button at this time.
If you don’t press the HOLD button when the HOLD icon appears the
thermostat will remain in temporary hold for 4 hours.
When connected to WIFI you may also have the ability to turn
programming ON or OFF by pressing and holding the FAN button for
3 seconds.
WIFI Setup WIFI Setup & Specications
Specications
The display range of temperature ... 41˚F to 95˚F (5˚C to 35˚C)
The control range of temperature.... 44˚F to 90˚F (7˚C to 32˚C)
Load Rating............................................... 1 amp per terminal, 1.5 amp
maximum all terminals combined
Swing (cycle rate or dierential) ...... Heating is adjustable from 0.2˚ to 2.0˚
Cooling is adjustable from 0.2˚ to 2.0˚
Power source ...........................................18 to 30 VAC, NEC Class II, 50/60 Hz
for hardwire
Operating ambient ............................... 32˚F to +105˚F (0˚C to +41˚C)
Operating humidity .............................. 90% non-condensing maximum
Dimensions of thermostat ................. 4.7”W x 4.3” H x 0.9” D
Frequency Range..................... 2.4 Ghz ISM radio band
WIFI Module............................... Supporting 802.11
B/G/N Standards
Technician Setup Menu & WIFI Setup
Tech Setup Steps Adjustment Options Default
LCD Will Show
This feature allows the installer
to select the minimum run
time for the compressor. For
example, a setting of 4 will force
the compressor to run for at
least 4 minutes every time the
compressor turns on, regardless
of the room temperature.
Minimum
Compressor
On Time
You can set the minimum
compressor run time to
“OFF”,“3”, “4”, or “5”minutes.
If 3, 4 or 5 is selected, the
compressor will run for at
least the selected time
before turning o. Use the
and buttons to
change the setting.
MIN COMP
OF OFF
WIFI Setup
Select F for Fahenheit
temperature read out or select C
for Celsius read out.
F for Fahrenheit
C for Celsius
F or C F
The display light can be congured to
operate 2 dierent ways. To come on
when Any Key is pressed, or stay on ALL
of the time.
Display
Light
ON - light always on
OFF - light on when any button
is pressed
DISP LIGHT
OFF
OF
WIFI
System Set Heat
Off
Cool
SYSTEM SET
O
Em.Heat
AutoCool
You can congure the system
switch for the particular
application. Heat - O - Cool,
Heat - O, Cool - O, Heat - O -
Cool – Auto.
Note: Emergency Heat is available
in heat pump mode only.
Use the or buttons
until the desired application
is ashing. AUTO = (Auto
Changeover)
F OR C
A Note About Auto Changeover:
In Auto you have the ability to switch between Auto Heat or Auto Cool
by pressing the system key. This can be done once the current mode has
reached its setpoint. For example: if in Auto Heat, the heat setpoint must
be satised before the thermostat will allow you to switch to Auto Cool.
You can switch out of Auto by holding down the system key. To get back
into Auto, you must toggle the system key to Auto.
Technician Setup Menu
The following WIFI Technician steps are intended for viewing
information and resetting your WIFI connection. They are not typically
necessary for installation or initial setup.
1. Press and hold the + and – buttons together for 3 seconds.
2. Press and hold the WIFI Button on the lower left.
3. Use the + or - buttons to change settings and the lower left and right
buttons to move from one step to another. To exit tech setup: press and
hold the + and - buttons for 3 seconds or wait 60 seconds.
This displays theThermostat
Firmware Identication Number
which can be used for trouble
shooting.
Tech Setup Steps Adjustment Options Default
LCD Will Show
This step resets the WIFI
connection when needed allowing
you to reconnect to a new local
WIFI network.
Reset WIFI
WIFI RESET
Firmware
WIFI SSID
SSID
This displays theWIFI Firmware
Identication Number which can
be used for trouble shooting. If
the thermostat is not connected
toWIFI it will display“WIFI IDLE”.
N/A
FW
N/A
990914
FW011500
N/A
N/A
YES Hold the button for
three seconds and you will
be returned to the home
screen.WIFI RESET will not
be displayed.
YES
This step resets the WIFI connection when needed for applications like
replacing WIFI routers, changing networks, or any other time you might
need to disconnect and reconnect your thermostat to a local WIFI
network.
1. Enter the WIFI Menu and cycle through the steps until you get to the
RESET WIFI setting.
2. Hold the + button for three seconds.
3. You will now be automatically returned to the home screen and “WIFI
RESET” network will be displayed indicating the thermostat is no longer
connected to the local WIFI network. You will need to recommission the
thermostat to control your system from the PRO1 Connect App.
WIFI Reset Process


