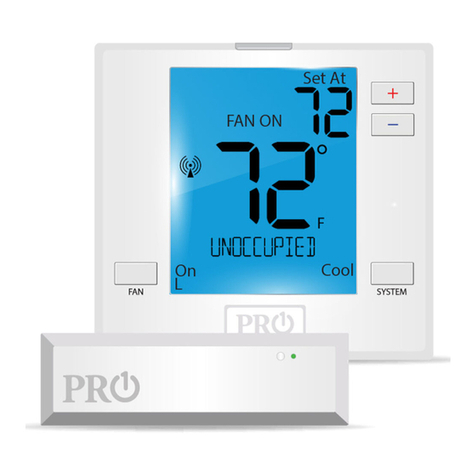
Remote Sensing Communication Technician Setup Menu Remote Sensing
Remote Sensing Technician Setup Menu Remote Sensor Conguration
Connecting to the Master Thermostat
Sensor Only Mode
Easy communication link set up.
(The remote sends temperature information
every 5 minutes.)
1. The Thermostat Tech setting for the Remote Sensor must be set to YES. See the
thermostat manual for instructions.
2. Navigate the Thermostat to the FINDING SENSORS technician setup step and then
select the zone you wish to connect tot hat remote.
3. On the Remote Sensor hold the LIGHT button for 3 seconds to enter the tech setup
screens.
4. In the 2nd tech setup step, choose the zone number selected on the
Master Thermostat
5. While in the ZONE tech setup step on the remote, hold the light button down until
the wireless icon ashes, approximately 3 seconds.
Example Step 1.
Master Thermostat
Remote Sensor
set toYES.
Then press NEXT STEP.
Example Step 2.
The Thermostat
Finding Sensor
zone numbers must match
the zone number on the REMOTE
Example Step 6.
The Thermostat now displays
the name and the ambient
temperature of the REMOTE
.
NOTE: you can only connect one
REMOTE to each zone.
EXAMPLE:
if you would like to connect two
REMOTES to the Thermostats. Then
connect the rst one to Zone 1 and
the second one to Zone 2.
Technician Setup Menu
This remote sensor has a technician setup menu for easy installer conguration. To
set up the remote for your particular application:
1. Press and hold the LIGHT button for 3 seconds. This 3 second delay is designed
so that homeowners do not accidentally access the installer settings.
2. Congure the installer options as desired using the table below.
3. Use the key to move to the next tech setup screen. Use the key to make
adjustments to the settings.
NOTE: Press and release the light button when you want to exit the tech setup
screens.
NOTE: Got to page 9 of this manual to
see the instructions on how to connect
this REMOTE to the Thermostat.
NOTE: Tech setup cannot be entered
if the REMOTE is in temporary hold
mode. Press the RUN key to exit
temporary hold.
(SHOW SET tech screen set to N)
In sensor only mode (set to N) the remote will not allow you to change the set point. The
current ambient temperature will be displayed and transmitted to the
Thermostat every ve minutes. The ambient temperature will be used for controlling when
system average is selected and whenever it is given priority by the program in the Thermostat.
Adjustable Remote Mode
(SHOW SET tech screen set to Y)
In show set mode it will show the temperature setpoint arrows and the CLEAN key.
In this mode the Remote can be used to override the Thermostats current settings for 4 hours
in addition to being used as temperature sensor.
OVERRIDE PROCEDURE:
Press the up or down arrows on the Remote. The current ambient temperature will be
displayed. Adjust the temperature reading to the desired set point.
The Thermostat will display the zone that currently has control and the Temperature at the
remote. The word REMOTE will be displayed on the Thermostat to show the remote has
overriden the program. Allow up to 1 minute for the Thermostat to acknowledge an override
from a Remote.
Pressing Run Schedule on the Thermostat will return the system to the programmed
schedule.
The Remote will also show a Run key that can be pressed to return the Thermostat to the
current programmed temperature, which cancels the hold.
Remote SHOW SET
Tech Setup Screen Remote SHOW SET
Tech Setup Screen
NOTE: The Remote will show the Run
key for 4 hours even if the Thermostat
is put back in to normal operation or
overridden by a 2nd remote. However,
the last device changed will have
priority.
NOTE: The last remote or master
changed will have priority
NOTE: There is no permanent hold
option for the remote but you can
select a permanent hold from the
Thermostat.
Example Step 3 and 5.
Set At
74 +
+
YES
REMOTE SENSOR
DonePrevious StepNext Step
+
1
FINDING SENSORS
DonePrevious StepNext Step
--
+
11
FOUND REMOTE 1
DonePrevious StepNext Step
74F
+
N
SHOW SET
+
SHOW SET
Y
Enabling this feature will allow
the remote to temporarily over-
ride the thermostat set point.
Selcts which zone is connected
to the thermostat. Only 1 remote
can be used for each zone for a
total of 4 remotes.
Zone Selction
Zone 1, Zone 2, Zone 3, Zone 4
The Zone number on the
remote and theThermostat
must match in order to
establish a connection
See previous page to connect.
Show Set
N: The remote is used as
a sensor only and cannot
change the current set point.
Y: Enables the temperature
adjustment keys allowing
the user to temporarily
override the thermostat set
point with the remote.
System
Select
This step congures the remote
device to connet to a wireless
THERMOSTAT, or a wireless
ZONING system master
thermostat. Leave setting on
‘THERMSTAT’for this application.
THERMSTAT: The remote is
congured to a wireless ther-
mostat. ZONING: The remote
is congured to connect to
wireless zoning system Master
Thermostat.
THERMOSTAT
ZONE 1
OFF
Tech Setup Steps Adjustment Options Default
LCD Will Show
Selcts a name for the remote.
This name will appear on the
thermostat when the thermostat
is displaying the remote’s
temperature
Remote
Name
Remote 1, Remote 2,
Remote 3, Remote 4,
Bedroom 1, Bedroom 2,
Bedroom 3, Bedroom 4,
Kitchen, Living Room, Hall,
Family Room, Dining Room,
Oce, Study, Den, Loft,
Upstairs
REMOTE 1
This feature sets the display tem-
perature to read either Fahrenheit
or Celsius.
F or C
F for Fahrenheit
Cfor Celsius
Room
Temperature
Calibration
This feature allows the installer
to change the calibration of
the room temperature display.
Fore example, if the thermostat
reads 70 and you would like it to
read 72.
You can adjust the room tem-
paerature display to read +
or - 4 degrees from the factory
calibrated settings. 0
F
90 F
Tech Setup Steps Adjustment Options Default
LCD Will Show
This feature allows you to set a
minimum cool setpoint value. The
setpoint temperature cannot be
lowered below this value.
Low
Temperature
Setpoint
Use the key to select the
minimum cool setpoint.
44 F
High
Temperature
Setpoint
Limit
This feature allows you to set a
maximum heat setpoint value.
The setpoint temperature cannot
be raised above this value.
Use the key to select the
maximum heat setpoint.
Remote Sensor
Wireless Icon Light Button
Master Thermostat Master Thermostat Master Thermostat
+
THERMSTAT
+
+
ZONE 1
+
REMOTE 1
+
SHOW SET
n
+
CALIBRATE
0
+
FAHRENHIT
F
+
LOW LIMIT
44
+
HIGH LIMIT
90
o
o
o o
+


