Usage instructions BUDDY 4all & classic
9
10 Commissioning and handover
The product will be handed over to you ready
for use by a rehabilitation specialist dealer or a
field representative or by a product consultant
from PRO ACTIV.
You will be fully instructed in the use of the
product based on the usage instructions in-
cluded in the delivery. You will be handed over
a record of training and handover certificate as
written proof. In addition, you will be handed
the usage instructions and, if necessary, fur-
ther accessories for your own use. It is rec-
ommended that you take along an assistant to
the training so that, if required, they can assist
you later when handling the product.
During the hand-over, the record of training
(chapter 38) and the hand-over certificate in-
cluding the associated check list (chapter 39)
must be filled in. The rehabilitation specialist
dealer should send the completed documents
to PRO ACTIV for filing as a file by e-mail or in
the form of a copy by fax or in the post.
11 Introduction to the product & the
surroundings
During the initial commissioning of the product,
drive at minimum speed and become accus-
tomed to the driving characteristics of the
product. Always adapt the speed and driving
manoeuvres to match your own abilities and
external circumstances. You will get a feel for
how to use the product safely after a short
time. Before driving up or down slopes or hills
with the product, you should be proficient in the
safe handling of the product on level ground.
Practice bending over, gripping, stretching and
getting out, until you know the limits of your
abilities. Allow yourself to be assisted until you
know what can cause falls or tips and how to
avoid it.
Get to know the environment in which you wish
to use the product. Look out for obstacles and
learn how to overcome or avoid them.
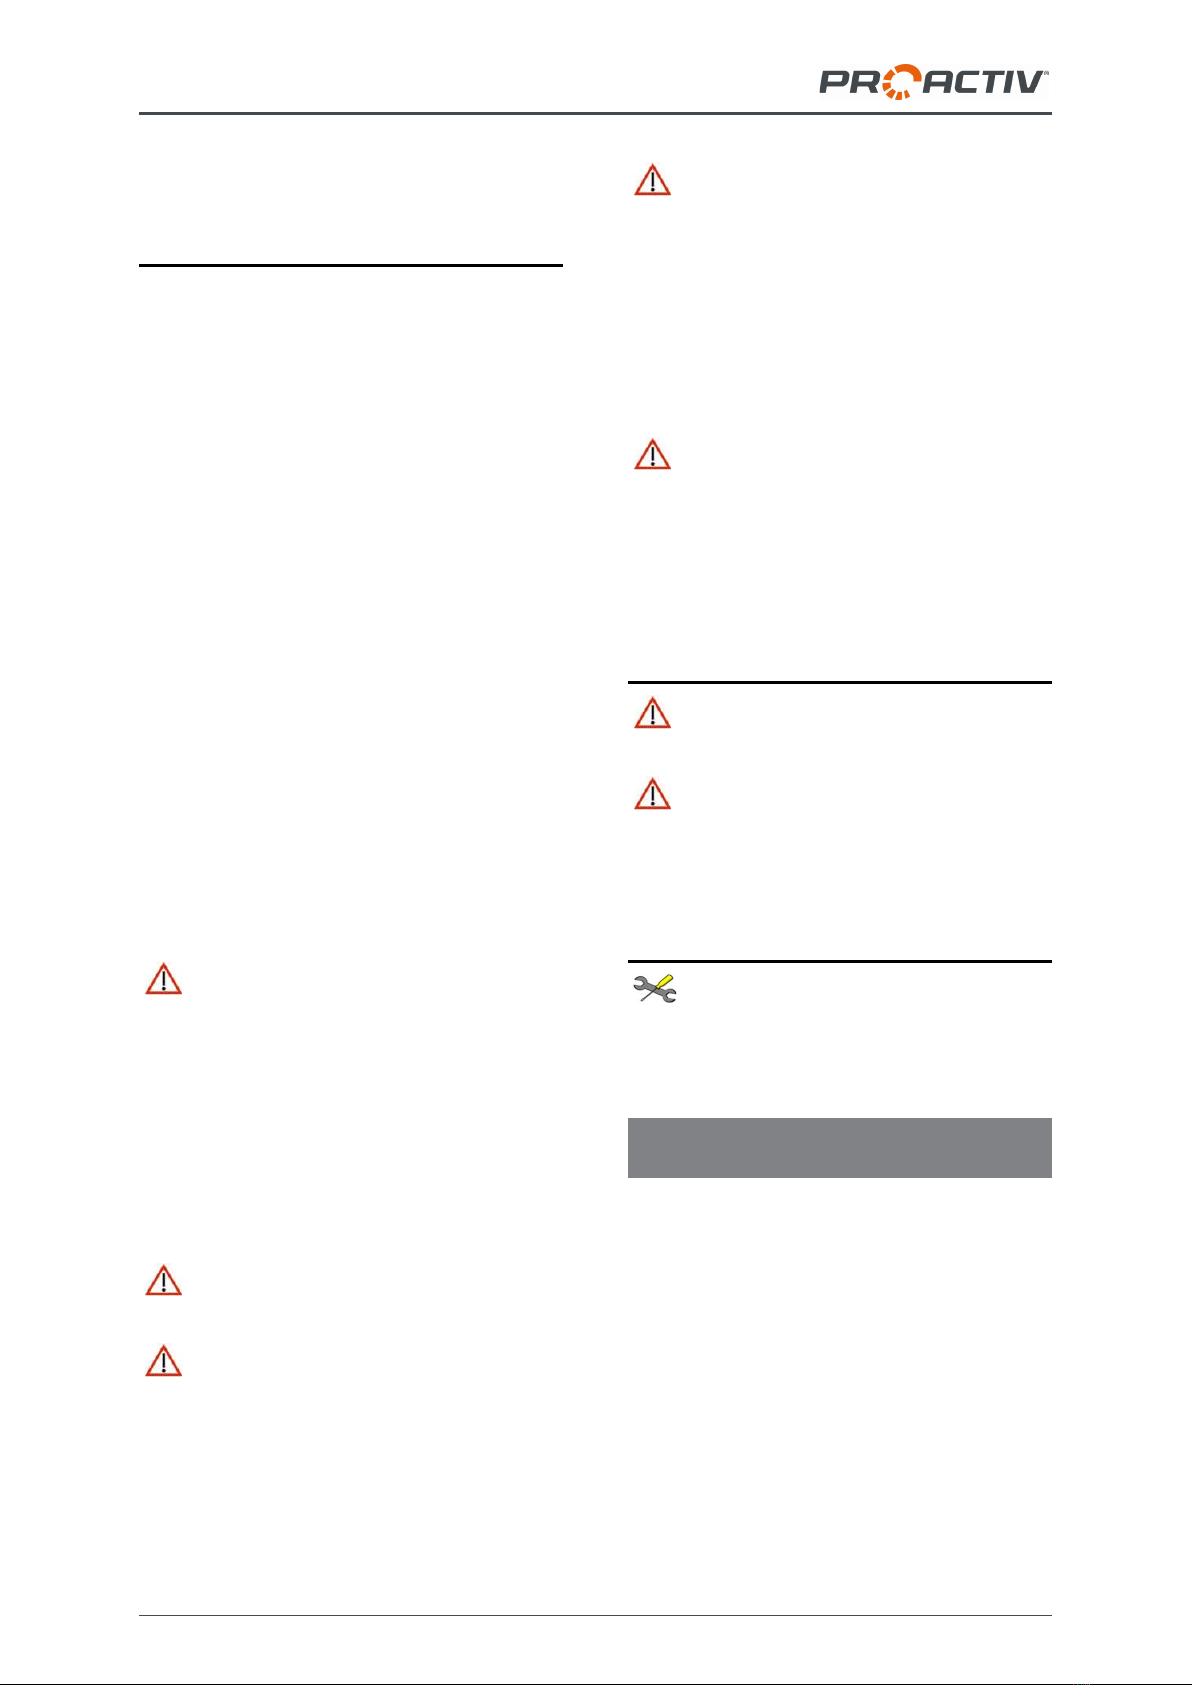
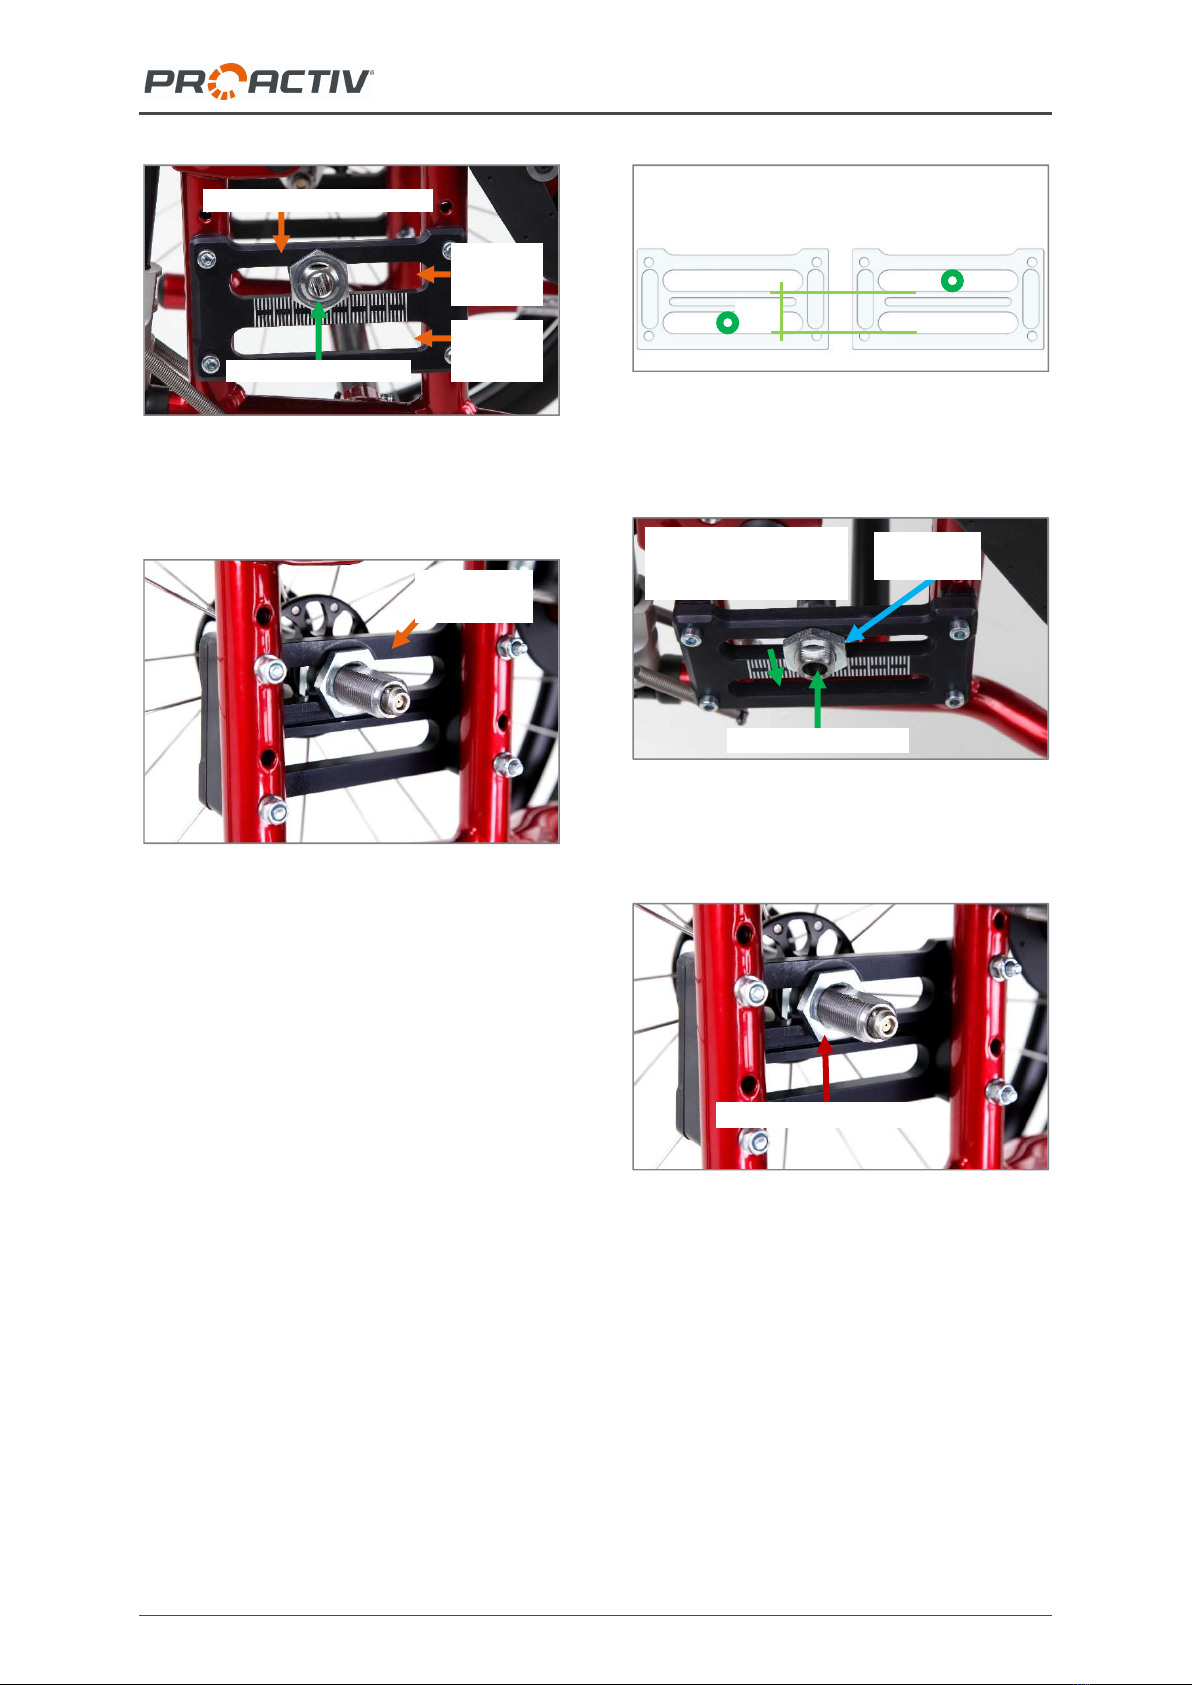
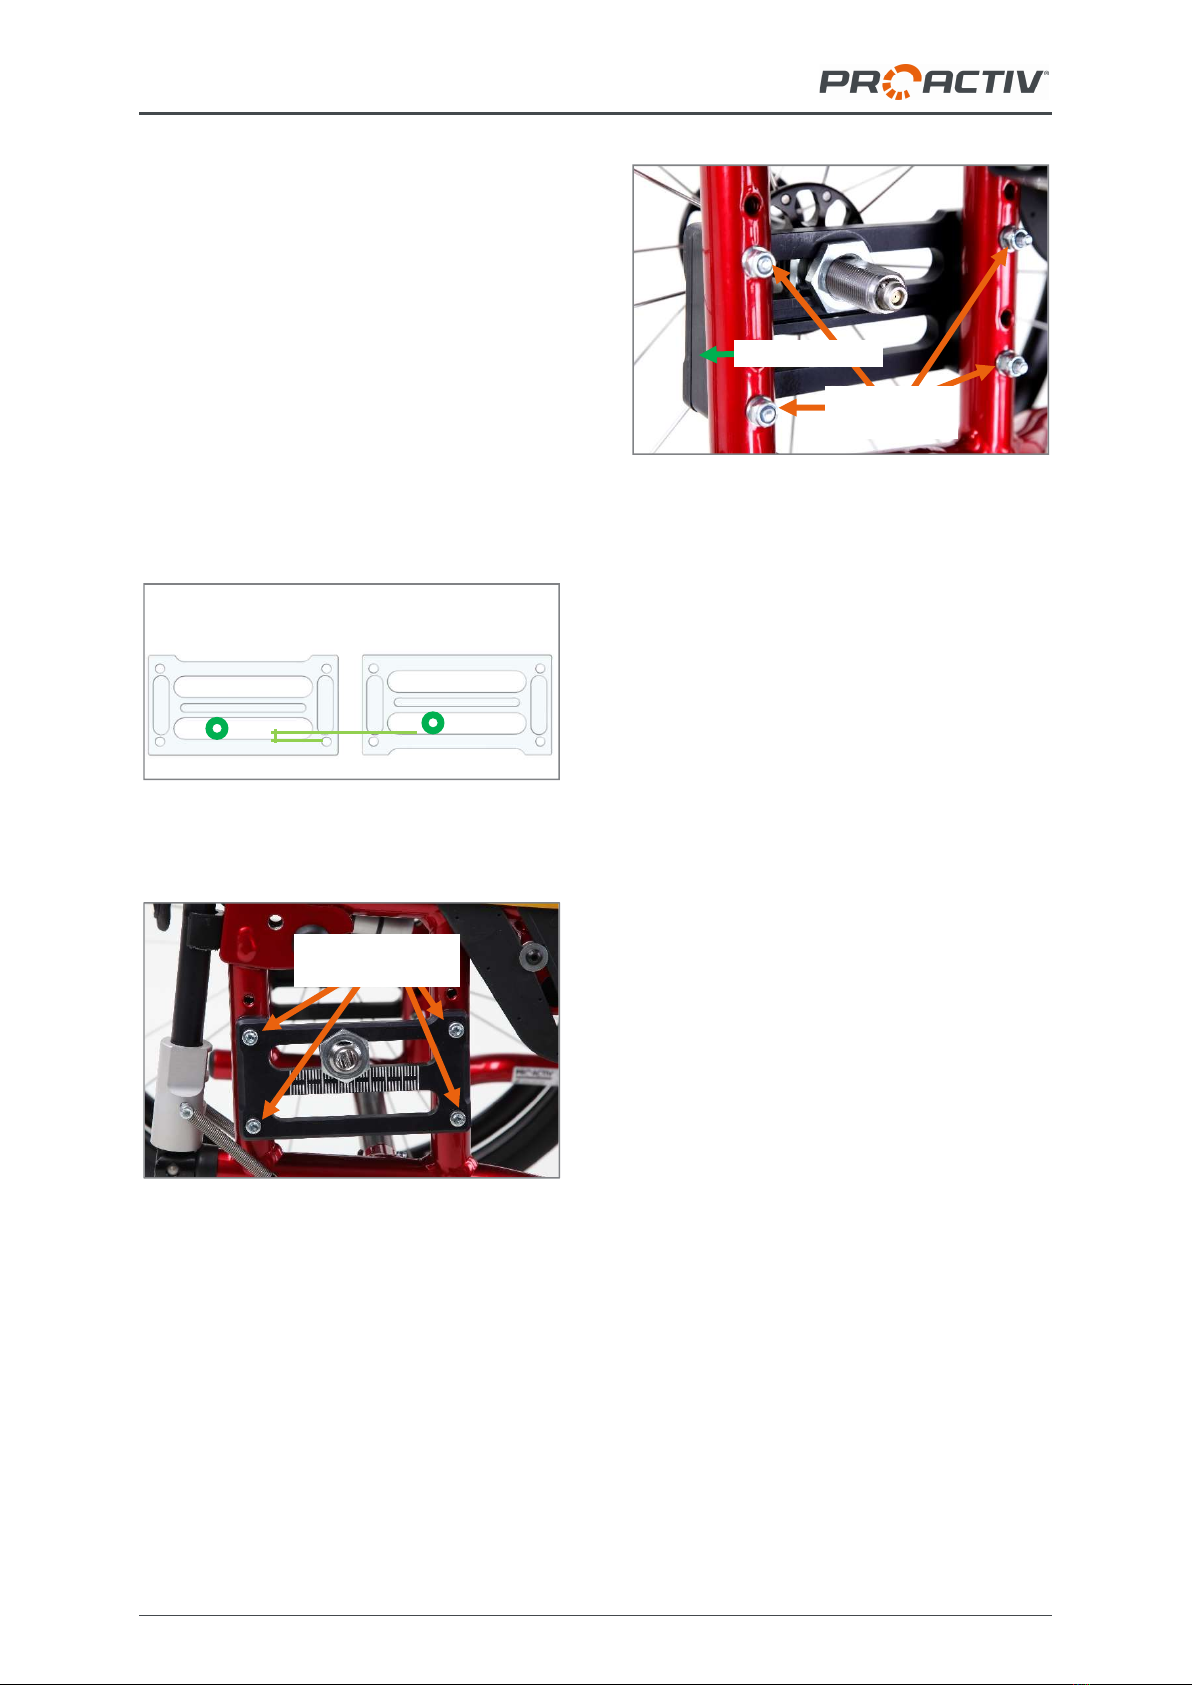
12 Safety instructions – prior to
driving/use
When getting into the wheelchair, do not
tread on the footrests as this may tip the chair
over.
Before every trip, check the condition of
the wheels (e.g. visual inspection of the spokes
and rims, check the tyres for damage, foreign
bodies and crack formation). If you have any
doubts about the serviceability of the product,
stop using it.
Check the tyre pressures at regular inter-
vals. Ensure that you comply with the manu-
facturer's specifications which can be found on
the tyres. If the tyre pressure is too low, the
optimum functional capability of the knee lever
brake is not guaranteed, and an excessively
low tyre pressure influences the driving behav-
iour. Apart from that, there is an increased risk
of a flat tyre.
Before starting out, check that the
product's brake works. If all existing brakes are
not fully functional, no trips may be taken.
Check the stable condition of the seat
and back system at regular intervals and in
case of doubt, have your rehabilitation special-
ist dealer assess its condition.
Always ensure that your feet cannot slip
off the footplate support when using the prod-
uct.
Before using the product, ensure that the
anti-tipping supports are in the operating posi-
tion and are functional.
Due to environmental effects, it is possi-
ble that the properties and therefore secure
attachment of the push handle covers may
change detrimentally. For this reason, it is
important to check that the handles are tightly
fitted and fixed in position prior to use. If this
should no longer be the case, then the push
handles may not be used until they have been
fixed.