2
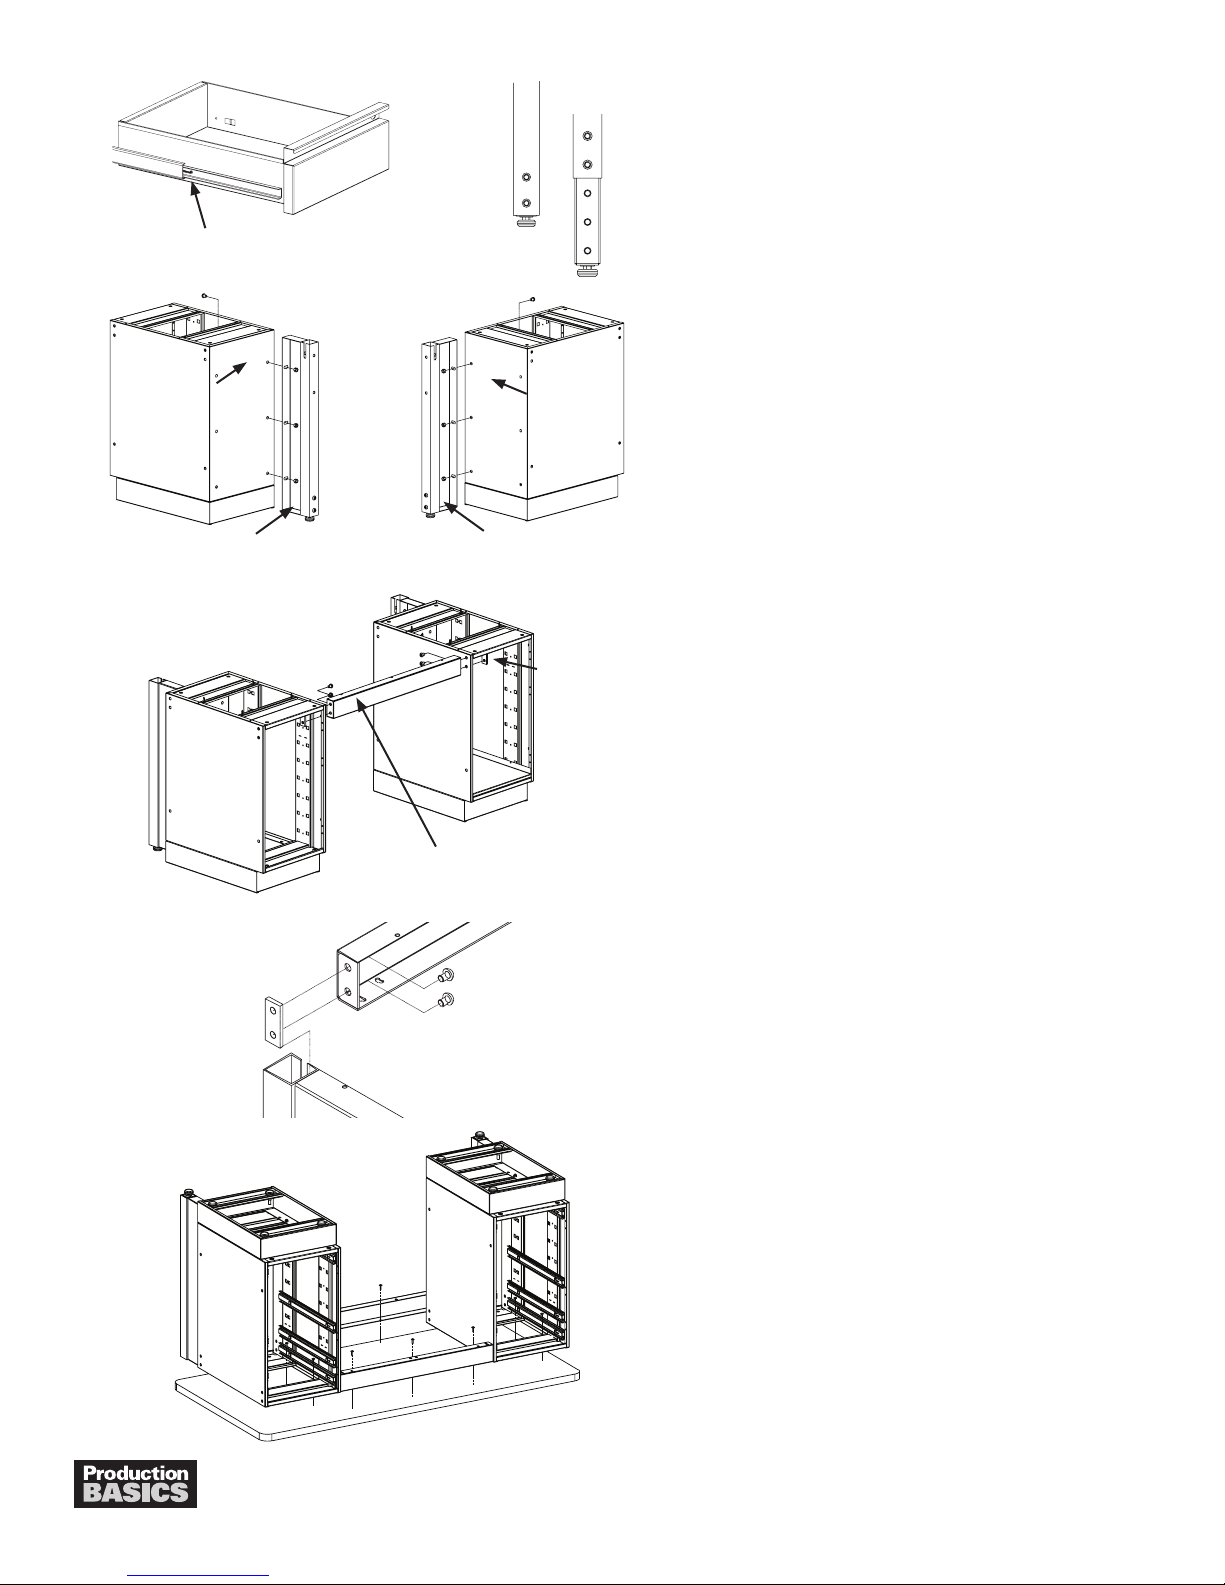
Remove drawers and/or pull-out shelves from the1.
Storage Package by pushing up or down on the black
tabs (depending on side) on both sides of the drawer
slide and pull forward. Set aside.
Screw leveling feet into the bottom of the Leg Adjusters.2.
Slide Leg Adjusters into the bottom of the PedSys3.
Support Legs and secure position by inserting two
(2) Basic Bolts. For 30” high models, Basic Bolts will
secure Leg Adjusters in the lowest position. For 36” high
models, Basic Bolts will secure Leg Adjusters in the
highest position, using top 2 holes.
Punch out bolt holes on the back of the storage4.
package using a mallet and screwdriver. Insert
three (3) Basic Bolts from the inside of the Storage
Package through the PedSys Support Leg and secure
with kep nut. Repeat for opposite storage package.
Locate Support Rails. Loosely attach the Chrome5.
Mounting Plates to the outside of the longer Support Rail
with two (2) Basic Bolts using Allen wrench provided.
Repeat for other side.
Punch out bolt holes on the side corners of the6.
Storage Package using a mallet and screwdriver.
Insert Basic Bolts from the inside of the short Support
Rail through the Storage Package and secure with
a Chrome Mounting Plate on the inside corner of
Storage Package. Channel faces inward and oval
slots face downward on Support Rail. Repeat for
other side. Tighten connections.
Set long Support Rail between PedSys Support Legs7.
from Step 3, creating the back width of your work bench.
Channel faces inward and oval slots downward. Tighten
connections.
Makenaladjustmentsandtightenallhardware,8.
ensuring PedSys Support Frame and Storage Package
components are square.
Invert the assembled PedSys work bench onto the9.
underside of the worksurface. Position the worksurface
ushwiththebackoftheunitwithequaloverhang,left
and right.
Attach the worksurface to the PedSys assembly by10.
drilling wood screws through the pre-drilled holes in
the Support Rails and Storage Packages, then into
the underside of the worksurface. For Phenolic Resin
surfaces, see Phenolic Resin assembly instructions.
Turn complete assembly right side up. Replace drawers11.
and pull-out shelves in Storage Package.
Need Help? Call Assembly Support at 800.318.2770
30” high
36” high
Left PedSys Support Leg Right PedSys Support Leg
Left Storage
Package-back Right Storage
Package-back
shorter Support Rail
Black tabs- push to release drawer
Chrome Mounting Plate


