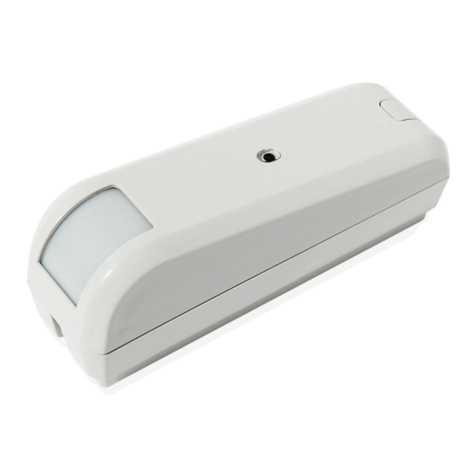
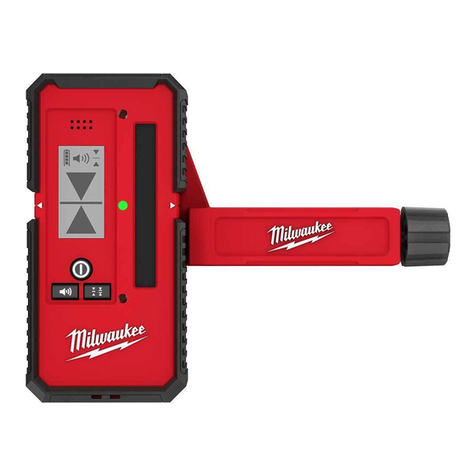
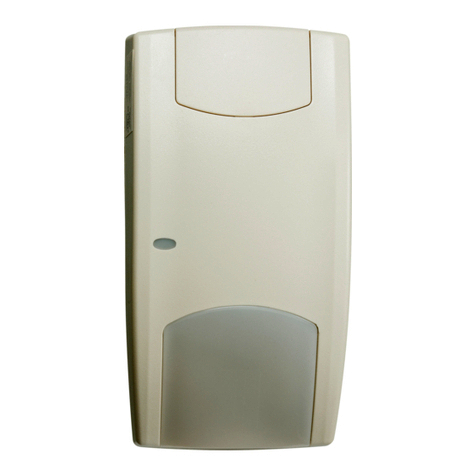
PROF 502291833 User manual

GB Inst uction manual pg 02-14
Original instructions
FI Käyttöohje s. 15-27
Alkuperäisten ohjeiden käännös
SE B uksanvisning s. 28-40
Översättning av originalinstruktionerna
NO B uksanvisning s. 41-53
Oversettelse av de opprinnelige
instruksjonene
EE Kasutusjuhend l. 54-66
Tõlgitud originaaljuhendist
LV Inst ukcijas l. 67-79
Tulkojums no oriģinālvalodas
LT Naudojimo inst ukcija p. 80-92
Vertimas originali instrukcija
PL Inst ukcja obsługi s. 93-105
Oryginalna instrukcja
Unive sal Detecto - 502291833
120mm, 20mm, 50mm

I TRODUCTIO
Thank you for purchasing this product which has passed through our extensive quality
assurance process. Every care has been taken to ensure that it reaches you in perfect condition.
SAFETY FIRST
Before attempting to operate this power tool the following basic safety precautions should
always be taken to reduce the risk of fire, electric shock and personal injury. It is important to
read the instruction manual to understand the application, limitations and potential hazards
associated with this tool.
CERTIFICATE OF GUARA TEE
This product is guaranteed for a period of 2 Years, with effect from the date of purchase and
applies only to the original purchaser. This guarantee only applies to defects arising from,
defective materials and or faulty workmanship that become evident during the guarantee period
only and does not include consumable items. The manufacturer will repair or replace the product
at their discretion subject to the following. That the product has been used in accordance with
the guide lines as detailed in the product manual and that it has not been subjected to misuse,
abuse or used for a purpose for which it was not intended. That it has not been taken apart or
tampered with in any way whatsoever or has been serviced by unauthorised persons or has been
used for hire purposes. Transit damage is excluded from this guarantee, for such damage the
transport company is responsible. Claims made under this guarantee must be made in the first
instance, directly to the retailer within the guarantee period. Only under exceptional
circumstances should the product be returned to the manufacturer. In these case it shall be the
consumer’s responsibility to return the product at their cost ensuring that the product is
adequately packed to prevent transit damage and must be accompanied with a brief description
of the fault and a copy of the receipt or other proof of purchase. The manufacturer shall not be
liable for any special, exemplary, direct, indirect, incidental, or consequential loss or damage
under this guarantee. This guarantee is in addition to and does not affect any rights, which the
consumer may have by virtue of the Sale of oods Act 1973 as amended 1975 and 1999.
The power tool is intended for domestic use only. The power tool is not suitable and is not
intended for commercial or professional use.
The warranty does not cover defects and damage to power tools resulting from use for
purposes other than domestic use, in particular as a result of pushing through and abuse.
”Warranty is voided in case the tool is damaged due to one of the conditions below:
1. Misuse of product or negligence of proper maintenance of product,
2. Commercial, professional or rental use of product,
3. Repair done by an unauthorized service company.
4. Damages caused by external objects or substances.”
2

STATUTORY RIGHTS
This guarantee is in addition to and in no way affects your statutory rights.
PRODUCT DISPOSAL
When this product reaches the end of it’s life or is disposed of for any other reason, it must not
be disposed of in household waste. In order to preserve natural resources, and to minimise
adverse environmental impact, please recycle or dispose of this product in an environmentally
friendly way. It should be taken to your local waste recycling centre or other authorised collection
and disposal facility.
If in doubt consult your local waste authority for information regarding available recycling and / or
disposal options.
SAFETY I STRUCTIO S
DO OT TAKE A Y ACTIO THAT COULD BE DA GEROUS IF THE WALL CO TAI S A LIVE
ELECTRICAL WIRE, GAS OR WATER PIPE.
Once the object is detected, always turn off the electrical power, gas and water supplies before
drilling holes or driving nail/screw into the wall. Failure to follow these instructions may result in
electrical shock, fire and/or serious injury.
Do not rely exclusively on the detector to locate items behind the scanned surface. Use other
information sources to help locate items before penetrating the surface. Such additional sources
include construction plans and visible points of entry of pipes and wiring into walls.
Do not disassemble. Have your product serviced by a qualified repair person using only identical
replacement parts. This will ensure that the safety of the product is maintained.
This device is not a toy and must not reach children’s hands. It contains hazardous objects as
well as small parts that the children could swallow. In case a child swallows any of them, please
contact a physician immediately.
Do not leave batteries and packing material lying around unattended; they can be dangerous for
children if they use them as toys.
In case the device is going to be unused for an extended period of time, remove the battery to
prevent it from draining.
Expired or damaged batteries can cause cauterization on contact with the skin. Always, therefore,
use suitable hand gloves in such cases.
See that the battery is not short-circuited. Do not throw batteries into a fire.
Do not use on a ladder or unstable support. Stable footing on a solid surface enables better
control of the tool in unexpected situations.
Do not attempt to modify this product or create accessories not recommended for use with this
product. Any such alteration or modification is misuse and could result in a hazardous condition
leading to possible serious personal injury.
3

I TE DED USE
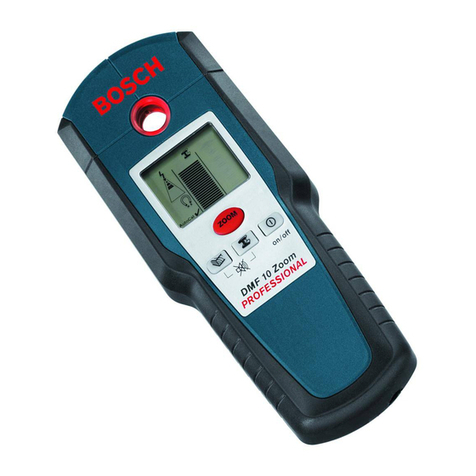
Your PROF wall detector has been designed for domestic use only. It may be used to detect
ferrous metal (e.g. steel), non-ferrous metal (e.g. copper) and live wires/conductors in walls,
ceilings and floors. It can also detect wood beams, metals and cables hidden beneath plaster-
board.
COMPO E TS & CO TROLS
4
1. Red Indicator Light
2. Yellow Indicator Light
3. reen Indicator Light
4. Display Screen
5. On/Off Button
6. Foreign Object Detection Button ( enerally refers to the wooden block).
Long press the button to switch between exact mode & deep mode.
7. Detect Metal or Cable Button
8. Detection Sensor
9. 9V Battery Compartment
1
2
3
4
5
6
7
8
9

5
DISPLAY SCREE
exact deep
Edge
Center
%
NS
cm
in
1
2
14
15
16
17
10 1211 13
18
10. Exact mode: Foreign object detection.
(The maximum detection depth in exact mode is 20mm).
11. Current detection mode: Metal, alternating current & foreign bodies.
12. Deep mode: Foreign object detection.
(The maximum detection depth in deep mode is 38mm).
13. Magnetic/Non-magnetic display icon.
14. Battery power indicator.
15. Sound icon. The sound can be turned off by pressing the Foreign Object Detection Button and
the Detect Metal or Cable Button at the same time.
16. Detection depth display area. This depth refers to the distance between the center point of
the detection area and the measured object.
17. Edge/Center display icon. Indicates the boundary (Edge) or center of the measured object to
the center line of the instrument. In metal mode only the center icon is displayed.
18. Detection signal strength display area.

U PACKI G
CAUTION. This packaging contains sharp objects.Take care when unpacking. Remove the
machine, together with the accessories supplied, from the packaging. Check carefully to ensure
that the machine is in good condition and account for all the accessories listed in this manual.
Also make sure that all the accessories are complete.
If any parts are found to be missing, the machine and its accessories should be returned together
in their original packaging to the retailer. Do not throw the packaging away, keep it safe
throughout the guarantee period, then recycle if possible, otherwise dispose of it by the proper
means. Do not let children play with empty plastic bags due to the risk of suffocation.
ASSEMBLY
I STALLI G THE BATTERY
This product requires 1 x 9V battery (supplied).
To install the battery remove the battery cover on the rear of the wall detector and fit the battery
according to the symbols on the inside of the battery compartment. Replace the battery cover.
WARNIN . Do not attempt to modify this product. Any
such alteration or modification is misuse and could
result in a hazardous condition leading to possible
serious personal injury.
BATTERY REPLACEME T
If the instrument does not switch on replace the
battery as previously stated above.
BATTERY DISPOSAL
You, as the end user, are legally bound to
return all used batteries, disposal in the
household garbage is prohibited! You can
hand over your used batteries /
accumulators at collection points in your
community or wherever batteries /
accumulators are sold.
Follow the valid legal stipulations in respect of the
disposal of the device at the end of its lifecycle.
BATTERY SAFETY REMI DERS
Please dispose of batteries responsibly; always
observe local, state, and federal regulations with
regard to battery disposal.
Never dispose of batteries in a fire. Batteries may
explode or leak.
Never mix battery types. Always install new
batteries of the same type.
6

7
IMPORTA T I FORMATIO
The detection result will be affected by the size and material of the detected object, as well as
the material and condition of the detected surface and other factors. If the cable is uncharged the
probe depth will be reduced.
Prior to operating this tool, make sure the area marked “SENSOR” in the bottom of the housing is
dry. If required, wipe dry using a dry and clean cloth.
If the tool has been subjected to an extreme temperature change, allow the sensor to adjust to
the ambient temperature before use.
Environmental influences, such as humidity or closeness to electrical devices (such as a
microwave oven), can influence the measurement accuracy. Surface quality and condition of the
walls (e.g., moisture, metallic building materials, conductive wallpaper, insulation materials and
tiles) as well as the amount, type, size and position of the objects can lead to inaccurate
measurements.
Due to uneven density of tile work on cement board (used in kitchens, bath/wash rooms) wall
sensor may generate false indications.
Do not expose product to rain or wet conditions or long term exposure to the sun.
Do not use in harsh environment. Use only in temperature range -10C° - + 40C°.
To increase battery life, turn off the unit after each use.
FOR THE BEST SCA I G RESULTS
Avoid wearing rings or watches when using the detector. Metal may cause inaccurate testing.
Move the tool evenly over the surface without lifting it or changing the applied pressure.
The detector must always be in contact with the surface during scanning.
When holding the tool make sure your fingers or any other body part do not touch the scanned
surface.
Always scan slowly for maximum accuracy and sensitivity.
OPERATIO
TUR I G THE U IT O A D OFF
Prior to operating this tool, make sure the area
marked “SENSOR” in the bottom of the
housing is dry. If required, wipe dry using a
dry and clean cloth.
Press and the On/Off button to turn on the
unit. Press the On/Off button again to turn the
unit off.

8
After a short period of automatic testing, the probe is ready to run. The instrument automatically
enters the metal detection function mode. At this time, if there is a signal display in the detection
signal strength display area (18) without metal interference it indicates that calibration is
required.
CALIBRATIO METHOD
Place the instrument in an environment free
from metal and strong magnetic field
interference. We recommend lifting the
instrument into the air by hand and then press
and holding the detect metal or cable button
(shown on the right). Keep the button pressed
until the detection signal strength display area
shows 0% and the green light at the top of the
unit is illuminated. Once the green light is
illuminated the calibration is complete and
you can release the detect metal or cable
button.
DETECTI G METAL OBJECTS
The maximum metal detection depth is
120mm.
Press the metal detect button (7) to enter
metal detection mode. The metal detection
icon will appear on the screen and the green
indicator light will illuminate.
Place the detector on the surface you wish to
scan and move the instrument slowly to the
left or right. As the instrument gets closer to
the metal object, the scale on the detection
signal strength display area (18) will gradually
rise and the intensity percentage will
gradually increase. As the instrument moves
away from the object, the scale drops and the
intensity percentage decreases.
%
cm
%
NS
cm

9
When the instrument detects a metal edge,
the indicator light will change from green to
red and a beep will be heard. The detection
signal strength display area (18) will also be at
100%. Mark this point with a pencil using the
marker point on the top of the wall detector.
Continue moving the instrument in the same
direction until the detection signal strength
display area (18) drops below 100%. Slowly
go back until it reaches 100% again and mark
this second point with a pencil. The midpoint
of these two marks is the central location of
the measured metal object.
The instrument will also detect the centre
point of the metal object and display the
center display icon (17). It is best to use both
methods for a more accurate result.
If the red indicator light on the detector flashes and a beep is heard it has detected both a metal
and AC signal.
When the detector displays a non-magnetic
symbol, it indicates the current object being
measured is generally a wire or copper pipe.
When the detector displays a magnetic symbol, it indicates the current object being measured is
generally steel bar.
When the detector does not display a magnetic or non-magnetic symbol, it indicates the current
object being measured is generally an alloy.
When the alternating current symbol on the detector flashes, it indicates that there is an
alternating current signal nearby.
Note: When detecting metal, the detection depth value will be displayed on the display screen
along with the detection operation. The accuracy of the depth value is related to the shape and
material of the metal being measured, the distribution of the relative detector of the object being
measured, and the surrounding media properties of the object being measured.When the
measured object is standard steel bar or copper tube with a diameter of 18mm, the accuracy of
depth value is high. Otherwise, the depth value can only be used as a rough reference value.
WARNIN ! The detector may not be able to accurately indicate live wires in walls if internal
equipment fails or is not properly operated, so do not rely solely on the instrument to identify the
presence of dangerous live wires. Other evidence, such as construction drawings or visual
identification of wiring or pipe entry points, should be used.
%
NS
cm
NSNS
non-magnetic magnetic

10
WARNIN ! If the wall contains live wires, do not take potentially dangerous measures. Be sure to
turn off power, gas, and water before drilling holes or nailing into the wall surface.
Concrete, brick, and ceramic surfaces all have shielding effects on the detector and may
generate false indications.
‘Live’ wire signals will spread from both sides of the wire. The ‘Live’ wire alarm area looks much
larger than the actual wire.
AC signals come mainly from live wires but may also come from static or induced electricity in
the environment. Placing your hand on the wall next to the detector may help eliminate static and
inductive electricity.
The signal strength of a ‘Live’ wire depends on the location of the cable.Therefore, take further
measurements nearby or use other information to check for ‘Live’ wires.
Non - ’Live’ wires may be detected as metal objects and thin wires may not be detected.
FOREIG BODY DETECTIO (GE ERALLY REFERRED TO AS WOODE BLOCK)
Exact Mode detection depth: 20mm. Deep Mode detection depth: 38mm
Foreign body detection mode will detect objects in gypsum drywall, plywood sheets, bare wood
floors and coated wood walls.
Foreign body detection mode will not detect concrete, mortar, bricks, carpet, foils, metal surfaces,
tiles, glass or any other dense surface.
Sensitivity depth and accuracy will vary due to moisture content, material content and wall
texture and paint.
The foreign body detection mode detects more than just wooden blocks. It can also detect metals
and other dense materials such as water pipes and plastic pipes near the back of walls or
ceilings. To help identify wooden material, first scan for metal using the metal detecting mode
and mark any location of any detected metal objects. Afterwards scan in foreign body detection
mode and any items not detected in metal detection mode may be wooden blocks.
Press the Foreign Object Detection Button (6)
to enter Exact foreign body detection mode.
The foreign object icon will appear on the
screen and the green indicator light will
illuminate.
Long press the Foreign Object Detection
Button (6) to enter Deep foreign body
detection mode.
exact
%

11
When detecting foreign bodies, the detector must be vertically placed to the wall. Press the
Foreign Object Detection Button (6) and keep the detector stationary for 1-3 seconds and wait for
the completion of the instrument calibration. Once the green light is illuminated the calibration is
complete.
Place the detector on the surface you wish to
scan and move the instrument slowly to the
left or right. As the instrument gets closer to
the edge of the wooden object, the scale on
the detection signal strength display area (18)
will gradually rise and the intensity
percentage will gradually increase. The Edge
Display Icon (17) will also gradually appear.
When the detector is at the edge of the
wooden block the ‘Edge’ character will be
displayed. Continue to move the detector in
the same direction until the Edge Display Icon
(17) displays the other half of the scale. When the detector locates the middle of the wooden
block the ‘Center’ character will be displayed and the red indicator light will illuminate. A beep
will also be heard. We recommend marking both left and right edges and the center point with a
pencil using the marker point on the top of the wall detector. Continue moving the detector
across the wall and if the instrument cannot detect any more wooden blocks and the green light
is illuminated the detection operation is complete.
Note: Repeated detection will give you a more accurate result.
If the red indicator light on the detector flashes, the AC current icon flashes and a repeated short
beep is heard it has detected both a foreign body and AC signal.
If the detector is only showing a flashing AC current icon then only a AC current has been
detected.
Due to various environmental factors the instrument may not be automatically calibrated and
there may be a wrong alarm signal. If this happens the detector will need to be manually
calibrated. To calibrate short press the Foreign Object Detection Button (6) and wait for the green
light to illuminate. Make sure the detector is away from any wooden block when calibrating.
If you receive unstable scan results it may be due to moisture in the wall cavity or drywall,
moisture, or recently applied paint or wallpaper that is not completely dry. While moisture may
not always be visible, it can interfere with the detectors sensor. Please let the walls dry for a few
days before using the detector.
exact
%

12
LIVE CABLE DETECTIO
WARNIN ! The detector may not be able to accurately indicate live wires in walls if internal
equipment fails or is not properly operated, so do not rely solely on the instrument to identify the
presence of dangerous live wires. Other evidence, such as construction drawings or visual
identification of wiring or pipe entry points, should be used.
WARNIN ! If the wall contains live wires, do not take potentially dangerous measures. Be sure to
turn off power, gas, and water before drilling holes or nailing into the wall surface.
Maximum scanning depth: 50mm. (220V@50Hz / 110V@60Hz)
Press the cable detect button (7) to enter live
cable detection mode. The AC icon will appear
on the screen and the green indicator light will
illuminate.
If the detection signal strength display area
(18) shows any reading above 0% the
detector will need to be reset to zero. To return
to zero hold the detector on the surface to be
measured and press and hold the cable detect
button (7). The detection signal strength
display area will return to 0% and the green
indicator light will illuminate.
If the detection signal strength display area does not return to zero there is too much humidity or
static electricity in the area. There may be too many electrical appliances nearby and they should
be moved or turned off before trying to detect.
With the wall detector flat against the wall move the instrument left or right. As the instrument
gets closer to a hot wire, the scale on the detection signal strength display area (18) will
gradually rise and the intensity percentage will gradually increase. When you have located a hot
wire the red indicator light will illuminate and flash and a intermittent beep will be heard. Mark
this point with a pencil using the marker point on the top of the wall detector.
Note: Under certain conditions live wires cannot be detected with certainty. These can be behind
metal or conductive surfaces, Shielded in a metal conduit or be behind surfaces with high
moisture content. Concrete, brick, and ceramic surfaces all have shielding effects on the detector
and may generate false indications.
Live AC wires are more easily detected when the power-consuming device is connected to its
power supply and turned on.
‘Live’ wire signals will spread from both sides of the wire. The ‘Live’ wire alarm area looks much
larger than the actual wire.
AC signals come mainly from live wires but may also come from static or induced electricity in
the environment. Placing your hand on the wall next to the detector may help eliminate static and
inductive electricity.
%

13
Note: Wires deeper than the detection limit from the surface, in conduit, or behind plywood
shearwall will not be detected. Use caution under these circumstances.
The signal strength of a ‘Live’ wire depends on the location of the cable.Therefore, take further
measurements nearby or use other information to check for ‘Live’ wires.
Non - ’Live’ wires may be detected as metal objects and thin wires may not be detected.
MAI TE A CE
This instrument is designed to provide years of dependable service, if the following care
instructions are performed:
Keep the wall detector dry and free from dust.
Use and store the wall detector in nominal temperature conditions. Temperature extremes can
shorten the life of the electronic parts and distort or melt plastic parts.
Handle the wall detector carefully and avoid shock and vibration. Dropping the wall detector may
damage the electronic parts or the case.
Keep the wall detector clean. Wipe the case occasionally with a damp cloth. DO NOT use
chemicals, cleaning solvents, or detergents.
Use only fresh batteries of the correct type. Remove old or weak batteries so they do not leak and
damage the unit.
If the wall detector is to be stored for long periods, the batteries should be stored separately to
prevent damage to the unit. Use the included protective case to store and carry the detector.
RECYCLI G A D DISPOSAL
Recycle unwanted materials instead of disposing of them as waste. All tools, hoses and
packaging should be sorted, taken to the local recycling centre and disposed of in an
environmentally safe way.
Recycle rather than dispose of unwanted material in landfill whenever possible. The machine
must be delivered in rigid packaging to avoid damage during transportation. The packaging and
the machine itself are manufactured from recyclable materials and should be disposed of
accordingly.
Only dispose of electrical/electronic/battery terms in separate collection schemes, which cater
for the recovery and recycling of materials contained within. Your cooperation is vital to ensure
the success of these schemes and for the protection of the environment.
Recycle packaging where facilities exist.
This symbol is known as the Crossed out Wheelie Bin Symbol.When this symbol is
marked on a product or battery, it means that it should not be disposed of with your
general household waste. Some chemicals contained within electrical/electronic
products or batteries can be harmful to health.

SYMBOLS
Some of the following symbols may be used on this product. Please study them and learn their
meaning. Proper interpretation of these symbols will allow you to operate the product better and
safer.
Safety Alert Symbol. Indicates danger, warning or caution. It means attention! Your
safety is involved.
Recycle Symbol. Waste electrical products should not be disposed of with household
waste. Please recycle where facilities exist. Check with your Local Authority or retailer
for recycling advice.
CE Marking. Conforms to relevant safety standards.
Read the Instruction Manual. Your manual contains special messages to bring
attention to potential safety concerns as well as operating and servicing information.
Please read all the information carefully to ensure satisfaction and safe use.
TECH ICAL SPECIFICATIO
Operating temperature: -10ºC to 40ºC
Storage temperature: -20ºC to 60ºC
Battery: 1 x 9V battery
Wall maximum scanning depth (metal): 120mm
Wall maximum scanning depth (wood): 20mm
Wall maximum scanning depth (cable): 50mm
Operating lifetime: 6 hours approx.
Automatic switch off: Approx. 5 minutes
14

15
JOHDA TO
Kiitos, että ostit tämän tuotteen, joka on käynyt läpi laajan laadunvarmistuskäsittelymme. Tuotetta
on käsitelty erittäin varovaisesti, jotta varmistettaisiin sen saapuminen sinulle täydellisessä
kunnossa.
TURVALLISUUS E SI
Ennen kuin yrität käyttää tätä työkalua, seuraavat turvallisuuden perusvarotoimenpiteet tulee
aina tehdä tulipalon, sähköiskun ja henkilövammojen vaaran vähentämiseksi. On tärkeää lukea
tämä käyttöopas, jotta ymmärtäisit tämän työkalun käytön, rajoitukset ja siihen liittyvät
mahdolliset vaarat.
TAKUUTODISTUS
Tällä tuotteella on takuu 2 vuoden ajan, voimassa ostopäivämäärästä lähtien ja sitä sovelletaan
vain alkuperäiseen ostajaan. Tätä takuuta sovelletaan ainoastaan vikoihin, jotka johtuvat
viallisista materiaaleista ja virheellisestä työstä, ja tulevat ilmeisiksi takuujakson aikana, eikä
takuu koske kuluvia hyödykkeitä. Valmistaja korjaa tai vaihtaa tuotteen harkintansa mukaan
seuraavien ehtojen mukaan. Tuotetta on käytetty käyttöoppaassa annettujen ohjeiden mukaisesti
ja sitä ei ole altistettu väärinkäytölle, huonolle kohtelulle tai käytetty tarkoitukseen, johon sitä ei
ole suunniteltu. Että sitä ei ole purettu tai siihen ei ole kajottu millään tavoin tai
valtuuttamattomat henkilöt eivät ole huoltaneet sitä tai sitä ei ole käytetty vuokraustarkoituksiin.
Kuljetusvauriot eivät kuulu tähän takuuseen, kuljetusyritys on vastuussa tällaisesta vauriosta.
Tämän takuun nojalla tehdyt vaatimukset tulee tehdä ensitilassa, suoraan vähittäismyyjälle
takuujakson aikana. Tuote palautetaan valmistajalle vain poikkeuksellisissa olosuhteissa. Näissä
tapauksissa tuotteen palauttaminen on kuluttajan vastuulla hänen kustannuksellaan, varmistaen,
että tuote on riittävästi pakattu kuljetusvaurioiden estämiseksi ja sen mukana tulee laittaa lyhyt
kuvaus viasta ja kuitin tai muun ostotodistuksen kopio. Valmistaja ei ole vastuuvelvollinen
mistään tietystä, esimerkillisestä, suorasta, epäsuorasta, oheis- tai seuraamuksellista
menetyksestä tai vauriosta tämän takuun nojalla. Tämä takuu on kuluttajan oikeuksien lisäksi ja
se ei vaikuta oikeuksiin, joita kuluttajalla voi olla Sale of oods Actin 1973, korjattu 1975 ja 1999,
nojalla.
Tämä sähkötyökalu on tarkoitettu ainoastaan kotikäyttöön. Sähkötyökalu ei sovellu
kaupalliseen tai ammatilliseen käyttöön eikä sitä ole tarkoitettu niihin.
Takuu ei kata sähkötyökalujen vikoja ja vaurioita, jotka ovat seurausta muusta kuin
kotikäytöstä, erityisesti kun ne ovat seurausta pakottamisesta tai väärinkäytöstä.
Takuu raukeaa, jos työkalu on vaurioitunut jostakin seuraavista syistä.
1. Tuotteen väärä käyttö tai sen asianmukaisen huollon laiminlyönti
2. Tuotteen kaupallinen tai ammatillinen käyttö tai vuokraus
3. Korjauksen on tehnyt muu kuin valtuutettu huoltoyritys
4. Ulkoisten esineiden tai aineiden aiheuttamat vauriot.

LAKISÄÄTEISET OIKEUDET
Tämä takuu on lakisääteisten oikeuksien lisäksi ja se ei millään tavoin vaikuta niihin.
TUOTTEE HÄVITTÄMI E
Kun tämän tuotteen käyttöikä loppuu, tai se hävitetään jostain muusta syystä, sitä ei saa hävittää
kotitalousjätteenä. Luonnonvarojen suojelemiseksi ja haitallisten ympäristövaikutusten
minimoimiseksi, kierrätä tai hävitä tämä tuote ympäristöystävällisellä tavalla. Se tulisi viedä
paikalliseen jätteenkierrätyskeskukseen tai muuhun valtuutettuun keräys- ja hävityslaitokseen.
Jos et ole varma, pyydä neuvoja paikalliselta jäteviranomaiselta käytössä olevista kierrätys- ja /
tai hävitysvaihtoehdoista.
TURVALLISUUSOHJEET
ÄLÄ TEE MITÄÄ SELLAISIA TOIME PITEITÄ, JOTKA VOIVAT OLLA VAARALLISIA, JOS
SEI ÄSSÄ O JÄ ITTEI E SÄHKÖJOHTO, KAASU- TAI VESIPUTKI.
Kun kohde tunnistetaan, kytke sähkövirta, kaasunsyöttö ja vedensyöttö pois päältä ennen reikien
poraamista tai naulojen/ruuvien kiinnittämistä seinään. Jos näitä ohjeita ei noudateta,
seurauksena saattaa olla sähköisku, tulipalo ja/tai vakava loukkaantuminen.
Älä luota yksinomaan ilmaisimeen kohteiden tunnistamisessa skannatun pinnan alla. Käytä muita
tietolähteitä kohteiden hakemiseen ennen pinnan läpäisemistä. Tällaisia lähteitä voivat olla
rakennuspiirustukset ja näkyvät putkien ja johtojen sijaintipaikat seinässä.
Älä pura laitetta. Huollata tuote ammattitaitoisella huoltohenkilöllä, joka käyttää vain identtisiä
varaosia. Näin varmistat, että tuotteen turvallisuus säilyy.
Tämä laite ei ole lelu ja se on pidettävä poissa lasten ulottuvilta. Se sisältää vaarallisia
kohteita, kuten pieniä osia, jotka lapset voivat niellä. Mikäli lapsi nielee jonkin osan, ota yhteys
lääkäriin välittömästi.
Älä jätä paristoja ja pakkausmateriaaleja valvomatta ympäriinsä, ne voivat olla vaarallisia lapsille,
jos niitä käytetään leluina.
Jos laitetta ei käytetä pitkään aikaan, poista paristo, jotta estät sen tyhjentymisen.
Vanhentuneet ja vaurioituneet paristot voivat aiheuttaa palovammoja ihokosketuksessa.
Käytä tästä syystä soveltuvia käsineitä.
Varmista, ettei paristo joudu oikosulkuun.Älä heitä paristoa tuleen.
Älä käytä tikapuilla tai epävakaan tuen päällä. Tasapainoinen asento vakaalla alustalla
mahdollistaa työkalun paremman hallinnan odottamattomissa tilanteissa.
Älä yritä muuttaa tätä tuotetta tai käyttää siinä lisävarusteita, joita ei ole suunniteltu käytettäviksi
tämän tuotteen kanssa. Kaikenlainen muuttaminen tai muuntelu on väärinkäyttöä, ja voi
aiheuttaa vaaratilanteen, joka voi johtaa vakaviin henkilövahinkoihin.
16

17
KÄYTTÖTARKOITUS
PROF-rakenneilmaisin on suunniteltu vain kotikäyttöön. Sitä voidaan käyttää rautametallin (esim.
teräksen), ei-rautametallin (esim. kuparin) ja jännitteisten johtojen/johtimien etsintään seinistä,
katoista ja lattioista. Se voi myös ilmaista kipsilevyn alle piilotetut puupalkit, metallit ja kaapelit.
OSAT JA SÄÄTIMET
1. Punainen merkkivalo
2. Keltainen merkkivalo
3. Vihreä merkkivalo
4. Näyttöruutu
5. Virtapainike
6. Vieraiden esineiden tunnistuspainike (viittaa yleensä puukappaleeseen).
Painikkeen pitkällä painalluksella voit kytkeä tarkan tilan ja syvän tilan välillä.
7. Metallin tai kaapelin tunnistuspainike
8. Tunnistusanturi
9. 9 V paristolokero
1
2
3
4
5
6
7
8
9

18
ÄYTTÖRUUTU
exact deep
Edge
Center
%
NS
cm
in
1
2
14
15
16
17
10 1211 13
18
10. Tarkka tila: vieraan kohteen tunnistus.
(Suurin tunnistussyvyys tarkassa tilassa on 20 mm).
11. Nykyinen tunnistustila: metallin, vaihtovirran ja tuntemattomien esineiden tunnistus.
12. Syvä tila: vieraan kohteen tunnistus.
(Suurin tunnistussyvyys syvässä tilassa on 38 mm).
13. Magneettinen / ei magneettinen näyttökuvake.
14. Paristovirran merkkivalo.
15. Äänikuvake. Ääni voidaan kytkeä pois päältä painamalla Vieraan kohteen -tunnistuspainiketta
ja Metallin tai Kaapelin tunnistuspainiketta samanaikaisesti.
16. Tunnistussyvyyden näyttöalue.Tämä syvyys tarkoittaa etäisyyttä tunnistusalueen
keskipisteen ja mitatun kohteen välillä.
17. Reunan/keskustan näyttökuvake Ilmaisee rajaa (reunaa) tai mitatun kohteen keskustaa
instrumentin keskilinjaan nähden. Metallitilassa vain keskustan kuvake kuvake näkyy.
18. Näyttöalueen signaalivoimakkuuden tunnistus.

19
PAKKAUKSESTA PURKU
HUOMIO. Tämä pakkaus sisältää teräviä osia. Ole varovainen pakkausta purkaessasi. Poista kone
ja sen mukana tulleet varusteet pakkauksesta. Tarkista huolellisesti, että kone on hyvässä
kunnossa ja kaikki tässä käyttöoppaassa luetellut varusteet ovat mukana. Varmista myös, että
kaikki varusteet ovat täydellisiä.
Jos joitakin osia puuttuu, kone ja sen varusteet on palautettava jälleenmyyjälle alkuperäisessä
pakkauksessa. Älä heitä pakkausta pois, säilytä se koko takuuaika, kierrätä sen jälkeen, mikäli
mahdollista, tai hävitä muulla asiallisella tavalla. Älä anna lasten leikkiä tyhjillä muovipusseilla
tukehtumisvaaran takia.
KOKOAMI E
PARISTO ASE TAMI E
Tämä tuote vaatii 1 x 9 V pariston (mukana).
Asenna paristo poistamalla paristolokeron kansi rakenneilmaisimen takaa ja asenna paristo
huomioiden paristolokeron sisällä olevat symbolit. Kiinnitä paristolokeron kansi.
VAROITUS.Älä yritä muuttaa tätä tuotetta. Kaikenlainen
muuttaminen tai muuntelu on väärinkäyttöä, ja voi
aiheuttaa vaaratilanteen, joka voi johtaa vakaviin
henkilövahinkoihin.
PPAARRIISSTTOO VVAAIIHHTTAAMMIIEE
Jos laite ei kytkeydy päälle, vaihda paristo, kuten
edellä on kuvattu.
PARISTO HÄVITTÄMI E
Loppukäyttäjä on laillisessa vastuussa
kaikkien käytettyjen paristojen
palauttamisesta. Hävittäminen
kotitalousjätteenä on kiellettyä! Voit
toimittaa käytetyt paristot/akut kunnallisiin
keräyspisteisiin tai paristojen/akkujen
myyntipaikkoihin.
Noudata voimassa olevia lakisääteisiä määräyksiä
laitteen hävittämisessä sen käyttöajan päättyessä.
PARISTOJE TURVALLISUUSHUOMAUTUKSIA
Hävitä paristot vastuullisesti. Noudata paristojen
hävittämisessä paikallisia ja kansallisia määräyksiä.
Älä koskaan heitä paristoja tuleen. Paristot voivat
räjähtää tai vuotaa.
Älä koskaan sekoita paristotyyppejä. Asenna aina
samantyyppiset uudet paristot.

20
TÄRKEÄÄ TIETOA
Tunnistustulokseen vaikuttavat havaitun kohteen koko ja materiaali, havaintopinnan materiaali ja
kunto sekä muut tekijät. Jos kaapeli on lataamaton, anturin syvyys pienenee.
Varmista ennen työkalun käyttöä, että ”SENSOR”-merkitty alue kotelon pohjassa on kuiva. Pyyhi
kuivalla ja puhtaalla liinalla tarvittaessa.
Jos työkaluun kohdistuu äärimmäinen lämpötilan muutos, salli anturin mukautuminen
ympäristön lämpötilaan ennen käyttöä.
Ympäristövaikutukset, kuten kosteus tai sähkölaitteiden (kuten mikroaaltouunin) läheisyys, voi
vaikuttaa mittauksen tarkkuuteen. Pinnan laatu ja seinän tila (esim. kosteus, metalliset
rakennusmateriaalit, johtavat tapetit, eristemateriaalit ja laatat) sekä kohteiden määrä, tyyppi,
koko ja sijainti voivat johtaa epätarkkoihin mittauksiin.
Sementtilevyn (käytetään keittiöissä, kylpy- tai pesuhuoneissa) epätasaisen laatoitustyön vuoksi
seinäanturi voi tuottaa vääriä ilmaisuja.
Älä altista tuotetta sateelle tai märille olosuhteille tai pitkäaikaiselle auringonpaisteelle.
Älä käytä kovissa ympäristöissä. Käytä vain lämpötila-alueella -10...+ 40 C°.
Voit pidentää pariston käyttöikää kytkemällä laitteen pois päältä jokaisen käyttökerran jälkeen.
PARHAAT SKA AUSTULOKSET
Älä käytä sormuksia tai rannekelloja, kun käytät ilmaisinta. Metalli voi aiheuttaa epätarkan
testituloksen.
Liikuta työkalua tasaisesti pinnalla nostamatta sitä irti pinnasta. Käytä tasaista painamisvoimaa.
Ilmaisimen täytyy olla kosketuksessa pintaan skannauksen aikana.
Kun pidät työkalua, varmista, etteivät sormesi tai muut kehosi osat kosketa skannattavaa pintaa.
Skannaa aina hitaasti parhaimman tarkkuuden ja herkkyyden varmistamiseksi.
KÄYTTÖ
LAITTEE KÄY ISTÄMI E JA SAMMUTTAMI E
Varmista ennen työkalun käyttöä, että
”SENSOR”-merkitty alue kotelon pohjassa on
kuiva. Pyyhi kuivalla ja puhtaalla liinalla
tarvittaessa.
Käynnistä laite painamalla virtapainiketta.
Kytke laite pois päältä painamalla
virtapainiketta uudelleen.
Table of contents
Languages:
