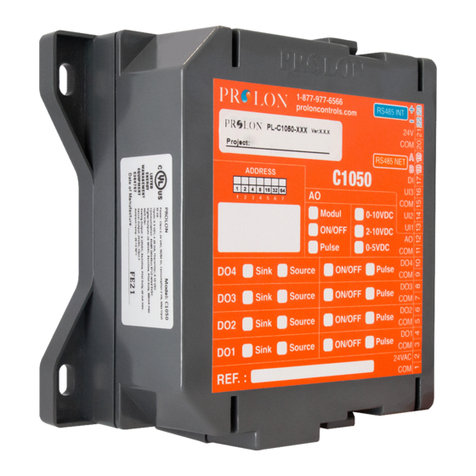
Prolon PL-M1000 Series Installation instructions

M1000
INTELLIGENT ZONE
CONTROL SYSTEM
HEATPUMP
CONTROLLER
HARDWARE GUIDE
DIMENSIONS &
SPECIFICATIONS
REV. 5.2
Montréal
1989 rue Michelin Laval,
QC H7L 5B7
TEL:(450) 973-7765 FAX: (450) 973-6186
1-800-461-1381
1-877-9PROLON
www.prolon.net

PL-M1000 SERIES
HEATPUMP HARDWARE GUIDE
www.prolon.net
Montréal
1989 rue Michelin Laval,
QC H7L 5B7
TEL:(450) 973-7765 FAX: (450) 973-6186
1-800-461-1381
1-877-9PROLON
www.prolon.net
2
Table of Contents
GENERAL INFORMATION......................................................................................................3
PL-M1000 Heatpump Controller...............................................................................................3
Description............................................................................................................................................3
General Behaviour................................................................................................................................3
Operation Sequence.................................................................................................................4
General.................................................................................................................................................4
Occupied Mode ....................................................................................................................................4
Unoccupied Mode.................................................................................................................................5
COMPONENTS............................................................................................................................6
Component Identification..........................................................................................................6
LEDs and Switches...................................................................................................................7
LED Descriptions:.................................................................................................................................7
HAND/OFF/AUTO Switches.................................................................................................................7
Internal Jumpers.......................................................................................................................8
Input and Output Identification..................................................................................................9
Addressing Dipswitch Configuration for Network Communication..........................................10
INPUTS........................................................................................................................................11
Temperature Sensors.............................................................................................................11
Room Sensors........................................................................................................................11
Proof of Fan............................................................................................................................12
Dry Contact for Clogged Filter or Schedule Override .............................................................12
Dry Contact for Alarm Signal ..................................................................................................13
Static Pressure........................................................................................................................13
OUTPUTS ...................................................................................................................................14
Output Specifications..............................................................................................................14
Typical Connection of Triac Outputs 1 to 5.............................................................................15
Typical Connection of Analog Outputs 1 to 3..........................................................................15
POWER SOURCE & NETWORK...........................................................................................16
Power Source .........................................................................................................................16
Network Communication.........................................................................................................16
OVERALL DIMENSIONS........................................................................................................17

PL-M1000 SERIES
HEATPUMP HARDWARE GUIDE
www.prolon.net
Montréal
1989 rue Michelin Laval,
QC H7L 5B7
TEL:(450) 973-7765 FAX: (450) 973-6186
1-800-461-1381
1-877-9PROLON
www.prolon.net
3
GENERAL INFORMATION
PL-M1000 Heatpump Controller
Description
The ProLon PL-M1000 Heatpump controller
is a microprocessor-based controller
designed to operate residential or commercial
heatpump equipment. It uses PI
(Proportional-Integral) control loops and acts
as a master when used on a network with PL-
VC1000 zone controllers.
General Behaviour
Although fully programmable, the ProLon M1000 Heatpump controller uses pre-established control
sequences or ’’profiles’’ to operate specific HVAC equipment with dedicated output functions. These
can be fully optimized to obtain the best results for each type of system. Numerous parameters
enable the modification or fine tuning of the fan, the compressor outputs, the action of the heating
outputs (On-or-Off / pulsed / modulating), the proportional bands, integration times, differentials,
operational ranges, setpoints and a whole range of limits and safeguards. The various programming
options also allow the user to modify the schedule, unoccupied mode settings, morning warm-up and
supply air pre-heating sequences as well as the network demand control strategy best suited for the
building space it is controlling. All these parameters can be accessed by using the ProLon Focus
software or with the ProLon handheld digital interface (PL-HNI).

PL-M1000 SERIES
HEATPUMP HARDWARE GUIDE
www.prolon.net
Montréal
1989 rue Michelin Laval,
QC H7L 5B7
TEL:(450) 973-7765 FAX: (450) 973-6186
1-800-461-1381
1-877-9PROLON
www.prolon.net
4
Operation Sequence
General
The ProLon M1000 Heatpump controller receives readings from three different temperature sensors:
outside air, return air and supply air. It operates on a configurable schedule using an internal real-
time clock. Also, as a Master device, it receives data from the zone controllers sent on the network
bus. The controller then analyzes all the data and demands sent by the zones and commands the
appropriate outputs to respond accordingly, within parameters set by the temperature sensors and
other safety limits. The Master sends back information on its network such as supply air
temperature, occupancy status and other relevant data for the zone controllers to use.
Occupied Mode
The controller operates the fan continuously. When there is a cooling demand from the zones, the
Heatpump controller will put the reversing valve into cooling mode and activate the compressor
outputs as long as all temperature limits, delays and other related parameters are respected. Once
the demand is satisfied, the outputs are deactivated within the prescribed minimum on/off time
delays.
When there is a heating demand from the zones and the outside temperature is above the low
balance point, the Heatpump controller will put the reversing valve into heating mode and activate
the compressor outputs as long as all temperature limits, delays and other related parameters are
respected. If the outside temperature is below the low balance point, the controller will activate the
auxiliary heating outputs. If the heatpump is configured for water-to-air mode, it will only use the
compressor for heating. Once the demand is satisfied, the outputs are deactivated within the
prescribed minimum on/off time delays.
When there is no cooling or heating demand from the zones, only the fan operates. If the heating
equipment permits, a supply air pre-heating sequence may be enabled. This allows cold mixed air to
be heated to a more comfortable level for subsequent use by the zones for ventilation.

PL-M1000 SERIES
HEATPUMP HARDWARE GUIDE
www.prolon.net
Montréal
1989 rue Michelin Laval,
QC H7L 5B7
TEL:(450) 973-7765 FAX: (450) 973-6186
1-800-461-1381
1-877-9PROLON
www.prolon.net
5
Unoccupied Mode
The fan operates in intermittent mode. When there is a cooling demand from any single zone, the
Heatpump controller will activate the fan and the compressor outputs as long as all temperature
limits, delays and other related parameters are respected. Once the demand is satisfied, the fan and
cooling outputs are deactivated within the min. on/off time delays set.
When there is a heating demand from any zone, the Heatpump controller will activate the fan and
the heating outputs as long as all temperature limits, delays and other related parameter are
respected. Once the demand is satisfied, the fan and heating outputs are deactivated within the min.
on/off time delays set.
During the unoccupied period, the Heatpump controller is driven by the highest demand on the
network and will operate the fan and relevant outputs accordingly.

PL-M1000 SERIES
HEATPUMP HARDWARE GUIDE
www.prolon.net
Montréal
1989 rue Michelin Laval,
QC H7L 5B7
TEL:(450) 973-7765 FAX: (450) 973-6186
1-800-461-1381
1-877-9PROLON
www.prolon.net
6
COMPONENTS
Component Identification
A
BC
D
E
F
GI
H
J
Legend:
A= Addressing Dipswitch
B= LEDs
C= AUTO/OFF/HAND Switches
D = RJ45 plugs for Interface Communication
E= Master reset button
F= Analog outputs
G = Digital outputs
H = Analog inputs
I= Connectors for Network Communication
J = Connectors for 24VAC

PL-M1000 SERIES
HEATPUMP HARDWARE GUIDE
www.prolon.net
Montréal
1989 rue Michelin Laval,
QC H7L 5B7
TEL:(450) 973-7765 FAX: (450) 973-6186
1-800-461-1381
1-877-9PROLON
www.prolon.net
7
LEDs and Switches
The M1000 has an LED block on the front of the casing whose LEDs are linked to different functions
and outputs of the controller. Each LED is individually identified to help the user make a quick visual
diagnostic of the controller’s activity and status.
LED Descriptions:
•24 VAC: The M1000 is receiving 24 VAC from the power source.
24VAC
5V DC
HBEAT
STAT
NETREC
NETSND
INTREC
INTSND
AO3
AO2
AO1
DO5
DO4
DO3
DO2
DO1
•5V DC: The microchip and other components on the M1000 are powered by a 5V
DC source successfully derived from the 24VAC source.
•HBEAT: When this LED is blinking, the microchip is active and the controller’s
program is running (normal). When this LED is ON and steady, the M1000 is
inactive and the microchip is awaiting programming (you must use ProLon’s
Focus software to reprogram the microchip).
•STAT: When lit, indicates the M1000 is using BACnet communication protocol
instead of Modbus on the RS485 communication port.
•NETREC: Indicates reception of data from the network communication bus.
•NETSND: Indicates transmission of data onto the network communication bus.
•INTREC: Indicates reception of data from the interface communication bus.
•INTSND: Indicates transmission of data onto the interface communication bus.
•AO3: The intensity of the LED represents the voltage present on analog output 3.
•AO2: The intensity of the LED represents the voltage present on analog output 2.
•AO1: The intensity of the LED represents the voltage present on analog output 1.
•DO5: Represents the activity of digital output 5.
•DO4: Represents the activity of digital output 4.
•DO3: Represents the activity of digital output 3.
•DO2: Represents the activity of digital output 2.
•DO1: Represents the activity of digital output 1.
HAND/OFF/AUTO Switches
Each output on the M1000 has a dedicated switch that lets the user manually override the activity of
the output. “HAND” mode (switch at leftmost position) fully activates the output (24 VAC for digital
outputs, 10VDC for analog outputs). “OFF” (switch at center) deactivates the output and “AUTO”
(switch at right) returns control of the output to the program in the M1000’s microchip.

PL-M1000 SERIES
HEATPUMP HARDWARE GUIDE
www.prolon.net
Montréal
1989 rue Michelin Laval,
QC H7L 5B7
TEL:(450) 973-7765 FAX: (450) 973-6186
1-800-461-1381
1-877-9PROLON
www.prolon.net
8
NET
INT
AI1
RJ45
AI2
AI3
AI4
AI5
AI6
AI7
AI8
AI9
BI 1
Internal Jumpers
The M1000 has several sets of jumpers
on the lower internal board that permit the
configuration of various hardware
elements (see Figure 1).
RJ45: The RJ45 jumper lets the user
select the voltage that will appear on pin
#7 of the RJ45 plug. This can be used to
power a device attached to the RJ45
plug, such as the PL-HNI digital interface.
NOTE: If multiple M1000 controllers are
connected together through the RJ45
plug, only one M1000 should be
supplying power onto the RJ45,
otherwise you will be mixing your supply
sources and possibly cause damage. The
jumper setups are as follow
No power 24 VAC 24 VDC
Figure 1: Location of internal jumpers
AS
BIAS2
TERM
INT: These are the jumpers
for the bias and terminating
resistors used for the
interface communication bus.
See the ProLon network
guide for information about
bias and terminating
resistors.
NET: These are the jumpers
for the bias and terminating
resistors used for the network
communication bus. See the
ProLon network guide for
information about bias and
terminating resistors.
BIAS1
BIAS2
TERM
AI 1 - 9: These jumpers allow the user to select the signal mode of the associated analog input.
0-5 volts 4-20 mA THERMISTOR
OR DRY CONTACT

PL-M1000 SERIES
HEATPUMP HARDWARE GUIDE
www.prolon.net
Montréal
1989 rue Michelin Laval,
QC H7L 5B7
TEL:(450) 973-7765 FAX: (450) 973-6186
1-800-461-1381
1-877-9PROLON
www.prolon.net
9
Input and Output Identification
All the inputs and outputs of the controller use "Plug-In" type screw connectors. The connectors used
for interface communication and programming are dual RJ45 type connectors, which are wired in
parallel with each other (one in, one out). With these connectors, the wiring can be done quickly and
much more easily.
Controller’s power source
Unit’s R&Cterminals (24VAC)
Network communication connectors
Common for all outputs
Return air temperature sensor (10K thermistor)
Remote computer with
ProLon Focus software /
PL-HNI network interface
A3 4 5 6 7 8 9
B1 2
DO 1 - Fan (G)
DO 2 - Compressor 1 (Y1)
DO 3 - Compressor 2 (Y2)
DO 4 - Rev Valve
DO 5 - Aux Heat
AO 1 Preheating / Mod Heat
AO 2 Economizer
AO 3 Bypass / VSD
2 1
4 3
2 1 53
Common for all inputs
Outside air / Water intake
temperature sensor (10K thermistor)
Supply air temperature sensor (10K thermistor)
Zone temperature sensor (10K thermistor)
Zone temperature setpoint (0-10K potentiometer)
External dry contact for alarm
External dry contact for proof of fan
Static pressure sensor (0-5 VDC)
Dry contact for clogged filter / Dry contact for schedule override /
Water intake temperature sensor (10K thermistor)
24
VAC

PL-M1000 SERIES
HEATPUMP HARDWARE GUIDE
www.prolon.net
Montréal
1989 rue Michelin Laval,
QC H7L 5B7
TEL:(450) 973-7765 FAX: (450) 973-6186
1-800-461-1381
1-877-9PROLON
www.prolon.net
10
Addressing Dipswitch Configuration for Network
Communication
For proper communication, a unique address must be configured on
each controller by setting the first 7 switches on the addressing
dipswitch to the desired value.
1234567
These switches are numbered from 1 to 7 and represent a binary
value from 1 to 64 (1, 2, 4, 8, 16, 32, and 64 respectively). The last
switch (#8) is reserved. The value of each switch that is in the ON
position is added together to form the numerical address of the
controller.
Figure 2: Addressing Dipswitch
The example in Figure 2shows the switches 1, 2 and 4 in the ON position. Therefore, the corresponding
values are 1, 2 and 8, giving an address sum of 11.
The ProLon network allows a maximum of 127 addresses, therefore 127 controllers.

PL-M1000 SERIES
HEATPUMP HARDWARE GUIDE
www.prolon.net
Montréal
1989 rue Michelin Laval,
QC H7L 5B7
TEL:(450) 973-7765 FAX: (450) 973-6186
1-800-461-1381
1-877-9PROLON
www.prolon.net
11
INPUTS
Temperature Sensors
The M1000 Heatpump controller has three analog inputs that monitor outside air, supply air and
return air temperatures (see Figure 3) and will integrate these readings into its control sequence.
The sensors used are standard 10k type thermistors that share a single common connection.
Alternatively, the supply air temperature can be retrieved from a slave that has a supply sensor and
is located on the Masters network.
Outside air sensor
Return air sensor
Supply air sensor
3 4 5 6 7 8 91 2
Figure 3: Connecting the temperature sensors
Room Sensors
The M1000 can receive the setpoint and temperature from a specific room when a PL-RSC analog
thermostat is connected to it. The M1000 will then automatically integrate this information into its
control sequence. The setpoint may also simply be set by software. The PL-RSC series room
sensors are connected using a 3-conductor cable (see Figure 4).
1Jumper from pins 1 to 3
1
°c
5
15
10
20
25
30
OVERRIDE
PL-RSC room sensor
1234
3 4 5 6 7 8 91 2
Figure 4: Typical wiring of the PL-RSC room sensor to the controller

PL-M1000 SERIES
HEATPUMP HARDWARE GUIDE
www.prolon.net
Montréal
1989 rue Michelin Laval,
QC H7L 5B7
TEL:(450) 973-7765 FAX: (450) 973-6186
1-800-461-1381
1-877-9PROLON
www.prolon.net
12
Proof of Fan
The M1000 has an analog input dedicated to the proof of fan signal. Please refer to Figure 5 to see
how to correctly connect it to analog input 7. To indicate proof of fan, the contact must be closed. If
no proof of fan signal is available, you must short analog input 7, or else the controller will interpret
the absence of signal as a fan malfunction and no heating or cooling action will be taken.
Proof of
Fan
3 4 5 6 7 8 91 2
Figure 5: Connecting the proof of fan contact to the controller
Dry Contact for Clogged Filter or Schedule Override
Analog input 4 on the M1000 can also be configured as a dry contact input for either a clogged filter
sensor or as a schedule override input. Please refer to Figure 6 to see proper connection.
•Clogged filter sensor: To indicate that the filter is clogged, the contact must be closed.
•Schedule Override: Closing the contact causes the M1000 to immediately return to occupied
mode from unoccupied mode. The M1000 remains in occupied mode as long as the contact
is held closed. If it was already in occupied mode, there is no change.
Clogged
Filter
3 4 5 6 7 8 91 2
Schedule
Override
OR
Figure 6: Connecting the dry contact input to the controller

PL-M1000 SERIES
HEATPUMP HARDWARE GUIDE
www.prolon.net
Montréal
1989 rue Michelin Laval,
QC H7L 5B7
TEL:(450) 973-7765 FAX: (450) 973-6186
1-800-461-1381
1-877-9PROLON
www.prolon.net
13
Dry Contact for Alarm Signal
The M1000 has an analog input dedicated to an alarm signal. Please refer to Figure 7 to see how to
correctly connect it to analog input 8. To signal an alarm, the contact must be closed. This input
does not affect the sequences of the M1000, and is only used to inform the user through the
visualisation software or the digital interface
Alarm
3 4 5 6 7 8 91 2
Figure 7: Connecting the alarm contact to the controller
Static Pressure
Analog input 9 on the M1000 rooftop controller is dedicated to a static pressure sensor. By default, a
0-5 VDC signal is expected for the static pressure input. However, this can be modified using the
internal jumpers (see p.8). Please refer to Figure 8 for correct wiring.
Static Pressure Sensor
(-)
(+)
3 4 5 6 7 8 91 2
Figure 8: Connecting pressure sensors

PL-M1000 SERIES
HEATPUMP HARDWARE GUIDE
www.prolon.net
Montréal
1989 rue Michelin Laval,
QC H7L 5B7
TEL:(450) 973-7765 FAX: (450) 973-6186
1-800-461-1381
1-877-9PROLON
www.prolon.net
14
OUTPUTS
The M1000 Heatpump controller contains 8 customizable outputs; five triac ON/OFF outputs
(24VAC) and three analog outputs (0-10VDC). Output configuration is performed via the ProLon
Focus software or the PL-HNI digital interface.
An integrated resettable fuse protects each of the outputs of the M1000 against current surges and
short circuits. This protection will cut the current to the output as soon as an overload condition is
detected. The fuse is a round, yellow-coloured PTC that will change to orange and heat up on a
overload condition. Once current has been removed from the output, the fuse will cool down and
automatically reset. Fix the faulty wiring and you will be able to activate the output once again.
Output Specifications
Output Type Action Application
DO 1 Triac source 24VAC
Max Current: 750 mA On-or-Off Fan (G)
DO 2 Triac source 24VAC
Max Current: 750 mA On-or-Off Compressor (1st Stage) (Y1)
DO 3 Triac source 24VAC
Max Current: 750 mA On-or-Off Compressor (2nd Stage) (Y2)
DO 4 Triac source 24VAC
Max Current: 750 mA On-or-Off Reversing Valve
DO 5 Triac source 24VAC
Max Current: 750 mA On-or-Off Auxiliary Heat
AO 1
Configurable Analog Output:
- 0 to 10 VDC
- 2 to 10 VDC
- 0 to 5 VDC
Max Current: 50 mA
Modulating proportional
OR
Pulsed
OR
On-or-Off
Preheatingonly
OR
Preheat + Heating
OR
Heating
AO 2
Configurable Analog Output:
- 0 to 10 VDC
- 2 to 10 VDC
Max Current: 50 mA
Modulating
proportional Economizer
AO 3
Configurable Analog Output:
- 0 to 10 VDC
- 2 to 10 VDC
Max Current: 50 mA
Modulating
proportional
Bypass
OR
Variable Frequency Drive

PL-M1000 SERIES
HEATPUMP HARDWARE GUIDE
www.prolon.net
Montréal
1989 rue Michelin Laval,
QC H7L 5B7
TEL:(450) 973-7765 FAX: (450) 973-6186
1-800-461-1381
1-877-9PROLON
www.prolon.net
15
Typical Connection of Triac Outputs 1 to 5
On the M1000 Heatpump controller, all triac outputs produce a 24 VAC live voltage when activated.
Note that all output voltages originate from a single voltage supply: the equipment’s transformer.
Consequentially, only the live side of the output connections are usually needed; these are on the
top row (see Figure 9). The bottom row is the common (GND).
2 1
4 35
(W1)
(Y2)
Equipment terminal board
Figure 9: Connection of digital outputs 3 and 4
Typical Connection of Analog Outputs 1 to 3
For all analog outputs, the common is found on the bottom row of connectors, and the active signals
are found on the top row of connectors (see Figure 10). Analog output 1 can be configured to
modulate a 0-10 VDC load, to pulse a 0 or 10 VDC triac relay or to control a 10 VDC On/Off relay.
Analog outputs 2 can only modulate a DC load (0-10 VDC or 2-10 VDC).
2 1
3
(+)
(-)
External
Load
SSR
Figure 10: Connecting the analog output 1 (external power)

PL-M1000 SERIES
HEATPUMP HARDWARE GUIDE
www.prolon.net
Montréal
1989 rue Michelin Laval,
QC H7L 5B7
TEL:(450) 973-7765 FAX: (450) 973-6186
1-800-461-1381
1-877-9PROLON
www.prolon.net
16
POWER SOURCE & NETWORK
Power Source
The M1000 controller is powered by the HVAC equipment’s 24 VAC power supply by connecting the
common (’’C’’ wire) to the "COM" pin and the live (‘’R’’ wire) to the "24 VAC" pin (see Figure 11). The
common for all inputs and outputs is the same as the power source’s common. All output power
sources also originate from the HVAC equipment’s power source.
24VAC ( R )
( C )
To HVAC equipment
terminal
Figure 11: Connecting the 24VAC power source
Network Communication
The ProLon M1000 Heatpump controller is designed to work with the VC1000 zone slaves. When
they are networked, the Master and slaves all communicate in real-time. The network connections
are made using the network pins located on the M1000 controller (see Figure 12).
Towards
network
+
-
(A)
(B)
Figure 12: Connecting to the network

PL-M1000 SERIES
HEATPUMP HARDWARE GUIDE
www.prolon.net
Montréal
1989 rue Michelin Laval,
QC H7L 5B7
TEL:(450) 973-7765 FAX: (450) 973-6186
1-800-461-1381
1-877-9PROLON
www.prolon.net
17
OVERALL DIMENSIONS
120 mm
(4.75")
115 mm
(4.5")
© Copyright 2010 ProLon. All rights reserved.
No part of this document may be photocopied or reproduced by any means, or translated to another language without prior written consent of ProLon.
All specifications are nominal and may change as design improvements are introduced. ProLon shall not be liable for damages resulting from misapplication or misuse of its
products. All other trademarks are the property of their respective owners.
This manual suits for next models
1
Table of contents
Other Prolon Control System manuals
Popular Control System manuals by other brands

Pepperl+Fuchs
Pepperl+Fuchs Bebco EPS 6100-MP-EX Series instruction manual

UTAH SCIENTIFIC
UTAH SCIENTIFIC SC-40 Set up and operation guide

El-Björn
El-Björn Connect Temp/RH manual

Reliance Foundry
Reliance Foundry R-7186 Installation

Topwisdom
Topwisdom TL-403 user manual

Linear Logic
Linear Logic ScanGauge II user manual

Siemens
Siemens SIMATIC PCS 7 SMART Getting started

Siemens
Siemens SINUMERIK 808D operating instructions

2VV
2VV AirGENIO Comfort INSTALLATION, OPERATION AND HANDLING

Jydepejsen
Jydepejsen DuplicAir Intelligent Control Blue user manual

Mitsubishi Electric
Mitsubishi Electric C70 Setup manual

Phase
Phase AxM II Series user manual