PRT-COMM
Dual Serial Communications Interface
Installation Manual
1.0 Introduction
The Protégé System is an advanced technology security
system specifically designed to enhance the functionality
of security, building automation and access control by
providing a complete integrated solution with local
monitoring and offsite communication.
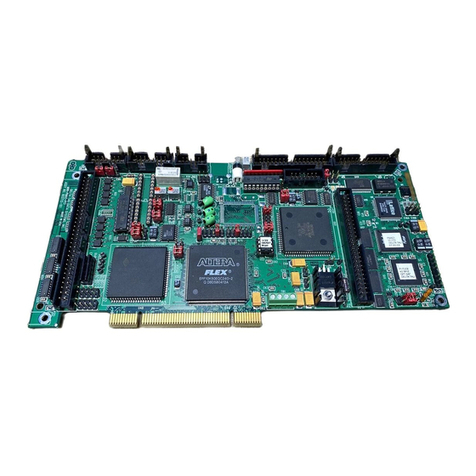
Connected directly on the Protégé System Controller, the
PRT-COMM adds 2 COM (serial communication) ports to
the system controller. You can connect up to 2 PRT-COMM
modules to the system controller. Take advantage of the
advanced communication services provided in the Protégé
System such as ModBUS Slave, GSM and SMS Modem,
Serial Printer and Direct Connect. To add RS485
communications connect an ACC-485 RS232/RS485 Serial
Converter to either of the COM ports.
2.0 Configuration
You can connect up to 2 PRT-COMM interface modules to
the system controller.
Figure 1 - DIP Switch Address Selection
The setting for the communication port numbers is
provided by a four way dip switch located beside the
COM1/3 DB9 connector.
Figure 2 - COM 1/2 Figure 3 - COM 3/4
If all of the address configuration switches are
in the off position the communication interface
will be disabled. The factory default setting is
COM1 and COM2.
3.0 Connection And Mounting
The Protégé System Controller allows up to two
communication interface units to be installed. Mounting is
made with the offset holes on the System Controller PCB.
Daughter Board Installation
When installing the daughter board ensure that the plastic
mounting hardware provided is correctly inserted from the
rear of the system controller PCB.
•Power down the system controller removing ac and
battery connections.
•Insert the plastic standoffs through the rear of the
system controller.
•Insert the 40 way ribbon cable connector in to the
system controller expansion connector.
•Place the PRT-COMM interface on the plastic
standoffs.
•Connect the 40 way ribbon cable to the 40 way
connector on the PRT-COMM board.
Figure 4 - Connection and Mounting
Power to the system controller MUST be turned
off when connecting any hardware or system
device to the system controller. Failure to do
so may damage the system controller and
expansion device.
4.0 Indication
Indicators are provided for both communication ports that
show data communication in receive and transmit. A red
LED indicates data is being transmitted out of the port to
the attached device and a green LED indicates data is
being received from the attached device.
5.0 DB9 Connector Wiring
The DB9 Male connectors are configured as DTE serial
communications plugs. The following table details the pin
output functions.
Figure 5 - DB9 Male Connector EIA-574 RS-232/V.24
Pin Function
3 (TXD) Transmit Data. Data is sent to the
connected device. (OUTPUT)
2 (RXD) Receive Data. Data is received from the
connected device . (INPUT)
7 (RTS) Request To Send. RTS/CTS Flow Control.
(OUTPUT)
8 (CTS) Clear To Send. RTS/CTS Flow Control.
(OUTPUT)
6 (DSR) Data Set Ready. Indicates to the system
controller that the attached device is
ready to communicate. (INPUT)
4 (DTR) Data Terminal Ready. Indicates to
connected device that the port is ready to
communicate. (OUTPUT)
1 (DCD) Data Carrier Detect. Modem is connected
with another modem. (INPUT)
9 (RI) Ring Indicator. Modem's telephone line is
ringing. (INPUT)
5 (SG) Signal Ground. Connected to the ground
of the System Controller.
The Transmit Data, Receive Data and Signal Ground are
also routed to standard terminal connections on the
Protégé PRT-COMM for direct hard wiring.
