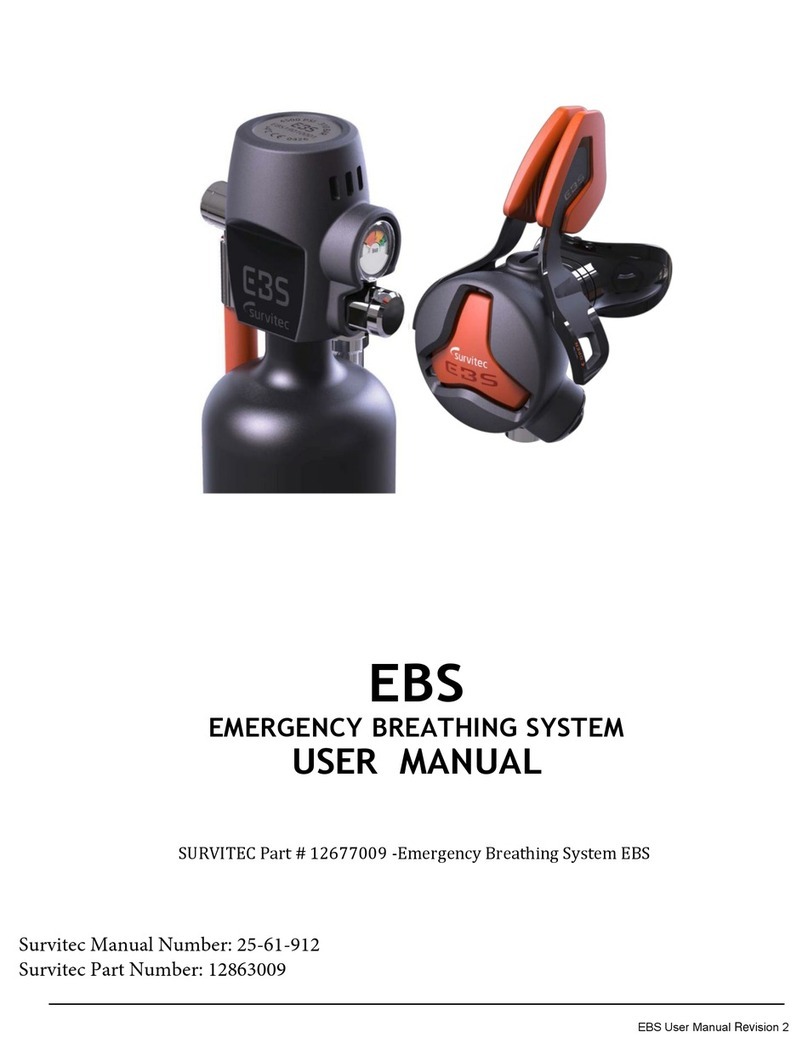
ProteGear A*LIVE SmartSafety User manual

1
A*LIVE SmartSafety
LiveTracking + LifeSaving + SatComm
A*LIVE Manual
Digital Safety

2
A*LIVE
Welcome to A*LIVE
Calls for help ... even if you can’t!
The Satellite-Hotspot for your smartphone with 100% global coverage for SMS, Emails & more.
The LiveTracker for all activities, teams and competitions.
The LifeSaver – the smart safety system for all outdoor activities.
Also outside cellphone networks. Generates early attention for possibly critical situations.
Reduces rescue response times by up to 90%.
With dead-man’s switch and companion rescue navigation.

3
Dead man switch
Halt / Crash Detection
Going alone ? – Never forget your A*LIVE !
never go unnoticed
adrift
buried
crashed
fallen

4
A*LIVE
How to charge & carry
To charge: Place the A*LIVE on the middle of any QI charger.
Be sure the charger is activated (eg. when using PowerBanks)
The charger will indicate as long as it is charging and should then switch o.
Power on the A*LIVE 10 seconds after taking o the charger.

5
<Activate
Activate the charging pad
or plug pad into USB charger Place device in the middle
of the charging pad.
Each white LED
=25% battery charge
<LED blue = charging
LED red = not charging
Technical data A*LIVE PowerBanks:
(subject to change without notice)
6000 mAh: 7 x 14,4 x 1,6 cm, 180 g
10000/12000 mAh: 7,8 x 16,2 x 2 cm, 290 g
12000 mAh Solar: 3,8 x 15,5 x 4 cm, 500 g
All chargers according to QI 1.2 can be used!
Charging times according to QI 1.2 standard:
Direct charge approx. 2 hrs.
Operation times:
GSM network approx. 30-50 hours
Iridium network approx. 12-20 hours
Tips for the best connection:
Always carry the A*LIVE high,
in the top bag of your backpack etc.
In satellite mode, a broad clear view to
the sky is necessary and the narrow end
of the A*LIVE should point half diago-
nally or all the way up - as seen in the
picture. The buttons should always face
towards the sky.

6
P
O
W
E
R
M
S
G
T
R
A
C
K
LI
G
H
T
A*LIVE
Quick Start after charging and subscribing to your data plan at www.protegear.com
➊POWER ON (press and hold POWER button 1x for 3 seconds) before you start
your activity. LED #1 and #3 start flashing green, Tracking is starting.
➋ Place the device outside (open sky) and wait approx. 5 minutes until you see your
position on the TripView Website we provided for you in the setup email TEST OK!
➌During your activity, when you are not moving for more than 5 minutes, the device
will fall asleep to save battery. As soon as it feels a vibration it will wake up again.
➍POWER OFF (Press POWER 3x quickly) after finishing your activity. LED #1 will turn
orange. The device will take some time to power o a it needs to transmit all datas.
Important: A*LIVE is an addition, it should never replace other safety measurements!
Quickstart
Buttons
LEDs

7
First Setup
Go to https://protegear.io TripShare
Settings and check your personal details, this is also forwarded as an emergency
call info to alarm receivers or rescue coordination centers.
Set up handlers for PRESET messages.
In addition to the text templates and recipients for the message key, you can also
create actions for any other function of the device.
The default settings are: 1x MSG key (PRESET1) = “All OK”, 2x MSG (PRESET2) =
“Need help”, 3x MSG (PRESET3) = “come back”, each with a GoogleMaps link of
your current position.
Customize the Globalmail feature. This is a unique e-mail address created for
your A*LIVE. You can set up white- & blacklist filters, length limitation and a CC
address so that messages sent to the device are also forwarded to your “normal”
email, e.g. while the A*LIVE is switched o.

8
taste POWER An/Aus
1x lang drücken: Startet das Gerät. Startet das
Tracking unmittelbar sobald GPS gefunden.
3x zum Ausschalten benötigt Netzverbindung
RESET: auf dem aktivierten Ladegerät 1x drücken
led1 Power
Ohne Ladegerät:
Grün .............Akku über 25% / Rot....Akku unter 25%
Orange ........POWER OFF eingeleitet
Auf dem aktivierten Ladegerät und Gerät AN:
LED rot: Ladeprozess / Grün: Voll geladen
LED 1+2+3 blinken rot ............ aktives manuelles SOS
LED 1+2+3 blinken orange ... aktiver automatischer Alarm (zB Zone)
Aufheben durch 3x SOS drücken
Alle 4 LED an: Updateprozess, nicht vom Ladegerät abnehmen!
Um unerwünschte Selbstauslösung (z.B. Betäti-
gung durch andere Gegenstände im Rucksack) zu
vermeiden wird „1x kurz drücken“ nicht verwendet.
Tasten
LEDs
led2 Message & External
Grün dauerhaft .......Nachricht eingegangen
Grün blinkend ..........ausgehende Nachricht
Rot blinkend .............Bluetooth Pairing läuft
Orange .......................Externer Sensor verbunden
taste MSG Sende Text #1/2/3
Lang 1x oder schnell 2x oder 3x drücken, um die
PRESET-Nachricht #1, #2 oder #3 zu senden
(Preset setzen: protegear.io → Tripshare → Handler)
Schlafmodus: Wenn das Gerät mehr als 15 min.
bewegungslos ist, schläft es ein (alle LEDs aus).
Sobald es bewegt wird, wacht es wieder auf.
A*LIVE
button POWER (On/Off)
Press long 1x: starts Tracking immediately after
GPS and network being found and connected
Press quickly 3x for Power OFF
RESET: Press once on activated charger
button MSG (Send Text #1/2/3)
Press long 1x, or quickly 2x or 3x
to send Preset-Message #1, #2 or #3
(Preset setting: protegear.io → Tripshare → Handler)
led1 Power
Flashing, without charger:
Green .........Battery above 25 to 100%
Red .............Battery below 25%
Orange ......POWER OFF initiated
Steady on activated charger: Green Fully charged
Red .............Charging in progress
LED 1+2+3 flashing red .............active manually triggered SOS
LED 1+2+3 flashing orange .....active automatic alarm (e.g. Zone)
Cancel by pressing 3x SOS button
All LEDs are on: OTA Update in progress, do not take off the charger!
To avoid unwanted self-triggering (eg in a back-
pack), the action „press short once“ is not used
with any key!
led2 Message & External
Green steady ....... message incoming
Green flashing .... message outgoing
Red .......................... Bluetooth pairing mode
Orange ................... External sensor connected
Buttons
LEDs
Sleep mode:
If the device is motionless for more
than 15 min., it falls asleep (on a charger it just stops
tracking). As soon as it is moved, it wakes up again.

9
taste TRACK Aus/An/Pause
1x lang drücken um Live-Tracking und automatische
Überwachung zu stoppen oder neu zu starten
2x drücken für PAUSE CheckIn (für SmartSafety)
taste SOS *** (siehe smartsafety)
3x drücken, um ein SOS auszulösen oder zu been-
den (beendet auch automatische Alarme, zB „Zone“).
In der Standardeinstellung wird mit einem „SOS“ die weltweite
Rettungskoordination „GEOS“ benachrichigt, die eine lokal
zuständige Rettungsleitstelle beauftragt und parallel versucht
mit Ihnen bzw Ihren Notfallkontakten zu kommunizieren.
led4 Netzwerkanzeige
Blinkt ............. GSM/4G | Dauerlicht.... Iridium
Rot ................. Sucht Netz ...........Signal schwach
Orange ......... Aufbau ...........Signal gut
Grün .............. Verbunden ...........Signal stark
LED 1+2+3 blinken rot ............ aktives manuelles SOS
LED 1+2+3 blinken orange ... aktiver automatischer Alarm (zB Zone)
Aufheben durch 3x SOS drücken
Alle 4 LED an: Updateprozess, nicht vom Ladegerät abnehmen!
taste LIGHT An/Aus | UPDATE
2x drücken für AN oder AUS
(Taschenlampe benötigt viel Energie!)
Bei eingeschaltetem Gerät im GSM/4G Bereich
startet langes Drücken das OTA Firmware Update.
Alle 4 LEDs werden dauerhaft aktiv.
Tasten
LEDs
led3 Tracking & GPS
Grün ......................Tracking an, GPS 3D/gut
Rot ........................Tracking an, GPS 2D/schlecht
Orange .................PAUSE Check In
button POWER (On/Off)
Press long 1x: starts Tracking immediately after
GPS and network being found and connected
Press quickly 3x for Power OFF
RESET: Press once on activated charger
button MSG (Send Text #1/2/3)
Press long 1x, or quickly 2x or 3x
to send Preset-Message #1, #2 or #3
(Preset setting: protegear.io → Tripshare → Handler)
led1 Power
Flashing, without charger:
Green .........Battery above 25 to 100%
Red .............Battery below 25%
Orange ......POWER OFF initiated
Steady on activated charger: Green Fully charged
Red .............Charging in progress
LED 1+2+3 flashing red .............active manually triggered SOS
LED 1+2+3 flashing orange .....active automatic alarm (e.g. Zone)
Cancel by pressing 3x SOS button
All LEDs are on: OTA Update in progress, do not take off the charger!
To avoid unwanted self-triggering (eg in a back-
pack), the action „press short once“ is not used
with any key!
led2 Message & External
Green steady ....... message incoming
Green flashing .... message outgoing
Red .......................... Bluetooth pairing mode
Orange ................... External sensor connected
Buttons
LEDs
Sleep mode:
If the device is motionless for more
than 15 min., it falls asleep (on a charger it just stops
tracking). As soon as it is moved, it wakes up again.
button TRACK (On/Off/Auto-Pause)
Press once long to start or stop the LiveTracking
and monitoring (SmartSafety)
Press quickly 2x to checkin Auto-Pause
button SOS *** for SmartSafety
Press 3 times quickly to trigger manual SOS or
cancel manual SOS and auto-alarms.
In the standard setting, the worldwide rescue coordination
“GEOS” will be informed by a “SOS”, which will commission a
local rescue coordination center and at the same time try to
communicate with you and your emergency contacts.
led4 Network indicator
Flashing ....GSM/4G | Steady .... Iridium
Red ..............Searching op. | ................... too weak
Orange .......establ.connect. | .................... good signal
Green ..........connected | .................... strong signal
LED 1+2+3 flashing red .............active manually triggered SOS
LED 1+2+3 flashing orange .....active automatic alarm (e.g. Zone)
Cancel by pressing 3x SOS button
All LEDs are on: OTA Update in progress, do not take off the charger!
button LIGHT (On/OFF) | UPDATE
Press quickly 2x to switch on/off, consumes a lot
of energy!
OTA-Firmware Update: Switch on device in GSM
area & press „LIGHT“ long. All 4 LEDs will turn on
led3 Tracking & GPS
Green ............Tracking on, GPS 3D/good
Red ................Tracking on, GPS 2D or bad
Orange .........PAUSE Check In
Buttons
LEDs

10
A*LIVE
LiveTracker
So your friends, family and teams can see your current position with many sta-
tistical values. Open the preset website „TripView“, with the link from our email
„Initial installation“
To create a new website with new filters:
Go to https://protegear.io Tripshare
Create a new trip Create a new public TripView URL. You could send this
link to your confidants with whom you want to share the trip. It can also be
integrated via iFrame in your own website or on Facebook and Co.
Also a connection to external services such as LiveTrack24 and others by
REST-API is possible.

11

12
A*LIVE
OFF ON
Notifications
calls friends/team*
OFF ON
Escalations
calls RCC*
*in default setup
LifeSaver activation
Calls for help ... even if you can‘t!
Go to https://protegear.io SmartSafety. A default setup* has already been set for you.
Profile: set the monitoring scenarios for your activity
Tours: set up the Geofences (SAFE, DANGER and REST-Zones)
Notifications: register the alarm receivers for 1st level notifications by SMS, Email, Telegram and more
Contacts: Full contact details for Escalations & Rescue Coordination Center
Trace: compile who, when and what kind of state is alerted
IMPORTANT: SmartSafety distinguishes between monitoring and notification (in 2 stages: Notification and optional Escala-
tion). The monitoring starts when the A*LIVE is switched on or starts the tracking – and the monitoring ends with stopping
the tracking or switching off the A*LIVE (in satellite mode, please allow 5 minutes transmission time under open sky!).
The notification of any alarms is turned OFF by default. It can be switched on and off under TRACE as well as in the dash-
board by clicking on the green or red dot. With a green dot the alarms only appear in the website, with a red dot the
alarms are sent to the Notifications receivers and if necessary Escalations address ( ). The detailed manual can be found
under „Help“.
In the *default setup, your own mobile phone number and your e-mail address are already used as alerting addresses for
notifications (also for testing) and the rescue center GEOS for escalations. Your address has been set as blue „Homezone“. In
the HomeZone no automatic alarms are triggered.
You‘ll never walk alone....

13
A*LIVE: Events and automatic alarm scenarios
As they are visible in TRACE-Map (colors as below) and available as triggers for
Handlers, Notifications and Escalations.
POWER ON /OFF Power On (PAUSE END) / Power Off (PAUSE START)
REST Inside the REST zone (blue zone in TOURS/ZONES), no
automatic alarms are triggered.
PAUSE Appears after Tracking Stop (long press button TRACK) or
Power Off. Appears also in Auto-PAUSE (2x button TRACK):
tracking continues, but monitoring starts again only after
you have moved more than x meters from the PAUSE loca-
tion.1No automatic alarms are triggered in PAUSE state
NOT-MOVING Absolute immobility of the device for at least 15 min. Can be
defined as a PAUSE START under PROFILES.
BATTERY Battery charge below 25%
SOS Manual SOS call (3x SOS button has been pushed)
Automatic Alarm Detections:
CRASH (+STILL) Shock above 1g and eventually subsequent standstill
HALT Standstill (moving less than x meters within y minutes)1
HEIGHT x meters above ground (AGL) exceeded / below / inside1
ALTITUDE x meters above sea level exceeded / below / inside1
ZONE Inside some DANGER zone (red zone in TOURS/ZONES)
EXTERNAL External sensor has been triggered (eg airbag via Bluetooth)
SPEED / VSPEED Horizontal or vertical speed exceeded or fallen below
DEADMAN Absence of the regular tracking message since x sec.1
This is the final alarm state when your device is „offline“ for
whatever reason (destroyed, battery empty, no connectivity)
and you have not switched off normally.
1) The distances or times replaced above with “x” and “y” can be set individually
in menu PROFILE. Also time slots can be set for each scenario.
Unusual acceleration and
height limits
Crash Detection and
External Sensors
Dead man‘s switch and
standstill detection
Geofence zones,
dynamisch and static

14
BASE LAYER
SAFE
BASE LAYER
DANGER
SmartSafety: Example for TOURS / ZONES
(Geofences)
DANGER ZONE
triggers ZONE alarm
SAFE ZONE
deactivates ZONE alarm
REST ZONE
disables all alarms
except SOS and DEADMAN2

15
https://protegear.io SmartSafety
Activity of user
Device OFF Normal
movement in
green zone
(SAFE)
Standstill ****
(movement
less than
100m in 5
min *)
Disconnection
***
> 11 min. *
SOS / or
CRASH / or
EXTERNAL**
then:
Cancel-SOS
Device is in
zone REST
(Home Zone)
Device is in
Zone DANGER
Normal
movement in
green zone
(SAFE), battery
<25%
PAUSE Modus
(Tracking
stays active)
Movement>
100 m * from
the„Pause“
location,
green zone
Tracking OFF
Monitoring in
TRACE Map Pin-Status in Map My A*LIVE My A*LIVE My A*LIVE My A*LIVE My A*LIVE My A*LIVE My A*LIVE My A*LIVE My A*LIVE My A*LIVE My A*LIVE
State in Infofield
ZONE: SAFE
detected by
the server
HALT detec-
ted by the
server
DEADMAN
detected by
the server
SOS /
CRASH**/
EXTERNAL**
from device
ZONE: REST
detected by
the server
ZONE:
DANGER
detected by
the server
BATTERY
detected by
the server
ZONE: SAFE
detected by
the server
Device-Events n/a SOS, CRASH, EXTERNAL, BATTERY will always be recognized (if activated in the PROFILE)
Ignored Events none
ignores
HALT,
CRASH,
DEADMAN1,
ALT/HEIGHT
none
ignores
HALT,CRASH,
DEADMAN1,
ZONE, ALT/
HEIGHT
none
ignores
HALT,
DEADMAN1,
ZONE, ALT/
HEIGHT
Benachrichtigungen
Notifications
OFF ON
Message to No-
tifications (only if
activated!)
by email/SMS...
„END PAU-
SE“
„START
HALT“
„START
DEADMAN“
„START
SOS“
„START
REST“
„START
DANGER
ZONE“
„LOW BAT-
TERY“
„START
PAUSE“
„END
PAUSE“
„START
PAUSE“
Escalations
OFF ON
Escalations in
standard profile
(only if activa-
ted!)
delayed automatic or
manual immediate
escalation
immediate
escalation
End of
Escalation
by Can-
cel-SOS
delayed
autom. or
manual
escalation
End of
Escalation
by arrival in
SAFE Zone
NOTIFICATIONS
Set alarm recipients
FLEETS
group tracking devices
PROFILES
adapt alarm scenarios
CONTACTS
Emergency contacts only for GEOS RCC
TOURS (ZONES)
set geo-fences
SmartSafety: Setup and Example of a “Trace”
TRACKING STOP
(A*LIVE: also POWER OFF)
TRACKING START
(A*LIVE: also POWER ON)
On the device:
Number of devices
in current Fleet
PAUSE-CheckIn
(A*LIVE: 2x Button TRACK
InReach: Text „PAUSE“)
TRACE
1. Activation of the monitoring based on the above denitions Fleet, Tour and Proles
2. If necessary activation of the notications per alarm detection, time window and alarm feedback on the device
3. If necessary activation of escalation for higher level rescue center (e.g., GEOS)
* Meters & minutes are examples in the standard prole, which can be changed at any time / ** CRASH & EXTERNAL is only available on the A*LIVE / *** The deadman time or PAUSE detection must t at the transmission interval & Sleep mode of tracking devices.
**** The A*LIVE knows 3 dierent„shutdowns“: NOT-MOVING: Min. 15 minutes absolute immobility of the device / HALT = movement, but within a radius of x meters in y minutes / CRASH + STILL: vibration and subsequent minimal movement
1

16
RCC
SMS, Email, Tele-
gram*,A*LIVE,
InReach®,...
3x
SOS
directly
(Escalation)
* Telegram is a chat app
similar to WhatsApp
or external call by
Airbag or pulsemeter
RCC connects to you and
your emergency contacts
via phone
and SmartSafety
RescueApp
RCC coordinates profes-
sional rescue services
depending on location
Manual Alarm (3x SOS)
Friends,Team
„Companion rescue“
(A*LIVE Community)
Information with localization is sent to
rescue coordination center RCC (eg GEOS)
and friends/team at the same time.
These are the default
settings. At TRACE, an indivi-
dual alarm (notification) and, if
necessary, escalation can be
set up or switched off for each
scenario.
pushes
A*LIVE alerting process in the default setup

17
SMS, Email, Tele-
gram*,A*LIVE,
InReach®,....
RCC
HEIGHT
DANGER
directly on
demand*
automatic escalation* to the RCC
after 15 min.
CANCEL
Alarm
by pushing
3x SOS Button
RCC coordinates profes-
sional rescue services
depending on location
Automatic Alarm (crash, halt, zone, deadman, height)
(* „Escalation“ must be activated in TRACE)
Generates early awareness to possibly critical situations. Only works when LiveTra-
cking enabled (LED # flashes). Location information first goes to friends / team, and
they can: ) help by themselves and stop the escalation or ... ) instantly escalate to the
RCC * or ... ) do nothing - RCC will automatically be contacted after waiting time *
Friends,Team
„Companion rescue“
(A*LIVE Community)

18
A*LIVE
Satellite
Hotspot
Connect A*LIVE to your smartphone
➊Install the App “A*LIVE” from the AppStore / PlayStore
➋Start the A*LIVE, start the App. It should connect automatically.
This allows you to send and receive messages, start TeamView, SOS trigger and cancel,
see the status of your A*LIVE and more.
As soon as messages can not be delivered via Iridium for more than 5 days, they will be
deleted.

19
Connect the ABS P.RIDE
➊ ACTIVATE the P.RIDE-Airbag-Trigger.
➋ POWER ON the A*LIVE. Both should happen within 1 minute.
The P.RIDE will automatically connect to A*LIVE where LED#2 will turn orange.
Hang or put the A*LIVE in the top of the backpack, eg in the top pocket.
When the airbag is triggered, the A*LIVE (if switched on) transmits an
„EXTERNAL SOS“ directly to the alarm receivers like rescue center. Thus, reaction
times can be shortened enormously.
To cancel an airbag alarm, press the SOS button 3 times.
For better near-field search, we always recommend to use an avalanche beacon.

20
A*LIVE EXTRA FEATURES
RESET: During charging, press the POWER button for at least 2 seconds.
OTA Update: The A*LIVE can even load its updates!
With each new firmware update, we will automatically send you an email with the instructions for the update.
GSM / 4G network coverage
The A * LIVE has a chipSIM installed, which can log into almost all GSM (2G / 4G) networks worldwide. It auto-
matically connects to the best available network at each location. In the 4G range the new “NB-IoT” technology
according to NB1 / M1 standard is used, which is currently being rolled out in more and more countries.
Iridium switching
After 10 minutes without GSM or 4G connection, the A*LIVE attempts to connect via Iridium (LED # 4 changes
from flashing to steady). In Iridium mode, the A*LIVE searches every 12-15 minutes for a GSM / 4G connection and
logs back in if available.
Please take care: Depending on the tariff type (eg ALIVE BASIC), the satellite tariff does not work if you switch
off the device in GSM mode and then switch it on again in an area without GSM coverage (only Iridium coverage)!
Please note the information for your tariff!
This manual suits for next models
1
Table of contents
