PROTMEX PT6708 User manual

PT6708 Calibration method
1、In the shutdown state, first press and hold the "H" and "MAX" keys at
the same time, and then press the power button without letting go, until
the LCD screen is lit up and release all hands to enter the debugging
mode.
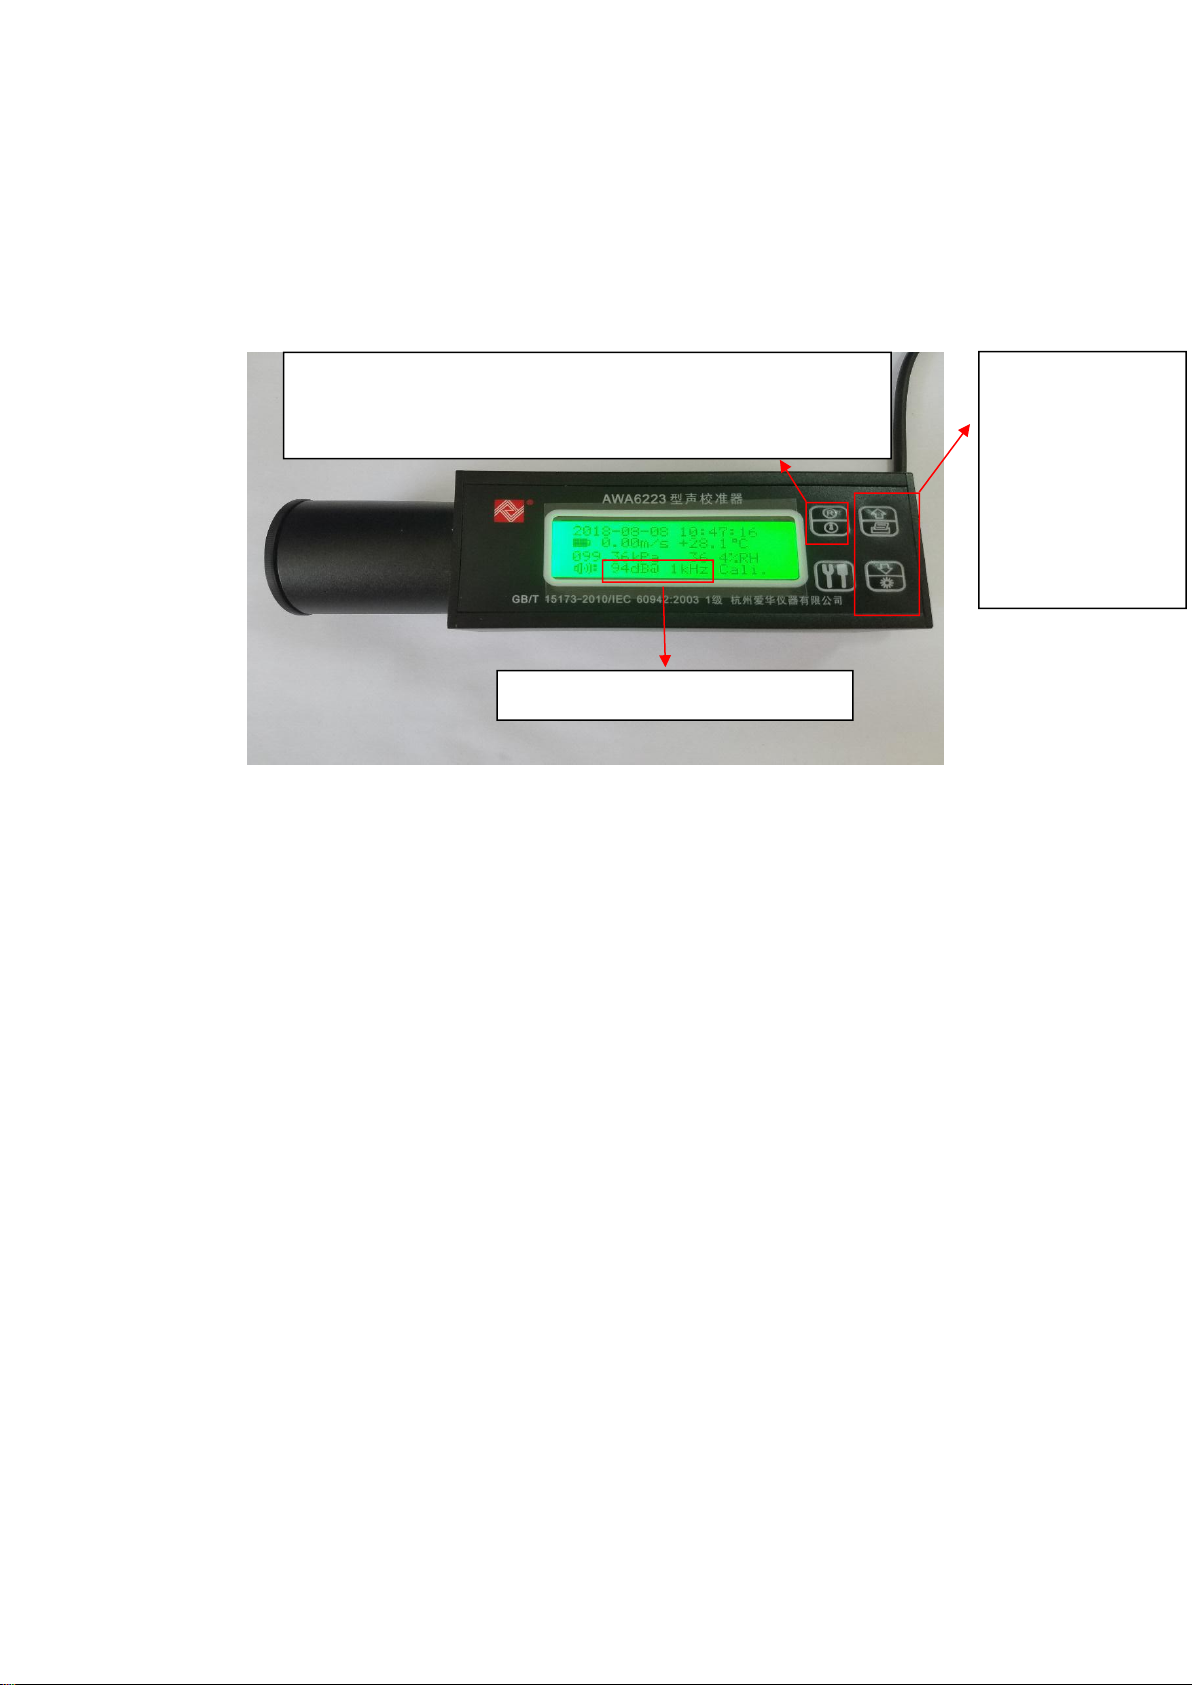
Figure 1-1 has entered debugging mode
2、Turn on the standard sound source, adjust the sound source to 1kHz,
94dB output.
Figure 2-1 Detailed explanation of standard sound source button
functions
Note: Press the source output key first, and then press the frequency
switch key to switch the frequency.
3、Insert the microphone head of the product under test into the
standard sound source and turn on the sound source output. There will
be corresponding data on the LCD screen of the product to be tested.
After the data is stable, press the "H" key, the screen will flash three times
to indicate that the calibration data has been saved. Then press the "A/C"
key to switch to C-weighted calibration. After the data is stable, press the
"H" key to save the calibration data, and then shut down.
Frequency switch
button, press once
to switch one
output frequency. It
can be switched
only when the audio
source is being
output.
Audio source output button. Press once and the screen lights up
and the audio source is being output. Press again and the screen
does not light up, and the audio source output is turned off.
Main parameters of sound source
Table of contents
Other PROTMEX Measuring Instrument manuals


