ProvetScan SV-3 User manual

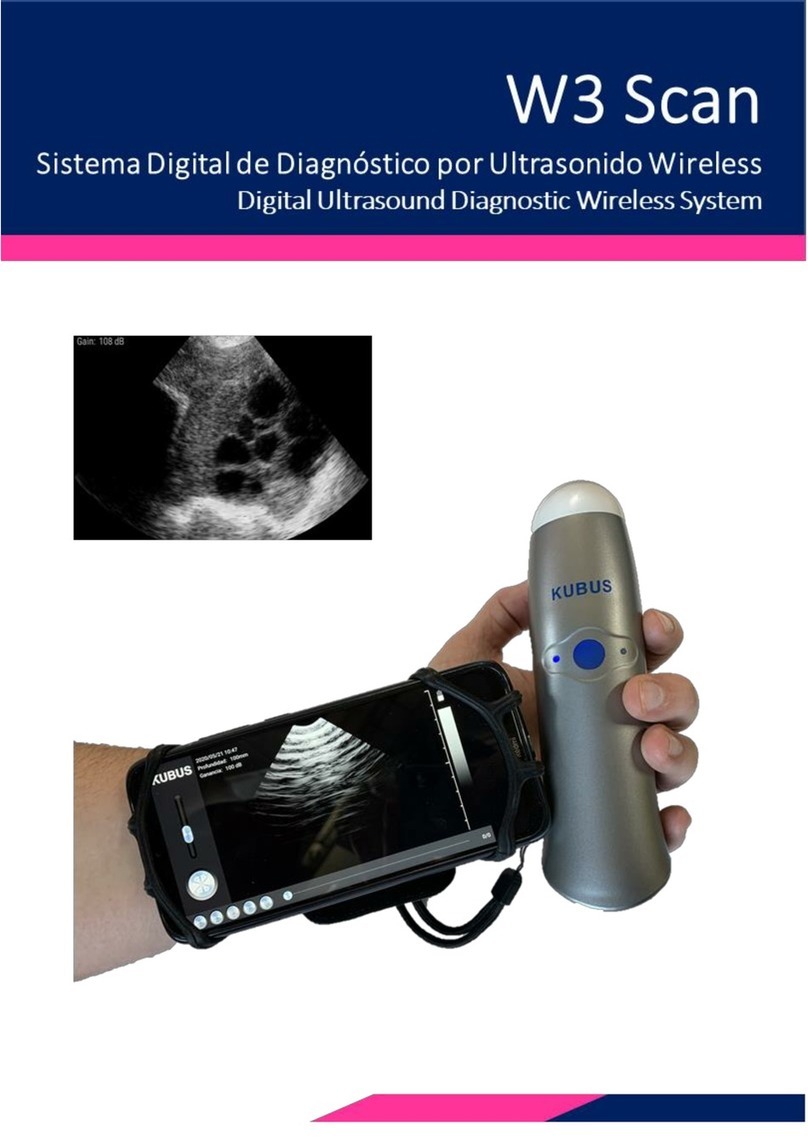
Provetscan SV-3
Sector ultrasound scanning for
reproductive disgnostic
User Manual

Introduction
The
SV-3
wireless
probes
are
state-of-the-art veterinary
u
l
t
r
a
s
o
un
d
i
n
s
t
r
u
m
en
t
s
.
Unlike traditional veterinary ultrasound scanners with a cable
connected to the probe, the SV-3 is wireless and has no cable.
T
he
S
V
-
2
p
r
ob
e
has
a
b
ui
l
t
-
i
n
u
l
t
r
a
s
ou
n
d
i
ma
g
e
p
r
o
c
e
ss
o
r
,
the
power supply and the wireless signal module to connect to the
main unit.
T
he
ma
i
n
un
i
t
has
n
o
w
b
een
r
e
p
l
aced
w
i
th
a
mobile
d
e
vi
c
e
.
The
probe acts as a WiFi access point and displays the image via the
SmartVus app.
This manual provides an overview and must be read carefully
b
e
f
o
r
e
the
d
e
vi
c
e
is
u
s
e
d
.
2

3
1.
Characteristics
Screen: iOS or Android mobile device
S
canning
:
80
°
s
e
ct
or-bas
e
d
Prob
e:
3
.
5
MHz
tr
ans
duc
er
Depth: 100 -180 mm
Display Mode: Mode B
Scales of grey: 256 levels
Battery life: 5 hours
Size:140 mm x 45 mm x 40 mm
Weight: 200 g

4
2.
Start
For your protection, please read these safety instructions before starting the
probe.
2.1
Unpacking
The
S
V
-
3
p
r
ob
e
i
s
ca
r
e
f
u
l
ly
pa
c
k
e
d
t
o
a
v
o
i
d
dama
g
e
d
u
ri
n
g
t
r
a
ns
po
r
t
.
B
e
f
o
r
e
op
eni
n
g
the
box
,
n
o
t
e
a
n
y
vis
i
b
l
e
dama
g
e
t
o
i
ts
e
x
t
e
r
i
o
r
during
t
r
a
n
s
po
r
t
.
The items must be checked to ensure everything has been received. The following
table includes the items included:
Artículos Incluidos
SV-3 ultrasound probe
USB charging Table
Wrist strap
User manual
Dust proof case
Subjection Harness
Each item must be examined to notify of any defects or damage that may have
occurred during delivery, despite it being carefully packed. Where this is the
cas
e
,
pleas
e
c
ontact
y
our
distribut
or
immedia
t
ely
t
o
inf
orm
of
the
pr
oblem.
2.2
2
.
2
Installing
the
app
If
t
h
e
S
ma
r
t
V
us
app
i
s
n
o
t
in
st
a
ll
e
d
o
n
y
our
mob
i
le
d
e
v
i
c
e
,
g
o
t
o
t
h
e
App
S
t
o
r
e
o
r
G
oo
g
le
Pl
ay
and
s
ea
r
ch
f
or
"
S
ma
r
t
V
u
s
”
.
When
y
ou
f
in
d
t
he
app
,
do
w
n
l
oad
i
t
f
r
ee
o
f
charge.

3
.
2
fl
1
.
2.3
2.3
Connecting the probe
The WiFi connection indicator and the battery capacity indicator must be off before
the probe is connected.
Press the ON/OFF button (1). The battery capacity indicator will indicate how much
battery life remains. This indicator (2) is divided into four levels. Seconds after
connecting the probe, the WiFi connection indicator (3) will flash to indicate that it is
ready for connection to the mobile device.
Press the ON/OFF button for three seconds to switch the probe off. When the probe is
switched off the indicator lights will also be off.
2.4
Wi-Fi Connection
When the probe is waiting for a WiFi connection, go to settings on the mobile device
and
s
ear
ch
f
or
the
pr
ob
e
SSID
.
The
SSID
is
,
f
or
e
x
ampIe
,"S
V
-3
GMBFLA
O
O1
".
Connect the SSID using the password, which is the same as the serial number printed
on the bottom of the probe. The password would be, for example, “WMPBFCAOO1".
The letters of the password must be entered in lower case.
Once connected to the WiFi network, start the SmartVus app. When you start working
with the probe, the WiFi signal indicator will no longer flash in the same way.
5

6
3.
APP Operations
Tablet Version Mobile Version
3.1
Ultrasound Scanning
Once the probe is connected, start the app and the main screen will be displayed. No image is
displayed when the app is opened for the first time.
The WiFi connection status indicates the SSID of the probe connected. Press the FREEZE/LIVE
butt
on
t
o
unfr
ee
z
e
the
ima
g
e
and
star
t
the
dia
gno
sis
.
Onc
e
the
ima
g
e
is
mo
ving
,
the
GAIN
(
GN)
setting can be modified up and down. The top right of the screen displays the date and time, the
image depth and the Gain in the case of the Smartvus app for tablet, and the top left in the case
of the SmartVus app for mobile. "LIVE" can be read at the bottom left of the screen when the
probe is moving, or "FREEZE" is displayed when the image is frozen.
The scan depth (D) can be adjusted by swiping up or down in the middle of the screen. The value,
which ranges between 100 and180 mm, is displayed below the Gain. There is a green bar below
that corresponds to the cine loop, and a number to the right that indicates the current image
recorded. Users can swipe the slider to select the required image.
In the mobile version, 20/20 or100/100 can be stored, depending on your version of the app. To
switch from one image to another, swipe left or right in the middle of the screen.
The WiFi connection status indicates the WiFi SSID of the probe connected. Click on the animal
information for a pop-up window to be displayed. Enter the information required in this window:

7
3.2
2.2
Saving images
When the image is frozen, press the "Save image to album" button to save the image in
the tablet. When the image is FROZEN, the number of images stored in the cine loop
is displayed in the top right (Photograms). Users can swipe left/right in the area of the
image to select the image in the loop. This image can also be saved.
3.3
Video storage
When the image is frozen, press the "Save video" button to save a sequence of around
10 seconds on the device. Not available on the mobile version.
3.4
2
.
4
D
a
ta
st
or
a
g
e
Press the "Save data" button to save the pregnancy data in the app's memory. This
data can be displayed by pressing the "View data" button, and can be exported by
pressing the "ExportFile" button to a CSV file (so that it can be opened, for example,
with Excel
or Numbers). The data is deleted by clicking ”RemoveAll”.
Data can be re-edited or deleted by swiping the desired data to the left (within the
"View data" window). Not available on the mobile version.
Important note: ID is required to save data. Up to SOO IDs can be saved. If more
are saved the first will be overwritten.

8
3.5
Exporting files
Exporting files from the tablet
A
ft
er
pr
e
ssing
the
"Sa
v
e
D
a
ta"
butt
on
t
o
sa
v
e
the
da
ta
in
the
r
e
c
or
ds
,
click
on
"Vie
w data"
and then "Export File" to export it toa "CSV" file. A pop-up window will be displayed
where
the
name
of
the
C
S
V
file
is
ent
ere
d
and
is
then
include
d
in
a
f
older
under
t
oday
’
s
date. Several files can be saved on the same day:
When you open the GSV file, you are given the option of opening and sharing the
file
in
other
app
s
such
as
Ex
c
el
or
Numb
er
s
.
Pro
vide
d
the
da
ta
is
sa
v
e
d,
it
can
b
e
e
dit
e
d
t
o
mo
dif
y
the
dia
gno
sis
,
add
comments or delete the record.

4
Maintenance
4.1
4.1 Probe Charging
Once the battery is flat it must be recharged. I could be done with a wireless
charger. Connect your USB cable and the mobile device charger to the charging
platform not supplied as standard.
When the charger has been connected to the platform using the USB cable, the
LED will light up green.
Us
e
a
2A
char
g
er
and
the
original
cable
of
the
wirele
ss
charging
bas
e
.
When the battery is charging, the indicator levels will flash until it is fully charged.
The four levels will then become visible and remain lit. The battery charge can
last
f
or
up
t
o
5
hour
s
.
4.2
Tablet resistance
To prevent the tablet from becoming dirty with dust and becoming wet or
damp, a "waterproof” case is included that is splash and dust resistant.
We specifically suggest purchasing a case for iPad mini or a case for Galaxy
T
ab
A
,
which
als
o
withstands
f
alls
of
1
.
2
m.
4.3
Cleaning
The probe must be regularly cleaned. Use a damp cloth or paper towel. The
probe has an IPX5 protection rating against water and dust, i.e. it withstands
dust and mild spurts of water. It is not submersible.
4.4
Storage
When storing the probe, a temperature of no less than15°C is firmly
recommended. Where the temperature of the probe or of the mobile device
dr
op
s
,
it
should
b
e
hea
t
e
d
up
b
ef
or
e
us
e
.
A last recommendation regarding the battery charge: If the probe and the
tablet are not to be used for a long period, they should be stored at full
charge.
1
0

Table of contents
