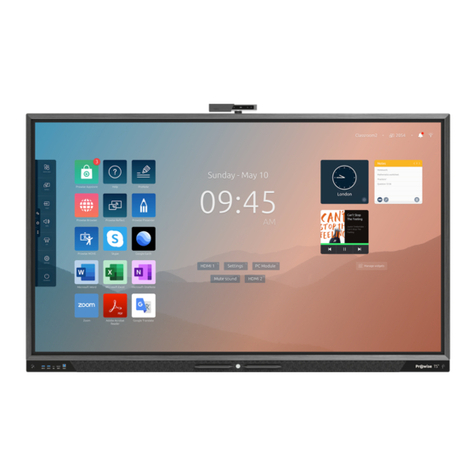
Prowise ProLine Plus User manual

Quick Start Guide
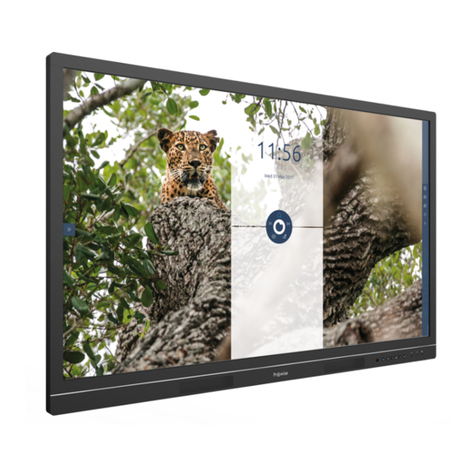
ProLine+ Multi-touchscreen
www.prowise.com

Congratulations!
...with this Prowise touchscreen. Designed with input from the eld of education, makes this screen the perfect addition to any educational environment.
This Quick Start Guide oers guidance to get you started. A detailed manual and more information can be found on www.prowise.com.
Create a free account here to start using our innovative Presenter software.
From all of us at Prowise, we wish you a lot of enjoyment teaching in your digital learning environment.
Herzlichen Glückwunsch!
...mit diesem Prowise-Touchscreen. Der mit Beiträgen aus der Unterrichtspraxis entwickelte Bildschirm passt sich perfekt jeder Unterrichtssituation an.
Mit dieser Kurzanleitung können Sie schnell an die Arbeit. Eine detaillierte Anleitung und mehr Informationen nden Sie auf www.prowise.com.
Hier können Sie auch kostenlos ein Konto erstellen, um unsere innovative Presenter-Software zu verwenden.
Im Namen des Prowise-Teams wünschen wir Ihnen viel Spaß beim Unterrichten mit Ihrer digitalen Lernumgebung.
Gefeliciteerd!
...met dit Prowise touchscreen. Dit scherm sluit perfect aan op iedere onderwijssituatie doordat het is ontwikkeld met input uit de praktijk.
Met deze Quick Start Guide kun je snel aan de slag. Een gedetailleerde handleiding en meer informatie vind je op www.prowise.com.
Hier kun je ook gratis een account aanmaken om onze innovatieve Presenter software te gebruiken.
Namens het Prowise team wensen we je veel onderwijsplezier in je digitale leeromgeving.
Welcome

Buttons and connections
USB 3.0 (external camera)
OPS slot
External inputs (side)
AC-in and main power switch (side)
Controls and docking
Remote control IR receiver / LED
status light / NFC card reader
External inputs / outputs (bottom)
USB 2.0 for lift control and service
Headphone
Analog Line Out (L/R)
Digital Coax
RS232
ProLine +
The ProWrite Ink PenThe ProLine+ Multi-touchscreen
F
G
G
A
A
B
C
D
E
F
G
B
C
C
D
D
E
E
On/o button
Prowise Central Home button
USB 3.0
Pen charging status light
Pen charging station
Wi antenna port
LAN port
USB-B
HDMI 2.0 inputs
HDMI 2.0 ARC
Display port 1.2
Main power switch
AC input
1
7
9
14
15
16
18
17
2
8
11
12
10
13
3
4
5
6
Right mouse button
Writing point
(pressure sensitive)
Grip
Eraser
Charging pins

Getting started
1. Make sure the touchscreen is connected to the mains.
2. Turn on the touchscreen by using the main switch on the right-hand side of the touch
screen (no. 7).
3. Now press the on/o button (no. 14).
4. You will go through a start-up procedure the rst time the touchscreen is turned on.
5. Follow the steps of the start-up procedure as indicated in order to make the screen
ready for use.
6. When the start-up procedure is nished, the system will search for the latest updates.
Subsequently, Prowise central will start automatically.
1. Zorg ervoor dat het touchscreen is aangesloten op het lichtnet.
2. Schakel het touchscreen in door aan de rechterzijde van de touchscreen de
hoofdschakelaar om te zetten (nr. 7).
3. Druk vervolgens op de aan/uit knop (nr. 14).
4. Wanneer je het touchscreen voor de eerste keer opstart zal je een opstartprocedure
doorlopen.
5. Volg de stappen van de opstartprocedure zoals aangegeven om het scherm
gebruiksklaar te maken.
6. Het touchscreen zal na het doorlopen van de opstartprocedure op zoek gaan naar de
laatste updates, vervolgens zal Prowise Central worden opgestart.
1. Der Touchscreen muss an das Stromnetz angeschlossen sein.
2. Zum Einschalten des Touchscreens schalten Sie auf der rechten Seite den
Hauptschalter ein (Nr. 7).
3. Dann drücken Sie die Ein/Aus Taste (Nr. 14).
4. Beim ersten Einschalten des Touchscreens wird eine Inbetriebnahme-Prozedur
gestartet.
5. Führen Sie die Schritte aus wie angegeben, um der Touchscreen einsatzbereit zu
machen.
6. Der Touchscreen sucht nach durchlauf von der Inbetriebnahme-Prozedur die neuesten
Updates. Danach wird Prowise Central automatisch gestartet.
EN EN
NL
NL
DE
DE
The ProWrite Ink Pen
The ProLine+ Multi-touchscreen has a ProWrite Ink Pen to give the writer a natural
writing experience. The pen can be stored and charged in the charging station (no. 18)
on the right-hand side of the screen. Once charged, the pen can be used immediately.
Charging station - LED indicatior (no. 17 and 18):
• O: there is no pen in the charging station.
• Flashing (red): the pen is being charged.
• LED continuously lit (green): the pen is fully charged.
Het ProLine+ Multi-touchscreen is uitgerust met een ProWrite Ink Pen voor een
natuurlijke schrijfervaring. De pen kan worden opgeborgen en opgeladen in het
oplaadstation (nr. 18) aan de rechterkant van het scherm. De pen is na opladen direct
klaar voor gebruik.
Oplaadstation - LED indicaties (nr. 17 and 18):
• Uit: er bevindt zich geen pen in het oplaadstation.
• Knipperend licht (rood): de pen laadt op.
• De LED blijft branden (groen): de pen is volledig opgeladen.
Der ProLine+ Multi-Touchscreen ist mit einem ProWrite Ink-Stift ausgestattet, der eine
natürliche Schreibweise ermöglicht. Der Stift kann in der Ladestation, (Nr. 18) die sich an
der rechten Seite des Bildschirms bendet, abgelegt und aufgeladen werden. Der Stift
ist nach dem Auaden sofort einsatzbereit.
Ladestation - LED-Anzeige (Nr. 17 und 18):
• Aus: es bendet sich kein Stift in der Ladestation.
• Blinkt (rot): der Stift wird geladen.
• LED leuchtet dauerhaft (grün): der Stift ist vollständig geladen.

DE
Prowise Central
Prowise Central menu
The Prowise Central menu can be opened in
dierent ways:
• Place 5 ngers on the screen for at least 2 seconds.
• Press the Prowise Central home button on the
control panel.
• Press the Prowise Central menu button on the
remote control.
Het Prowise Central menu is op verschillende manieren
op te roepen:
• Houd vijf vingers minimaal twee seconden op het
scherm.
• Druk op de Prowise Central home knop van het
bedieningspaneel.
• Druk op de Prowise Central menu knop op de
afstandsbediening.
Das Prowise Central-Menü können Sie auf mehrer Art
und Weisen önen:
• Legen Sie 5 Finger einer Hand, mindestens 2 Sekunden
auf den Bildschirm.
• Drücken Sie die Prowise Central Home-Taste des
Bedienfeldes.
• Drücken Sie die Prowise Central Menütaste auf der
Fernbedienung.
ProNote
ProNote allows you to write, draw, highlight and insert
shapes on an innite canvas. Additionally you can make
the canvas transparent, which allows you to annotate on
any background, such as your desktop or any underlying
input source.
ProNote maakt het mogelijk om te schrijven, te tekenen,
te markeren en om guren in te voegen op een oneindig
canvas. Maak het canvas transparant om aantekeningen
te maken over iedere achtergrond, zoals de desktop of
een achterliggende invoerbron.
Mit ProNote können Sie schreiben, zeichnen, markieren und
Formen einfügen, die Leinwand ist endlos. Sie können die
Leinwand auch transparent machen und somit auf jedem
Hintergrund, z.B. dem Desktop oder einer zugrundeliegenden
Quelle, Notizen und Kommentare anbringen.
Reect
Prowise Reect allows users to project their device’s
screen onto the multi-touchscreen. It is even possible
to operate the device via the touchscreen (screen
control only available on a MacBook and Windows PC).
You, therefore, no longer need cables to connect your
device to the screen. Download the Reect app from our
website (www.prowise.com).
Support:
Reect has full support (screencast + touch) for
Windows and Mac OS.
Met Prowise Reect kunnen gebruikers het scherm
van devices delen op het scherm van het touchscreen.
Daarnaast is het mogelijk om het device (geldt voor
MacBook en Windows pc) met het touchscreen te
bedienen. Er zijn geen kabels meer nodig om een device
met het scherm te koppelen. Download de Reect app
op onze website (www.prowise.com).
Ondersteuning:
Reect wordt volledig ondersteund (scherm delen +
bedienen) door Windows en Mac OS.
Mit Prowise Reect können Anwender den Bildschirm
ihres Geräts auf dem Multi-Touchscreen teilen. Es ist
sogar möglich, das Gerät über den Multi-Touchscreen zu
bedienen (diese Funktion ist ausschließlich für Mac und
Windows verfügbar). Sie benötigen kein Kabel mehr, um
Ihren PC an den Bildschirm anzuschließen.
Die Reect App nden Sie auf unserer Website
(www.prowise.com).
Kundenservice:
Reect wird in vollem Umfang (Bildschirm teilen +
Bedienung) unterstützt von Windows und Mac OS.
3
2
1
4
5
EN EN
NL
DE
EN
NL
NL
DE
EN
NL
DE
1. Canvas or annotation mode
2. Operating tool: hand or cursor
3. Eraser
4. Create screenshot
5. Insert shapes
6. Pencil or marker
1. Canvas of Annotatie modus
2. Bedieningstool: handje of pijltje
3. Gum
4. Screenshot maken
5. Figuren invoegen
6. Potlood of marker
1. Canvas oder Anmerkungen Modus
2. Bedienungstool: Hand oder Pfeil
3. Radierfunktion
4. Bildschirmfoto machen
5. Formen einfügen
6. Bleistift oder Marker
EN
NL DE
1. Prowise Central Home
2. Volume settings
3. ProNote
4. Change input source
5. Menu button
1. Prowise Central home
2. Volume aanpassen
3. ProNote
4. Ingangskanaal veranderen
5. Menu-knop
1. Prowise Central Home
2. Einstellen der Lautstärke
3. ProNote
4. Dateneingang wechseln
5. Menutaste
4
3
2
5
6
1

Let education speak
www.prowise.com
Other manuals for ProLine Plus
1
Table of contents
Other Prowise Touchscreen manuals
