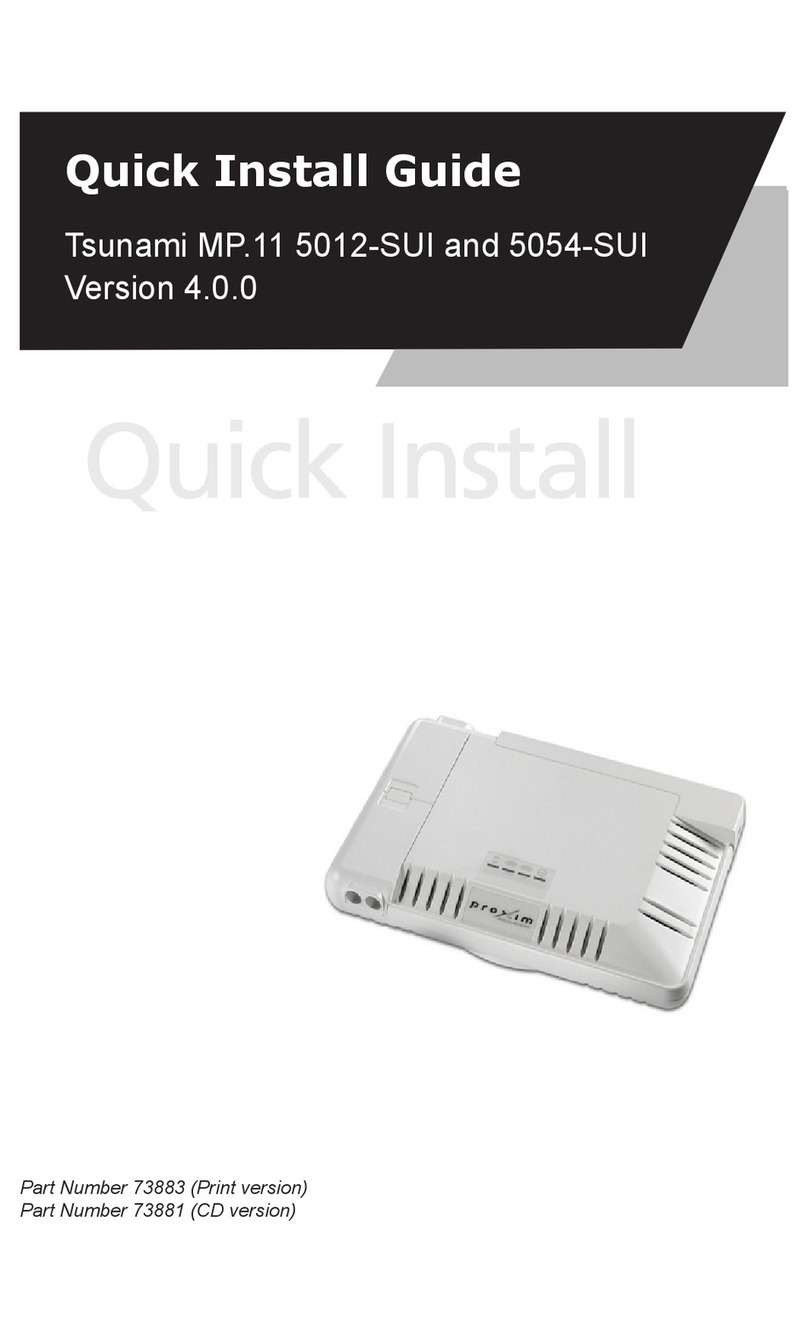
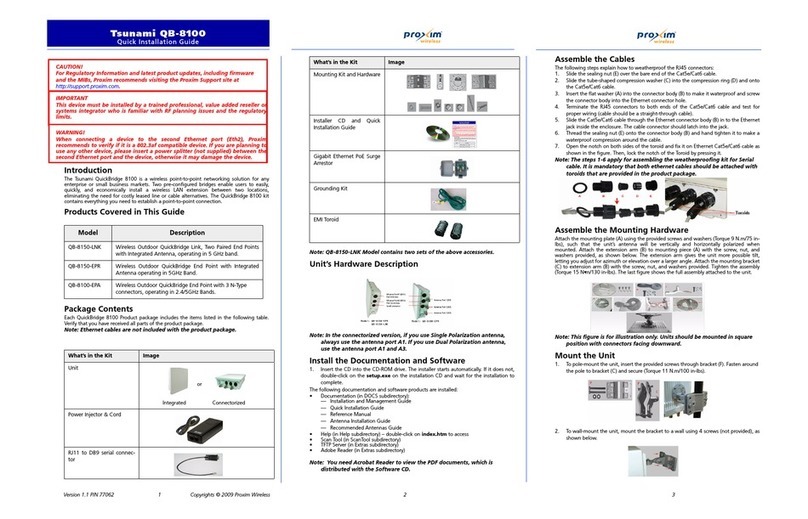
Proxim Tsunami QuickBridge.11-R Series User manual

Quick Install Guide
Tsunami QuickBridge.11-R Family
Version 4.0
Part Number 73897 (Print version)
Part Number 73895 (CD version)

Page 2 Copyright © 2007 Proxim Wireless
NOTICES
Copyright
Copyright ©2007 Proxim Wireless Corporation, San Jose, CA. All rights
reserved. Covered by one or more of the following U.S. patents: 5,231,634;
5,875,179; 6,006,090; 5,809,060; 6,075,812; 5,077,753. This manual and
the software described herein are copyrighted with all rights reserved. No
part of this publication may be reproduced, transmitted, transcribed, stored in
a retrieval system, or translated into any language in any form by any means
without the written permission of Proxim Wireless Corporation.
Trademarks
Proxim is a registered trademark, and Tsunami and the Proxim logo are
trademarks, of Proxim Wireless Corporation. All other trademarks mentioned
herein are the property of their respective owners.

All rights reserved Page 3
CONTENTS
Introduction ................................................................... 4
Package Contents........................................................... 5
Hardware and Software Installation............................... 7
Step 1: Plan for Installation....................................................................8
Step 2: Choose a Location......................................................................9
Step 3: Gather Required Tools .............................................................. 10
Step 4: Unpack the Shipping Box .......................................................... 10
Step 5: Determine Proper Mounting Orientation ...................................... 11
Step 6: Assemble Mounting Hardware.................................................... 12
Step 7: Perform Condence Test (Optional) ............................................ 14
Step 8: Mount the Unit ........................................................................ 15
Step 9: Plug in the Cables .................................................................... 16
Step 10: Power on the Unit .................................................................. 17
Step 11: View LEDs............................................................................. 18
Step 12: Align the Antenna .................................................................. 19
Step 13: Tighten the Cables ................................................................. 20
Step 14: Weatherproof the Connectors .................................................. 21
Step 15: Install Documentation and Software ......................................... 22
Initialization................................................................. 23
Setting the IP Address ......................................................................... 23
Accessing the Web Browser ................................................................. 24
Accessing the Command Line Interface ................................................. 24
Basic Conguration ...................................................... 26
System Conguration .......................................................................... 26
Dynamic Frequency Selection (DFS) ...................................................... 26
Transmit Power Control ........................................................................ 26
IP Conguration.................................................................................. 28
Interface Conguration ........................................................................ 28
VLAN Conguration ............................................................................. 28
Security Settings ................................................................................ 28
Upgrading Embedded software.............................................................. 29
Applying Changes ............................................................................... 29
Default Settings ........................................................... 30
Technical services and support..................................... 32
Support Options.................................................................................. 32
Page 4 Copyright © 2007 Proxim Wireless
INTRODUCTION
The Tsunami QuickBridge.11 is a wireless point-to-point networking solution for
any enterprise or small business. Two pre-congured bridges enable users to
easily, quickly, and economically install a wireless LAN extension between two
locations, eliminating the need for costly leased line or cable alternatives. The
QuickBridge.11 kit contains everything you need to establish a point-to-point
connection, including one Base Station Unit (BSU), one Subscriber Unit (SU),
power injectors, antennas, and Ethernet cables.
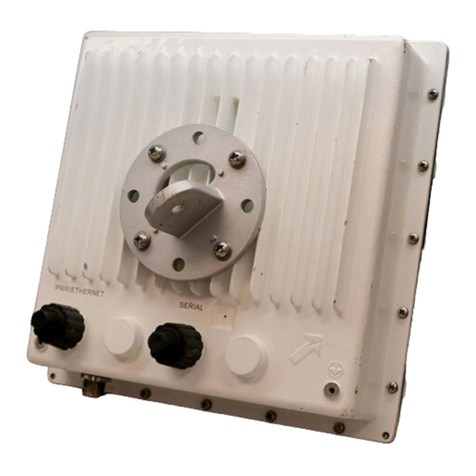
The product’s principle components are a unit and a power-and-Ethernet
injector. The unit has a self-contained antenna enclosed in a weatherproof
container, which can be mounted to the side of a building, on a pole, or on a
tower structure.
The following products are covered in this guide:
Model 2454-R: Wireless outdoor Base Station and/or subscriber unit
operating in the 2.4 GHz band.
Model 4954-R: Wireless outdoor Base Station and/or subscriber unit
operating in the 4.9 GHz Public Safety band.
Model 5054-R: Wireless outdoor Base Station and/or subscriber unit
operating in the 5 GHz band.
Model 5054-R-LR: Wireless outdoor long-range Base Station and/or
subscriber unit operating in the 5 GHz band.
KEY FEATURES
Some of the key features of the QuickBridge.11 include:
The use of a highly optimized protocol for outdoor applications
Asymmetric bandwidth management
Management through a Web Interface, a Command Line Interface (CLI), or
Simple Network Management Protocol (SNMP)
Software and conguration upgrade through le transfer (TFTP)
Outdoor placement for signicantly improved range and ease of installation
Integrated antenna
VLAN Support
This document shows the basics of setting up the units. For detailed
information, see the Installation and Management manual.
▪
▪
▪
▪
▪
▪
▪
▪
▪
▪
▪

All rights reserved Page 5
PACKAGE CONTENTS
Each QuickBridge.11 shipment includes the items in the following table. Verify
that you have received all parts of the shipment.
Note:
Unless listed here, cables are not included with the unit.
Units with integrated
antennas (2 ea.)
Installation CD (1 ea.)
Power Injectors and Cords
(2 ea.)
50 meter outdoor rated
CAT 5 cables (Non UL) with
connectors (2 ea.)
Mounting Kits (2 ea.) Kit includes the following:
A. Mounting clamp for wall/pole
B. Extension arm
C. Mounting plate to enclosure
D. Mounting clamp for pole mounting
A B C D

Page 6 Copyright © 2007 Proxim Wireless
Mounting Hardware (2 sets) The following mounting hardware is included
with mounting kit:
Qty. Description
6 ea. Plain washer #5/16
2 ea. Hex cap screw NC 5/16-18 x 35
2 ea. Nut NC 5/16-18
4 ea. Helical spring lock washer # 1/4
4 ea. Helical spring lock washer #5/16
2 ea Hex cap screw NC 5/16-18 x 80
4 ea. 68764, Screw, Machine, Pan,
Phillips, 1/4”-20, 5/8”L
Rubber Tape Strip (2 ea.)

All rights reserved Page 7
HARDWARE AND SOFTWARE INSTALLATION
Notes:
Be sure to read the Release Notes as they contains software version and
driver information that may not have been available when this document
was produced.
Equipment is to be used with, and powered by, the power injector provided
or by a power injector that meets these requirements:
UL-Listed/ITE (NWGQ)
Limited Power Source Output per UL/IEC 60950
CE-marked
Approved for Power-over-Ethernet
Rated output, 48 Vdc/0.42 A
Pinout follows 802.3af standard for mid-span devices
▪
▪
–
–
–
–
–
–
IMPORTANT!
Before installing this product, see Safety and Regulatory Compliance
Information on the product CD for important information.
IMPORTANT!
Before installing this product, see Safety and Regulatory Compliance
Information on the product CD for important information.
IMPORTANT!
All units must be installed by a suitably trained professional installation
technician or by a qualied installation service.
IMPORTANT!
All units must be installed by a suitably trained professional installation
technician or by a qualied installation service.
WARNING!
To ensure proper grounding, use the hole at the bottom point on the back
of each unit and the provided grounding screws to attach a ground wire of
at least 10 AWG stranded to each unit. Use proper wire grounding tech-
niques in accordance with local electric codes.
WARNING!
To ensure proper grounding, use the hole at the bottom point on the back
of each unit and the provided grounding screws to attach a ground wire of
at least 10 AWG stranded to each unit. Use proper wire grounding tech-
niques in accordance with local electric codes.

Page 8 Copyright © 2007 Proxim Wireless
Step 1: Plan for Installation
There are several planning factors to be considered prior to installing the
QuickBridge.11 system. In addition to selecting the installation site, you should:
Calculate:
Required RSL and fade margin to achieve availability objectives
Required path availability
Anticipated Multi-Path Reection Points
Determine:
System Frequency Plan
Required Antenna Mounting Height to obtain proper Path Clearance
Required Transmission Line Types and Lengths
Plan for:
The unit’s continuous power consumption needs
Lightning protection and system grounding
Hardware mounting
Cable installation including egress
Pre-testing Equipment (back-to-back test procedure)
▪
▪
▪
▪
▪
▪
▪
▪
▪
▪
▪

All rights reserved Page 9
Step 2: Choose a Location
To make optimal use of the unit, you must nd a suitable location for the
hardware. The range of the radio unit largely depends upon the position of the
antenna. Proxim recommends you do a site survey, observing the following
requirements, before mounting the hardware.
The location must allow easy disconnection of power to the radio if
necessary.
Air must be able to ow freely around the hardware.
The radio unit must be kept away from vibration and excessive heat.
The installation must conform to local regulations at all times.
The units are designed to directly mount to a pole. Using the supplied brackets
and hardware, you can mount them to a 1.25 inch to 3-inch pole (outside
diameter). Longer bolts (not supplied) are required for mounting the units to
a larger diameter pole. Using just one of the pole mounting brackets, you can
mount the units to a wall or other at surface.
Caution!
Proxim recommends the use of a lightning arrestor at the building
ingress point. You can purchase the Proxim Lightning Protector;
see the documentation that comes with the Lightning Protector for
more information and installation instructions.
▪
▪
▪
▪

Page 10 Copyright © 2007 Proxim Wireless
Step 3: Gather Required Tools
You should have the following tools available before installing the
QuickBridge.11 units:
Phillips (cross-tip) screwdrivers
Small blade standard screwdriver
Large blade standard screwdriver
Wire crimpers (if using connectors that are not pre-made)
Adjustable 6” wrench
Weatherproong material for sealing external connectors (such as butyl
tape)
Straight-through UV-protected CAT5 or CAT5e Ethernet cable for
connecting to PC, or crossover cable for connecting to a hub or a switch.
Note:
The total length of cabling between the PC and the QuickBridge.11 units
cannot exceed 100 meters, which includes both the cable from the PC to the
power injector and the cable from the power injector to the QuickBridge.11
unit. Due to DC power requirements, the maximum cable length between
the power injector and the QuickBridge.11 units is 75 meters.
Step 4: Unpack the Shipping Box
Unpack the unit and accessories from the shipping box.
Note the Ethernet and MAC addresses of the unit, as well as the serial
number; these addresses may be used when conguring the unit.
Note:
The serial number is required to obtain support from Proxim. Keep this
information in a safe place.
▪
▪
▪
▪
▪
▪
▪
1.
2.

All rights reserved Page 11
Step 5: Determine Proper Mounting Orientation
Locate the arrow on the back of the unit and determine your desired
mounting orientation. For vertical polarization using the integrated
antenna, the arrow should be pointing up (perpendicular to the ground).
For horizontal polarization using the integral antenna, the arrow should be
horizontal (parallel to the ground).
1.

Page 12 Copyright © 2007 Proxim Wireless
Step 6: Assemble Mounting Hardware
Attach the mounting plate (A) using the provided screws and washers
(Torque 9 N∙m/75 in-lbs), such that the unit’s antenna will be vertically or
horizontally polarized when mounted.
Attach the extension arm (B) to mounting piece (A) with the screw, nut,
and washers provided, as shown below. The extension arm gives the unit
more possible tilt, letting you adjust for azimuth or elevation over a larger
angle.
Attach the mounting bracket (C) to extension arm (B) with the screw, nut,
and washers provided.
Tighten the assembly (Torque 15 N∙m/130 in-lbs).
The following gure shows the full assembly attached to the unit.
1.
2.
3.
4.

All rights reserved Page 13
Note that this gure is for illustration only. Units with integrated antennas
must always be mounted in diagonal position to achieve vertical or horizontal
polarization as indicated by the arrow on the back of the unit. Also, on units
with direct-connected omni antennas, the enclosure must be mounted with the
lower side in the horizontal position.

Page 14 Copyright © 2007 Proxim Wireless
Step 7: Perform Condence Test (Optional)
This step allows you to verify the equipment’s operation and test a wireless link
between the BSU and SU prior to the actual installation. If you wish to proceed
without performing a condence test, continue to Step 8: Mount the Unit.
To perform a condence test:
Place the units on a tabletop or shipping box, positioning them at least 10
feet from each other. If the units are too close together, the radio signal
from the antennas may be too strong to get good reception, resulting in
a bad quality due to distortion in the receiver. Do not aim the antennas at
each other, as this may cause too high a signal level.
Plug one end of the CAT5 cable into the RJ45 jack of the BSU.
Connect the free end of the CAT5 cable to the “Data and Power Out” port
on the power injector.
To connect the BSU through a hub or a switch to a PC, connect a straight-
through Ethernet cable between the network interface card in the PC and
the hub, and between the hub and the RJ45 “Data In” port on the PoE
adapter.
To connect the BSU directly to a PC, connect a cross-over Ethernet cable
between the network interface card in the PC and the RJ45 “Data In” port
on the power injector.
Repeat steps 2 through 4 for the SU.
Connect the power injector cord for each unit into an AC outlet. When the
units are powered on, they perform startup diagnostics. When startup is
complete, the wireless LED should briey blink green and turn solid green
when the wireless link between the two units is established.
Verify that the SNR (Signal to Noise Ratio) is no more than 50 dB to
guarantee a good reception. The SNR is displayed in the Link Test and Per
Station monitoring Web interface pages, and also displayed on the serial
port through the CLI when the serial dongle is plugged into the unit. If the
SNR is greater than 50 dB, reposition the units.
Verify that the network connection is working correctly (by accessing the
Web or e-mail).
When all tests have passed successfully, the wireless point-to-point bridge
is ready to be installed.
Proxim recommends that the BSU be installed at the location from where you
expect the wireless network to be extended in the future.
1.
2.
3.
4.
5.
6.
7.
8.
9.
10.

All rights reserved Page 15
Step 8: Mount the Unit
To pole-mount the unit, insert the provided screws through bracket F.
Fasten around the pole to bracket E and secure (Torque 11 N.m/100 in-
lbs).
To wall-mount the unit, mount bracket (E) to the wall using 4 screws (not
provided), as shown:
Note:
At the end of the installation, the Ethernet and serial ports must be made
weatherproof by installing the caps. Be careful not to over-tighten the caps
as damage to the cable may occur.
1.
2.

Page 16 Copyright © 2007 Proxim Wireless
Step 9: Plug in the Cables
Plug one end of the CAT5 cable (A) into the RJ45 jack of the unit (B).
Connect the free end of the CAT5 cable to the “Data and Power Out” port
on the power injector.
To connect the unit through a hub or a switch to a PC, connect a straight-
through Ethernet cable between the network interface card in the PC and
the hub, and between the hub and the RJ45 “Data In” port on the PoE
adapter.
To connect the unit directly to a PC, connect a cross-over Ethernet cable
between the network interface card in the PC and the RJ45 “Data In” port
on the power injector.
1.
2.
3.

All rights reserved Page 17
Step 10: Power on the Unit
The unit is equipped with a Power-over-Ethernet (PoE) module. Using PoE, you
can provide electricity and wired connectivity to the unit over a single Category
5 cable. Although the power injector that is supplied with the unit is 802.3af-
compatible, standard 802.3af-compliant power modules will not properly power
the units. Always use the supplied power injector.
The PoE integrated module provides –48 VDC over a standard CAT5
Ethernet cable.
Maximum power supplied to the unit is 20 Watts (when the unit is heating
or cooling); the units typically draw less than 7.5 Watts.
The unit only accepts power on the “extra pairs”, not on the data pairs
according the conguration for “midshipman” power injection, see the IEEE
802.3af standard.
Once you have connected the power injector to the Ethernet cabling and
plugged the power injector cord into an AC outlet, the unit is powered on.
There is no ON/OFF switch on the unit. To remove power, unplug the AC cord
from the AC outlet or disconnect the RJ45 connector from the “Data and Power
Out” port on the power injector.
▪
▪
▪

Page 18 Copyright © 2007 Proxim Wireless
Step 11: View LEDs
Two LED indicators are available on the Ethernet port of the unit. These LEDs
display the activity of the Ethernet and RF links.
When the unit is powered on, it performs startup diagnostics. When startup is
complete, the LEDs show the unit’s operational state, as follows:
LED State Wireless LED Power/Ethernet LED
Red Power is on; unit is self-heating. --
Flashing Green Wireless link is being
established.
Power is on; Ethernet link is
down.
Solid Green Wireless link has been being
established.
Power is on; Ethernet link is
down.

All rights reserved Page 19
Step 12: Align the Antenna
Antenna alignment is a process to physically align the antenna of the radio
receiver or transmitter for the best possible radio link between them.
The units have an audible antenna alignment tool that can be activated by
plugging in the serial dongle (supplied with every BSU) or by issuing the CLI
command for antenna alignment (see “Antenna Alignment Commands”). The
CLI command causes both audible and numerical feedback as the CLI shows
the running Signal-to-Noise Ratio (SNR) values twice a second.
The output from the beeper for antenna alignment consists of short beeps
with a variable interval. The interval changes with the SNR level to assist in
correctly aligning the antenna. An increase in signal level is indicated by a
shorter interval between beeps; a reduction in signal level results in beeps
longer apart.
To allow for precise antenna alignment, small changes in SNR result in large
changes in the beep period. The alignment process averages the SNR, which
is represented by an average length beep. When a higher SNR is received, the
beep period is made shorter, dependent upon the difference to the average.
A lower SNR results in a longer period between beeps. Aiming is complete if
moving in any direction results in a falling SNR value, which can be heard as
longer periods between beeps.
Antenna Alignment Commands
The following CLI commands are used to initiate and stop the antenna
alignment process. After the process has been successfully initiated, the CLI
displays the current-local/current-remote/average SNR values (in 500 ms
intervals) to indicate the link quality.
set aad enable local: Enables display of the local SNR (the SNR measured
by the receiver at the near end).
set aad enable remote: Enables display of the remote SNR (the SNR as
measured by the receiver at the far end).
set aad enable average: Enables display of the average SNR (the
average of local and remote SNR).
set aad disable: Disables Antenna Alignment Display (Ctrl-C also disables
AAD).
▪
▪
▪
▪

Page 20 Copyright © 2007 Proxim Wireless
Step 13: Tighten the Cables
Apply two wraps of Teon tape around the threads of the unit’s RJ45 jack
(A) in a clockwise direction.
Make sure that the red rubber gasket is still seated in the sealing cap of the
sealing cap/lock nut assembly (B).
Slide the sealing cap/lock nut assembly (B) over the RJ45 jack (A) and
thread onto enclosure. Hand tighten rst, then use a pipe wrench or similar
tool to tighten one more quarter turn.
Caution!
Do not over-tighten!
Tighten the lock nut (C) (Torque 4 N.m/35 in-lbs).
Thread the sealing nut (D) onto the sealing cap/lock nut assembly (B) and
tighten (Torque 3 N.m/25 in-lbs).
Caution!
The lock nut (C) on the sealing cap/lock nut assembly (B) must
be fully tightened over the RJ45 connector before the sealing nut
(D) is fully tightened. Otherwise, the Ethernet cable may twist and
damage.
1.
2.
3.
4.
5.
This manual suits for next models
4
Table of contents
Other Proxim Network Hardware manuals

Proxim
Proxim Lynx.GX 4T Programming manual

Proxim
Proxim 6221e User manual

Proxim
Proxim Antenna Tsunami MP.11 Programming manual

Proxim
Proxim Antenna Tsunami MP.11 Programming manual

Proxim
Proxim MP11 5012-SUI User manual

Proxim
Proxim Symphony HomeRF Base Station User manual

Proxim
Proxim 6221e User manual

Proxim
Proxim Tsunami QuickBridge II T1/E1 User manual

Proxim
Proxim Tsunami QuickBridge 2454-R Programming manual

Proxim
Proxim ORiNOCO AP-4000 User manual