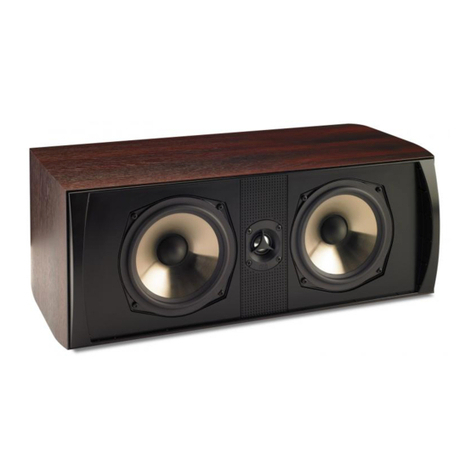
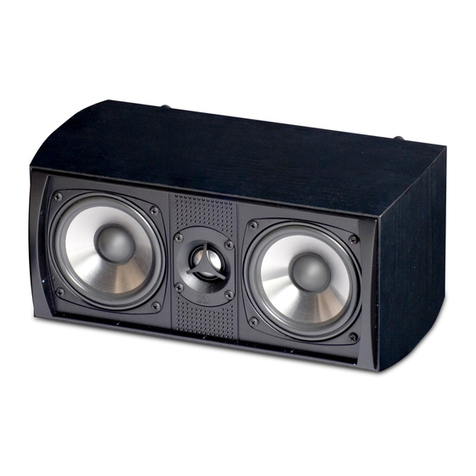
PSB VisionSound VS300 User manual

PSB VisionSound
Owner’s Manual
Manuel d'informations du
propriétaire
Manual del propietario
VS300 / VS400


CONTENTS
I. Warranty Registration 4
II. Unpacking 4
III. Speaker Placement 4
Angular position
Proximity to Boundaries
IV. Installation 7
On-Wall Mounting
Table Top Mounting
V. Connections 10
Selecting Speaker Wire
When Wall Mounted
Making the Connections
VI. Grilles, Installing & Removing 11
VII. Setup, Response Adjustment switches 12
VIII. Protecting Your Investment 12
Recommended Power
Cabinet Care
Grilles & Ports
IX. In Case of Problems 14
X. Specifications 15
3
Notes on environmental protection
At the end of its useful life, this product must not be
disposed of with regular household waste but must be
returnedtoacollectionpointfortherecyclingofelectrical
and electronic equipment. The symbol on the product,
user'smanualandpackaging,pointthisout.
The materials can be reused in accordance with their
markings. Through re-use, recycling of raw materials, or
other forms of recycling of old products, you are making
an important contribution to the protection of our
environment.
Your local administrative office can advise you of the
responsiblewastedisposalpoint.

Congratulations on choosing PSB VisionSound Series speakers. Please take the
timetoread theinstructionsinthis guide,astheywillhelp youenjoy thefull potential
ofyourloudspeakersinanystereoormultichannelhometheaterapplication.
I.WARRANTYREGISTRATION
We recommend you take a few moments now to register your warranty, preferably
on-lineatpsbspeakers.com/Warranty.htmlor viatheenclosed warrantycard sothat
wewillbeabletoserveyoubetterinthefuture.
II.UNPACKING
The packing materials of your PSB speakers are designed to protect them from
damage during shipping. Retain the packaging in case the need arises to transport
thespeakersinthefuture.
III.SPEAKERPLACEMENT-MAXIMIZINGYOURENJOYMENT
Proper loudspeaker placement is an essential ingredient to getting the best sound
from your high performance stereo, multi-channel audio or home theater system.
The goal is to reproduce faithfully the audio soundtrack the movie director or music
producercreatedwithoutcallinganyattentionto thespeakersthemselves.Howand
where you place your loudspeakers, and where you sit relative to them will have a
significantimpactonthequalityofthemovieormusicexperience.
These placement effects fall into two broad categories. The first is their location
around the listener and how that determines the spatial impression of the created
sound field. Secondly the surfaces of the room and the systems proximity to these
surfaces (the listeners proximity as well) will have a strong impact on the balance of
thesystem.
Wewilldealwiththeseinturn.
Angularposition
5.1 movie soundtracks and to a lesser degree, stereo soundtracks are mixed with
the intention of creating (or transporting you to) a specific sonic environment. This
includes both placing sound elements at specific locations around the listener and
also with creating the general impression of being in another sound space. This
environment is best recreated in your home when the speakers are properly placed
attheappropriateanglesaroundyourseatingarea.
It is best to imagine that your listening/viewing area was viewed from overhead and
thatyourspeakerswillbepositionedatdifferentanglesonacirclethatsurroundsthe
primarylisteningarea. IdeallyallspeakersandtheTVwouldbeplacedonthiscircle
and therefore be all equidistant to the listener at the center. In reality the distances
can vary by as much as 2 to 1 (farthest vs. nearest) and the sound processor's
controls for level setting and time delay (if present) will satisfactorily compensate.
More important are the angles of the speakers around this imaginary circle. The
center speaker will of course be in the center front just above or below the television
set. Theleft and rightspeakers shouldbe about30 degreesleft and30 degreeright
ofcenter,againreferringtotheimaginarycircleviewedfromoverheadthelistener.
With on-wall speakers used with a flat panel (Plasma or LCD) TV it is common
practice to surround the TV with speakers just a few inches separated from the set.
4

This is seldom optimum. Unless you sit quite close to the TV then the left and right
speakers should be spaced farther apart than the width of the TV to get to the 30
degreeleftandrightspacing.
With just 2 surround speakers the best location for the surrounds would be to the
siderather thanto the back of thelistening area. They should be 90 to100 degrees
around the circle from the front (straight to the sides and just a little back of the
listeners), although there is a little more leeway in where the surrounds can be
placedthanwiththefrontloudspeakers.
Otherhints:
Ideally, listeners will be equidistant from front right and left and center channel
speakers and from rear (or side) left and right surround channels for most accurate
spatial imaging. If listeners are too close to front or to rear channel speakers the
image cannot come together and blend seamlessly across. With the VS300, while
setting the center of the system at ear-level is ideal, the response of the system is
usefully wide and some height placement latitude is permissible. The left and right
speakers can be mounted at the same wall height as the television. Ideally for
comfortable viewing, the television will be seated head height or perhaps between
an appropriate seated height and a standing height. Most importantly, a center
channel speaker should be located centered on the TV screen - to keep center
channel sound coming from the center of the screen. In the case of a wall mounted
Television ( suchas a PlasmaTV) thesystemwill usuallybemounted justbelow the
set. In the case of floor standing rear projection sets the center can sit on top of the
unit,angledslightlydownward.
Balanceadjustmentcancompensateforsomephysicallocationdifferencebetween
left and right. Time-delay adjustment within the surround sound processor (if
present) can more effectively compensate for path length differences between left
andright,orfrontandrear.
If you sit equally distant from both speakers, angling the speakers inward (“toeing
them in') about 10 to 20 degrees usually produces the best convergence of high
frequencies where you listen. Toe-in will also improve the consistancy of sound
fromseattoseat.
All distances are equal
30° 30°
100°100°
30° 30°
100°100°
Ideal speaker placement: 5.1 Ideal speaker placement: 7.1
5

All VisionSound models are designed to maintain the same tonal balance when
different models are mixed in a system. Mixing a VS300, used as a center, with
VS400's as left and right is fine. The same model should be used in symmetrical
listeninglocationsinasystem–frontleftandfrontright;rearleftandrearright.
Mostsurround sound(that issound thatcomes fromthe surroundspeakers, notthe
front speakers) is meant more to create greater depth and overall ambience than to
localize effects as coming from a particular spot. How much you prefer these
localized effects vs. overall sonic depth and diffusion is up to your listening
preferences. If you are listening to multi-channel music from DVD-Audio or SACD,
you may want the maximum localization of instruments. However, for most home
theater applications a diffuse sound field might be preferred. You can locate your
surround speakers to produce the effects you prefer, whether precisely pinpointed
orpleasantly diffused. In general,the fartherthe distanceto the surround speakers
from the listener, the more diffuse the surround sound field. Diffusion can also be
created via directing the sound away from listeners, for example, your surround
speakerscanbeaimedtowardsarearreflectivesurfaceforincreaseddiffusion.
ProximitytoBoundaries
The closer you place speakers to the boundary surfaces of your room, either to the
rear or to the sides, the greater the proportion of bass in their overall sound. This is
due to the enclosing, “focusing” effects of nearby surfaces on longer-wavelength
(lower) frequencies. Positioning the speakers near the intersection of two surfaces
(wall and wall, wall and floor, or wall and ceiling) will produce more bass than
placement near a single surface. The greatest proportion of bass is delivered by
placement near three intersecting surfaces–in a room corner near the floor or
ceiling, where the convergence of the two walls and the floor/ceiling produces an
amplifying effect that is a bit like that of a megaphone. And the least bass comes
from placing a speaker away from all boundaries. Your own tastes should decide
whatproportionofbassresponseseemsrightinyourroom.
Of course, the VS300 is designed to be mounted on the wall with its included wall
mountingbracket. SeesectionVII.ResponseAdjustmentSwitchesforadiscussion
ofitsspecialfeaturewhenwallmounted.
Where you sit in relation to your speakers obviously makes a difference too. The
proportionsoftheparticulartriangleformedbyyourfrontleftandfrontrightspeakers
and you matter. (You may need to send more power to the more distant speaker to
compensate if you get much further from one speaker than the other.) The overall
distances involved also matter. As you get further from the speakers, more sound
reflected from your room's surfaces (in contrast to the sound coming directly from
thespeakers)reachesyourears,andtheoriginalspatialrelationshipsinarecording
are changed as your room “takes over.” Sometimes the result is a mellower, more
“integrated” sound. Other times, it's a more strident or annoyingly “echoey” – or
other–quality. Onceagain,the particulardimensionsandsurfacematerialsofyour
room play a part. And depending on what seems more realistic and/or enjoyable to
your ears, you may choose to sit at a great distance or have close-up, “near-field”
sound. Keep in mind that the right “toe-in,” the right speaker height, and a
reasonably symmetrical distance from the speakers all tend to work together to
deliverthebesthigh-frequencydefinitionandimaging.
6

Changing your own position with respect to a room's boundaries may also bring a
big effect, sometimes for a small change. Getting further from the wall behind you
maymakesoundmorepreciseandlocalized. Gettingclosermaymakesoundmore
“mellow”andintegrated. Comingtooclose–tobackwall,sidewall,or(especially)a
corner – you may experience a major peak or cancellation of a certain band of
frequencies. It depends on factors we can't cover fully here but do get into on our
website.
IV.INSTALLATION
TheVS300hasanumberofwaysformounting,
both on wall and table-top. As shipped it will
come with its on-wall bracket already attached.
The two feet (included) will let you use it as a
horizontal center channel either on top of a TV
setoronatableinfrontofatelevision.
To mount the feet, loosen both knobs and
extend the mounting bracket to create some
space between the bracket and the VS300.
Slot the feet onto the bracket and fasten them
with the two small Philips head (cross-head)
screws provided.Angle the system as required
and snug down the two knobs to hold the
systeminposition.
On-WallMounting
When wall mounting the VS300 certain tools and materials may be required as well
as a certain expertise. If wires are to be fully hidden within the walls of your house
thenyourbestbetistohireanexperiencedcustominstaller. (LookforalocalCEDIA
certified installer in your area.) If your wires are to remain external to the walls then
you can wall mount the system as long as you are handy with a few basic tools and
feelconfident in theprocess. Onesimple approachto hidingthe wires isto putthem
into the walls and let them drop down to the floor level where they can exit the walls
througha simplewall plate. Thiscan beachieved withthe minimum amount of wire
fishing and will get the wires cleanly down to a point where they are much less
visible,perhapsfullyhiddenbyanequipmentcabinet.
Thefollowingtoolsareusefulforon-wallmountingofaVS300:
TapeMeasure,Pencil,andLevel
PhilipsScrewdriverandPuttyKnife
DrillandBits(smallerforleadholesandlargerforcabling)
Each on-wall bracket includes two smaller holes for attachment to the wall and a
largercentralholeforthewiretoenterthewallthrough. Usingtheguidelines below,
determine the best location for your VS300's. Remove the brackets from each
speaker and use them as a guide for the location of the mounting holes. The level
will assure that the systems are at right angles to the TV and the horizon. Use a
sufficiently strong wall mount. The only kind that we recommend are the metal
expanding or “butterfly” style or the newer type were a large plastic screw pre-
Center Channel Feet
7

threads into the wall and a metal screw screws into the center of it. Do not use the
simple straight split plastic inserts. Although commonly used in drywall, these
aredesignedforuseintobrickandwillNOTsupporttheweightofaVS300.
You will see that the wall bracket has an angle between the wall mounting surface
and the two support struts. Since the bracket is reversible this allows the system
more mounting swing while reducing the required slot in the end caps. The product
comeswiththe rightorientation forcenter channeluse (this angleorientation allows
thefeettobeattached).Note thatoneorientationgivesmore swing inonedirection,
whileremovingandflippingthebracketgivesgreaterswingintheoppositedirection.
Between these two orientations the system can be wall mounted at any angle
required,itcanevenbemountedonasidewallandfiredat90degreesdownthewall
(as might be required in surround applications or if attached to a ceiling). To flip the
bracketloosenboth knobs, spinthem offandturn the bracketend for end.Insertthe
bracket back into the end slots, being careful not to scratch the system’s finish, and
reattach the knobs. You will see a rubber disc under each knob on the internal end
Mounting the Wall Bracket
8

caps. This assures that the system stays put at any angle that you set it.Also note
that the mounting bracket ends have slots that allow over an inch of in/out
adjustment. This range can be used to tilt the system slightly when on wall and also
to adjust the space between the system and the wall. Most likely the installer will
hang the system on the wall with the brackets loose, connect the wires and then
pushthesystemclosetothewallandtightentheknobs.
The question of orientation may arise. That is, when mounted vertically, which side
of the system should be inside and which should be outside? Acoustically the
response is quite symmetrical so it becomes a matter of visual preference. The
systemistypicallymountedwiththeexposedcabinetedgetotheinside(towardsthe
Plasma set) because
when angled inward the
system sets nearer the
wall.
When the VS300 is wall
mountedyoumay prefer
to tilt the speakers
towards ear level by
l o o s e n i n g t h e
attachment screws
slightly and pulling one
endortheotherforward.
This shouldn't be required for acoustical reasons but can help align the system with
a TV that angles slightly downward, for cosmetic reasons. A slot in the wall
attachmentbracketislongenoughforusefulangleadjustment.
TabletopmountingwiththeoptionalVisionSoundBaseKit
You may be using the VS300’s next to a table top mounted TV. If so it may be
preferable to stand them upright on the table rather than to wall mount them. We
haveprovidedforthiswiththeoptionalVisionSoundBaseKit.(Onepairofbasesper
kit) Each kit includes two cast aluminum bases, a left and right spacer and
replacement(sansknobs)topcaps.Thebasesarenicelyweightedandhaverubber
feettokeepfrommarringfurniture.
To attach them you should first remove the two knobs and the wall bracket. Then
both end caps need to come off.Although the end caps are snugly attached a firm
graspandsteadypull(wigglesidetoside)willremovethem.Resistthetemptationto
pry them off with a screwdriver which would certainly mar the cabinet. Use a Philips
screwdrivertoremovethe4screwsfromoneendofeithersystem.Notethatyouare
turning“centers” into“lefts” and “rights” and soyou needto remove thescrews from
one end of one system and the opposite end of the other. Add the appropriate
adaptor plate (the plastic piece approximately ¾” thick) and reattach and snug the
screws.TheflatsideofthespacerwillattachtotheVS300.Thecurvedsideisamate
tothealuminumbase.Thecastbasethenattachesvia3hexkeytype(keyincluded)
screws. Finally, attach the new end caps. Note that you won’t be re-using the knobs
so the new end caps delete the knob hole and also the unused bracket slot around
backforacleanappearance.
9

V.CONNECTIONS
Important:Alwaysturnoffyourelectronicequipmentbeforeconnectingspeakers.
SelectingSpeakerWire
Werecommendaminimumof16gaugespeakerwirefornormallengthruns,andup
to12gaugeforlongruns(over30feet).
You may wish to audition and compare the performance of some of the specialty
audiointerconnectsandspeakercableavailablefromyourdealer.
Whenwallmounted
Whenwallmountingthe VS300youmay wish tohidethe speakerwiresinthe walls.
The wall mounting bracket includes a larger central hole near the input terminal cup
that allows the wires to enter the wall without being visible from the front. From the
wall bracket the wires can run back to a central equipment location or simply run
down to a junction box near the floor. Unless you are experienced in house wiring,
werecommendyouengagetheservicesofacustominstaller.
MakingtheConnections
Besure to connect all of the speakers in your system in an identical manner: Red or
(+)amp/receiverterminaltoRed(+)speakerterminal,Black(-)toBlack(-). Thiswill
Attaching the Base Kit
10

ensure that the diaphragms of the speakers on both channels move forward and
backwardtogether(“in-phase”),ratherthaninopposition(“out-of-phase”). In-phase
connection provides maximum clarity and bass, while out-of-phase connection
results in frequency cancellations and produces thinner and less distinct sound –
with less bass, vague vocal quality, and no solid center image. To help ensure the
proper connection, the two separate conducting wires in a standard two-conductor
speaker cable are coded in one way or another to be distinguishable from each
other. (The jacket of one wire may be ribbed or marked with “+” signs, or one wire
under the insulation may be a different color from the other.) Use this wire-coding,
together with the amp/receiver and speaker color-coding, to be sure you are
connectingthesamewireofagivenpairtoalike-codedterminalatbothendsofyour
connection.Assureallwiringterminalsaretightenedfirmlybutbecarefulnottoover-
tightenanddamagetheconnectors.
VI.GRILLES
InstallingandRemoving
Grilles for the VS models are magnetically attached. Bring the grille up to the
approximate position and it should snap into place. Confirm that all magnetic
catcheshavealignedandthatthegrilleiswellseatedarounditsfullperimeter.
Bare Wire Connection Banana Plug Connection Spade Plug Connection
Loosen knurled nut.
Insert wire through
hole and tighten nut.
Takes wire sizes up to
8 gauge.
Insert banana plug into
the top of the nut.
Ensure the hex nuts
are tightened to
prevent rattles.
Loosen nut. A
1/4"(6mm) or
5/16"(8mm) spade will
fit on the narrower
section of the post.
Tighten the nut.
Power Amplifier
Spkr/R +
-
Spkr/L
Observe Proper Connection Polarity
11

VII.SETUP
ResponseAdjustmentSwitches
We at PSB have spent great effort to make the frequency response of your in-wall
system as flat and neutral as possible. This will yield accurate and pleasurable re-
creation of all manor of input materials: music, voice or movie soundtrack. Still,
variations in the listening position, room acoustics and listener preferences can be
accommodatedusingafewwellchosencontrols.
One of the most unique features of the VS300 is its correction for on-wall mounting.
The walls of your room and the proximity of the system to these walls will have an
effect on overall bass level as described above. With a bracket mounted on wall
VS300 there is also a very specific phenomenon stemming from wall mounting that
all on-wall speakers would share. Only the VS300 has a control to give a precise
correctionofthiseffect.
An on-wall speaker radiates sound in all directions. The sound traveling forward is
the first to arrive at your ears. This “direct arrival” sound is similar to the anechoic
chamber response and getting it flat was one of the criteria of designing the VS300.
Sound travels backwards as well. That component of the sound will bounce off the
wall behind and then carry forward to arrive at your ears about 1 millisecond behind
the direct sound. The main impact of this delayed arrival is to put a significant
response “hole” in the sound of your system at 500Hz, or dead center in the human
voice range. This would disembody or thin out the sound of voices. A very
significant amount of extra crossover network is added to the VS300, along with a
switch, to compensate for this phenomenon. When the VS300 is wall mounted the
switch should be set to the “on wall” position per the graphic on the rear label. DO
NOT set the switch to “on wall” for any other mounting conditions such as stand
mountingor table top mounting with the optional bases. Even ifsuch mounting puts
the system somewhat near to a wall it will degrade the response for any mounting
conditionsotherthantheon-wallcase.
TheVS400hasitsownuniqueresponseadjustmentcontrol.Asitisastandmounted
system and will never be mounted in contact with a wall like the VS300, there is no
need for on-wall compensation. But we feel that varying room acoustics and
personal preference, as well as other system factors, will give rise to a need for
subtle response adjustments that balance the bass end vs. the treble end of the
audiblerange.
TodealwiththiswehavegiventheVS400acontrolfor“SpectralTilt”.Thisisasubtle
but effective 3 position control that gives the full audio spectrum a gradual uphill
slopetoward the treble (SpectralTilt +) or a gradual downhill slope (SpectralTilt-) as
well as a flat or 0 position. Using the bass end as a hinge point the control tilts the
response about 2dB in total (+ or-) to give a subtle yet effective means of
“brightening” or “darkening” the overall balance. Although the anechoic chamber
response would be flat in the Spectral Tilt 0 position, don’t be afraid to try the
alternate positions on a variety of program material and leave it on the setting that
soundsbesttoyou.
Our goal is to provide listeners with completely convincing, "being there"
performance. Final judgments on the quality of the sound output are of course
personal. We encourage listening to the speakers with clear and familiar recordings
12

–particularly of femaleand malevoices andacoustic instruments– toconvince and
satisfy listeners of the natural tonal balance, wide frequency and dynamic range,
andspatialimagingdelivered.
VIII.PROTECTINGYOURINVESTMENT
RecommendedPower
We recommend amplifiers and receivers rated from a range of 25-250 watts. For
playingatconsistentlyroom-fillingvolume,aminimumof100wattsisusuallyagood
idea. Be wary of driving low-powered amplifiers to their limits as under-powering
may cause “clipping” which can cause permanent speaker damage. Most people
will use the VS300 in a home theater system that includes a subwoofer. This is
certainlynotmandatory andtheVS300 willgivea fullandsatisfying soundwithouta
subwoofer. However,addingasubwooferandreducingthebasspowergoingtothe
VS300 will increase its total output capability considerably. In such cases where a
subwoofer is used, your audio processor or receiver should be set with the
appropriatechannelsdesignatedas“small”.
A. For full, year-after-year enjoyment from your speakers, you should respect their
limits. Excessive volume levels can damage even the most “bullet-proof”
speakers,especiallyoverextendedtimeperiods.
B. When listening to music or movies at very loud volume, you shouldn't turn up
bass or treble all the way or close thereto. This sends tremendously increased,
disproportionate power into the speakers, and may well damage them. Some
loudness compensation (“Loudness”) controls, which boost both bass and
treble, can also be troublesome at high volume. They are intended only for low-
volumelistening.
C. Finally, you should be aware that when amplifiers and receivers are pushed to
theirlimitstoproduceexcessivevolumelevels,theyaredriveninto“clipping”and
can do severe damage – especially to tweeters. Often, the damage is done by
underpowered amplifiers, which may reach their limits very soon. When such
units begin to “clip” the audio waveform, they may generate high-frequency
“spikes”oftremendous power. More tweetershaveprobably beendestroyedby
this phenomenon than any other. If using your speakers at loud levels, listen
carefully for any sign of harsh, garbled midrange and diminishing intelligibility –
andturnthevolumedownrightawayifyoudetectit.
NEVER TURN UP THE VOLUME ALL THE WAY TO SEE HOW LOUD YOUR
SYSTEMWILLPLAY!
CabinetCare
Cabinets are made of aluminum extrusions and precision molded plastic end caps
finished in a durable paint. They should be treated as you would any fine household
item with similar finishes. Dust lightly with a soft cloth; avoiding abrasive cloths,
sponges or cleaners. If necessary, wipe carefully with a cloth slightly dampened
withwaterorglasscleanertoremoveheavysoil.
GrillesandPorts
A lint brush does a good job of cleaning grilles. Grilles can be taken off and
vacuumed if you prefer. If need be, you can use a lint brush to clean ports. Avoid
touching speaker diaphragms. Particularly, pushing in the aluminum dome of the
tweeterwillcausepermanentdamage. 13

IX.INCASEOFPROBLEMS
A. Lower the volume if a speaker begins to sound distorted or seems to be missing
certain frequencies, to check first to see whether playing at somewhat lower
volume seems to clear up the problem. It can be especially important to turn
down the volume right away if you have pushed a low-powered amplifier or
receiver past its comfortable limits as discussed in the “Protecting Your
Investment”section.
B. Isolate the problem to the electronics or the speakers and, if the speakers, to
specific speakers. Interchange the speaker wire connections on your amplifier
or receiver between channels, so that the left speaker is connected to the right
channel, or vice versa. If the problem shifts to the other speaker, the problem is
notinthespeakerbutintheelectronics.
C. Another component – or, very often, a cable or connection problem between
components – may be at fault. If the problem stays in the same speaker,
irrespective of the channel to which it's connected and after changing the
connectingwirethespeakeritselfprobablyneedsservice.
D. See your dealer if you require service. PSB dealers are equipped to handle
almost all problems. If you have moved since your purchase, the nearest
authorized PSB dealer should be able to help you. You may locate your nearest
PSB authorized dealer on-line at www.psbspeakers.com. If the problem is not
resolved, please contact us, providing the Model name, Serial Number, date of
purchase,dealername,andafulldescriptionoftheproblem.
Thankyou!
We appreciate your purchase, and hope this owner's guide helps you enjoy the
exceptionalsatisfactionthatPSBspeakersystemshavetooffer. Wewishyoumany
yearsofenjoyablelistening!
14

X. Specifications
VS300 VS400
Frequency Range
Response
On Axis @ 0° ±3dB 68-23,000Hz 59-23,000Hz
LF Cutoff -10dB 52Hz 43Hz
Sensitivity
Anechoic Chamber 86dB 88dB
For 2.83 Volt input
Impedance
Nominal 6 Ohm 6 Ohm
Minimum 4 Ohm 4 Ohm
Input Power
Recommended 25-100 Watts 25-250 Watts
Acoustic Design
Tweeter (Nominal) 1” (25mm) Aluminum Dome 1” (25mm) Aluminum Dome
Woofer (Nominal) 2 x 4.5” (114mm) 4 x 4.5” (114mm)
Treated paper cone Treated paper cone
butyl rubber surround butyl rubber surround
Crossover 2500Hz 2500Hz
EQ Adjustment On-wall correction Contour correction
Finish/Construction
Finish Frame Titanium or Black Titanium or Black
Grille Matching grille cloth, Matching grille cloth,
magnetic catches magnetic catches
Dimensions
(W x H x D) 6 1/3 x 26 1/3 x 5 1/3” 6 1/3 x 46 x 5 1/3”
(110 x 670 x 135mm) (110 x 1170 x 135mm)
Weight
Net 11 lbs 20 lbs
Shipping 14 lbs 26 lbs
15

16

TABLE DES MATIÈRES
I. Enregistrement de la garantie 18
II. Déballage 18
III. Disposition des haut-parleurs 18
Position angulaire
Proximité des limites de la pièce
IV. Installation 21
Installation murale
Montage sur une table
V. Branchements 25
Choix des fils de haut-parleurs
Pour une installation murale
Réalisation des branchements
VI. Grilles, Installation et retrait 26
VII. Réglage, Commutateur de 26
réglage de réponse
VIII. Protection de votre investissement 27
Puissance recommandée
Soins à apporter au boîtier
Grilles et bornes
IX. En cas de problèmes 29
X. Caractéristiques techniques 30
17
Un mot sur la protection de
l'environnement
Autermede saduréedevie,ce produitnedoitpasêtre jeté
avec les ordures ménagèresordinaires, maisretourné à un
pointdecollectepourrecyclagedescomposantsélectriques
et électroniques. Le symbole sur le produit, sur le manuel
d'installationetsurl'emballageattirel'attentionsurcepoint.
Les matériaux peuvent être réutilisés en conformité avec
leur marquage.Atravers la réutilisation et le recyclage des
matériaux bruts, ou toutes autres formes de recyclage des
produits anciens, vous contribuez de manière importante à
protégernotreenvironnement.
Votremunicipalitépeutvousindiqueroùsetrouvelepointde
collecteleplusproche.

Félicitationsd'avoir choisides haut-parleurs PSB de lasérie VisionSound. Veuillez
prendre le temps de lire les instructions contenues dans le présent guide, car elles
vous aideront à tirer le meilleur parti de vos haut-parleurs dans tout système stéréo
oudecinémaàdomicilemultivoies.
I.ENREGISTREMENTDELAGARANTIE
Nousvousrecommandonsàprésentde prendre quelques instantspourenregistrer
votre garantie, de préférence en ligne à l'adresse psbspeakers.com/Warranty.html
ouàl'aidedelacartedegarantiejointeafinquenouspuissionsvousserviraumieux
àl'avenir.
II.DÉBALLAGE
Lesmatériauxd'emballagedevoshaut-parleursPSBsontconçuspourlesprotéger
de tout dommage pendant le transport. Conservez cet emballage au cas où vous
devrieztransporterleshaut-parleursàl'avenir.
III.DISPOSITIONDESHAUT-PARLEURS-POURVOTREPLAISIRMAXIMUM
La disposition optimale des haut-parleurs est un élément essentiel pour obtenir le
meilleur environnement sonore à partir de votre système stéréo à hautes
performances, audio multivoies ou de cinéma à domicile. L'objectif est de
reproduire fidèlement la bande sonore produite par le réalisateur
cinématographique ou par le compositeur sans attirer l'attention sur les haut-
parleurseux-mêmes.Lamanièreetl'endroitoùvousplacezvoshaut-parleurs,ainsi
que l'endroit où vous vous asseyez par rapport à eux auront une influence
importantesurlaqualitédelasensationcinématographiqueetmusicale.
Ces effets d'emplacement se répartissent dans deux grandes catégories. La
premièreestconstituéepar l'emplacementdeshaut-parleurs autour del'auditeuret
comment cela définit l'impression spatiale du champ acoustique ainsi créé.
Deuxièmement,les surfaces de la pièce et laproximité du système deces surfaces
(ainsi que la proximité des auditeurs) auront un impact important sur l'équilibre du
système.
Nousdevonstenircomptetouràtourdecela.
Positionangulaire
Les bandes originales des films 5.1 et à un degré moindre les bandes originales
stéréo, sont mixées avec l'intention de créer (ou de vous transporter dans) un
environnement sonore spécifique. Pour cela, il faut à la fois placer les éléments
sonores en des endroits spécifiques autour des auditeurs et aussi de créer
l'impression générale d'être dans un autre espace sonore. Cet environnement est
mieux recréé dans votre séjour lorsque les haut-parleurs sont placés correctement
àdesanglesappropriésautourdevotrezoned'écoute.
Il est plus facile d'imaginer que votre zone d'écoute et de visualisation soit vue de
dessus et que vos haut-parleurs soient positionnés à des angles différents sur un
cercle entourant la zone d'écoute principale. Idéalement, tous les haut-parleurs et
le téléviseur doivent être placés sur ce cercle, et par conséquent sont tous
équidistants de l'auditeur placé au centre. En réalité, les distances peuvent varier
du simple au double (entre le haut-parleur le plus proche et le haut-parleur le plus
éloigné) et les commandes de niveau et de temps de propagation (si elles existent)
18

duprocesseur sonore compenseront ces variations de manière satisfaisante. Plus
importants sont les angles des haut-parleurs autour de ce cercle imaginaire. Le
haut-parleur central sera bien entendu placé au centre à l'avant juste au-dessus ou
endessous dutéléviseur. Leshaut-parleurs degauche etde droite seront placés à
environ 30 degrés à gauche et à droite du centre, toujours en se référant au cercle
imaginairevuau-dessusdel'auditeur.
Avec les haut-parleurs muraux utilisés avec les téléviseurs à écran plat (plasma ou
ACL), il est de pratique courante de placer ces haut-parleurs à quelques
centimètresdepartetd'autredutéléviseur. C'estparfoislapositionoptimale. Sauf
si vous vous asseyez plutôt prêt du téléviseur, les haut-parleurs de droite et de
gauchedevront être placés plus loin de part et d'autre du téléviseur pour obtenir les
30degrésd'espacementàgaucheetàdroite.
Avec 2 haut-parleurs d'ambiance seulement, le meilleur endroit pour les placer
serait sur les côtés plutôt qu'à l'arrière de la zone d'écoute. Ils seraient à 90 - 100
degrésle long du cercle à partir de l'avant(directement sur lecôté ou justeun peu à
l'arrièredesauditeurs),bienqu'ilyaitunpeuplusdemargedelibertépourplacerles
haut-parleursd'ambiancequepourplacerleshaut-parleursavant.
Autresconseils:
Idéalement,lesauditeursserontplacésàégaledistancedeshaut-parleursdevoies
droite et gauche et centrale et des haut-parleurs des voies d'ambiance arrière (ou
latérales) droite et gauche pour une restitution plus précise de l'image spatiale. Si
les auditeurs sont trop proches des haut-parleurs des voies avant ou arrière, les
sons ne peuvent pas parvenir ensemble et se mélangent d'une manière confuse.
Avec le VS300, alors que le positionnement du centre du système à la hauteur des
oreilles est idéal, la réponse du système est suffisamment large et une certaine
latitude de positionnement en hauteur est permise. Les haut-parleurs droit et
gauche peuvent être installés à la même hauteur sur le mur que le téléviseur.
Idéalement pour une visualisation confortable, le téléviseur sera placé à la hauteur
delatêteoupeut-êtreàune hauteur intermédiaire entre la position assise etdebout
du téléspectateur. Le plus important, c'est qu'un haut-parleur de voie centrale soit
situéaucentredel'écrandutéléviseurpourquelesondecettevoiecentralesemble
19
30° 30°
100°100°
30° 30°
100°100°
Toutes les distances sont égales

émanerducentredel'écran. Danslecasd'untéléviseurinstallésurunmur(comme
les téléviseurs plasma), le haut-parleur central sera installé habituellement juste en
dessous du téléviseur. Dans le cas des vidéo projecteurs, le haut-parleur central
peutêtreinstalléau-dessusdel'imageetlégèrementinclinéverslebas.
Leréglaged'équilibragepeutcompenserunecertainedifférencedepositionnement
physique entre les voies droite et gauche. Le réglage de temps de propagation
incorporé au processeur d'ambiance sonore (s'il existe) peut compenser plus
efficacement les différences de longueur de trajet entre les voies gauche et droite,
ouavantetarrière.
Si vous vous asseyez à égale distance de tous les haut-parleurs, les incliner vers
l'intérieur d'environ 10 à 20 degrés produit habituellement une meilleure
convergence des hautes fréquences à l'écoute. Cette inclinaison améliorera aussi
lacohérencedusond'unsiègeàl'autre.
Tous lesmodèles VisionSoundsont conçuspour conserver lemême équilibre tonal
lorsque différents modèles sont mélangés dans un système. Mélanger un VS300,
utilisé comme haut-parleur central, avec des VS400 comme haut-parleurs gauche
etdroit constitueune solution parfaite. Les mêmesmodèles doivent seulement être
utilisés d'une manière symétrique dans un système - avant gauche et avant droit ;
arrièregaucheetarrièredroit.
La plupart des sons d'ambiance (c'est-à-dire les sons provenant des haut-parleurs
d'ambiance, et non ceux provenant des haut-parleurs avant) sont plus destinés à
créer une plus grande profondeur et une ambiance globale qu'à localiser des effets
provenant d'un point particulier. Vous pouvez préférer plus ou moins ces effets
localisés par rapport à la profondeur et à la diffusion sonore globale. Si vous
écoutez de la musique multivoies issue d'un DVD-Audio ou d'un SACD, vous
pouvez souhaiter localiser au maximum les instruments. En revanche, pour des
applications de cinéma à domicile, un champ sonore diffus peut être préférable.
Vous pouvez placer vos haut-parleurs d'ambiance afin qu'ils produisent les effets
que vous préférez, que ce soit une localisation précise ou une diffusion agréable.
En général, plus la distance séparant les haut-parleurs d'ambiance des auditeurs
estgrande, plus le champsonore d'ambiance est diffus.Ladiffusionpeut aussi être
créée en dirigeant le son loin des auditeurs. Par exemple, vos haut-parleurs
d'ambiance peuvent être dirigés vers une surface réfléchissante arrière pour
augmenterladiffusion.
Proximitédeslimitesdelapièce
Plus vous rapprochez les haut-parleurs des surfaces limites de votre pièce, que ce
soit à l'arrière ou sur les côtés, plus la proportion de graves sera importante dans le
champ sonore global. Cela est dû aux effets de « renforcement » des surfaces
proches sur les fréquences (basses) de grandes longueurs d'onde. Le
positionnement des haut-parleurs près de l'intersection de deux surfaces (mur et
mur, mur et sol ou mur et plafond) produira plus de graves qu'un positionnement
près d'une seule surface. La plus grande proportion de graves est produite en
plaçantles haut-parleurs prèsde l'intersection detrois surfaces -dans un coin de la
pièce près du sol ou du plafond, où la convergence de deux murs et du sol ou du
plafond produit un effet d'amplification un peu semblable à celui d'un mégaphone.
Et le moins de graves seront produites en plaçant le haut-parleur loin de toutes les
20
Other manuals for VisionSound VS300
1
This manual suits for next models
1
Table of contents
Languages:
Other PSB Speakers manuals
Popular Speakers manuals by other brands

Focal
Focal Auditor R-130S2 user manual
AUDAC
AUDAC AXIR User manual & installation guide

Pehratek Products
Pehratek Products XM-5000 VRA instruction manual

JBL
JBL SoundPoint SP8 Series Technical manual

Party Light & Sound
Party Light & Sound 12RGB user manual
Wisdom
Wisdom ICS3 Installation and owner's manual
