#PKFIREXX PSI Woodworking Products
Assembly
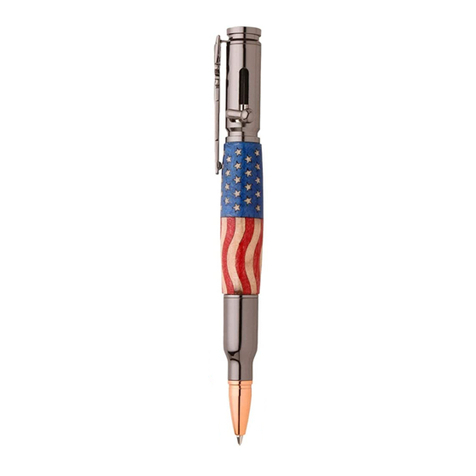
• Press Tip Nut, recessed end fi rst, into small diameter end of Barrel.
• To prevent damage when pressing, push the ends of the Upper Assembly into the closed position and twist to lock.
• Thread the Cap through the Clip and Cap Nut, aligning the clip to the front of the cap to form the Clip Assembly and tighten.
• Orient the Clip Assembly on the Upper Assembly according to Diagram D.
• Push the Clip Assembly in slightly so it wedges in the Upper Assembly, then unthread the cap and clip to avoid pressing
damage.
• Press the Cap nut fully into the Upper Assembly
• Press Upper Assembly into larger end of Pen Barrel.
• Thread cap and clip back onto the upper assembly.
• Twist Upper Assembly counter-clockwise to unlock.
• Place small post of Refi ll Extender into the back of Refi ll.
• Hold Refi ll so that extender is upright and insert refi ll and extender into open end of Pen until Upper Assembly is fully retracted.
• Turn pen over so that tip is pointed upward and place spring over tip of refi ll.
• Thread Pen tip over refi ll and spring.
• To extend refi ll, push Upper Assembly towards tip and twist clockwise to lock. To retract, unlock by pushing Assembly slightly
towards tip and twisting counter-clockwise..
• To change refi ll, unscrew tip and remove old refi ll, spring and extender.. Insert new refi ll according to instructions above.
Diagram C / Bushings #PKFIREBU
Turning the Blank
• Mount the bushings and blanks according to diagram B.
• Thread on the knurled nut and hand tighten to hold all components in place.
• Slide the Tailstock up snugly against the Mandrel shaft, inserting the live center point into the Mandrel dimple. Lock Tailstock.
• Hand tighten the quill adjustment on the tailstock to steady the mandrel. Do not over tighten, it could damage the mandrel shaft.
• When using Mandrel Saver, there is no need for extra spacer bushings or the knurled nut. Slide tailstock directly against bush-
ings and tighten until blank and bushings are secure.
• Using sharp tools, turn the blank down close to the bushing diameter. Turn the barrel straight or to a profi le of your choice.
• Sand the blank down to be fl ush with the bushings, gradually increasing sandpaper grits.
• Finish the barrel using your choice of polish. Allow Suffi cient time for the polish to cure—refer to polish instructions.
DIAGRAM B / TURNING THE BLANKS
Live Center
Mandrel Saver
Blank
Spacer
Bushings
Finished
Profi le
Spacer
Bushing
Tip Bushing Cap Bushing
Or
© 2018 PSI Woodworking Philadelphia PA 19115 - v06/18
1
1. Align clip badge and helmet badge
2. Screw the Cap Nut onto helmet post tightly.
3. Align clip with the “N” in HONOR and push.
3
2
Diagram D
