PSI Woodworking Barracuda4 CSCBARR4 User manual

Chuck Gripping Depth
When turning a large pieces such as a bowl, for safety reasons, allow a minimum amount of wood for the
chuck to grab while turning.
1. Cavity base (inside grip) – for a 2" diameter base, minimum hole depth is 3/16".
2. Spigot base (outside grip) – for a 2" diameter base, minimum grip is 3/16".
Lathe Speeds
Turning: 500-1500rpm
Sanding & Polishing: 1500-2500rpm
Make sure your wood is properly aligned and balanced when mounted or re-mounted. Use slower speeds for
larger work.
Maintenance
Brushing is all that is needed to clean your chuck. If the chuck becomes sticky, soak in varsol or mineral spirits
with 10% oil added. Soak for thirty minutes and blow dry.
Accessories
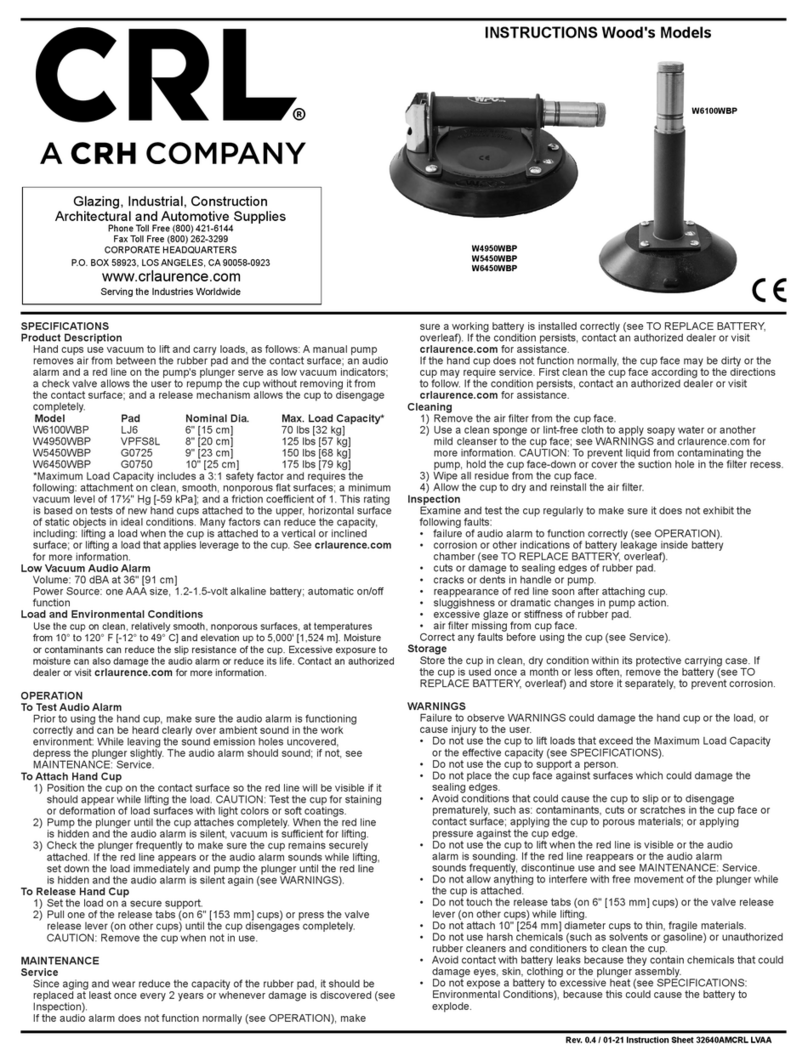
LATHE SPINDLE CONVERTERS
#LABAR418 - 1-1/2" x 8tpi to 1" x 8tpi
#LABAR4114 - 1-1/2" x 8tpi to 1-1/4" x 8tpi
#LABAR4M33 - 1-1/2" x 8tpi to M33 x 3.5
EXTRA JAWS
#BARR4FJ3 - 8-1/2" Jumbo Flat Jaws
4-Jaw Self-Centering
Key Chuck System
The Ideal Chuck for Midi and Full Size Woodworking Lathes
Product CSCBARR4
4
3/16”
Spigot base
Cavity base 3/16”
©2006 PSI Woodworking Products 9900 Global Rd., Philadelphia, PA 19115 v2

Warranty
Thank you for purchasing one of PSI’s growing family of woodworking products. The #CSCBARR4 is engineered
and manufactured to the highest standards of quality. You will find this lathe chuck an essential accessory to
your workshop.
This product is warranted against defects in material and workmanship for a period of two years for all
components. This warranty applies to the original purchaser of the product and is limited to the repair and/or
replacement of the product, or its parts at the discretion of PSI Woodworking Products. Excluded are parts
which have been misused, abused, altered, or consumed by normal operation of the chuck. Also excluded are
direct or consequential damages to persons, properties, or materials. Your invoice serves as proof of purchase
and must be referenced to authorize any warranty repair. Call your PSI dealer for proper authorization.
Safety Instructions for Chuck System #CSCBARR4
1. Do not wear gloves or loose clothing when turning
2. Do not wrap any strip sandpaper or clothing around your hands or fingers when sanding or turning.
3. Use proper eye protection when turning.
4. Check your wood for splits, weakness or cracking prior to mounting on the chuck.
5. Confirm that the wood is tightly gripped before turning your chuck under power.
6. Rotate the chuck manually prior to starting your lathe to confirm proper clearance.
7. Always check and re-tighten after any problem or catch.
8. Use appropriate speeds as referenced in instructions.
9. Always turn with sharp lathe chisels.
10. Capture fine particles from the air with a dust collector.
Package Contents
A. CSCBARR4
Barracuda 4 Key Chuck
(pre-threaded to 1-1/2" x 8tpi)
B. Gear tightening wrench
C. Hex wrench (removes jaws)
D. 1 set (4 pieces) of #2 round
jaws (pre-mounted to chuck)
E. Screw chuck
F. #1 step jaws
G. #3 wide jaws
H. Extended pin jaws
I. Wooden Carrying Case (unshown)
Jaw Capacity Chart
Jaw Style Gripping Dowel Outside Diameter Gripping in Hole Inside Diameter
#1 Step Jaws 3/16" to 2-1/4" 15/16" to 3"
#2 Round Jaws 1-3/4" to 3-11/16" 2-3/8" to 4-1/2"
#3 Wide Jaws 3-11/16" to 5-9/16" 4-3/8" to 6-1/2"
Pin Jaws 1/4" to 2" 1-1/8" to 2-7/16"
Chuck System Description
A. Main body: designed to hold all jaws as an assembly.
B. Carrier: to which the top jaws are each attached with one or two
hex screws.
C. Jaws: attached to the carrier, used for gripping the wood piece to
be turned (#2 round jaws are shown in the photograph on left).
D. Socket hex screws: attach jaws to chuck (2 per jaw).
E. (2) Wrench tightening holes: insert and turn key to secure grip
Installing the Jaws
Select the appropriate jaw for your project. Place the selected jaw on top of the carrier, matching the number
stamped on the main body to the number on each individual jaw. Using the provided hex wrench and the hex
set screws, firmly tighten the jaw down onto the surface of the carrier. Repeat this step for for the remaining
three jaws.
Installing Screw Chuck
This screw chuck mounts directly into the #2 round jaws. To safely secure the
chuck, insert into the recess of the spindle at the base of the chuck; on the sides
of the jaws (see illustration). Then proceed to close and tighten the jaws to secure
into place.
Mounting the Adapter
1. This chuck is supplied pre-cut with 1-1/2" x 8tpi threads. If your lathe’s
spindle threads are different than that size, check the Penn State Industries’
catalog for the appropriate adapter for your lathe.
1. Wipe the inside of the threads and the outside to insure that both surfaces are
clean prior to mounting.
2. Hold the chuck in your hand, screw and tighten the adapter into the bottom
threaded portion of the chuck.
3. Use the same procedure when using any adapter.
Mounting the Chuck to Your Lathe
Screw the completed assembly onto your lathe. The chuck should go on effortlessly with no binding. Screw the
chuck all the way until the adapter face contacts the shoulder of the lathe spindle. Lock the spindle, slightly
unscrew the chuck and give it a firm spin. This will snap the chuck firmly in place.
Operating the Chuck
Mount chuck onto the lathe headstock. Insert key wrench into a square key hole on the side of the chuck.
Rotate key wrench to open and close jaws.
#2 Jaw (internal profile)
Screw Chuc
k
A.
B.
C.
D.
E.
F.
G.
H.
A.
D.
E.
B.
C.
PSI CSCBARR4 Barracuda 4 Key Chuck
PSI CSCBARR4 Barracuda 4 Key Chuck
