Pullmaster PL8 Technical reference manual

070228
INSTRUCTION AND PARTS MANUAL
MODEL PL8
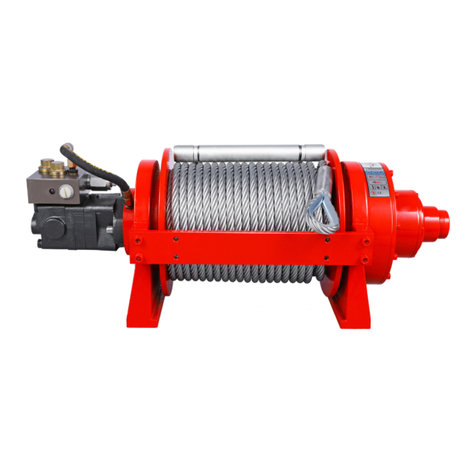
PLANETARY HYDRAULIC WINCH
READ THIS MANUAL BEFORE INSTALLING, OPERATING OR
SERVICINGTHISPRODUCT. THISMANUALCONTAINSIMPORTANT
INFORMATION. MAKETHISMANUALAVAILABLETOALLPERSONS
RESPONSIBLEFORTHEOPERATION,INSTALLATION,SERVICING
ANDMAINTENANCEOFTHISPRODUCT.
PULLMASTER WINCH CORPORATION
8247-130thStreet,Surrey, B.C. V3W7X4,Canada
Telephone: 604-594-4444 Fax: 604-591-7332
Website:www.pullmaster.com
E-mail:[email protected]
PMC271
THE LOGICAL CHOICE

US.DIST.01.01.07 [PULLMASTER LOGO]
Pullmaster Limited Warranty Effective 8/1/2008
SUPERSEDES ALL PRIOR WARRANTIES
Seller warrants that each article (whether Gear Drive Products, Brake Products and/or Winch Products, all of which are covered hereunder)
sold under this order shall at the time of shipment (i) conform to applicable specifications, and (ii) be free from defects in material and
workmanship during normal and ordinary use and service (the "Warranty").
Buyer's exclusive remedy and Seller's sole obligation under this Warranty shall be, at Seller's option, to repair or replace any article or part
thereof which has proven to be defective, or to refund the purchase price of such article or part thereof. Buyer acknowledges that Buyer is
knowledgeable concerning the articles covered by this Warranty and sold in connection therewith which are being purchased, that Buyer has
reviewed this Warranty and that the remedies provided hereunder are adequate and acceptable to Buyer.
This Warranty shall expire one (1) year from the date the article is first shipped by Seller. Notice of claimed breach of this Warranty must be
given by Buyer to Seller within the applicable period. Such notice shall include an explanation of the claimed warranty defect and proof of
date of purchase of the article or part thereof for which warranty coverage is sought. No allowances shall be made by Seller for any
transportation, labor charges, parts, "in and out" costs, adjustments or repairs, or any other work, unless such items are authorized in writing
and in advance by Seller. Nor shall Seller have any obligation to repair or replace items which by their nature are expendable.
If an article is claimed to be defective in material or workmanship, or not to conform to the applicable specifications, Seller will either
examine the article at Buyer's site or issue shipping instructions for return to Seller. This Warranty shall not extend to any articles or parts
thereof which have been installed, used, or serviced otherwise than in conformity with Seller's applicable specifications, manuals, bulletins,
or instructions, or which shall have been subjected to improper installation, operation, or usage, misapplication, neglect, incorrect
installation, overloading, or employment for other than normal and ordinary use and service. This Warranty shall not apply to any article
which has been repaired, altered or disassembled, or assembled by personnel other than those of Seller. This Warranty shall not apply to
any article upon which repairs or alterations have been made (unless authorized in writing and in advance by Seller). This Warranty shall
not apply to any articles or parts thereof furnished by Seller to Buyer's specifications and/or furnished by Buyer or acquired from others at
Buyer's request.
SELLER MAKES NO EXPRESS WARRANTIES AND NO IMPLIED WARRANTIES OF ANY KIND, OTHER THAN THE WARRANTY
EXPRESSLY SET FORTH ABOVE. SUCH WARRANTY IS EXCLUSIVE AND IS MADE AND ACCEPTED IN LIEU OF ANY AND ALL
OTHER WARRANTIES, EXPRESS OR IMPLIED, INCLUDING WITHOUT LIMITATION THE IMPLIED WARRANTIES OF
MERCHANTABILITY AND FITNESS FOR A PARTICULAR PURPOSE.
Buyer expressly agrees that Seller is not responsible to perform any work or investigation related in any way to tensional vibration issues
and is not responsible for the detection or remedy of Natural Frequency Vibration of the mechanical system in which the unit is installed.
Buyer acknowledges, understands and agrees that this Warranty does not cover failures of the unit which result in any manner from the
operation of the machine or unit at vibration frequencies at or near the natural frequency vibration of the machine in such a way that damage
may result. Buyer expressly agrees that Seller is not responsible for failure damage or accelerated wear caused by machine or ambient
vibration. Further, Buyer acknowledges and agrees that Buyer is always solely responsible for determination and final approval of the
“application factor”which may be used in Seller’s calculations, and this application factor is 1.0 unless otherwise stated in Seller’s quotation
specifications.
The remedies for this Warranty shall be only those expressly set forth above, to the exclusion of any and all other remedies of whatsoever
kind. The limited remedies set forth above shall be deemed exclusive, even though they may fail their essential purpose. No agreement
varying or extending the foregoing Warranty, remedies, exclusions, or limitations shall be effective unless in a writing signed by an executive
officer of Seller and Buyer. This Warranty is non-transferable. If a party who had purchased articles from Buyer, or from persons in privity
with Buyer, brings any action or proceeding against Seller for remedies other than those set forth in this Warranty, Buyer agrees to defend
Seller against the claims asserted in such action or proceeding at Buyer’s expense, including the payment of attorneys’fees and costs, and
indemnify Seller and hold Seller harmless of, from and against all such claims, actions, proceedings or judgments therein. Buyer also
agrees to defend and indemnify Seller of, from and against any loss, cost, damage, claim, debt or expenses, including attorneys’fees,
resulting from any claims by Buyer or third parties to property or injury to persons resulting from faulty installation, repair or modification of
the article and misuse or negligent operation or use of the article, whether or not such damage to property or injury to persons may be
caused by defective material, workmanship, or construction. ADVISORY: Winches and hoists are not approved for lifting or handling
personnel or persons unless specifically approved in writing from Seller for the specific intended application.
Under no circumstances shall Seller be liable (i) for any damage or loss to any property other than the warranted article or part thereof, or (ii)
for any special, indirect, incidental, or consequential damage or loss, even though such expenses, damages, or losses may be foreseeable.
The foregoing limitations on Seller's liability in the event of breach of warranty shall also be the absolute limit of Seller's liability in the event
of Seller's negligence in manufacture, installation, or otherwise, with regard to the articles covered by this Warranty, and at the expiration of
the Warranty period as above stated, all such liabilities shall terminate. Buyer’s purchase of any article(s) covered by this Warranty shall
constitute acceptance of the terms and conditions hereof and shall be binding upon Buyer and Buyer’s representatives, heirs and assigns.
The laws of the Province of British Columbia shall govern Buyer’s rights and responsibilities in regard to this Warranty and the transaction(s)
subject thereto, and the Province of British Columbia shall be the exclusive forum and jurisdiction for any action or proceedings brought by
Buyer in connection herewith or any dispute hereunder. If any of the terms and conditions contained within this Warranty are void, the
remaining provisions thereof are and shall remain valid and enforceable.
Note: Prices and specifications contained in this price book are subject to change without notice.

PAGE 1
271REV.051117
1. Do not install, operate or service winch before
reading and understanding manufacturer’s
instructions.
2. The winch described herein is not designed for
operations involving lifting or moving personnel.
3. Do not lift or carry loads over people.
4. Do not exceed recommended operating pressure
(psi) and operating volume (gpm).
5. Do not jerk the winch. Always smoothly
accelerate and decelerate load.
6. Do not operate a damaged, noisy or
malfunctioning winch.
7. Do not leave a load suspended for any extended
period of time.
8. Never leave a suspended load unattended.
9. Winch should be maintained and operated by
qualified personnel.
10. Inspect winch, rigging, mounting bolts and hoses
before each shift.
11. Warm-up equipment before operating winch,
particularly at low ambient temperatures.
12. Verify winch function by raising and lowering a
full test load to a safe height before each shift.
13. Do not weld any part of the winch.
14. Verify gear lubrication and brake circulation
supply and return before operating winch.
15. Be sure of equipment stability before operating
winch.
16. Wear proper clothing to avoid entanglement in
rotating machinery.
17. Always stand clear of the load.
The planetary hydraulic winches and drives are made for hoisting and lowering loads and to be operated by trained and professional
personnel. They are not designed for operations involving lifting or moving personnel. The winches are powered by hydraulic power.
The ropes/cables for hoisting operations are not supplied by PULLMASTER. The winches are always assembled in an application,
they do not function as an independent machine and it is not allowed to use them as such.
Thewinchesaretobeusedwithinthespecificationsaslistedinthemanualunder“SPECIFICATIONS”.Otheruseasforeseen
in the functional description of the hydraulic winch is not allowed without written permission from PULLMASTER.
FAILURETOCOMPLYWITHTHEFOLLOWINGSAFETY
RECOMMENDATIONSANDLOCALRULESAND
REGULATIONSWILLRESULTINPROPERTY
DAMAGE,SEVEREINJURYORDEATH.
Definition: Caution indicates a potentially
hazardous situation which, if not avoided may
result in minor or moderate injury.
Definition: Warning indicates a potentially
hazardous situation which, if not avoided could
result in death or serious injury.
Definition: Danger indicates a potentially
hazardous situation which, if not avoided will
result in death or serious injury.
18. Use only recommended hydraulic oil and gear
lubricant.
19. Keep hydraulic system clean and free from
contamination at all times.
20. Maintain winch and equipment in good operating
condition. Perform scheduled maintenance regularly.
21. Keep hands clear when winding wire rope onto
the winch drum.
22. Do not use the wire rope as a ground for welding.
23. Rig the winch carefully. Ensure that the wire rope
is properly anchored to the correct cable anchor slot at
the cable drum.
24. Do not lift a load with a twisted, kinked or
damaged wire rope.
25. Consult wire rope manufacturer for size, type and
maintenance of wire rope.
26. Maintain five wraps of wire rope on the cable
drum at all times.
27. In case of a power failure or breakdown leading
to an unexpected stop of the hydraulic power circuit,
stand clear of the area and the load being hoisted,
take the necessary precautions to prevent access to
area where the load is halted.
28. The noise level of the winch is 89 dBA measured
on a distance of 1.00 meter, 1.60 meters high. The
measuring equipment used was: Realistic #42-3019.
29. Clean up any oil spillage immediately.
30. Wear proper clothing and personal protection
equipment such as, footwear, safety goggles and a
hard hat. Read manual first.
DANGER
SAFETY RECOMMENDATIONS

PAGE 2
DESCRIPTION OFTHE MODEL PL8
GENERAL DESCRIPTION:
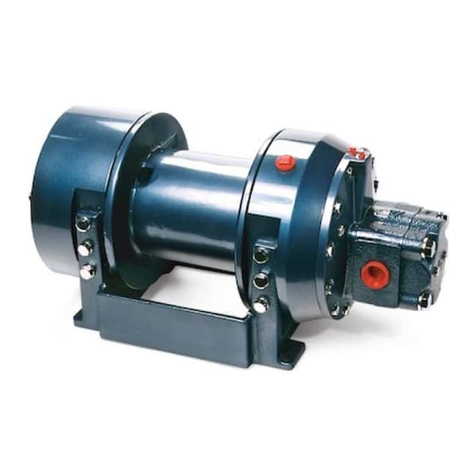
The PULLMASTER Model PL8 is a planetary, hydraulic winch having equal speed in both directions. The main
components of this unit are:
✛Hydraulicgearmotor
✛Multi-disc brake with static and dynamic function
✛Over-runningclutch
✛Primaryplanetreduction
✛Finalplanetreduction
✛Brakehousing
✛Finaldrivehousing
✛Cabledrum
FUNCTION IN FORWARD ROTATION (HOISTING):
Inforwardrotation,theoutputtorque andrpm ofthehydraulicmotoraretransmittedto thesungear oftheprimary
planet reduction. The output of the primary reduction stage is transmitted to the final reduction stage by the final
sungearshaft,whichissplinedtotheprimaryplanethub. Inforwardrotation,orwhenaloadisraised,anover-running
clutch,whichconnectsthemotordriveshafttotheautomaticbrakeassembly,permitsfreerotationofthesungear
withouteffectingthebrake. Whenthewinchrotationisstopped,theloadonthecabledrumcausestheover-running
clutch to lock and the maximum load is held safely by the disc brake.
FUNCTION IN REVERSE ROTATION (LOWERING):
Inreverserotation,hydraulicpressurefromthereversingsideofthehydraulicmotorischannelledtothebrakepiston
causingthebrakepistontoreleasethemultidiscbrakeagainstanumberofbrakesprings.Theover-runningclutch,
connecting the motor drive shaft to the brake assembly, locks, causing the brake discs to rotate between divider
plateswhichareengagedintothebrakehousing.Iftheloadonthecabledrumtendstoeffecttheloweringspeed,
the resulting pressure drop in the brake piston causes friction between the brake discs and the divider plates. In
thisway,acompletelysmoothpayingoutspeedcanbeachievedinasteplessoperationbymodulationof thewinch
control handle. When the control handle is returned to neutral position, rotation stops and the disc brake applies
automatically.Ahydrauliccounterbalancevalveorholdingvalveisnotrequiredforsmoothandpositiveoperation
of the automatic brake.
During the lowering operation of the winch, the friction created by the brake discs results in temperature. This
temperature is dissipated by an internal circulation flow, supplied out of the hydraulic motor or from an external
source.For modelswithexternal circulation,supplywinchwith approximately2.5(US) gpm-9.5 l/min circulation
flow. This circulation flow must be returned directly to the reservoir with a permissible back pressure of 30 psi (2
bar).
IMPORTANT: Undernocircumstancesmustthebackpressureinthebrakehousingbepermittedtoexceed30
psi(2bar).Excessivepressureinthebrakehousingwilldamagetheoilsealseparatingthebrake
housing from the drum interior. Damage to this seal will cause the drum to fill up with hydraulic
fluid.
271REV.970407

PAGE 3
BASIC UNIT SERIES
SIZE OF UNIT
TYPE OF BRAKE
-3 Automaticbrake, counterclockwisedrumrotation,
internalcirculationflow
-4 Automaticbrake, externalbrake release,counterclockwise
drumrotation,internalcirculationflow
-5 Automatic brake, external brake release, clockwise drum
rotation,internalcirculationflow
-6 Automatic brake, clockwise drum rotation,
internalcirculationflow
-7 Automaticbrake, counterclockwisedrumrotation,
externalcirculationflow
-8 Automaticbrake, externalbrake release,counterclockwise
drumrotation,externalcirculationflow
-9 Automatic brake, external brake release, clockwise drum
rotation,externalcirculationflow
-10 Automatic brake, clockwise drum rotation,
externalcirculationflow
HYDRAULIC MOTOR
-30
COMMERCIALWM31
hydraulicmotor,2inchgearsection
(Othergear sections for this motor are optional)
DRUM SIZE
-1 9.6inchdrumdiameterx14.1inchflangediameterx8inchlength
-STANDARD
(For other drum sizes refer to APPENDIX A)
DESIGN REVISION
SPECIFICATION NUMBER
Describesfeaturesnotidentified by preceding codes
NOTE: Clockwise and counterclockwise drum rotation is the direction of rotation for pulling or hoisting,
established by looking at the hydraulic motor.
EXPLANATION OF MODEL CODING
PL 8 - XX - XX - XX - X - XXXX
271REV.950401

PAGE 4
OPTIONS
CABLE DRUM SIZES:
Aside from the standard drum sizes listed in APPENDIX A, the PULLMASTER Model PL8 planetary winch can
besuppliedwithoptional drums to accommodate large wire rope storage capacity.
DRUM GROOVING:
CabledrumsforthePULLMASTERModelPL8planetarywinchcanbegrooved.Wherethisoptionisarequirement,
it is necessary to state the size of wire rope which is to be used with the winch.
OPTIONAL GEAR SECTION FOR THE HYDRAULIC MOTOR:
TheperformanceofthestandardPULLMASTERModelPL8planetarywinchisbasedonaCOMMERCIALWM31
hydralicmotor,havinga2inchgearsection.Theperformanceofthewinchcanbechangedbyusingdifferentgear
sections. (Contact the factory for performance information of different gear sections).
HYDRAULIC MOTORS FOR HIGH PRESSURE HYDRAULIC SYSTEMS:
The operating pressure of the PULLMASTER Model PL8 planetary winch is limited to 2150 psi (148 bar). For
hydraulicsystemsoperatingwithhigherhydraulicpressure,thewinchcanbesuppliedwithahydraulicpistonmotor,
whichwillprovideforthesamebasicperformanceintermsoflinepullandlinespeedcapacity(contactthefactory
forthisrequirement).
ThePULLMASTERWINCHCORPORATIONwillconsiderotheroptionsforquantityrequirements.
FAILURETO PROPERLY VENT EXTERNAL BRAKERELEASE PORT
WILLTRAP BRAKE PRESSURE AND ALLOWTHE LOADTO DROP,
CAUSINGPROPERTYDAMAGE,SEVEREINJURYORDEATH.
WINCHESSUPPLIED WITHEXTERNAL RELEASE OPTION
MUSTBECONNECTEDACCORDINGTOTYPICALHYDRAULICCIRCUIT.
CLOCKWISE ROTATION:
ThedrumrotationofthestandardPULLMASTERModelPL8planetarywinchiscounterclockwiseforhoisting,when
lookingatthehydraulicmotorofthewinch.Drumrotationforclockwisehoistingdirectionisavailableasanoption.
EXTERNAL BRAKE RELEASE:
PULLMASTER planetary winches can be supplied with an external brake release which permits release of the
automatic disc brake from an external pressure source.
271REV.970407
DANGER

PAGE 5
SPECIFICATIONS
Performancespecificationsarebasedonstandardhydraulicmotor,gearratioandcabledrumwith1/2inchdiameter
wire rope. For other cable drums refer to APPENDIX A. Performance specifications for winches supplied with
optionalmotorsareprovidedinattachedsupplement.
CABLE DRUM DIMENSIONS (STANDARD DRUM):
Barreldiameter 9.63 in 244mm
Flangediameter 14.13in 359mm
Barrellength 8.00 in 203mm
CABLE STORAGE CAPACITY:
(Size of wire rope) 3/16 in 1234 ft 376 m
1/4 in 684 ft 209 m
5/16in 462 ft 141m
3/8 in 294 ft 90 m
7/16in 215 ft 66 m
1/2 in 196 ft 60 m
9/16in 140 ft 43 m
MAXIMUM OPERATING PRESSURE: 2150psi 148bar
MAXIMUM OPERATING VOLUME: 37(US)gpm 140l/min
MINIMUM OPERATING VOLUME: 11(US)gpm 42 l/min
DRUM TORQUE AT MAXIMUM PRESSURE: 35438lb-in 4004Nm
DRUM RPM AT MAXIMUM VOLUME: 46rpm
LINE PULL AT MAXIMUM PRESSURE:
Bare drum 7000 lb 31.1kN
Fulldrum 5202lb 23.1 kN
LINE SPEED AT MAXIMUM VOLUME:
Bare drum 122fpm 37 m/min
Fulldrum 164fpm 50 m/min
PERMISSIBLE SYSTEM BACK PRESSURE AT
MOTOR RETURN PORT: 65 psi 4.5 bar
PERMISSIBLE PRESSURE
AT CIRCULATION RETURN PORT: 30 psi 2 bar
LUBRICATING OIL: Refer to RECOMMENDATIONS for viscosity and instructions.
Refer to APPENDIX A for oil volume required.
271REV.011203

PAGE 6
PG-PL8
LINE PULL VS. OIL PRESSURE
LINE SPEED VS. OIL VOLUME
271REV.950401
PERFORMANCE GRAPHS
Performance graphs are based on standard hydraulic motor, gear ratio and cable drum with 1/2 inch diameter
wire rope.
BARE DRUMBARE DRUM
FULL DRUMFULL DRUM
LINE PULL - kN
LINE SPEED - m/min
FULL DRUMFULL DRUM
BARE DRUMBARE DRUM
1720
2150
1290
860
430
0
40
32
24
16
8
0
7200600048003600240012000
0 5.3 10.7 16.0 21.4 26.7 32.0 148
119
89
60
30
0
LINE PULL - lb
OIL PRESSURE - psi
OIL PRESSURE - bar
270 54 81 108 135 162
0 8 16 25 33 41 49
0
LINE SPEED - fpm
30
60
91
121
151
OIL VOLUME - (US)gpm
OIL VOLUME - l/min

PAGE 7
HC-PL8
271REV.950401
TYPICAL HYDRAULIC CIRCUIT
800 PSI [55 BAR]
1/2(US)GPM [2 L/MIN]
REQUIRED FOR MODELS
SUPPLIED WITH EXTERNAL
BRAKE RELEASE OPTION
FILTER
HYDRAULIC
PUMP
RESERVOIR
RETURN TO CENTER
4-WAY SPRING
(MOTOR SPOOL)
CONTROL VALVE
PRESSURE
RELIEF VALVE
CIRCULATION SUPPLY
LINE 2.5 (US) gpm
[9.5 l/min]
EXTERNAL CIRCULATION
MODELS ONLY
CIRCULATION
RETURN LINE
(MUST GO
DIRECT TO
RESERVOIR)

PAGE 8
RECOMMENDATIONS
HYDRAULIC FLUID:
ThehydraulicfluidselectedforusewithPULLMASTER
planetary winches should be a high grade, petroleum
based fluid, with rust, oxidation and wear resistance.
Fluid cleanliness and operating viscosity are critical to
winch reliability, efficiency and service life.
Foroptimumperformance,therecommendedviscosity
rangeatoperatingtemperatureis81-167SUS(16-36
CS).Forextremeoperatingconditionsofshortduration,
the maximum viscosity range of 58 - 4635 SUS (10 -
1000 CS) should not be exceeded.
For optimum performance, the winch recommended
hydraulic fluid temperature operating range is 80 -
150F (27 - 66 C). For extreme operating conditions of
shortduration,themaximumtemperaturerangeof-5 -
180F (-21 - 82 C) should not be exceeded.
LUBRICATION:
The winch gear train requires oil bath lubrication. The
winchisshippedfromthefactorywithoutlubricatingoil.
IMPORTANT: ADD LUBRICATING OIL UP TO
THELEVEL OFTHEOIL FILLPORT
BEFORE RUNNING WINCH.
Refer to INSTALLATION DIMENSIONS for location of
lubricatingoilfillport.RefertoAPPENDIXAforquantity
of oil required. For normal operating temperature use
SAE90lubricatingoil.Consultlubricatingoilsupplieror
factoryfortemperaturesbeyondnormaloperatingrange.
HYDRAULIC PUMP:
For maximum performance of the PULLMASTER
planetary winch, the hydraulic pump must supply the
maximumflowofhydraulicfluidatthehydraulicpressure
stated in SPECIFICATIONS.
HYDRAULIC CONTROL VALVE:
The standard control valve used for operating the
PULLMASTERplanetary winchmusthave afour-way,
spring return to neutral feature, which provides for
open flow from the pressure ports of the winch to the
reservoir in neutral position of the control (motor
spool). It is important to point out that good speed
control, especially when lowering a load, depends on
the “metering” characteristics of the control valve. The
bettertheoilflowis“metered”thebetterwillbethespeed
control.
HYDRAULIC PRESSURE RELIEF:
The hydraulic circuit for the PULLMASTER planetary
winch requires a pressure relief set at the operating
pressure(seeSPECIFICATIONS).Usually,apressure
relief is part of the hydraulic control valve. Where this
isnot the case, a separate pressure relief valvemust
be installed and set at the recommended maximum
pressure.
HYDRAULIC RESERVOIR:
It is recommended that the hydraulic reservoir has
sufficient capacity to provide good heat dissipation in
order to prevent over-heating of the hydraulic fluid. The
hydraulic reservoir should be made from clean and
scale-free material to prevent contamination of the
hydraulic fluid. In order to prevent air from being mixed
with the hydraulic fluid, the reservoir should have an
over-flow baffle separating the return lines from the
suctionlineandallreturnlinesshouldenterthereservoir
below the fluid level. The reservoir should be mounted
close to and above the hydraulic pump in a location
whichprovidesforfreeaircirculationaroundthereservoir.
HYDRAULIC HOSES:
The following hydraulic hoses are recommended for
maximum efficiency of the PULLMASTER Model PL8
planetary winch:
Pressure lines:
Equivalent to SAE 100R12-16
Circulation return line:
Equivalent to SAE 100R4-12
Itisrecommendedthatalargersizeofhydraulichoseis
installedwherethepressurelinesareexcessivelylong.
HYDRAULIC FILTER:
Consult hydraulic component manufacturer for
recommendation. Generally, 5 to 10 micron filters are
acceptable. In order to prevent accidental stoppage of
the return line flow, the filter should have a by-pass
feature.
USE OF AN E STOP:
(FOR EUROPEAN MACHINERY DIRECTIVE APPLICATIONS)
The use of an E stop (emergency) is mandatory in the
controls circuit. The E stop is to be placed in the
operator’s control panel. The E stop must be designed
and placed in line with EN 60204 and EN 418.
271REV.011125

PAGE 9
INSTALLATION INSTRUCTIONS
TheinitialinstallationormountingofaPULLMASTERplanetarywinchiscriticallyimportantforproperoperationand
performance. If the winch is mounted to an uneven surface, the centre line of the unit can be distorted to a point
wherethewinchwillnotoperate ineither direction.Itisthereforeveryimportantthat thefollowing instructionsare
observedwhenaPULLMASTERplanetarywinchisinstalled:
1) Makecertainthatthe mounting platform is sufficiently strong in order to avoid deflection when a load is lifted.
2) Set the winch on the mounting platform and check for surface contact on all mounting pads of the winch.
3) If there is a space between the mounting surface and one of the mounting pads, the mounting surface is not
even and the space below the mounting pad must be shimmed. If this condition exists, proceed as follows:
a) Install mounting bolts snug tight on the three mounting pads which are in contact with the mounting
surface. For mounting bolt size and grade see INSTALLATION DIMENSIONS.
b) Measure the space underneath the fourth mounting pad with a feeler gauge and use shim stock of
equivalent thickness in the space between the mounting pad and the mounting surface.
c) Onlyafter this procedure, should the fourth mounting bolt be installed. Tighten all four bolts as per BOLT
TORQUE CHART.
4) Fill the winch with lubricating oil. (See APPENDIX A for oil volume required).
5) Use recommended circuit components and hydraulic hoses.
6)
Thecirculationreturnline of the winch should be plumbed in such a manner that the brake housing remains full
ofoilatalltimes.Connectthereturnlinedirectlytoreservoir.Donotconnecttoacommonreturnline.
7) Before operating the winch with a load, verify adequate circulation flow through the circulation return line as
statedin TYPICAL HYDRAULIC CIRCUIT.Verifythat pressure measured atthecirculationsupply port does
not exceed the permissible pressure stated in SPECIFICATIONS. Winches equipped with the internal
circulation option will supply circulation flow only when the winch is run in the lowering direction.
8) If, after new installation, the winch does not function properly, refer to the TROUBLESHOOTING section of
this manual.
FAILURE TO FOLLOW INSTALLATION INSTRUCTIONS WILL
RESULT IN PROPERTY DAMAGE, SEVERE INJURY OR DEATH.
271REV.970407
DANGER

PAGE 10
CABLE ANCHOR SLOT
CABLE ANCHOR
OPERATING INSTRUCTIONS
FAILURE TO FOLLOW OPERATING INSTRUCTIONS WILL
RESULT IN PROPERTY DAMAGE, SEVERE INJURY OR DEATH.
271REV.051117
DANGER
WIREROPEINSTALLATION
Counterclockwise hoistingwinchshown.
(Use cable anchor slot on opposite side
of drum for clockwise hoisting winch.)
Feed the wire rope through the cable
anchor slot. Loop rope back into slot
as shown. Insert cable anchor into
slot, small end first and long side
nearest the drum flange. Pull rope
tight to wedge rope in slot.
SI1013-PL8
2) Onwireropeinstallation,caremustbetakenthatthewireropeiswrappedcompletelyaroundthecableanchor
andproperlypulledintothecableanchorslotinthecabledrum. Thecabledrumrequires5wrapsofwirerope
for safety.
3) Thewinchoperationiscontrolledbyasinglecontrolvalveleverwhichhasaforward,areverseandaneutral
position. Speed control in either direction is obtained by modulation of the control valve lever. Maximum line
speed in either direction is obtained when the control valve lever is moved as far as it can go. The disc brake
of the winch will come on automatically when the winch control lever is returned to neutral.
4) Always warm up equipment prior to operating winch, particularly in low ambient temperature. Circulate
hydraulic oil through the winch control valve for several minutes to warm the hydraulic system. To prime the
winch with warm oil, operate the winch at slow speed, forward and reverse, several times.
5) Preventcorrosion damage to winch interior.If not used regularly, run winchup and down at leastonce every
two weeks.
6) Toensure proper winch installation and function, raise and lowera full test load to a safe height beforeusing
winch for regular operation at the start of each shift.
If, after a new installation, the winch does not function properly, refer to the TROUBLESHOOTING section
of this manual.
After the PULLMASTER planetary winch has been installed in accordance with the INSTALLATION
INSTRUCTIONS, the wire rope can be fastened to the cable drum.
IMPORTANT: The ropes, chains, slings, etc. are not part of the winch and are not covered by this manual.
Refer to manufacturer’s handling, inspection and maintenance recommendations to avoid
potentialaccidents.Forselectionofropes,etc.pleasecheckfollowingproductstandards:DIN
15020, prEN818-1/9, prEN 1492-1/2, prEN 1677-1/3 and other relevant product standards.
1) Thecabledrumofthe PULLMASTERplanetary winchhas twocable anchorslots, oneforclockwiseandone
forcounterclockwisehoisting.Standardrotationforhoistingiscounterclockwisewhenlookingatthehydraulic
motor of the unit. It is critical to select the cable anchor slot which will permit winding of the wire rope on the
drum in the correct direction of rotation. If the wire rope is wound on the cable drum in the wrong direction of
rotation,thewinchwillhavenobrakingcapacity.Eachwinchisshippedfromthefactorywithalabelonthedrum,
indicating the correct cable anchor slot.

PAGE 11
TROUBLE SHOOTING
GENERAL:
In most cases, when the hydraulic winch does not perform satisfactorily, the cause for malfunction is found
somewhere in the hydraulic circuit. Before the winch is removed from its mounting and disassembled, all of the
hydraulic circuit components should be checked for proper function.
IMPORTANT:
The hydraulic oil volume relates to the line speed or rpm of the winch.
Therefore,ifthewinchdoesnotproducethespecifiedmaximumratedlinespeedordrumrpm,alossofhydraulic
flow somewhere in the hydraulic circuit can be analysed. If this condition exists, install a flow meter into the
hydraulic circuit to check the volume of oil supplied to the pressure port of the hydraulic winch motor when the
winchcontroliscompletelyopened.Theflow meter should indicate the maximum operating volume. If this test
indicates a loss of hydraulic flow, check the hydraulic pump, the relief valve and the control valve. If the pump
is driven by V-belts, check for belt slippage.
The hydraulic pressure relates to the pulling capacity of the winch.
Ifthewinchwillnotproducethespecifiedmaximumlinepull,installapressuregaugein thepressurelineleading
to the hoisting port on the hydraulic winch motor. Stall the winch to prevent rotation of the drum and then open
the control valve. Check the hydraulic pressure reading of the installed pressure gauge. If the pressure reads
below the specified maximum operating pressure, look for trouble in the hydraulic pump, the relief valve and
thecontrolvalve.IfthehydraulicpumpisdrivenbyV-belts,checkforbeltslippage.Whencheckingoilpressure
and volume in the hydraulic circuit, make sure that the hydraulic reservoir is filled to the top level and the
hydraulic pump is running at maximum operating rpm.
Only after the hydraulic system has been checked and found to be in order, use the following indications for
probable causes of failure in the winch:
PROBABLE CAUSEFAILURE
Winch will not produce line pull at maximum
pressure as listed in SPECIFICATIONS.
Winch will not produce line speed at maximum
volume as listed in SPECIFICATIONS.
Winch will not reverse.
271REV.960215
a) Winch is mounted to an uneven surface.
(See INSTALLATION INSTRUCTIONS.)
b) Cable sheaves or block purchase operated with the
winch are not turning freely.
c) Damage or wear in the hydraulic motor.
d) The relief valve pressure may be set too low.
e) Excessive back pressure in the hydraulic circuit might
cause the automatic brake to release momentarily.
a) Winch is mounted to an uneven surface.
(See INSTALLATION INSTRUCTIONS.)
b) Cable sheaves or block purchase operated with the
winch are not turning freely.
c) Damage or wear in the hydraulic motor.
d) Excessive back pressure in the hydraulic circuit.
a) Leakage outofthebrake piston prevents the discbrake
from being released against the brake springs. This is
caused by damaged O-ring seals on the brake piston.
b) Insufficienthydraulicpressure. (See SPECIFICATIONS
for minimum operating pressure.)
c) Winch is mounted to an uneven surface.
(See INSTALLATION INSTRUCTIONS.)
d) Hydraulic pressure is not reaching the brake piston due
to plugged passages.

PAGE 12
TROUBLE SHOOTING CONTINUED
a) Brake plates or divider plates have been damaged by
contaminationinthehydraulicfluidor lackofcirculation
flow in the brake housing.
b) Brakepistonis seized in thebrakehousing because of
contamination in the hydraulic fluid.
c) Excessive back pressure in the return line of the
hydraulic circuit causes the brake to release.
d) Controlvalvehas incorrectspoolwhichtrapshydraulic
pressure in the brake piston when the control valve
handleisreturnedtoneutralposition.Forproperfunction
oftheautomaticbrake,bothpressureportsofthewinch
must be open to the reservoir in neutral position of the
control valve.
e) Wireropeisfastenedtotheincorrectcableanchorslot.
f) Spragclutchisdamagedorsurfacewherespragclutch
engageson motor drive shaft or brake hub are wornor
indented.
g) Winch supplied with external brake release option is
not plumbed per TYPICAL HYDRAULIC CIRCUIT.
Failure to vent external brake release port to reservoir
may trap pressure and cause winch brake to slip.
a) Pump is too slow. Pump rpm must be maintained at
normal operating speed when a load is lowered.
b) Brake isrunning too hot.This is causedby a complete
lack of, or insufficient circulation flow. To check the
circulation, observe the flow of oil from the circulation
return line of the winch (approx. 2-3 (US) gpm (8-11 l/
min) when the winch is reversed.
c) Controlvalveforthewinchoperationhaspoormetering
characteristics.
d) Damaged brake plates or divider plates.
e) The over-running clutch, which connects the motor
shaft with the brake assembly, is damaged.
f) Air has mixed with hydraulic oil resulting in foamy oil.
a) Oil leaks from the motor flange are caused by a
damaged O-ring seal on the motor flange.
b) Oil leaks occurring between the cable drum flanges
and housing are caused by excessive pressure in the
brakehousing. Excessivepressureinthebrakehousing
willdamagetheoilsealbetweenthebrakehousingand
cable drum interior.
PROBABLE CAUSE
FAILURE
Oil leaks.
Refer to the SERVICE INSTRUCTIONS if it becomes necessary to disassemble the Model PL8 winch.
271REV.950401
Brake vibrates when lowering a load.
Brake will not hold.

PAGE 13
271 REV.970407
SERVICE INSTRUCTIONS
GENERAL:
Before attempting disassembly of the PULLMASTER Model PL8 planetary winch, the following instructions for
disassemblyandreassemblyshouldbereadandunderstood:
Itissuggestedthatallexpendableparts,suchasO-ringsandoilseals,arenotreusedonreassembly. Itistherefore
importanttohave asealkit(PartNo.23101)and,providingthehydraulicmotorhastobeserviced,asealkit(Part
No.23131)onhandbeforetheunitistakenapart.Twonewneedlebearings,item875,mayalsoberequired(Part
No.25322).
NOTE: Back up washers may be included with seal kit. Install with oil seals as per instructions. If not
present in seal kit, the oil seals supplied do not require backup washers.
A clean working area is of prime importance, similar to conditions used for service work on any other hydraulic
component.
All parts, as they are removed from the winch assembly, should be inspected for wear and damage. Worn or
damagedpartsmustbereplaced. Thoroughlycleanpartsbeforereassembly. Donotusesolventtocleanthebrake
friction plates.
Duringreassembly, lubricate all O-rings and oil seals with greasebefore installation.
In the following service instructions, reference to parts is made by numbers and shown on the applicable group
drawings.
DISASSEMBLY:
For the majority of required service or repair work, disassembly is required only on the brake housing of the
PULLMASTERModelPL8 planetary winch. There are no special toolsneededfor the service or repair work and
no adjustments or calibrations are necessary. Proceed with the disassembly as follows:
DISASSEMBLY OF HYDRAULIC MOTOR ASSEMBLY:
Iftheanalysedserviceorrepairworkrequiresaccesstotheinteriorofthebrakehousing,thehydraulicmotorshould
not be disassembled. In this case, the hydraulic motor should be removed together with the motor adaptor as a
complete assembly. If a problem has been analysed to be in the hydraulic motor, proceed with the disassembly
as follows:
1) Removethefourhexcapscrews,item951,togetherwiththelockwashers,item953,fromthemotorassembly.
IMPORTANT: Failureto exercise care when removing the motor port endcover or gear housing could
permanently damage the machined surfaces of these motor components. Take care not
to damage machined surfaces of motor components at disassembly.
2) Remove(prylooseifnecessary)portendcover,item870,togetherwithbearings,item875,andringseal,item
877. Thrust plate, item 885, and dowel pins, item 865, may stay in the gear housing.
3) If thrust plate comes off with the end cover, carefully pry it off of the bearings, item 875, and discard pocket
seals, item 887.
4) Remove gear set, item 881, which consists of two gears which are a matched set.
5) Carefullyprythegearhousing,item861,offofthemotoradaptor,item 800.Thrustplate,item885,anddowel
pins, item 865, may stay in the gear housing.
6) If thrustplatestaysonthemotoradaptor,carefullypryitoffofthebearings,item875,anddiscardpocketseals,
item 887.
7) Discard body seals, item 869. It is also advisable to replace ring seals, item 877, at this time. Bearings, item
875, have to be removed to allow access to the ring seals.

PAGE 14
SERVICE INSTRUCTIONS CONTINUED
Pocket seals, body seals, and ring seals in the hydraulic motor assembly are not part of the winch seal kit. The
seal kit for the hydraulic motor can be ordered from the factory under Part No. 23131. All parts of the hydraulic
motor,withtheexceptionofthemotoradaptor,item800,arestandardpartsofthe
COMMERCIALWM31
hydraulic
motor, having a 2 inch gear section. All of these parts can be ordered from PULLMASTER or COMMERCIAL
INTERTECH dealers in Canada, the United States and in most overseas areas.
REMOVAL OF HYDRAULIC MOTOR ASSEMBLY
If disassembly of the hydraulic motor is not necessary, proceed as follows:
1) Remove the12hexheadcapscrews,item821,withlockwashers,item823,fromthemotoradaptor,item800.
Sincebrakesprings,item752,applypressureagainstinsideofthemotoradaptor,itisrecommendedthat hex
capscrews are unscrewed, one turn at a time, until the spring pressure has been released. Complete motor
assembly,including motor adaptor, can now be removed from brakehousing assembly.
2) RemoveanddiscardO-ring,item801,andO-ring,item707.(O-ring,item801,sealspressuretransferholefor
automaticbrake release and is situated on flangeof brake housing.)ffffff
DISASSEMBLY OF BRAKE HOUSING ASSEMBLY
1) Aftermotorassemblyhasbeenremoved,allpartsofbrakeassemblyareaccessible.Remove10brakesprings,
item752. Thoroughlyexaminespringsfordamageandmeasureoveralllength. Overallspringlengthshould
be 1.99 inches. If any spring measures less than 1.93 inches, replace all springs as a set.
2) Pull motor drive shaft, item 730, and complete brake hub assembly from brake housing.
3) Disassemblebrakehubassembly by removing circlip, item 727, from motor drive shaft. Remove motor drive
shaftfrombrakehub,item720.Removespragclutchaligners,items722and724,supportwashers,item717,
sprag clutch, item 723, and sprag clutch spacer, item 726, from brake hub.
4) Thoroughly inspect motor drive shaft, item 730, and brake hub, item 720, particularly surfaces where sprag
clutch,item723,engages.Ifanyindentationorsurfacedamageisdetected,replacebrakehub,spragclutch
and motor drive shaft as a set.
5) Pullthebrakepiston,item750,outofbrakehousingusingtwo7/16-14NCbolts screwedinto twopuller holes
in piston and discard O-rings, item 751 and item 753.
6) Thoroughlyexamineinnerboresofthebrakehousingandouterdiametersofthebrakepistonforscoringcaused
byhydraulicfluidcontamination. Minorsurfacedamagemayberepairedbypolishingwithafineemerycloth.
271 REV.970407
MINORSURFACEDEFECTSWHERETHESPRAGCLUTCHENGAGES
THEMOTOR DRIVE SHAFT AND BRAKE HUB, WILLRESULT IN
BRAKEFAILUREANDALLOWTHELOADTODROP,CAUSING
PROPERTYDAMAGE,SEVEREINJURYORDEATH. THOROUGHLY
INSPECTTHESEAREASANDREPLACEMOTORDRIVESHAFT,
SPRAGCLUTCHANDBRAKE HUB ASASET.
DANGER

PAGE 15
7) Removefourfrictionplates,item715,togetherwithfivedividerplates,item714,andinspectfordamageorwear.
Platesshouldbeflatandsmooth. Platesshouldnotshowheatdiscoloration. Papermaterialonfrictionplates
should be intact and grooved. If any damage is detected, replace friction and divider plates as a set.
8) Removebrakespacer, item 712.
9) Remove oil seal, item 711, and backup washer, item 710, and discard.
Allpartshavenowbeenremovedfrombrakehousingandthereisnoneedforfurtherdisassemblyunlessafailure
has been analyzed in the remaining winch assembly.
DISASSEMBLY OF PRIMARY DRIVE
If primary drive requires service or repair, disassemble as follows:
1) Remove pipe plug, item 503, from cable drum, item 500, to drain lubricating oil from winch interior.
2) Removeeightcapscrews,item971,andlockwashers, item973. Removetwo tiebars, item970.Standwinch
upright on its end housing.
3) Removesixcapscrews, item 537, and lockwashers, item 541, throughaccessopening in brake housing. Lift
brakehousingwithbearingflangeassemblyoutofcabledrum,item500.RemoveanddiscardO-ring,item539.
4) Pull bearing flange, item 530, and ball bearing, item 533, off of brake housing, item 700.
5) Remove circlip, item 535. Push ball bearing, item 533, out of bearing flange. Inspect and replace if damged.
6) Remove and discard oil seal, item 531.
7) Inspect planet hub stopper, item 704, for damge or wear and replace if less than 0.13 inch thick.
8) Removeprimarysungear,item440.
9) Removeprimaryplanethub assembly from cable drum.
10) Inspect planet hub stopper, item 402, for damage or wear and replace if less than 0.13 inch thick.
11) Inspect three primary planet gears, item 420, for damage or wear. If it is necessary to remove planet gears,
removecirclip, item 411, and pressplanet pin, item 410, out ofplanet hub, item 400. Inspectneedle bearing,
item 423, and two thrust washers, item 421, and replace if damaged or worn.
12) Remove final sungear, item 340, with circlip, item 341, and sungear stopper, item 344. Inspect stopper for
damage or wear. If stopper protrudes less than .03 inch from sungear, stopper should be replaced.
271 REV.970407
SERVICE INSTRUCTIONS CONTINUED
DAMAGEDFRICTIONORDIVIDERPLATESWILLREDUCE
BRAKINGCAPACITYANDALLOWTHELOADTODROP,CAUSING
PROPERTY DAMAGE, SEVERE INJURY OR DEATH. SOLVENT MAY
DAMAGE THE FRICTION PLATES. DO NOT USE SOLVENT TO CLEAN
THEFRICTIONPLATES.PERFORMTHOROUGHINSPECTIONAND
REPLACE FRICTION AND DIVIDER PLATES AS A SET.
DANGER

PAGE 16
DISASSEMBLY OF FINAL DRIVE
If final drive requires service or repair, disassemble as follows:
1) Remove final planet hub assembly from the cable drum.
2) Inspectthreefinalplanetgears,item320,fordamageorwear.Ifitisnecessarytoremoveplanetgears, remove
circlip,item311,andpressplanetpin,item310,outofthefinalplanethub,item300.Inspectseventeenloose
rollers, item 323, and two thrust washers, item 321, and replace if damaged.
Winches with optional -2 drum only:
2A) Remove coupling, item 520, from end housing spline. Proceed to step 3.
3) Pull the end housing, item 100, out of the cable drum ball bearing, item 507.
4) Removecirclip,item513.Pushballbearing,item507,outofthecabledrum.Inspectandreplaceifdamaged.
5) Remove and discard oil seal, item 505.
6) Inspectcabledrumgear teeth for damage or wear.
Thoroughly clean all parts. Use only new, well-greased O-rings and oil seals. Unless otherwise specified, torque
fasteners per BOLT TORQUE CHART at back of manual.
REASSEMBLY OF FINAL DRIVE
Reassemblefinaldrivebyreversingthedisassemblyprocedure:
1) Press a new, well-greased oil seal, item 505, into cable drum, item 500.
2) Press ball bearing, item 507, into cable drum and secure with circlip, item 513.
3) Press end housing, item 100, into the cable drum ball bearing, item 507.
Winches with optional -2 drum only:
3A) Replace coupling, item 520, onto end housing spline. Proceed to step 4.
4) Reassemblefinal planethubassembly. Usegreasetotemporarily hold17loose rollers,item323, in thebore
oftheplanetgear,item320.Positionthrustwashers,item321,oneithersideoftheplanetgearandpressplanet
pin, item 310, into the final planet hub, item 300. Retain with circlip, item 311.
5) Insert final planet hub assembly into the cable drum. Ensure that the planet hub spline is fully engaged.
REASSEMBLY OF PRIMARY DRIVE
Reassembleprimarydriveby reversingthedisassemblyprocedure:
1) Press a new, well-greased oil seal, item 531, into the bearing flange, item 530. Press ball bearing, item 533,
into bearing flange and install circlip, item 535. Press bearing flange assembly onto brake housing hub.
2) Verify planet hub stopper, item 704, is installed on brake housing hub.
3) Verify sungear stopper, item 344, and circlip, item 341, are installd on final sungear, item 340.
4) Install final sungear into primary planet hub, item 400.
5) Reassembleprimaryplanethubassembly.Pressneedlebearing,item423,intoplanetgear,item420.Position
thrustwashers,item421, on either side of planet gear and press planet pin,item410,intothe primary planet
hub, item 400. Retain with circlip, item 411.
SERVICE INSTRUCTIONS CONTINUED
271 REV.950401
REASSEMBLY:

PAGE 17
271 REV.970407
SERVICE INSTRUCTIONS CONTINUED
INCORRECT ASSEMBLY OF THE FRICTION PLATE AND DIVIDER PLATE
STACK WILL REDUCE BRAKING CAPACITY AND ALLOW THE LOAD
TO DROP, CAUSING PROPERTY DAMAGE, SEVERE INJURY OR
DEATH. REASSEMBLE PER INSTRUCTIONS
DANGER
6) Verify planet hub stopper, item 402, is installed on planet hub.
7) Insertprimaryplanet hub assembly into cable drum. Ensure that thefinalsungear,item340,is fully engaged
with final planet gears, item 320.
8) Install primary sungear, item 440.
9) Install new, well-greased O-ring, item 539, onto bearing flange, item 530. Lower brake housing, item 700,
complete with bearing flange assembly, into cable drum. To fasten bearing flange to cable drum, align holes
inthebearingflangewiththreadedholesinthecabledrum.Installsixcapscrews,item537,andlockwashers,
item541, through access opening in brake housing.
10) Use eight capscrews, item 971, and lockwashers, item 973, to secure tie bars, item 970.
11) Install pipe plug, item 503, into cable drum.
REASSEMBLY OF BRAKE HOUSING ASSEMBLY
Reassemblebrake housingassemblybyreversing thedisassemblyprocedure:
1) Pressneedlebearing,item 733, into brake housing bore.
2) Press new, well-greased oil seal, item 711, and back-up washer, item 710, into brake housing bore.
3) Installspragclutch,item723,andspragclutchspacer,item726,intoboreofbrakehub,item720.Positionsprag
clutch aligners, item 722 and 724, and support washer, item 717, on either side of brake hub. Carefully slide
motor drive shaft, item 730, into brake hub assembly and secure with circlip, item 727.
IMPORTANT: For proper brake function, verify that the brake hub rotation is correct. When
viewed from the motor end, the motor drive shaft of a counterclockwise hoisting winch
must turn freely clockwise and lock in the counterclockwise direction.
4) Install motor drive shaft assembly, carefully twisting shoulder of shaft through oil seal, item 711. Ensure that
oil seal is not damaged as motor drive shaft is installed.
5) Installbrakespacer,item712,intobrakehousing,item700.Startingandfinishingwithdividerplate,alternately
install five divider plates, item 714, and four friction plates, item 715.
6) Installnew,well-greasedO-rings,item751and753,intopistonglands,item750.Carefullyinstallbrakepiston
inbrakehousing.
7) Install 10 brake springs, item 752, into the 12 holes of brake piston, leaving two holes vacant opposite each
other.
8) Use grease to temporarily hold a new O-ring, item 801, into recess on the flange of motor adapter, item 800.
Installnew, well-greasedO-ringitem707, ontomotoradapterpilot.
9) Positionmotoradapter,withbrakereleasepressuretransferholesofmotoradapterandbrakehousingaligned.
Tighten 12 capscrews, item 821, and lockwashers, item 823, one turn at a time to evenly compress springs.

PAGE 18
REASSEMBLY OF HYDRAULIC MOTOR
If the hydraulic motor was disassembled, the following procedure should be followed for reassembly:
1) Cleanallpartsthoroughlybeforereassemblyandapplygreaseliberallytoallseals.Useonlynewseals(seal
kit Part No. 23131) for hydraulic motor.
2) Install six new pocket seals, item 887, on each thrust plate, item 885. The seal kit includes a single strip of
rubber.Usingasharpknife,cutlengths to fit the openings in the thrust plates. Press one of the thrust plates,
together with six pocket seals, onto bearings, item 875, installed in motor adaptor, item 800, so that pocket
sealsare againstmotoradaptor.
3) Install a well-greased body seal, item 869, on each side of gear housing, item 861. Slide the gear housing
togetherwiththebodyseals,ontomotoradaptor,linedupontwodowelpins.Tapontightusingasoftheaded
hammer.
4) Installgearset,item881,ingearhousing (Thelongergearwiththe internalsplinegoesintothetopposition).
5) Presstheotherthrustplate,completewithsixnewpocketseals,ontobearingsinstalledinportendcoverso
pocket seals are facing port end cover.
6) Installportend cover, item 870, together with two bearings, item875,andnewringseal, item 877, onto gear
housing,linedupontwodowelpins,item865.Tapontightusingasoftheadedhammer.Installandlightlytorque
four hex capscrews, item 951, and lockwashers, item 953, to approximately 50 ft-lb (70 Nm).
7) Plumbwinchassemblytoahydraulicsupplyandtorquemotorcapscrewsaccordingtothefollowingprocedure:
- Ensure that circulation supply flow is being supplied to the brake housing.
- Run the winch, with no load, in the hoisting direction at reduced speed
(approximately 30% of maximum hydraulic volume).
- With winch running, evenly tighten four capscrews, item 951, to 200 ft-lb (270 Nm).
- Test motor operation by running winch at full speed in both directions.
IMPORTANT: Before operating the winch, add lubricating oil up to the level of the end housing oil fill port.
(Refer to INSTALLATION INSTRUCTIONS for location of fill port. Refer to APPENDIX A
foroilvolumerequired.)
Toensure proper reassembly, run the winch in both directionswithout load.
LIFTING A LOAD WITH A NEWLY SERVICED WINCH WILL
ENABLEAN INSTALLATIONOR SERVICEPROBLEM TOGO
UNDETECTEDANDALLOWTHELOADTODROPCAUSING
PROPERTY DAMAGE, SEVERE INJURY OR DEATH. TO ENSURE
PROPERREINSTALLATION,REFERTOPROCEDURESAND
TESTS DESCRIBED IN “INSTALLATION” AND
“OPERATINGINSTRUCTIONS”.
SERVICE INSTRUCTIONSCONTINUED
271 REV.970407
DANGER
Table of contents
Other Pullmaster Winch manuals

Pullmaster
Pullmaster HL25 Technical reference manual

Pullmaster
Pullmaster M50 Technical reference manual

Pullmaster
Pullmaster M5 Technical reference manual

Pullmaster
Pullmaster M5 Technical reference manual

Pullmaster
Pullmaster R7 Series Technical reference manual

Pullmaster
Pullmaster M25 Technical reference manual
Popular Winch manuals by other brands

GEBUWIN
GEBUWIN WW2000 D/FS Series operating instructions

Comeup
Comeup CP-500T quick start guide

Warrior Winches
Warrior Winches 13JR02H-CAD owner's manual

Mile Marker
Mile Marker HI9000 Installation and operator's manual

Ingersoll-Rand
Ingersoll-Rand Liftstar LS2-600H Product Maintenance Information

Northern Tool
Northern Tool NWB3000 Assembly & operating instructions