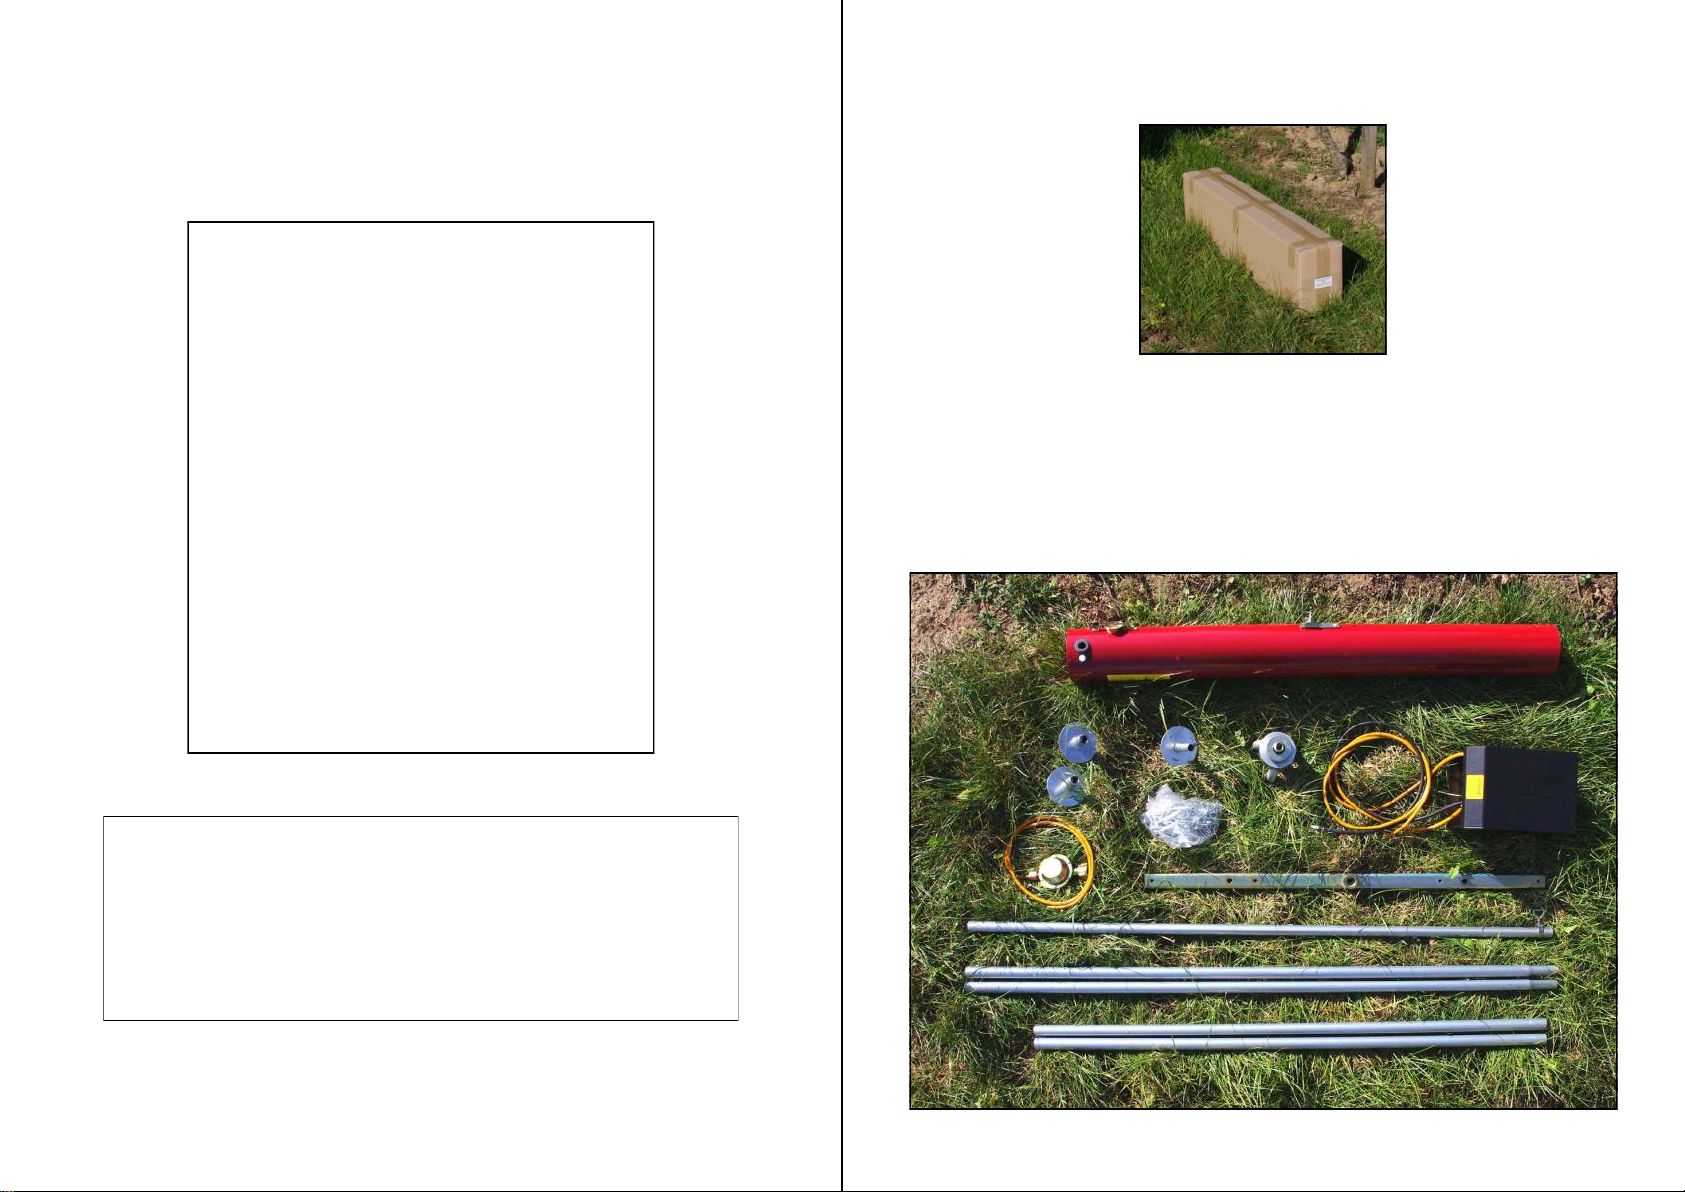
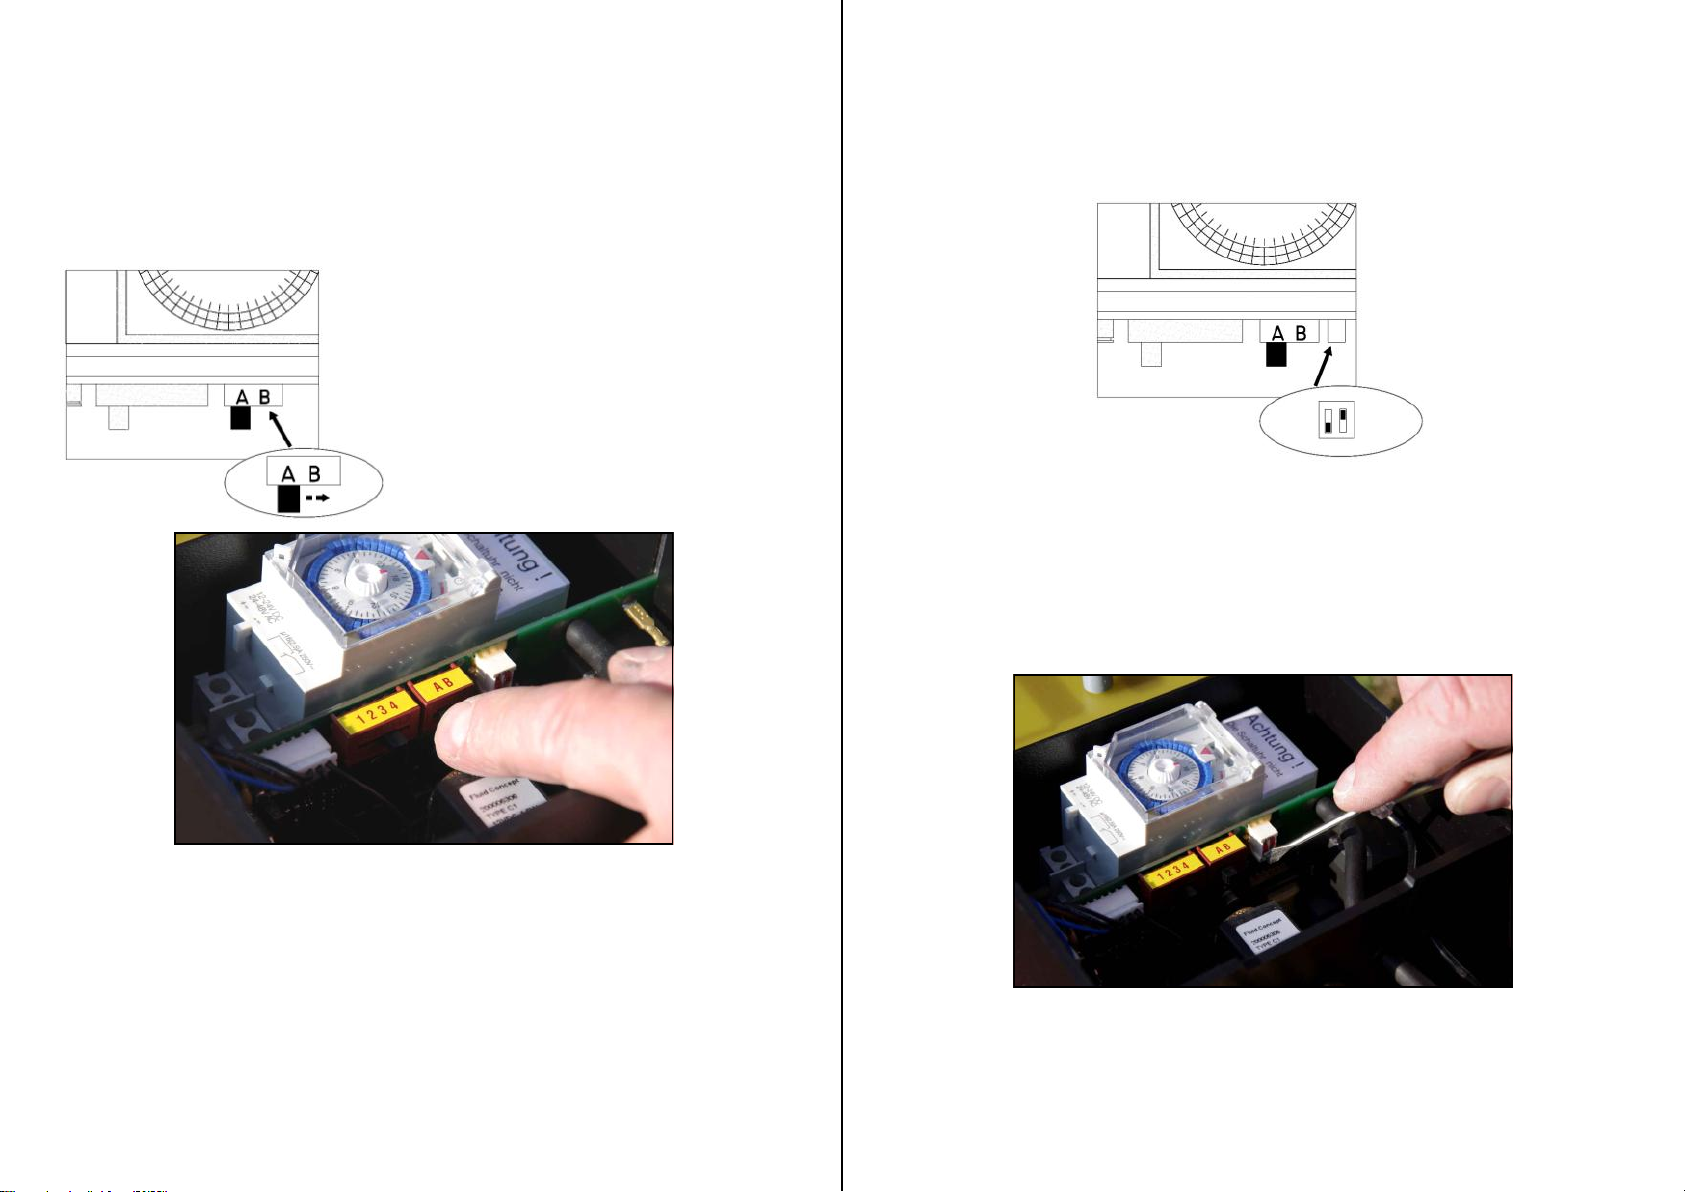
Purivox Carousel Triplex V User manual

Purivox
Carousel
Triplex V
Instruction
manual
1
Hazard warning -
Purivox Carousel Triplex V
Please read the instruction
manual very carefully before using
and assembling the unit.
Using the device indoors is not permitted.
Never point the sound tube in the direction of people or
flammable objects, because a small jet flame and a pressure
wave will exit the sound tube.
Note regulations in terms of storage, setting up and arranging
the propane gas bottle.
The Purivox Carousel Triplex V is only built for using in the
agricultural sector (Proper use)
Any other use is considered improper.
For damage resulting from improper use. The manufacturer of
the equipment shall not be liable.
The Purivox Carousel Triplex V may only be used, maintained
and repaired by persons over 18 years, who are acquainted with
the equipment and informed of risks.
The relevant accident prevention regulations as well as other
generally recognized safety, health rules and regulations must
be observed.
Any modifications to the equipment shall immediately exclude
the manufacturer from any liability or resulting damages.

2
Contents
1 Hazard warning
2 Contents
3 Components - Purivox Carousel Triplex V
4 Electronic unit
5 Power supply / Batteries
6 Timer
7 Shot frequency
8 Volume
9 Number of shots
10 Assembly instruction
22 Spare parts - Electronic unit
23 Spare parts - Purivox Carousel Triplex V
24 Troubleshooting
25 Optional equipment - Mirror pyramid
Notice:
The gas regulator which is shown on all the pictures in the manual is
a German gas regulator type. If you have ordered a unit with a POL
gas regulator, the German regulator is replaced with a POL regulator.
Also the gas bottle can look different to the model that you are using.
But always remember to use only certified propane gas bottles.
3
Components - Purivox Carousel Triplex V
1. Sound tube (106040) 2. Foot plate big (102273)
3. Foot plate small (102275) 4. POL gas regulator complete (101660)
5. Cain 2m (102080) 6. Adjustable pole (102026 & 102028)
7. Pole long (102025) 8. Pole short (102023)
9. Tripod bearing block (102072) 10. Cross bar (102090)
11. Electronic unit (108510)
11
9
8
7
6
5
4
3
2
1
10

4
Gh-1
Gh-2
Electronic unit
The controller is in a black weatherproof plastic case.
To get to the operating elements and set up the unit, lift up the lid
Inside of the Electronic unit:
Battery compartment
24 hour Timer
Switch for shot frequency
Switch for volume
Switch for number of shots
Outside of the Electronic unit:
ON / OFF switch
Ignition cable with spark plug and ground wire
Solenoid valve with gas hoses
Gas hoses (Gh-1 and Gh-2)
5
Power supply / Batteries
Before working on the batteries or inserting new batteries,
make sure that the unit is turned OFF!
The ON / OFF switch is on the front of the electronic unit
and is labelled with I for ON and 0 for OFF.
To insert the batteries release the locking by pressing the plastic
plate direction the clock. The battery contact board
can then be removed upwards.
Important:
The batteries must be removed
when the unit is stored!
Open the lid of the electronic unit (108511) and make sure that the paper strip
between the batteries and the contact board is removed.
After this press the battery contact board back down to close it.

6
Setting the timer
If the batteries are inserted and are in contact with the battery contact
board the timer will directly start working
To set up the timer, open the clear cover from the timer.
Setting the actual time
By turning the inner disk clockwise the current time is set to the small arrow.
One turn means one hour.
The little mark on the disc is meant to be the minutes. If the mark shows up it
is one hour, to the right 1/4 hour, downwards 1/2 hour and to
the left a 3/4 hour.
Setting the work time
The clock is set from the factory so that it will work 24 hours. All cams are
pushed outward. To set the pause time, the cams have to pushed in.
Each cam stands for 30 minutes
Cam outside / Unit works
Cam inside / Break (Unit doesn’t work)
The working time should adjust to suit the local conditions. It is recommended to
observe the feeding times of the birds/animals and set the timer to suit.
Council regulations may also need to be observed.
Switch I AUTO 0 always in position “Auto”
Important:
NEVER turn the timer anticlockwise!!
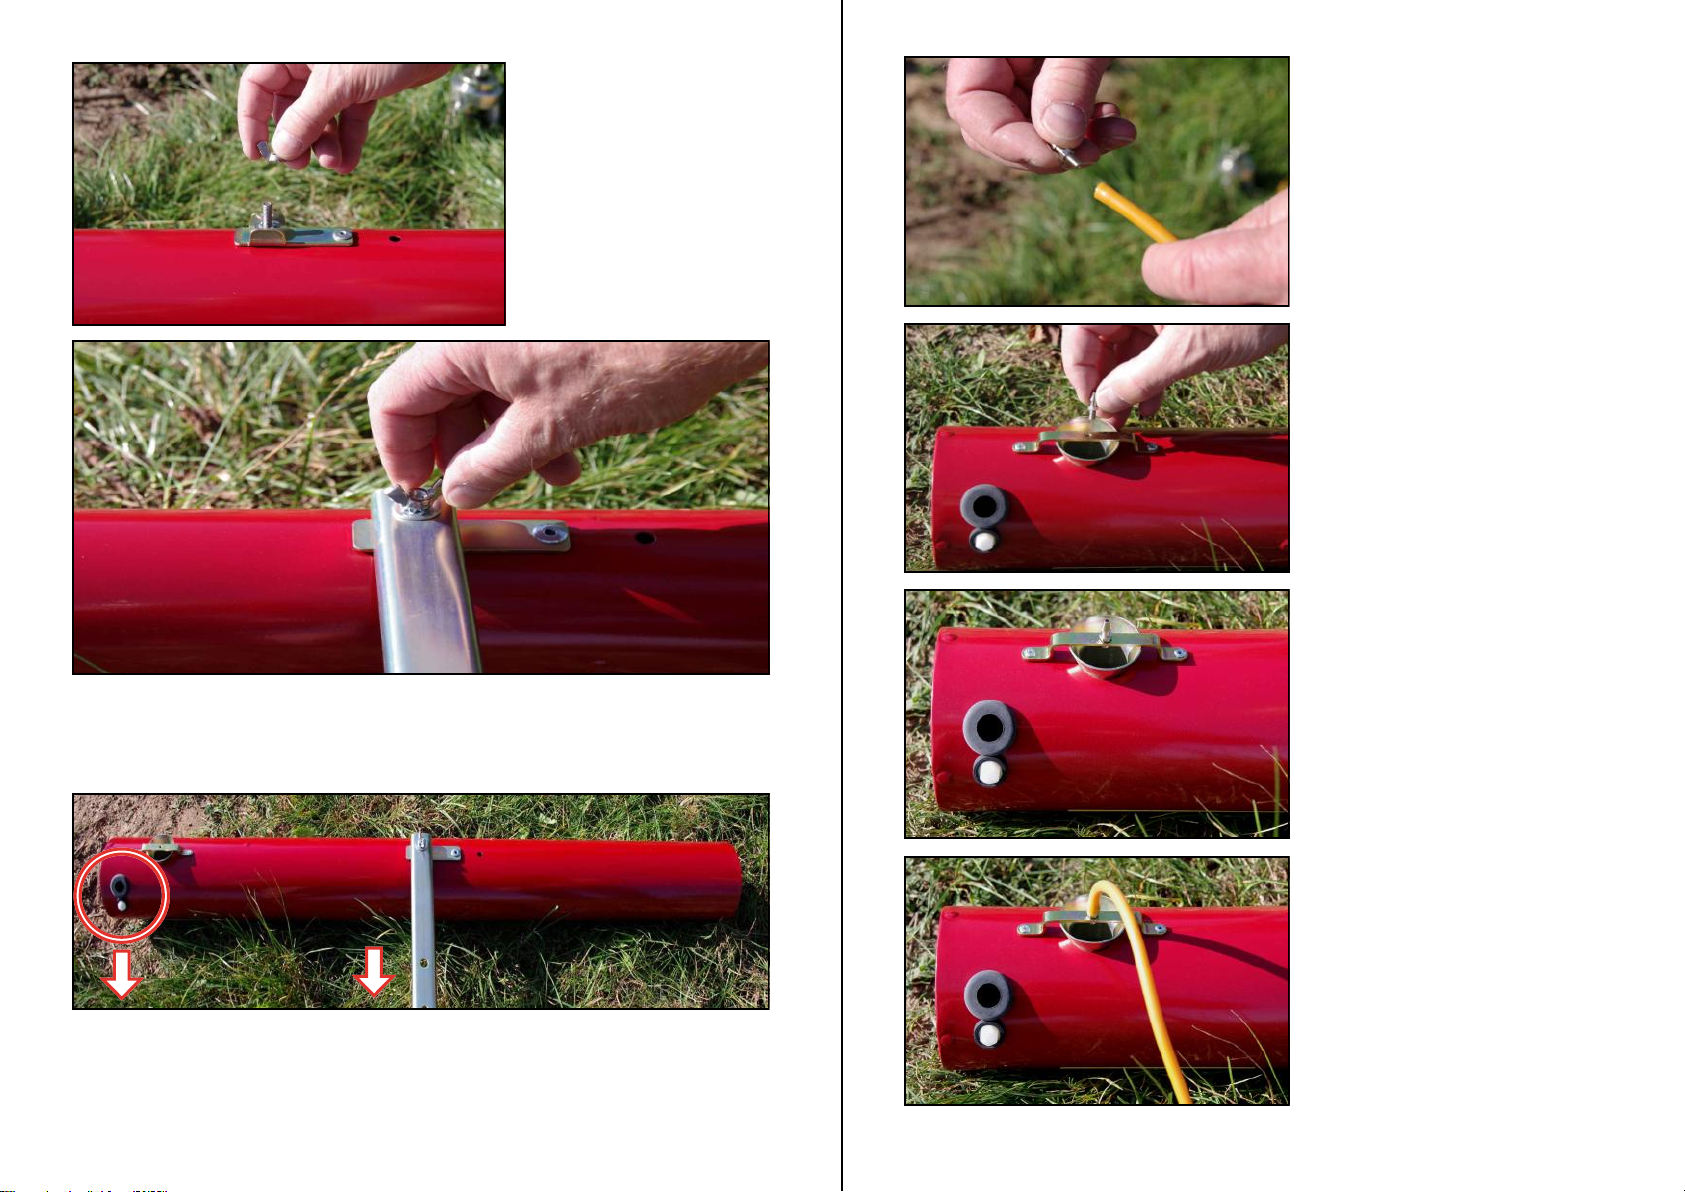
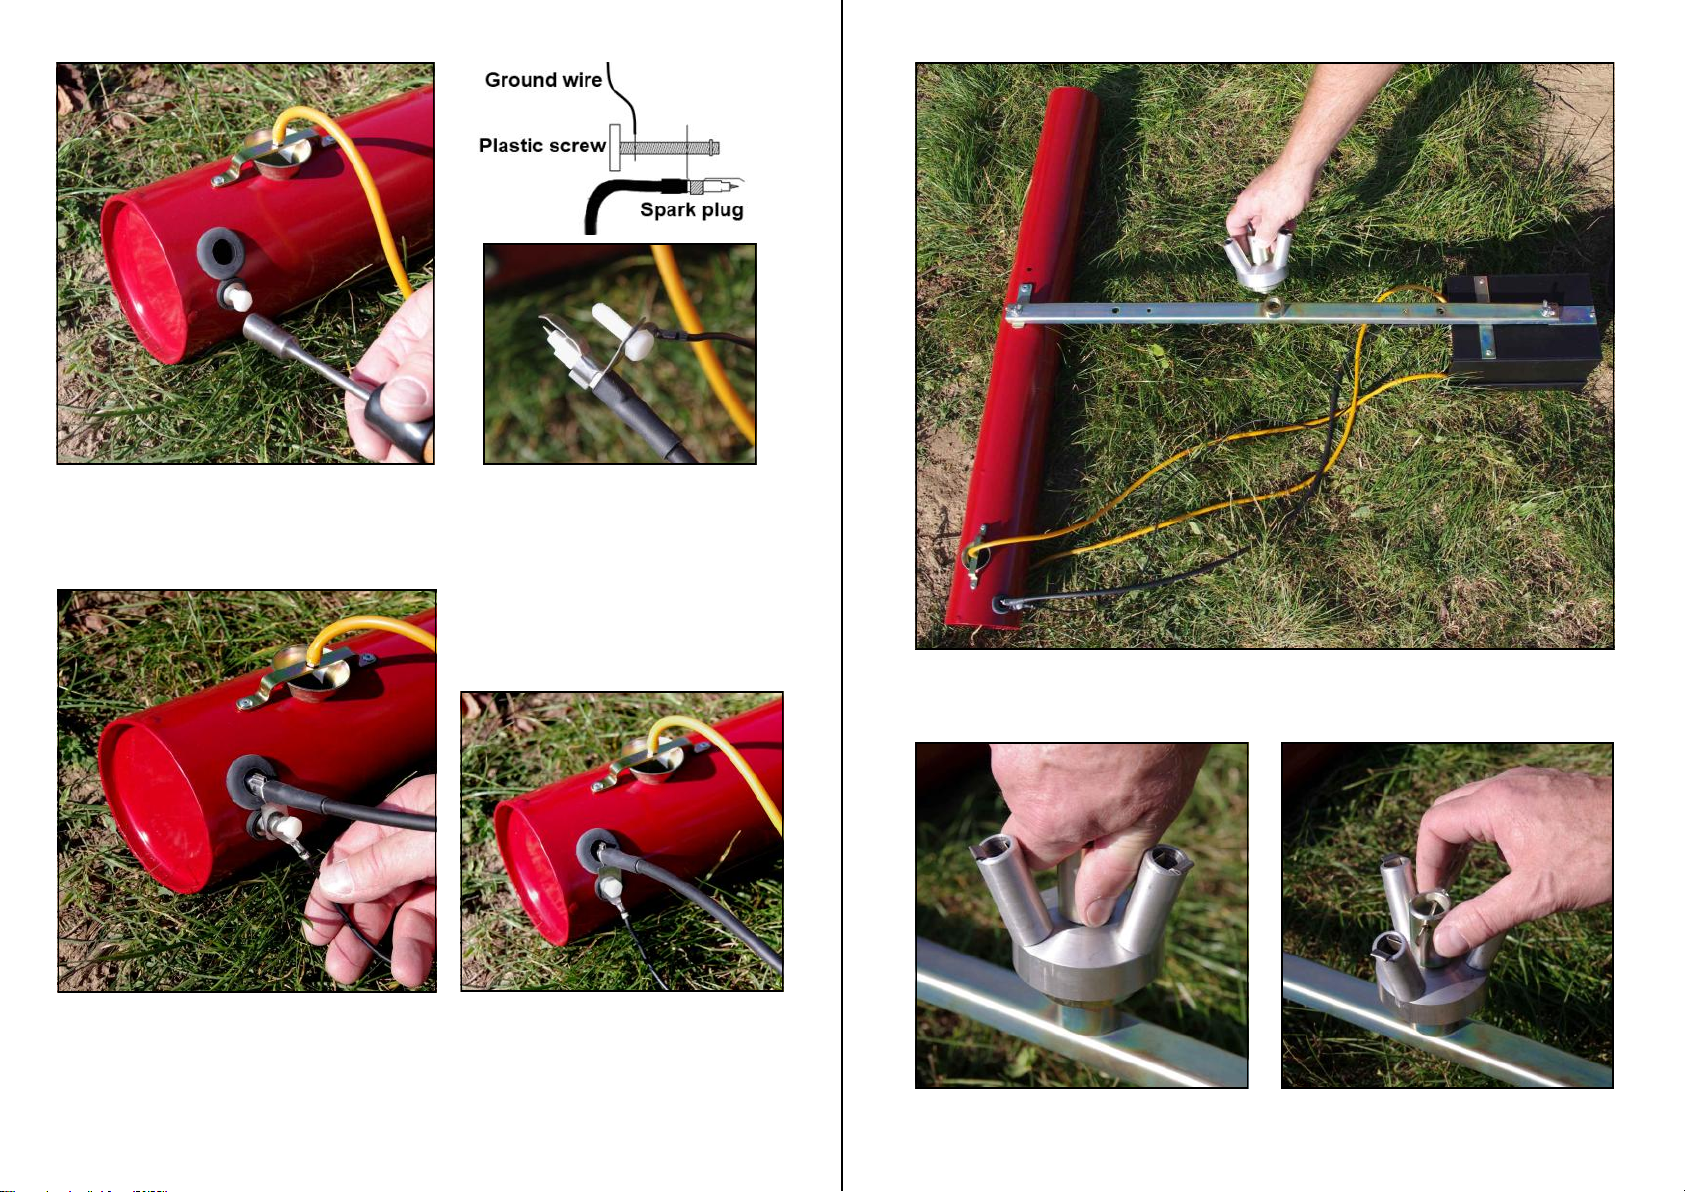
7
The best thing is to start with a setup that bangs not so often.
Only when the number of birds and wild animals is getting bigger then
change the switch (for example from 3 to 2) to reduce the pause interval.
Setting the shot frequency
You can choose from 4 different time frames, how long the pause time should be.
The unit will then shoot randomly in that time to avoid habituation effect.
If the number of birds and wild
animals is not large then it is
possible to increase the pause
time. In our experience, an
intensive multi-shot approach
with longer pause intervals is
much better and more effective
than lots of frequent shots.
Switch position Break time
1Break of 2 –4 minutes
2Break of 4 –8 minutes
3Break of 8 –16 minutes
4Break of 16 –32 minutes

8
Setting the volume
With a switch on the board the volume of the unit can
be set in two different volumes
For the full volume the switch has to be on position B, for
a reduced volume the switch has to be on A
Switch position A= Reduced sound level
100m distance approx 90db(A)
Switch position B= Full sound level
100m distance approx 96db(A)
9
1 shot = both switches up
2 shot = left up / right down
3 shot = left down / right up
4 shot = both switches down
Setting the number of shots
Changing the number of shots only when the unit is turned off!
Wait 15 seconds before turning the unit on again so it can re-set properly.
The recommended number of shots is 3.
Tests have shown that the best results will be made with the 3 shots.

10
Required tools:
Spanner (size 10) or
socket wrench (size 10)
and
Pliers
A standard propane gas bottle
is required for normal operation.
(Not included in delivery)
Notice:
Propane gas bottle can look similar to
the one which is shown in the manual.
Assembly instruction
Purivox Carousel Triplex V
11
Once the electronic unit is set.
Close the lid of the electronic
unit and turn the electronic unit
over.
Now remove the wing nut, tooth
washer and washer.
Take the cross bar (102090)
and put on end with the hole on
the screw.
Once that is done put the
washer, toothed washer on the
screw and tighten it firmly with
the wing nut.
Use the pliers.

12
Once this is done the cross bar will be attached to the sound tube
and tightened with the wing nut. Make sure that the cross bar is
Remove the wing nut,
toothed washer and the
washer from the thread on
the sound tube (106040).
Make sure that the opening from the sound tube for the spark plug
shows in the same direction like the cross bar (see picture)
13
Remove the propane nozzle which
is plugged into the gas hose
(Gh-2) which runs away from
the electronic unit.
The propane nozzle will screwed
into the nozzle-bracket from the
sound tube.
Now the gas hose is pushed onto
the gas nozzle. Make sure that it is
the gas hose (Gh-2) which goes
away from the electronic unit.

15
The bearing block (102072) will be screwed on the cross bar and
tighten carefully by using a screwdriver.
14
Unscrew the plastic screw from the thread insert rubber. Take now the plastic
screw; slide it onto the ground wire and through the spark plug.
The spark plug is inserted through the opening of the rubber grommet. Then the
plastic screw is screwed into the thread insert rubber and tightened firmly.

16
Insert the big foot plates (102273) into the
long poles (102025). Make sure to use the long
poles. This will prevent that rainwater can run
into the poles.
Now the short pole (102023) will be fitted to
the long pole.
17
Take the adjustable pole (102026 & 102028) and put the small foot
plate (102275) on. Now hold the previously assembled poles (long + short)
next to the adjustable pole. Use the wing screw to adjust the length so
that the adjustable pole has the same length like the other poles.
After this place all three poles on the bearing block.

18
Slide the gas hose (Gh-2) trough
the middle of the bearing block.
Using the adjustable pole the unit
can be adjusted to the ground that
the unit stands horizontally.
After all poles are mounted on the bearing block, the Purivox
Carousel Triplex V can be turned over and put on the foot plates.
19
Hang one side of the chain (102080) with the sharp end of the hook
pointing out of the bearing block. Move the chain
through the handle of the bottle and attach the other end of the chain
also to the bearing block (sharp end outside!)

20
Screw the POL gas regulator (101660) on the propane gas bottle
and connect the gas hose from the regulator with the gas hose (Gh-2)
of the electronic unit. Take care that the two hoses are
moved together completely.
21
Open the valve of the gas bottle and switch on the unit.
The unit will now start working.
After the unit is switched on move
immediately away from the unit!

22
Spare parts - Electronic unit
108511 Electronic unit for Purivox Carousel / Razzo Triplex V
108328 Battery contact board with cable
105481 Battery 6 Volt/7Ah
105786 Timer - Paladin 12 Volt
108506 Circuit board - Uplexa08
105855 Grommet DK 6/9/12-12 PVC
105850 Grommet 2/5/8-2
108206 Ignition cable for Purivox Carousel / Razzo Triplex V
105911 Straight fitting for solenoid valve with filter
108208 Ground wire for Purivox Carousel / Razzo Triplex V
105900 Solenoid complete
101440 Spark plug complete
100381 Gas hose / sold by meter
105910 Straight fitting for solenoid valve conical
108331 Plastic case with lid and spring plungers
105161 ON/OFF switch without cable
105165 ON/OFF switch with cable
105017 6-pin connector with cable
23
108511 Electronic unit V for Purivox Carousel Triplex V
102090 Cross bar
106040 Sound tube
108332 Lid for electronic unit case
100920 Plastic screw M6x20
100910 Rubber grommet
103440 POP-blind rivet 3,2x10
101100 Threaded insert rubber M6
100412 Propane nozzle Ms60Pb
102280 Bracket
105016 Rubber buffer for electronics unit
102072 Tripod bearing block complete
102062 Sealing ring 17x4 for tripod bearing block
102061 Protective cover for tripod bearing block
102220 Circlip for steel shaft
102060 Bearing
102052 Tripod bearing block with foot parts 1-3
102054 Clamping spring for tripod bearing block / foot plates
101660 Gas regulator POL with hose, grommet and union nut complete
101610 Gas regulator POL
101570 Tail for regulator
101350 Union nut for regulator
101570 Tail for regulator
100401 Hose spout brass double nipple
102273 Footplate big
102275 Footplate small
101750 Injector
101760 Nozzle bracket
102080 Chain 2m long
106140 Bearing tube
102023 Stand pole short
102025 Stand pole long
102026 Stand pole adjustable out
102028 Stand pole adjustable in
100820 Washer 6,4x18 DIN 9021
100790 Toothed washer I6,4
101131 Wing nut M6
111127 Purivox Carousel Triplex V
100910
100920
101100
101760 101750
Spare parts - Purivox Carousel Triplex V

24
Troubleshooting
Purivox Carousel Triplex V doesn´t bang:
1. Check the gas bottle capacity; remove the gas hose from the solenoid valve
an dip the hose into a bucket of water and open the gas valve.
Smoke or open fire in this situation can be dangerous!
2. If the gas bubbles in the water, check the hose for leaks.
3. Check the hose connections on the solenoid valves. Is the direction of the gas
flow the same as the arrow on the solenoid valve? Don´t kink the hoses.
4. Is the propane jet from the jet hose screwed into the injector?
5. Battery check: Each battery must have a minimum voltage of 5 volts. Is the
transmitter in function? If necessary check the voltage of batteries with a
voltmeter in the workshop of your dealer. If the combined voltage has
dropped to 9,0 volts, or the short circuit current of the single batteries drops
under 1 ampere, replace the batteries.
6. Is the time at the timer set correctly? Maybe control.
7. Is the outside switch at position “1” ON?
8. Spark control. Is the spark cable intact? If the cable is damaged, please
don´t fix it by yourself! Warning: High voltage spark! Distance between
the electrodes of the ignition spark should be approx 5mm. Test the
controller function without gas flow turned on! Hold ignition spark plug
holder together with the earth cable to the metal bracket. Don´t touch
the spark gap with your fingers while switching the unit ON. Don´t run
the earth cable and spark cable next to each other.
9. The unit has a self reset security safety element. Please watch out for
potential short circuits between the connecters.
10. Timer is set wrong.
11. The timer has no internal battery. So after removing the batteries or
when the batteries are totally flat, the time must be reset when
new batteries are fitted.
Notes: If the device is not in use you have to - in order to avoid
damage to the electronic units by leaking batteries - remove the
batteries mandatory. Close the unit and store it dry.
Purivox Carousel Triplex V bangs at times, when it shouldn’t bang.
25
Mirror pyramid
Using the optional mirror pyramid which is mounted on the top of the
Purivox Carousel Triplex V adds a strong visual deterrent.
The mirror pyramid is especially made for protecting areas which are
close to power lines and big trees. It reflects powerful light beams
from the sun which will flash at any birds nearby. These blinding
flashes cause the birds to fly off.
With the two different colors on the Pyramid,
the scaring effect is reinforced.
The mirror pyramid is mounted on a rod to the crossbar of the
Purivox Carousel Triplex V. With the rubber buffer fitted, the
pyramid can wiggle. This means with every shot, the pyramid is
wiggling and increases the overall effect of the unit.
Order No. : 111135
Table of contents
Other Purivox Farm Equipment manuals
Popular Farm Equipment manuals by other brands

enorossi
enorossi EASY RAKE Series User and maintenance manual

Checchi & Magli
Checchi & Magli BABY TRIUM Use and maintenance manual

Hardi
Hardi ALPHA evo ALU-TWIN FORCE Instruction book

Kverneland
Kverneland CTC 427 Service manual

KIFCO
KIFCO WATER-REEL T 210L Operator's manual

New Holland
New Holland L215 Service manual

Zoovilla
Zoovilla TUDOR PH0010010800 Care Instructions

Gaspardo
Gaspardo PA1 Use and maintenance

Krone
Krone Swadro 38 T Original operating instructions

Ag Leader Technology
Ag Leader Technology CaseIH 1822 manual

Amazone
Amazone Avant 4002-2 Original operating manual

Nidec
Nidec LEROY-SOMER TRACTELEC TF3-16.5 Installation and Maintenance