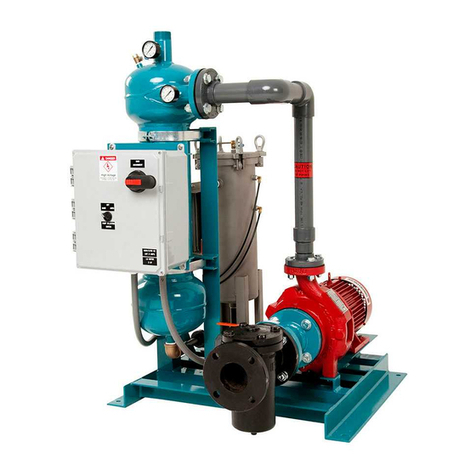
puroflux PF-40 Series User manual

PUROFLUX
C O R P O R A T I O N
FILTRATION AND CONTROL SYSTEMS
OPERATION AND MAINTENANCE MANUAL
PF- 40
Series
Permanent Media Filters
PF-40 Series Filter (ver 8/21)
Page 1

Please read this OPERATION AND MAINTENANCE MANUAL thoroughly and understand
all safety related issues before attempting any work on the PF-40 series filter.
NOTE: All recommendations are minimums. The environment/operating conditions in which the filter
unit is installed will dictate the frequency of scheduled maintenance. Maintaining your PF-40 series filter
will assure a long trouble free life.
NOTE: Puroflux reserves the right to change, modify, or revise this manual at any time without prior
notification.
P U R O F L U X C O R P O R A T I O N
PF- 40SERIES PERMANENT MEDIA FILTERS
INTRODUCTION
PUROFLUX is the right choice when it comes to having a more efficient, safe, and effective system. The
PF-40 series filters are designed to assist in eliminating expensive "down-time," reducing operating costs,
chemical usage, wear and tear on equipment and maintenance. With over 30 years of combined filtration
experience, PUROFLUX engineers can find a solution to a wide variety of filtration problems.
Following the guidelines listed in this manual will help to insure the safety of all personnel who maintain
the filter unit and related equipment. If there are any questions on the procedures or performance of the
PF-40 series filters contact the local factory representative or call the factory direct at (805)579-0216.
Do not operate the filter until all questions about operating procedures are answered by a qualified
representative. This manual covers recommended procedures for installation and anchoring, start-up and
shut down, and safety and maintenance.
Puroflux Corporation
2121 Union Place, Simi Valley, CA 93065
Phone (805)579.0216 • Fax (805)579.6005
Website: www.puroflux.com
E-Mail: sales@puroflux.com
PF-40 Series Filter (ver 8/21)
Page 2

TABLE OF CONTENTS
SECTION 1
SECTION 2
Receiving
4
Theory of Operation 12
Design Criteria
5
Operation and Maintenance 12
Support and Lifting
5
General Maintenance 12
Installation and Anchoring
5
24 Hour Time Clock Settings 13
Piping Interface Connections
6
Pump Pre-Strainer 14
Table II
7
Pump and Motor 14
Loading Media
8
Cleaning and Adjusting Pump 14
Table IV
9
Filter Vessel 15
Electrical Controls 10 Backwash Cycle 15
Wiring Requirements 11 Start-Up Procedure 16
Operation In Cold Weather 17
Shutdown 17
Recommended Spare Parts 18
Fluid Treatment 18
Safety 18
SECTION 3
Pre-Start Up Check List 19
Start-Up Check List 21
Figure 3 24
Warranty 25
PF-40 Series Filter (ver 8/21)
Page 3

P U R O F L U X C O R P O R A T I O N
SECTION 1
RECEIVING
Recommended procedures for the receiving of the PF-40
series permanent media filter.
Before accepting the filter equipment and prior to signing
the bill of lading, all equipment should be checked
thoroughly for any shipping damage. Make sure that
all required equipment noted on the bill of lading is
received. Refer to Figure 1 and Table I for components to
be inspected upon receiving.
Check the model and serial number against the
packing slip. Serial and model numbers can be found on
a nameplate inside the control cabinet (automatic unit) or
on the vessel leg (manual unit).
Figure 1
Pressure Guage
(TYP. 2 PLC’S)
Manhole/Handhole
(TYP. 2 PLC’S)
Auto/Manual
Air Relief Valve
Lifting Lugs
Pneumatic Actuator
(Automatic Units)
Nema 3R
Control Cabinet
(Automatic Units)
Butterfly Valve
(TYP. 4 PLC’s)
Lined Carbon
Steel Vessel
with Internal
and Media
Filter Tee
Drain
Unit shown with source
water B/W configuration
Table 1 - Items to be
inspected upon receiving
Filter Vessel
Control Panel (Automatic Units)
Pump & Motor (Optional)
Pump Pre-strainer (Optional)
Gauge Kit
Valves & Linkage
Actuator (Automatic Units)
Face Piping (Optional)
Media
PF-40 Series Filter (ver 8/21)
Page 4

NOTE: Never install the PF-40 series filter in an application where the system pressure exceeds the
filter design pressure.
NOTE: The PF-40 series filter should not be installed more than 8 feet above the process liquid operating level.
DESIGN CRITERIA
The PF-40 series filter is designed for use in both open and closed process liquid filter applications. The
PF-40 series can be utilized for special applications where individual component selection will depend on
the particular filter application and environment. The PF-40 series filter is rated at 50 psi (standard). Higher
design pressures are available. The PF-40 series filter with standard media will remove suspended solids
down to 10 microns and finer (optional medias are available).
The PF-40 series filter is constructed of a fusion bonded epoxy lined and polyester coated carbon steel
vessel. Standard components include industrial grade butterfly valves, C.I. tees, pressure gauges, air vent
assembly and media. The PF-40 series filters offer a wide variety of optional configurations depending on
flow rates, pressure ratings and design conditions.
SUPPORT AND LIFTING
If the PF-40 series filter is hoisted, lifting straps must be placed through the lifting lugs of the filter as well as
under the body of the unit. The lifting straps should not come in contact with the filter components. If
supplied as a packaged unit, lifting straps must be placed under the bottom of the filter skid and should not
come in contact with the filter components.
INSTALLATION AND ANCHORING
The PF-40 series filter is designed for slipstream use on non-pressurized open sump or pressurized
closed system applications. The PF-40 series filter should be located as close to the sump or interface
piping as possible. Never install the PF-40 series filter in full flow system piping unless it has been
specifically designed for this type of application
The PF-40 series filters should be rigidly anchored to the floor. Reference the specification drawing or ask for
a factory certified drawing for locations and size of anchor holes.
PF-40 Series Filter (ver 8/21)
Page 5

NOTE: It is important that all piping and components associated with the filter system installation must
be supported to eliminate stress on the filter and piping.
NOTE: Do not reduce the pipe sizes listed, the pipe sizes are minimums. If long runs, excess fittings, or
lifts are necessary, it is recommended to enlarge the pipe diameter in order to reduce friction loss.
Never reduce the waste line; this can restrict the flow of the backwash cycle and reduce efficiency.
NOTE: The sewer drain must be large enough to handle and maintain the flow of the backwash cycle.
If the drain is not large enough to support the volume of waste generated during a backwash cycle, it
may be necessary to use a reservoir tank to collect the waste water. The flow from the reservoir tank
can then be regulated to the drain. It is not recommended to have any restrictions in the waste line.
However, it may be necessary to install a valve to manage the flow to the drain. If this is necessary, do
no throttle the flow to less than the minimum backwash flow (Table II page 7).
NOTE: Never overtighten service unions on the filter unit. Service unions should be hand tightened only.
Overtightening can cause damage, which may result in leaks.
NOTE: Always follow local, county, state or other government authorities requirements for piping hook-ups.
P U R O F L U X C O R P O R A T I O N
PIPING INTERFACE CONNECTIONS
The filter piping should be installed as follows:
1. Installation of interconnecting piping
• When mating interconnecting fittings to the filter unit make sure that filter components are securely
held in place so no damage or leaks occur.
• If welding or soldering mating flanges or fittings make sure not to overheat filter components.
Overheating filter components can cause damage or leaks.
• If welding, DO NOT use the filter or its components as a ground.
2. Refer to Table ll on page 7 for piping connection sizes.
3. Run an influent line from the system or sump to the filter connection labled “INLET”. A service valve
and union should be installed in this line near the filter. If a pump or pre-strainer is provided, connect
the influent line to the flange labeled "INLET". Refer to specification drawings.
4. Run an effluent line from the filter return labeled "OUTLET" back to the system or sump. A service valve
and union should be installed in this line near the filter. Refer to specification drawings.
5. Run a waste line from the filter waste outlet labeled "WASTE" to the nearest sewer drain. Table II on
page 7 lists the minimum and maximum backwash flow rates and volumes for the PF-40 series filter. A union
should be installed in this line near the filter. Refer to specification drawings.
6. For filters utilizing a source other than the process system water for backwash supply, Table Il on page
7 shows the required backwash flow and volumes. The minimum backwash supply pressure is 20 psi and
the maximum backwash supply pressure for the PF-40 series filter is 50 psi. Run a line to the connection
labeled "BACKWASH." If public or municipal water is used for backwash, a backflow preventer is required
in this line on all units. A service valve and union should be installed in this line near the filter.
NOTE: If the filter inlet connection is located above the process liquid operating level, a foot or check
valve must be installed below the water level to prevent loss of pump prime.
PF-40 Series Filter (ver 8/21)
Page 6

TABLE II - CONNECTION SIZE AND FLOW RATES - DIMENSIONS SHOWN IN INCHES
Model PF-40
Connection
Sizes
Flow
Rate
Backwash
(Max)
Backwash
(Min)
Backwash
Volume
24
2" flange
65 gpm
65 gpm
55 gpm
195 gal
30
2" flange
100 gpm
100 gpm
85 gpm
300 gal
36
3" flange
140 gpm
140 gpm
120 gpm
420 gal
42
3" flange
190 gpm
190 gpm
160 gpm
570 gal
48
4" flange
250 gpm
250 gpm
210 gpm
750 gal
54
4" flange
315 gpm
315 gpm
265 gpm
945 gal
60
4" flange
390 gpm
390 gpm
330 gpm
1170 gal
66
4" flange
475 gpm
475 gpm
400 gpm
1425 gal
72
6" flange
565 gpm
565 gpm
480 gpm
1695 gal
78
6" flange
665 gpm
665 gpm
565 gpm
1995 gal
84
6" flange
770 gpm
770 gpm
655 gpm
2310 gal
90
6" flange
885 gpm
885 gpm
750 gpm
2655 gal
96
8" flange
1000 gpm
1000 gpm
850 gpm
3000 gal
* Backwash duration is factory set for 3 minutes.
** Connection sizes and types shown for standard base units.
PF-40 Series Filter (ver 8/21)
Page 7

P U R O F L U X C O R P O R A T I O N
LOADING MEDIA
The filter media should be installed as follows (refer to Table lV for media quantities).
The 40 series filter units are supplied with two types of media (support gravel and filter media). The sup-
port gravel is used at the base of the filter below the underdrain to support the filter media. The filter media
is a spherical based crystalline silica and will remove up to 90% by volume of the suspended solids
10 microns and larger. The filter media will be shipped in 1/2 cubic-foot drums.
1. To load the filter media in the PF-40 series filter, remove the hex nut and crab clamp from the
handhole/manhole ring (be careful not to drop the handhole/manhole into the vessel). Press down on the
handhole/manhole cover until it drops loose. Remove the gasket and rotate the handhole cover lifting it
through the tank ring. Inspect the internals for damage before continuing.
2. Fill the vessel with water until the underdrain assembly is completely submerged in water. Load the
support gravel into the filter vessel first and level it out, then load the 10 micron silica into the vessel
and level it out. (refer to Table IV for the amount of media required for each individual PF-40 series filter).
Contact the factory or your local representative for different types of media combinations.
3. Inspect the handhole/manhole, gasket, ring, and cover for foreign matter, and clean all surfaces. Place
the handhole/manhole cover into the vessel. Slip the gasket over the handhole/manhole and reinstall the
crab clamp and hex nut. Align the gasket and crab clamp properly with the handhole/manhole and ring,
before tightening the hex nut. Do not overtighten the hex nut. Overtightening the hex nut can damage the
gasket.
4. Always follow start-up procedures whenever the filter unit has been turned off.
PF-40 Series Filter (ver 8/21)
Page 8

TABLE IV - MEDIA REQUIREMENTS
QUANTITIES SHOWN IN CU.FT.
Model PF-40
Support Media
Filter Media
24
2
4.5
30
3
7
36
5
9.5
42 10.5 18
48
14.5
23
54
19
29
60
24
36
66
30
43.5
72
39
49.5
78
47
58
84
55.5
67
90
65
77
96
84
105
Note: Media quantities shown are for standard 50 psi non-code vessels.
Consult factory for higher pressure or ASME code stamped vessel quantities.
PF-40 Series Filter (ver 8/21)
Page 9

NOTE: A NEMA type 3R coated steel enclosure may be supplied as an alternative to the coated steel
NEMA type 4X polycarbonate enclosure on certain units.
NOTE: Optional control items may include: programmable logic controller (PLC), indicating lamps, delay
timer, audio and visual alarms, dry contact signals, and hand-off-auto (HOA) switch.
P U R O F L U X C O R P O R A T I O N
ELECTRICAL CONTROLS
The PF-40 series filter can be supplied in a number of configurations and voltages including
460v/3Ø/60hz, 230v/3Ø/60hz, 208v/3Ø/60hz. Primary voltage will be reduced to 120v control voltage.
Control components will vary depending on filter configuration and options. Standard voltage for base unit
supplied without pump is 120v/1Ø/60hz.
1. PF-40 series filter units supplied with automatic backwash and pump are equipped with a NEMA type 4X
polycarbonate enclosure containing a locking combination on/off disconnect switch with motor circuit
protection (MCP), control transformer (primary/120v secondary), adjustable backwash timer, 24 hour
backwash time clock, magnetic motor starter (external backwash source units only), pressure differential
switch, electric or pneumatic (optional) valve actuator, solenoid valve (pneumatic only), terminal strip, and
manual override push button.
2. Manual filter units are provided with a manually controlled valve positioner and exclude all control
components and motor protection.
PF-40 Series Filter (ver 8/21)
Page 10

NOTE: Always follow local, county, state or other government authorities requirements for electrical
hook-up.
NOTE: All incoming power supply lines must be connected to the door disconnect.
WIRING REQUIREMENTS
Manual Units:
1. Install a circuit breaker between the closest branch distribution panel and the pump motor if supplied
(refer to Table V for amperage draw by motor horsepower).
2. Install an externally operated switch with fuse protection and door interlock in plain sight of the filter.
Fuse protection must be sized to handle starting and full load amperage draws.
Automatic Units:
1. Install circuit breaker between the closest branch distribution panel and the control panel (refer to Table V
for amperage draw by motor horsepower). The control cabinet is pre-wired and includes a door disconnect
switch with overload and short circuit protection.
TABLE V - ELECTRICAL REQUIREMENTS
MOTOR HP MOTOR VOLTAGE AMPERAGE 1 PHASE
1
110, 208, 220
16, 9, 8
2
110, 208, 220
24, 14, 12
MOTOR HP MOTOR VOLTAGE AMPERAGE 3 PHASE
1
208, 240, 460
5, 4, 2
2
208, 240, 460
8, 7, 4
3
208, 240, 460
11, 10, 5
5
208, 240, 460
17, 16, 8
7 1/2
208, 240, 460
25, 22, 11
10
208, 240, 460
31, 28, 14
15
208, 240, 460
47, 42, 21
20
208, 240, 460
60, 54, 27
PF-40 Series Filter (ver 8/21)
Page 11

NOTE: All recommendations are minimums. The environment/operating conditions in which the filter
unit is installed will dictate the frequency of scheduled maintenance. Maintaining your PF-40 series
filter will assure a long trouble free life.
P U R O F L U X C O R P O R A T I O N
SECTION 2
THEORY OF OPERATION
Influent (unfiltered) fluid is drawn via the pump into the filter piping, where it enters the overdrain (upper
internals). The influent fluid is dispersed over the filter media evenly. Suspended solids are trapped in the
pores formed between the media. The effluent (filtered) fluid then passes from the vessel through the
underdrain (lower internals) and is returned to the system.
As the trapped particles load the media, the differential pressure increases. When the differential pressure
reaches 16 psi, a backwash cycle is required. The control valves are repositioned, reversing the flow, and
the media is backwashed. The reverse flow lifts and churns the media causing a scouring action to release
the trapped debris. The trapped debris is then pushed up through the overdrain and flushed to drain.
On completion of the backwash cycle, the valves are repositioned and the filtration process continues.
OPERATION AND MAINTENANCE
The following information pertains to the procedures, operation and general maintenance of the PF-40 series
filter.
Please read this entire OPERATION and MAINTENANCE MANUAL thoroughly and understand all safety
related issues before attempting any work on the PF-40 series filters.
GENERAL MAINTENANCE PROCEDURES
Always follow the start-up and shut down procedures before and after any service or maintenance is done on
the filter unit. The PF-40 series filters are designed for low maintenance and minimal service. With proper
care the PF-40 series filters will provide trouble free service. The following is a list of maintenance check
points and schedules for standard units and includes optional components.
1.Visually inspect filter every 48 hours (minimum) for proper operation
(check for unusual noise and/or vibration).
2. Read pressure gauge (gauge reading should not exceed 45 psi for standard units).
3. Backwash filter every 48 hours (minimum).
4. Never allow differential pressure to increase above 16 psid.
5. Check media condition every 6 months (replace if needed).
6. Inspect filter internal assembly each media change.
7. Clean pump pre-strainer before blind-off occurs (check as often as environment dictates).
8. Check condition of gaskets (filter and pre-strainer) each time the filter is serviced.
9. Check voltage and amperage draw on motor lead.
PF-40 Series Filter (ver 8/21)
Page 12

NOTE: The 24 hour time clock is a non-resetting clock.
NOTE: The 7-day timer (optional) works in the same manner as the 24 hour time clock except each pin
represents 2 hours.
NOTE: If a Programmable Logic Controller (PLC) is supplied, a 48 hour clock has been programmed
into the PLC. The automatic backwash cycle is initiated every 48 hours of run time (minimum). Every
initiation of the backwash cycle, whether initiated manually or automatically, will reset the 48 hour clock.
SETTING 24 HOUR TIME CLOCK
Figure 2
PULL SINGLE PIN OUT
to initiate backwash cycle at
desired time.
The 24 hour time clock initiates a backwash cycle at any specified time in the day. The backwash clock comes
preset from the factory for a backwash cycle to occur once every 24 hours of run time (refer to Figure 2).
By moving the pins (in or out) on the 24 hour time clock, the number of backwash cycles in a 24 hour period
can be adjusted. Every pin represents 15 minutes of a 24 hour period. For every non-consecutive pin
pulled out in a 24 hour period, the filter will backwash. The time clock can only initiate a backwash once
every 1/2 hour. Pins pulled out consecutively will initiate a backwash once and then lock out any further
backwash cycle 15 minutes for each consecutive pin pulled out. In order to eliminate the 24 hour time
clock from initiating a backwash cycle, move all pins in toward the center.
Pin Out
PF-40 Series Filter (ver 8/21)
Page 13

NOTE: Always relieve internal vessel pressure before attempting any repairs or adjustments on the filter unit.
WARNING: Disconnect and lock out all electrical power to the filter prior to performing pump maintenance.
P U R O F L U X C O R P O R A T I O N
PUMP PRE-STRAINER (Optional)
Pump pre-strainer housing is flange mounted to the pump suction. The pre-strainer contains a corrosion
resistant stainless steelbasket with 1/8 inch perforations. The pre-strainer basket must be kept clean and
free of debris. Always follow the shut down procedure before attempting any repairs, adjustments, or
cleaning. To clean the pre-strainer basket, loosen the four hex bolts that hold the cover in place. Gently lift
the cover off the strainer body (take care not to damage the gasket). If the gasket does not come off in one
piece it will need to be replaced. Before replacing the gasket clean all surfaces of old material. Utilizing
the handle remove the basket from the housing. After cleaning the basket, reverse the above procedure
making sure that thegasket is in place and tighten the four hex bolts. Always follow the start-up procedures
after any shut-down(refer to page 16).
PUMP AND MOTOR (Optional)
The pump wet end is cast iron bronze fitted. The close coupled, back pull-out pump, and motor assembly
is bolted together with hex bolts for ease of maintenance or repair. The pump utilizes a standard
mechanical seal pressed into the motor bracket, which is bolted directly to the pump volute. The
pump sleeve slides over the motor shaft. The pump impeller is threaded or keyed on to the end of the
motor shaft and locked in place with a hex jam nut (refer to Figure 3 on page 20).
The pump flows for the PF-40 series filters are listed in Table II, page 7 at 50 feet of head (TDH). This
correlates to approximately 22 psi discharge pressure at design flow.
CLEANING & ADJUSTING PUMP
Always follow the shut down procedure before attempting any repairs or adjustments. The impeller should
spin freely. If not, check for an obstruction or debris that may be lodged between the impeller and volute
or impeller and adapter bracket. If no debris can be found and the impeller remains obstructed, remove
the bolts holding the volute to the motor bracket and the two bolts holding the motor to the base
(see Figure 3, page 20). Slide the motor and motor bracket away from the pump volute. Inspect the volute
for foreign material. Reverse the above procedures to reassemble (replace any gaskets which are not in
good condition). Rotate the pump shaft manually after assembly to check clearance. Always follow the
start-up procedures whenever the filter unit has been turned off.
PF-40 Series Filter (ver 8/21)
Page 14

NOTE: Always relieve internal vessel pressure before attempting any repairs or adjustments on the filter unit.
NOTE: Always relieve any trapped air in the filter vessel.
FILTER VESSEL
The filter vessel is constructed of carbon steel with a fusion bonded epoxy lining and polyester coating. The
vessel is designed with a handhole/manhole located in the upper head for service. The internals are
constructed of corrosion resistance Sch. 80 PVC plastic. The underdrain assembly is a header lateral
configuration design to help induce even flow through the media. The underdrain laterals can be removed
individually by rotating each lateral counter clockwise until all threads are disengaged. The 3 point
overdrain assembly is designed to distribute the influent evenly over the top of the filter media. The
internal assembly should be thoroughly inspected before adding media. To inspect the internals follow
the shutdown procedure. Carefully remove the filter vessel handhole by removing the hex nut on the crab
clamp of the filter vessel (do not drop the handhole into the filter vessel). Refer to Loading Media on
page 8.
BACKWASH CYCLE
When the pressure drop across the media bed reaches its terminal differential pressure (16 psid), it is
necessary to initiate a backwash. The backwash cycle must be completed in order to keep the media from
becoming contaminated. Higher differential pressures drive the debris deep into the media bed where they
cannot be flushed out. Over a period of time, the buildup of debris will cause a media failure and channeling
or plugging of the media will occur.
Automatic Units
Controls are furnished with a factory preset pressure differential switch, manual backwash override push
button and a 24 hour time clock to activate a backwash cycle. Upon an initiation of a backwash cycle, the
electric valve actuator will reposition the valves into the backwash mode. The backwash cycle is preset
from the factory for three minutes. After completion of the backwash cycle, the valve actuator will
reposition the valves into the filter mode. The duration of the backwash time may be adjusted if necessary.
Please consult the factory before adjusting the backwash timer. It is essential that the backwash time
remain at a minimum of three minutes to insure that the media is cleaned properly.
Manual Units
The manual units function in the same manner as the automatic units except the valves have to be
manually repositioned into and out of the backwash cycle. The filter unit will need a backwash cycle when
the differential pressure reaches 16 psid or a minimum of every 24 hours. For units supplied with pump,
the operator must shut off the pump before repositioning the valves into or out of the backwash cycle. For
filter units utilizing the system for a backwash supply, reposition the valves, and then turn the pump back
on. The backwash cycle should run three minutes. After completing a backwash cycle, the pump should
be turned off and the valves repositioned to the filter cycle. Once the valves are repositioned the pump can
be turned back on. For filter units utilizing an external source for a backwash supply, the pump must remain
off during the three minute backwash cycle. After three minutes, the valves are repositioned into the filter
position and the pump can be turned back on.
PF-40 Series Filter (ver 8/21)
Page 15

NOTE: Perform the first five recommendations with the electrical power off and locked out. Refer to
the section under "Safety" regarding the safeguarding of maintenance personnel from biological
contaminants prior to start-up.
NOTE: An excessive amount of air released from the vent valve can indicate an air leak. All leaks must
be repaired before running the filter unit.
P U R O F L U X C O R P O R A T I O N
START-UP PROCEDURE
Before initial start-up or after a long shutdown period, the filter unit should be thoroughly inspected.
1. Close all isolation valves in interconnecting piping and relieve all pressure from the filter system by
opening the manual air relief valve.
2. If supplied, loosen the four hex bolts around the pump pre-strainer lid. Remove the lid, inspect gasket
and lubricate if necessary. Clean debris from the pump pre-strainer basket. Prime the pump and associated
piping by filling the pre-strainer housing. Replace the basket, lid and tighten bolts.
3. Turn the pump and motor shaft by hand to insure free rotation.
4. Remove the top handhole/manhole cover by removing the hex nut on the crab clamp by pushing the
handhole/manhole into the vessel (do not drop handhole/manhole). Remove and inspect the gasket
(replace if necessary).
5. Inspect the internal assembly for any damage. Install media as described in Loading Media on page 8.
6. Inspect the handhole/manhole, gasket, ring, and cover for foreign matter, and clean all surfaces. Place the
handhole/manhole cover into the vessel. Slip the gasket over the handhole/manhole and reinstall the crab
clamp and hex nut. Align the gasket and crab clamp properly with the handhole/manhole and ring, before
tightening the hex nut. Do not overtighten the hex nut. Overtightening the hex nut can damage the gasket.
7. Prime the pump by filling the pre-strainer and associated piping with water (refer to Pump Pre-strainer
on page 14). Check pump rotation by bumping the motor. Verify rotation with the arrow on the pump volute.
DO NOT run the pump for an extended period of time in reverse direction or dry. Have a qualified
electrician change leads to correct rotation if necessary.
8. Open the service valves in the filter inlet, outlet, and backwash lines. Before starting the pump, verify
all valves are open. Open the manual air relief valve on top of the filter vessel. Start the pump and fill
the filter vessel. Once a steady stream of water is coming out of the manual air relief valve, and all air has
been evacuated, the manual air relief valve can be closed. Verify the auto air vent is open by turning the
knob located on the top of the unit one half turn.
9. Check the voltage and current of all leads on the pump motor. The correct amperage draw can be found
on the motor nameplate (refer to Table V on page 11).
10. Check the filter unit for any unusual noise or vibration. Shut filter unit off and contact your local PUROFLUX
representative or the factory direct if there are any questions about the performance of the filter unit.
11. Check the filter unit and all integral piping to the unit for any air or fluid leaks. All air leaks must be found
and repaired. Failure to do so could result in poor performance and/or personal injury.
12. Backwash the filter (refer to Backwash Cycle on page 15 and Table II on page 7). After backwashing
the filter, check the pressure gauge on top of the filter vessel and record the clean start up pressure. Use
the starting pressure as a bench mark whenever routine maintenance is preformed.
13. After several hours of run time from start up, perform steps 8 through 12 again.
PF-40 Series Filter (ver 8/21)
Page 16

OPERATION IN COLD WEATHER
When the PF-40 series filter is exposed to below-freezing temperatures, it will require protection to
prevent freezing. An indoor installation in a heated room is the best way to prevent freezing of any
liquid in the filter unit. If an indoor installation is not practical, supplemental heat must be supplied. Heat
tape and insulation around the liquid filled filter components must be used to prevent freezing. The filter
unit should be drained when not in use for long periods of time. Refer to shutdown procedures below.
SHUTDOWN
The following services should be performed when the unit is to be shutdown for a prolonged time period.
1. Run the filter unit through a complete backwash cycle.
2. Shut off and lock out all electrical power.
3. Close the service valves in the filter inlet, outlet and backwash lines.
4. Relieve all pressure from the filter vessel and piping. Open the manual relief valve located on top of the
vessel, and leave the valve open.
5. Drain all external piping to and from the filter.
6. Remove the drain plug on the filter vessel. Allow the liquid to drain. After all liquid has drained replace
the drain plug. If supplied, open the drain plug on the pre-strainer housing. Allow all the liquid to drain and
then replace the drain plug.
7. If supplied, remove the bolts from the pump pre-strainer cover. Remove the cover, and clean debris from
the pump pre-strainer basket. Inspect the gasket and lubricate (replace gasket if necessary). Replace the
basket and cover and tighten bolts.
8. Remove the top handhole/manhole cover by removing the hex nut on the crab clamp by pushing
the handhole/manhole into the vessel (do not drop handhole/manhole). Remove and inspect the gasket
(replace if necessary).
9. Inspect the media for foreign material. Over a period of time, a build up of debris may become imbedded
in the media which cannot be backwashed out. Contaminated media should be discarded. If the media pack
is contaminated, replace the media. If the media is removed, thoroughly inspect the internal assembly
before loading new media (refer to Loading Media and Table IV on page 8). Reinstall the handhole/manhole
cover.
10. Close the manual air relief valve located on the top of the vessel.
PF-40 Series Filter (ver 8/21)
Page 17

P U R O F L U X C O R P O R A T I O N
RECOMMENDED SPARE PARTS
PUROFLUX maintains a complete stock of replacement parts. When ordering replacement or stock parts,
be sure to include the unit serial and model numbers.
The following spare parts are recommended:
1. Gaskets for filter vessel handholes/manhole.
2. Pre-strainer gasket (optional).
3. Replacement media.
4. Pump seal and gasket kit (optional).
5. Transformer fuses (automatic units only).
FLUID TREATMENT
Filtration is an effective way of reducing the level of suspended solids in a system. However, it is only one
portion of a complete treatment program. Dissolved solids will not be removed from the system by media
filtration. It is important to realize that the dissolved solids will concentrate and can cause damage to a
system. Furthermore, airborne impurities and biological contaminants may be introduced into the system
through the equipment being filtered.
To control all potential contaminants, a chemical treatment program must be employed by a competent
professional. Such treatment should be initiated before the system start-up and continued regularly
thereafter.
SAFETY
All electrical, mechanical, and rotating machinery are potential hazards. It is important to be familiar
with the design, construction, and operation of all equipment before performing any work. Always use
adequate safeguards (including use of protective clothing where necessary or required) whenever
installing, operating, or working on the equipment.
Care should be taken when working on, near, or around this equipment. Appropriate safeguards must be
established to prevent personnel and/or public from injury and to prevent damage to the equipment,
affiliated system, and premises.
It is important to be thoroughly familiar with the equipment, associated system, controls, and the
procedures set forth in this manual. Only qualified personnel should operate, maintain, and repair this
equipment. Always follow proper procedures and use the correct tools, when handling, lifting, installing,
operating, maintaining, or repairing the equipment. This will aid in the prevention of personal injury and/or
property damage.
PF-40 Series Filter (ver 8/21)
Page 18

PUROFLUX CORPORATION
2121 Union Place, Simi Valley, CA 93065
Phone: (805) 579-0216 Fax: (805) 579-6005
Sand Filter Pre Start-Up Check List
Equipment model:
Equipment designation (TAG):
Equipment location:
Equipment Serial Number:
ELECTRICAL INSPECTION
[Y]
[N]
* Electrical completed and disconnect installed
per code compliance.
[]
[]
* Wire sizing per code. [] []
* Unit grounded per code
[]
[]
* Wire terminations check/verified for proper torque.
[]
[]
* Voltage and motor amps (per phase) documented. [] []
* Motor rotation verified.
[]
[]
AUTOMATIC CONTROLS (where applicable)
[Y]
[N]
* Control wiring complete.
[]
[]
* Control "points" confirmed.
[]
[]
* Electrical system interlocks complete. [] []
* Verify timer setting. .
[]
[]
PF-40 Series Filter (ver 8/21)
Page 19

EQUIPMENT INSTALLATION [Y] [N]
*
Sufficient access around equipment installation. [] []
*
Adequate water capacity for system startup. [] []
*
Skid restraints installed and complete per code. [] []
*
Manufacturer's O&M available. [] []
*
Internals inspected (prior to media installation) [] []
*
Media installed per mfg. recommendations. [] []
*
Hand/manholes properly installed (gaskets seated correct). [] []
DISTRIBUTION (TO AND FROM EQUIPMENT) [Y] [N]
*
Piping complete. [] []
*
Piping pressure tested. [] []
*
Piping adequately supported independent. [] []
*
Piping properly sized. [] []
*
System isolation valve installed as required. [] []
*
Verify pump strainer clean (where applicable). [] []
*
Verify piping connections (inlet/outlet/waste/backwash source) [] []
.
*
Verify working pressure of system. [] []
PF-40 Series Filter (ver 8/21)
Page 20
Table of contents
Other puroflux Water Filtration System manuals
Popular Water Filtration System manuals by other brands

Spectra Watermakers
Spectra Watermakers AQUIFER 150 owner's manual

Everpure
Everpure Claris M Installation and operation

Premier
Premier EZ-RO 4 Installation, operation and maintenance manual

Econ
Econ 1096 Installation & operation manual

Pentair
Pentair STA-RITE SAND DOLLAR Installation and user guide

Tenco
Tenco ENOLMATIC manual

Judo
Judo i-soft TGA 2 Installation and operating instructions

Davey
Davey Steriflo UV130 Installation and operating instructions

AAF
AAF FAH-202-2P-MD Installation, operation and maintenance instructions

Pentair
Pentair INTELLICHLOR COMSYS-16 installation guide

Zodiac
Zodiac Nature2 Express operating manual

GE
GE SmartWater GXWH35F installation instructions