manuals.online logo
Brands
  1. Home
  2. •
  3. Brands
  4. •
  5. Pyle
  6. •
  7. Car Video System
  8. •
  9. Pyle View PLDVD7M User manual

Pyle View PLDVD7M User manual

Other manuals for View PLDVD7M

1

Other Pyle Car Video System manuals

Pyle PLDNANDVR695 User manual

Pyle

Pyle PLDNANDVR695 User manual

Pyle PLVW56MN User manual

Pyle

Pyle PLVW56MN User manual

Pyle PYLE View Series PLVWR7300 User manual

Pyle

Pyle PYLE View Series PLVWR7300 User manual

Pyle PLD76BK User manual

Pyle

Pyle PLD76BK User manual

Pyle PLTV7.5DIN User manual

Pyle

Pyle PLTV7.5DIN User manual

Pyle PLD71MU User manual

Pyle

Pyle PLD71MU User manual

Pyle PLDVD188 User manual

Pyle

Pyle PLDVD188 User manual

Pyle PLVSHR6 User manual

Pyle

Pyle PLVSHR6 User manual

Pyle PLVIN65 User manual

Pyle

Pyle PLVIN65 User manual

Pyle PLDVD168 User manual

Pyle

Pyle PLDVD168 User manual

Pyle PLVSR7B User manual

Pyle

Pyle PLVSR7B User manual

Pyle PLHR78W User manual

Pyle

Pyle PLHR78W User manual

Pyle PYLE View Series PLHR4M User manual

Pyle

Pyle PYLE View Series PLHR4M User manual

Pyle PLINTBL10 User manual

Pyle

Pyle PLINTBL10 User manual

Pyle PLDVD128 User manual

Pyle

Pyle PLDVD128 User manual

Pyle PLDVSL7 User manual

Pyle

Pyle PLDVSL7 User manual

Pyle PLVWR1752 User manual

Pyle

Pyle PLVWR1752 User manual

Pyle PLVIN56 User manual

Pyle

Pyle PLVIN56 User manual

Pyle PYLE PL7PHRB User manual

Pyle

Pyle PYLE PL7PHRB User manual

Pyle PLDVD-150 User manual

Pyle

Pyle PLDVD-150 User manual

Pyle PLDVD124 Installation instructions

Pyle

Pyle PLDVD124 Installation instructions

Pyle PL2DN4D User manual

Pyle

Pyle PL2DN4D User manual

Pyle PLSD131BT User manual

Pyle

Pyle PLSD131BT User manual

Pyle PLVWR770T User manual

Pyle

Pyle PLVWR770T User manual

Popular Car Video System manuals by other brands

Farenheit MD-1510CM instruction manual

Farenheit

Farenheit MD-1510CM instruction manual

Mazda Connect manual

Mazda

Mazda Connect manual

RCA DRC97983 Manual de usuario

RCA

RCA DRC97983 Manual de usuario

Panasonic CY-VHD9401U Service manual

Panasonic

Panasonic CY-VHD9401U Service manual

Stinger HEIGH10 RB10RAM13B installation manual

Stinger

Stinger HEIGH10 RB10RAM13B installation manual

Alpine IVA-W203 - 6.5" Touch Screen 2-DIN DVD In-Dash... owner's manual

Alpine

Alpine IVA-W203 - 6.5" Touch Screen 2-DIN DVD In-Dash... owner's manual

Eonon E1057 instructions

Eonon

Eonon E1057 instructions

Milion D2223 user manual

Milion

Milion D2223 user manual

Metra Electronics 99-8153 installation instructions

Metra Electronics

Metra Electronics 99-8153 installation instructions

Voxx Electronics HR8MA1 owner's manual

Voxx Electronics

Voxx Electronics HR8MA1 owner's manual

Axxera AV604Bi quick start guide

Axxera

Axxera AV604Bi quick start guide

Clarion NX706E owner's manual

Clarion

Clarion NX706E owner's manual

Pyle view PLDN74BTi owner's manual

Pyle view

Pyle view PLDN74BTi owner's manual

Clarion NX602 quick start guide

Clarion

Clarion NX602 quick start guide

RCA DRC6296 - Twin 9" Mobile DVD System Manual Del Usuario

RCA

RCA DRC6296 - Twin 9" Mobile DVD System Manual Del Usuario

Fiat Uconnect 5.0 manual

Fiat

Fiat Uconnect 5.0 manual

Lanzar SVDVD5 owner's manual

Lanzar

Lanzar SVDVD5 owner's manual

Eonon E1060 instructions

Eonon

Eonon E1060 instructions

manuals.online logo
manuals.online logoBrands
  • About & Mission
  • Contact us
  • Privacy Policy
  • Terms and Conditions

Copyright 2025 Manuals.Online. All Rights Reserved.

7” TFT-LCD Monitor
w/Built-in DVD/CD/MP3 Player
PLDVD7M
Operation Manual
Table of Contents
Welcome! ----------------------------------------------------------------------- 2
Precautions ---------------------------------------------------------------------3
Installation
Installation ----------------------------------------------------------------------4
Operation
Monitor Section --------------------------------------------------------------- 5
Adjusting the display setting-------------------------------------------------5
DVD section --------------------------------------------------------------------6
Operate DVD by Remote control--------------------------------------------7
Preparing the Remote Control
Inserting the Batteries--------------------------------------------------------8
Using the Remote Control----------------------------------------------------8
Connections
Connection Diagram ---------------------------------------------------------9
Additional Information
Troubleshooting -------------------------------------------------------------10
Specifications ----------------------------------------------------------------11
1
Welcome!
Thank you for purchasing the 7" headrest TFT-LCD Monitor with
DVD Player. For Maximum enjoyment and prolonged life of the
DVD player, we strongly recommend that you read the instruction man
ual carefully before attempting to operate the unit. Please store this
manual in a safe place for future reference.
Digital Video Discs are the best source of movies for your life.
The latest digital technology allows compression of an entire movie
onto one disc. DVD's provide greater picture clarity and sound fidelity
than any video player on the market.
* You can select PAL or NTSC system.
* In addition to normal screen mode, full screen and zoom
screen modes are also available.
* The low reflection liquid crystal panel reduces the glare
from outside lighting sources.
* You can manually adjust the brightness of the display according
to the prevailing light conditions of your surroundings.
* The backlighting control produces sharp contrast images
free from reversed or blurred colors.
* This unit has 1 Audio/Video input and1 Audio/Video output,
for additional connection to another monitor.
* In addition, this unit has a built-in IR transmitter of IR
wireless headphone. This Convenient feature allows you
to use infrared wireless headphones with this unit.
2
Precautions
To avoid the risk of serious injury or accident. Please read the
following precautions before installing and operating the unit.
On Safety
IMPORTANT: Always comply with your local traffic rules and
regulation.
▓ While driving
 ●The driver must not watch or operate the monitor. This is
  a safety hazard and may cause an accident.
 ●The driver must not listen to or use the headphones.
  It may be distracting and cause an accident.
If the driver wants to watch or operate the monitor at any time,
you must first park the car in a safe place before doing so.
▓ When operating
 ●Do not hang onto the monitor.
 ●Do not insert your hands, fingers or foreign objects into
the unit while the monitor is functioning. It may cause
injury or damage to the unit.
 ●Take care not to bump your head against the unit when
getting up from the back seat.
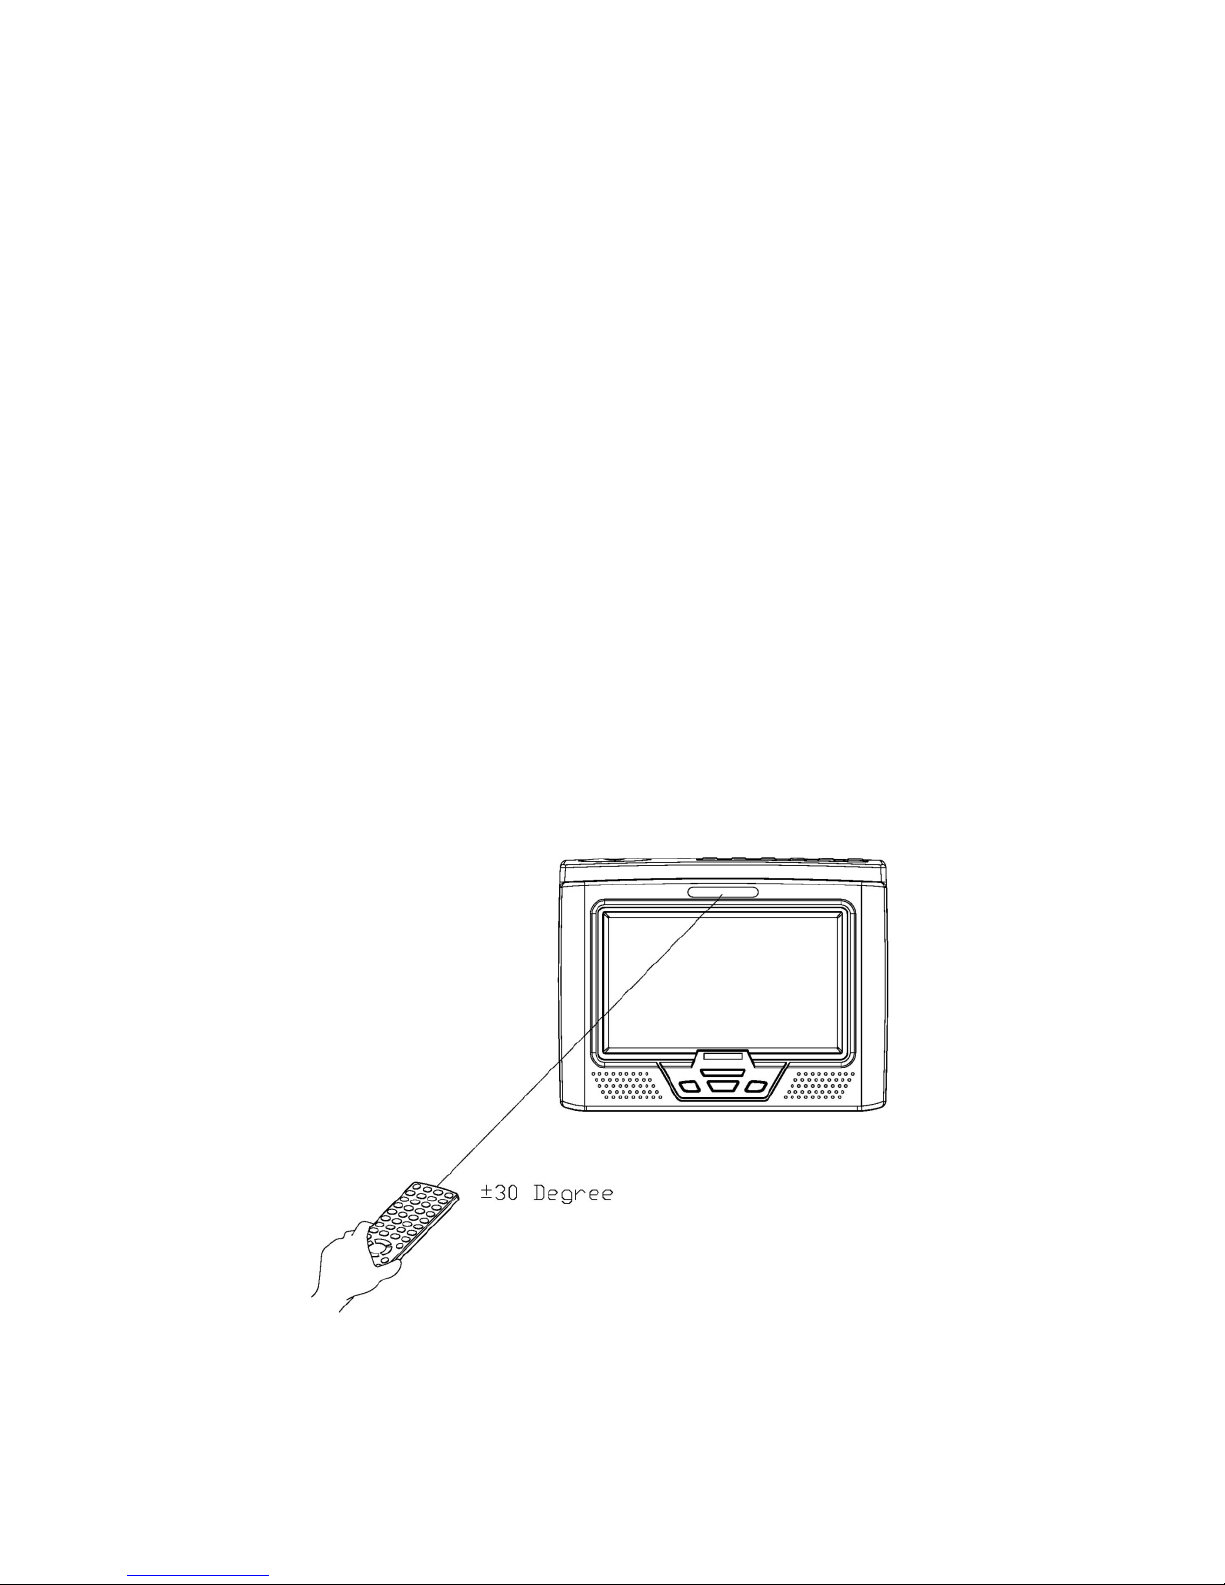
 ●Keep small articles, such as DVD Disks or Remote
Controls, out of the reach of children.
On Installation
●Installing this unit requires technical expertise. This unit
should be installed by a qualified technician or service
personnel.
●If you try to install this unit by yourself, do it properly, referring
to the installation and wiring diagrams in this operation manual.
Improper installation may result in a fire or an electric shock.
●Before installation, be sure to turn the ignition switch to the
OFF position or take the key out. Installing this unit with the
ignition on may cause battery drain or a short circuit.
●Do not damage any pipes, tubes, the fuel tank or electric
wiring when installing this unit. This can cause a fire.
If you drill a hole in car panels, make sure that any hidden
car parts will not be damaged.
●Do not use any nuts or bolts for safety devices such as
steering linkage, fuel supply braking systems. This can
cause a fire or an accident.
3
Installation
● Place the mounting bar on the poles of headrest and then tighten 4 long
screws until the mounting bar is fastening firmly to the headrest poles.
● Put the adapter on the face of L type mounting stand and screw it tightly.
● Slide the engagement nut into the slide bracket slot on the rear of the
monitor housing.
● Slide the engagement head on the monitor into the adapter of L-type
mounting stand and tighten firmly.
● Insert the L type mounting stand on the monitor into the mounting
bar and screw tight until the monitor is securely fastened to the
Mounting stand.
● Squeeze the clamp of engagement head and pull up to release monitor
from bracket.
4
MONITOR SECTION
1. POWER: Press "POWER" for ON/Off.
2. UP : Press "▲" to adjust volume up
3. MENU: Press "MENU" TO select OSD menu
4. DOWN: Press "▼" to adjust volume down.
ADJUSTING THE DISPLAY SETTING
Press the MENU on screen display OSD menu using the function
button, then scroll to the menu as follows:
BRIGHTNESS
COLOR
CONTRAST
TINT
SHARPNESS
DEFAULT
SOURCE
ZOOM
IR-PHONE
Press ▲ or ▼ to adjust Brightness
Press ▲ or ▼ to adjust Color.
Press ▲ or ▼ to adjust Contrast.
Press ▲ or ▼ to adjust TUBT for NTSC system.
Press ▲ or ▼ to adjust Sharpness.
NO / YES
AV1 or DVD
16:9 or 4:3
NO / YES
DVD SECTION
To operate DVD by pressing the buttons on up panel:
1. POWER: Press the"POWER" button, insert the disc with printed side
facing up into the disc slot, the player starts playback automatically.
2. EJECT: Press"EJECT" button to eject the disc.
3. PLAY/PAUSE: Press once to "PAUSE" a play, press again to resume
continuous playback.
4. FORWARD: Press "FF" to forward to next chapter
5. REVERSE: Press "REW" to previous chapter
6. STOP: Press the "STOP" button to stop the unit playback,
when press the "PLAY" buttons it will resume playback to the last scene
you were watching. If you press the "STOP" button twice, it will stop
the playback and go back to the initial Track/Chapter.
6
Operate DVD by Remote Control
1. POWER: To turn the unit ON or OFF.
2. MUTE: Turn off sound.
3. AUDIO: Changes the AUDIO soundtrack
on multi-audio soundtrack DVD disc.
4. OPEN/CLOSE: Open or close disc tray.
5. LANGUAGE: Choose different output
language.
6. 0-9: Choose number key
7. ANGLE: Changes the viewing angle on
multi- angle DVD disc.
8. SUBTITLE: Select or cancel subtitles.
9. EXIT: To exit selection
10. TIMER: Time indication
11. SETUP: Menu setup.
12. VOL-: Decreases current DVD Player
volume
13. DISPLAY: Display statistical disc
information during playback.
14. II: Press one time to stop
15. I<<: Go back last chapter
16. <<: RFV to reverse rapidly.
17. RETURN: Return to disc menu play
back.
18. REPEAT: Repeat playback for the
current chapter.
19. PROGRAM: Arrange program.
20. ZOOM: Enlarge the picture
21. TV/AV: Switch TV / AV button
23. DOWN: Decreases selected OSD function.
Also decreases monitor's volume.
24. UP: Increases selected OSD function. Also increases monitor's
volume.
26. CH+: TV channel choices
27. ENTER: Confirm the Track/Chapter selected with the number ke y or
selected with the cursor buttons on screen.
28. VOL+: Decreases current DVD Player volume
29. CH-: TV channel choices
31. STOP: Stop play
32. PLAY: Press one time to play DVD function.
33. >>I: Forward to next chapter
7
34. >>: Press next to skip to the next track
35. BOOKMARK: Memory play
36. A-B: Repeat play segment. Press once to set
37. FORMAT: Switch video output PAL/NTSC.
38. TITLE: Display the TITLE menu that is stored in the DVD disc.
40. MENU: Enter to menu playback.
41. MODE: Switch video input AV1/AV2
Inserting the Batteries
1.Open the battery compartment cover.
2.Insert the new batteries. Make sure that the positive and
negative terminals of the batteries are properly followed.
3.Close the cover Battery: two AAA size batteries.
Using the Remote Control
Face the remote control towards the player front face IR mark
(remote control signal receiver).
Operation angle: About 30 degrees in each the directions from
the front of the IR mark.
8
Connection Diagram
Refer to the connection diagram for the proper connections.
You can make connections shown as below. Please ask a qualified
technician for assistance on any other connections.
1.On a towel or soft cloth, gently place the monitor unit "face down"
on a stable work surface.
2.Locate the pigtail with the DIN connector.
3.Connect the DIN connector to the interface cable provided.
4.Connect the RED wire to the positive (+) battery terminal.
5.Connect the BLACK wire to a chassis electrical ground point.
6.Connect the cable with RED RCA jack to Audio Input and Yellow
RCA jack to Video Input Sources for your Video Program material.
7.In case of Video output, connect an RCA cable on the interface
cable box.
9