Pylontech PowerCube-X1 User manual

Lithium-Ion Phosphate Energy Storage System
PowerCube-X1/X2 Operation Manual
For UL version
Information Version: 2.4
US20PIXV1001


This manual introduces PowerCube-X1/X2 from Pylontech. PowerCube-X1/X2 is a high voltage
Lithium-Ion Phosphate Battery storage system. Please read this manual before you install the
battery and follow the instruction carefully during the installation process. Any confusion, please
contact Pylontech immediately for advice and clarification.
Content
1. SAFETY ................................................................................................................................................ 1
1.1 Symbol..................................................................................................................................1
Symbol in label ............................................................................................................................2
2. SYSTEM INTRODUCTION....................................................................................................................6
2.1 Product Introduce.............................................................................................................6
2.2 Specifications .....................................................................................................................6
2.2.1 The parameter of system................................................................................................7
2.2.2 Battery Module (H48050, H48074) ................................................................................8
Battery Module Front Interface ............................................................................................10
2.2.3 Control Module SC0500 (internal power supply)...................................................11
Definition of RJ45 Port Pin .......................................................................................................13
LED Indicators Instructions ......................................................................................................14
2.3 System Diagram...............................................................................................................14
2.3.1 Multiple battery string parallel connection via CAN communication
between MBMS and BMS diagram (battery string qty. ≤6 sets) ..................................14
2.3.2 Diagram between BMS and battery modules:...................................................15
3. INSTALLATION .................................................................................................................................. 15
3.1 Tools.....................................................................................................................................15
3.2 Safety Gear.......................................................................................................................16
3.3 System Working Environments Checking .................................................................16
3.3.1 Cleaning.........................................................................................................................16
3.3.2 Temperature..................................................................................................................17
3.3.3 Cooling System.............................................................................................................17
3.3.4 Heating System.............................................................................................................17
3.3.5 Fire-extinguisher System..............................................................................................17
3.3.6 Grounding System .......................................................................................................17
3.4 Package Items.................................................................................................................18
Accessories.................................................................................................................................18
Unpacking and check the Packing List: ............................................................................18
3.5 Handling and placement.............................................................................................19
3.5.1 Handling and placement of the battery module ..............................................19
3.5.2 Handling and placement of the rack....................................................................20
3.5.3 The fix and installation of the rack ..........................................................................20
3.5.4 Control Module (BMS) and all Battery Modules install into the Rack............21
3.5.5 Install the MBMS into a 19’ standard rack [On the top of BMS, or use the rack
configured by user]..................................................................................................................21
3.6 Cables connection.........................................................................................................21
3.6.1 Grounding connection: .............................................................................................21
3.6.2 Power and communication cable Connection .................................................22
3.6.3 ADD Switch Setting (Address Assignment) ...........................................................24
3.6.3.1 Under communication for single BMS (battery string qty. 1 set) .................24
3.6.3.2 Under CAN Communication Mode between MBMS and BMS (battery
string qty. ≤6 set) .......................................................................................................................24
3.6.3.3 Multi MBMS Communication Mode ....................................................................25
3.6.4 System turns on.............................................................................................................25
3.6.5 System turns off.............................................................................................................31
4. SYSTEM DEBUG ................................................................................................................................32
5. MAINTENANCE ................................................................................................................................ 33
5.1 Trouble Shooting:.............................................................................................................33
5.2 Replacement of main component ...........................................................................35
5.2.1 Replacement of Battery Module ............................................................................35
5.2.2 Replacement of Control Module (BMS)................................................................36
5.2.3 Replacement of 3rd level Control Module (MBMS) ............................................37
5.3 Battery Maintenance.....................................................................................................37
6. STORAGE RECOMMENDATIONS..................................................................................................... 39
7. SHIPMENT ......................................................................................................................................... 39
ANNEX 1: CABLE CONNECTION DIAGRAM ............................................................................................40
ANNEX 2: INSTALLATION AND SYSTEM TURN ON PROGRESS LIST.......................................................... 41
ANNEX 3: SYSTEM TURN OFF PROGRESS LIST...........................................................................................42

1
1. Safety
The PowerCube-X1/X2 is a high voltage DC system, operated by authorized person only. Read all
safety instructions carefully prior to any work and observe them at all times when working on with the
system.
PowerCube-X1/X2 est un système à haute tension CC, opéré uniquement par le personnel autorisé.
Lisez attentivement toutes les instructions de sécurité avant tout travail et respectez-les à tout
moment lorsque vous travaillez avec le système.
Incorrect operation or work may cause:
Une opération ou un travail incorrect peut causer:
Injury or death to the operator or a third party;
blessure ou mort à l'opérateur ou à un tiers;
Damage to the system hardware and other properties belonging to the operator or a third party.
Dommage au matériel du système et à d'autres propriétés appartenant à l'opérateur ou à un
tiers.
Skills of Qualified Person
Qualified personnel must have the following skills:
Le personnel qualifié doit avoir les compétences suivantes:
Training in the installation and commissioning of the electrical system, as well as the dealing with
hazards;
Formation en matière d'installation et de mise en service du système électrique, et de gestion
des risques;
Knowledge of the manual and other related documents;
Connaissance du manuel et d'autres documents concerné;
knowledge of the local regulations and directives.
Connaissance des réglementations et directives locales.
1.1 Symbol
Danger
Danger
Lethal voltage!
Tension mortelle!
Battery strings will produce high voltage DC power and can
cause a lethal voltage and an electric shock.
La batterie produira un courant continu à haute tension et
peuvent provoquer une tension mortelle et un choc
électrique.
Only qualified person can perform the wiring of the battery
strings.
Seule le personnel qualifié peut effectuer le câblage de la
batterie.

2
Warning
Avertisse
ment
Risk of battery system damage or personal injury
Risque d'endommagement du système de batterie ou de blessure
corporelle
DO not pull out the connectors while the system is working!
NE PAS debrancher les connecteurs lorsque le système
fonctionne!
De-energize from all multiple power sources and verify that
there is no voltage.
Mettez hors tension toutes les sources d'alimentation et vérifiez
qu'il n'y a pas de tension.
Caution
Attention
Risk of battery system failure or life cycle reduces.
Risque de défaillance ou de réduction de durée de vie du système
de batterie.
Symbol
in label
Read the product and operation manual before operating the
battery system!
Lisez le manuel du produit avant d'utiliser le système de batterie!
Symbol
in label
Danger! Safety!
Danger ! Sécurité !
Symbol
in label
Warning electric shock!
Avertissement : choc électrique !
Symbol
in label
Do not place near flammable material
Ne placez pas à proximité de matériaux inflammables
Symbol
in label
Do not reverse connection the positive and negative.
N’inversez pas la connexion des pôles positif et négatif.
Symbol
in label
Do not place near open flame
Ne placez pas près d'une flamme nue

3
Symbol
in label
Do not place at the children and pet touchable area.
Ne placez pas à la portée des enfants et des animaux
domestiques.
Symbol
in label
Recycle label.
Étiquette de recyclage.
Symbol
in label
Label for Waste Electrical and Electronic Equipment (WEEE)
Directive (2012/19/EU)
Étiquette pour Directive de rebuts d'équipements électriques et
électroniques (WEEE) (2012/19/UE)
Symbol
in label
The certificate label for EMC.
Étiquette de certificat pour EMC.
Symbol
in label
The certificate label for Safety by TÜV SÜD.
Étiquette de certificat de sécurité par TÜV SÜD.
Symbol
in label
The certificate label for Safety by TÜV Rheinland.
Étiquette de certificat de sécurité par TÜV Rheinland.
Symbol
in label
The certificate label for Safety by TÜV Rheinland.
Étiquette de certificat de sécurité par TÜV Rheinland.

4
Danger: Batteries deliver electric power, resulting in burns or a fire hazard when they are short
circuited, or wrongly installed.
Les piles fournissent de l'énergie électrique, ce qui entraîne des brûlures ou un risque
d'incendie lorsqu'elles sont court-circuitées ou mal installées.
Danger: Lethal voltages are present in the battery terminals and cables. Severe injuries or death may
occur if the cables and terminals are touched.
Des tensions mortelles sont présentes dans les bornes et les câbles de la batterie. Des
blessures graves, voire mortelles, peuvent survenir si les câbles et les bornes sont touchés.
Warning: Do not open or deform the battery module;
Ne pas ouvrier ou déformer le module de batterie.
Warning: Whenever working on the battery, wear suitable personal protective equipment (PPE) such
as rubber gloves, rubber boots and goggles.
Chaque fois que vous travaillez sur la batterie, portez un équipement de protection
individuelle (PPE) approprié, tel que des gants en caoutchouc, des bottes en caoutchouc
et des lunettes de protection.
Warning: PowerCube-X1/X2 system working temperature range: 0℃~50℃; Optimum temperature:
18℃~28℃.Out of the working temperature range may cause the battery system over / low
temperature alarm or protection which further lead to the cycle life reduction as well as. It
will affect the warranty terms as well.
Plage de température de fonctionnement du système PowerCube-X1/X2: 0°C –50°C ;
température optimale: 18°C-28°C. En dehors de la plage de température de
fonctionnement, la batterie risque de réduire sa durée de vie et même l'alarme de
protection contre les températures trop élevées ou trop basses du système de batterie. Cela
affectera la garantie.
Warning: For battery installation, the installer shall refer to NFPA70 standard for operation.
Avertissement :
Lors du montage extérieur de la batterie, le montage doit être réalisé conformément à la
Norme NFPA70.
Caution: Improper settings or maintenance can permanently damage the battery.
Le réglage ou la maintenance incorrecte peuvent endommager en permanence la
batterie.
Caution: Incorrect inverter parameters will lead to the premature aging of battery.
Les paramètres de l’inverseur incorrects entraîneront un vieillissement prématuré de la
batterie.

5
1.2 Reference standards
No
Description
Code
1
Safety standard for
secondary lithium batteries
IEC62619
2
UN38.3 Safe transport
standard
UN38.3
3
CE EMC StandardCE EMC
Directive 2014/30/EU
EN IEC 61000-6-1:2019
EN IEC 61000-6-2:2019
EN 61000-6-3:2007+A1
EN 61000-6-4:2007+A1
IEC 61000-6-1:2016
IEC 61000-6-2:2016
IEC 61000-6-3:2006+A1
IEC 61000-6-4:2018
4
Battery Cell safety standard
UL1642
5
Battery Cell safety standard
UL1973
6
Battery Cell safety standard
JIS C 8715-2
7
Battery Cell safety standard
UL9540A
8
safety standard for electrical
devices
CE LVD Directive 2014/35/EU
IEC62477-1
9
Safety Standard for Lithium
Battery (US)
UL1973

6
2. System Introduction
2.1 Product Introduce
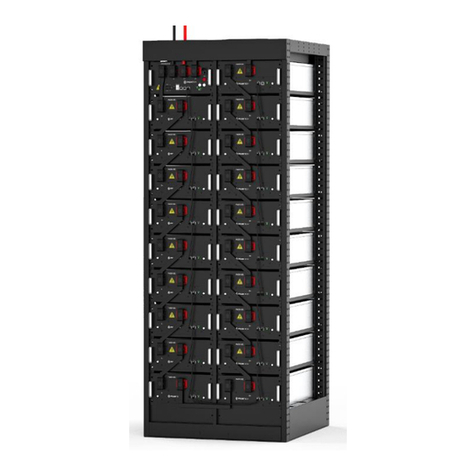
PowerCube-X1/X2 is a high voltage battery storage system based on lithium iron phosphate battery,
which is one of the new energy storage products developed and produced by Pylontech. It can be
used to support reliable power for various types of equipment and systems. PowerCube-X1/X2 is
especially suitable for those application scenes which required high power output, limited installation
space, restricted load-bearing and long cycle life.
2.2 Specifications
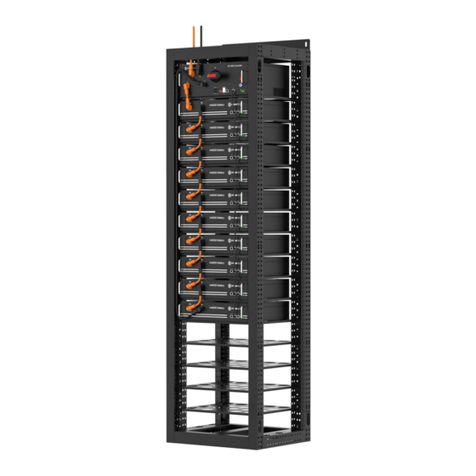
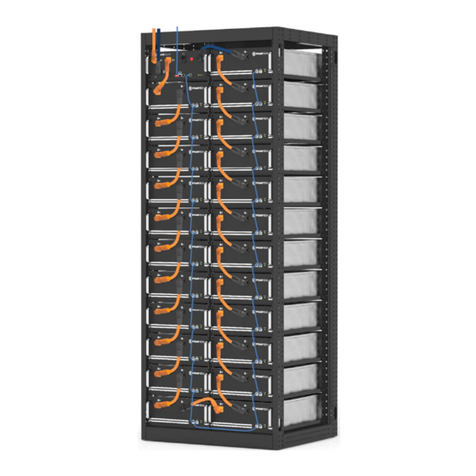
PowerCube-X1 PowerCube-X2

7
2.2.1 The parameter of system
Product Type
PowerCube-X1-48/zzzV
PowerCube-X2-48/zzzV
(zzz=96~528, in step of 48)
Product Name
LFP Lithium Ion Energy Storage
System
LFP Lithium Ion Energy
Storage System
Cell Technology
Li-ion(LFP)
Li-ion(LFP)
Battery System Capacity(kWh)
2.4 ×n
(where n = 2~10)
3.552 ×n
(where n = 2~10)
Battery System Voltage(Vdc)
48 ×n
(where n = 2~10)
48 ×n
(where n = 2~10)
Battery System Capacity(AH)
50Ah
74Ah
Battery Controller Name
SC0500-100
SC0500-100
Battery Module Name
H48050
H48074
Battery Module Quantity(pcs)
n (where n = 2~10)
n (where n = 2~10)
Battery Module Capacity(kWh)
2.4
3.552
Battery Module Voltage(Vdc)
48
48
Battery Module Capacity(AH)
50
74
Battery Module Cell Series
Quantity(pcs)
15
15
Battery System Charge Upper-
Voltage(Vdc)
54 ×n
(where n = 2~10)
54 ×n
(where n = 2~10)
Battery System Charge/Discharge
Current(Standard)
10
14.8
Battery System Charge/Discharge
Current(Normal)
25
37
Battery System Charge/Discharge
Current(Max)
50
74
Battery System Discharge lower-
Voltage(Vdc)
43.5 ×n
(where n = 2~10)
43.5 × n
(where n = 2~10)
Short circuit rating
<4000
<4000
Efficiency(@0.5C-rate)
96%
96%
Depth of Discharge
90%
90%
Dimension(W*D*H,mm)
600mm(W)*505mm(D)*1300mm
(H) (where n = 2~8), or
600mm(W)*505mm(D)*2130mm
(H)
(where n = 2~10)
600mm(W)*505mm(D)*2130m
m(H)
(where n = 2~10)
Communication
MODBUS RTU\CAN
MODBUS RTU\CAN
Protection Class
IP20
IP20
Weight (kg)
Rack 1: 58kg+ 24kg×n (where n
= 2~8),
Or Rack2: 77kg+ 24kg×n
(where n = 2~10),
77kg+ 32kg×n
(where n = 2~10)

8
Operation Cycle Life
5,000
5,000
Operation Life(Years)
15+
15+
Cooling Type
Nature
Nature
Operation Temperature(℃)
0~50℃
0~50℃
Storage Temperature(℃)
-20~60℃
-20~60℃
Humidity
5~95%
5~95%
Product Certificate
UL1973, IEC62619 ,
CE EMC, IEC62477-1,
UL1973, IEC62619 ,
CE EMC, IEC62477-1
Transfer Certificate
UN38.3
UN38.3
Other:
1)Battery Controller
Dimensions(W*D*H)
442*390*176
442*390*176
2)Battery Module Dimensions
(W*D*H)
442*390*100
442*390*132
Remark: The parameter will be changed when the battery modules in different series (2~10 pcs
battery modules).
2.2.2 Battery Module (H48050, H48074)
Product Type
H48050
Cell Technology
Li-iron (LFP)
Battery Module Capacity (kWh)
2.4
Battery Module Voltage (Vdc)
48
Battery Module Capacity (AH)
50
Battery Module Charge Voltage (Vdc)
54
Battery System Charge/Discharge Current (Standard)
10
Battery Module Charge/Discharge Current (Normal)
25
Battery Module Charge/Discharge Current (Max.)
50
Battery Module Discharge Voltage (Vdc)
43.5
Dimension (W*D*H, mm)
442*390*100
Communication
RS232 / CAN
Protection Class
IP20
Weight
24
Operation Life
15+Years
Operation Cycle Life
5,000
Operation Temperature
0~50℃
Storage Temperature
-20~60℃
Transportation Certificate
UN38.3

9
Product Type
H48074
Cell Technology
Li-iron(LFP)
Battery Module Capacity(kWh)
3.552
Battery Module Voltage(Vdc)
48
Battery Module Capacity(AH)
74
Battery Module Charge Voltage(Vdc)
54
Battery Module Charge/Discharge Current(Standard)(A)
14.8
Battery Module Charge/Discharge Current(Normal)(A)
37
Battery Module Charge/Discharge Current(Max.)(A)
74
Battery Module Discharge Voltage(Vdc)
43.5
Dimension(W*D*H, mm)
442*390*132
Communication
RS232\CAN
Protection Class
IP20
Weight(kg)
32
Operation Life(Years)
15+
Operation Cycle Life
5,000
Operation Temperature(℃)
0~50
Storage Temperature(℃)
-20~60
Transportation Certificate
UN38.3

10
Battery Module Front Interface
Power Terminal +/-
To connect battery series power cables.
Status
Status light: to show the battery module’s status (RUN●, Alarm● and Protection●).
RS232 Terminal
Console Communication Terminal: (RJ45 port) follow RS232 protocol, for manufacturer or
professional engineer to debug or service.
Link Port 0, 1
Link Port 0, 1 Communication Terminal: for communication between multiple serial battery
modules and control module.
Power Terminals
Power cable terminals: there are two pair of terminals with same function,
one connects to equipment, the other one paralleling to other battery
module for capacity expanding. For each single module, each terminal
can achieve charging and discharging function.
For power cables uses AMPHENOL connectors. Must keep pressing the
Lock Button during pulling out the power plug.

11
2.2.3 Control Module SC0500 (internal power supply)
Product Type
SC0500-100
Related Product
H48050/H48074
Controller Working Voltage
60~600Vdc
System Operation Voltage(Vdc)
60~600
Charge/Discharge Current(Max.)(A)
100
Self-consumption Power(W)
8
Dimension(W*D*H,mm)
442*390*132
Communication
Modbus RTU\CAN
Protection Class
IP20
Weight(kg)
8.5
Operation Life(Years)
15+
Operation Temperature(℃)
-20~65
Storage Temperature(℃)
-40~80
Product Certificate
TUV, CE
Control Module (SC0500-100) Front Interface

12
Power Terminal +/-
To connect battery power cables in series.
Power Switch
Switch the battery system’s (control module and high voltage DC power) ON/OFF.
Caution: When the breaker is tripped off because of over current or short circuit, must wait after
30min to turn on it again, otherwise may cause the breaker damage.
Attention : Lorsque le disjoncteur est déclenché en raison d'une surintensité ou d'un court-circuit,
il ne peut être rallumé qu’après avoir attendu plus de 30 minutes, sinon cela pourrait
endommager le disjoncteur.
External Power Terminal +/-
Connect battery system with Inverter.
Dry Contact Terminal
Dry Contact Terminal: provided 2 input and 4 output dry contact signal.
Out1
Stop Charge
Always close, when open shall stop charge.
Out2
Stop Discharge
Always close, when open shall stop discharge.
Out3
Error
Always close, when open shall stop operation
Out4
Current Limit
Always close, when open shall limit current to ≤0.2C-rate
In1
Internal Using ONLY
For wake up signal serial connection using ONLY.
In2
For wake up or
For Emergency Stop signal**
Always close, when open will switch off the system.
Reset
Reset Button: Long press this button to restart the battery system.
ADD
ADD Switch is a 6 bit dial switches to manually distribute the communication address of the battery
system. Nether position is OFF, means “0”. Upper position is ON, means “1”. For BMS, 1st bit to 5th
bit is for address allocation, and the 6th bit dial switch support a 120Ω resistance (Terminal
Resistance).
Start
Start function: press more than 5sec until the buzzer rings, to turn on controller.
Black start function: 30 sec after system turned on and finished self-check process, press and hold
the start button again for more than 5sec, after ‘STATUS’ lamp becomes green, the relay will close
and output for 10 min.
Fonction de démarrage : appuyez plus de 5 secondes jusqu'à ce que le buzzer sonne, pour allumer
le contrôleur.
Fonction Black start : 30 secondes après la mise sous tension du système et la fin du processus
d'auto-vérification, appuyez à nouveau sur le bouton de démarrage et maintenez-le enfoncé
pendant plus de 5 secondes, après que le voyant «STATUS»devienne vert, le relais se fermera et
sortira pendant 10 minutes.

13
Mise sous tension: appuyez et maintenez >=
5 sec jusqu'à ce que le buzzer sonne
CAN / RS485
CAN Communication Terminal: (RJ45 port) follow CAN protocol, for communication between
battery system and Inverter.
RS485 Communication Terminal: (RJ45 port) follow Modbus RTU protocol, for communication
between battery system and Inverter.
RS232 Terminal
Console Communication Terminal: (RJ45 port) follow RS232 protocol, for manufacturer or
professional engineer to debug or service.
Link Port 1
Link Port 1 Communication Terminal: (RJ45 port) for communication between multiple serial
battery modules and control module.
Definition of RJ45 Port Pin
No.
CAN
RS485
RS232 Pin
1
---
---
---
2
GND
---
---
3
---
---
TX
4
CANH
---
---
5
CANL
---
---
6
---
GND
RX
7
---
RS485A
---
8
---
RS485B
GND
12VDC Output Terminal
Power supply for 3rd level control module, with 12VDC cable:
Status
Status light: to show the battery module’s status (RUN●, Alarm● and Protection●).
LED Status Indicators
Battery capacity indicator: 4 green lamps, each light represents 25% capacity.

14
LED Indicators Instructions
Battery
Statues
Protection /
Alarm /
Normal
RUN
ALM
PRC
Capacity SOC
Descriptions
●
●
●
●
●
●
●
Shut Down
Off
Off
Off
Off
Off
Off
Off
All off
Sleep
Normal
Flash1
Off
Off
Off
Off
Off
Off
Indicates Sleep Mode, to
save the power.
Standby
Normal
Flash1
Off
Off
Off
Off
Off
Off
Indicates Standby mode.
Alarm
Off
Light
Off
Off
Off
Off
Off
Indicates the battery is low or
high
Charge
Normal
Light
Off
Off
The highest capacity
indicator LED flashes (flash
2), others lighting
The highest capacity
indicator LED flashes (flash 2),
others lighting
Alarm
Off
Light
Off
Protection
Off
Off
Light
Off
Off
Off
Off
Stop charging, PRC lighting
Discharge
Normal
Flash3
Off
Off
Indicate based on capacity
Alarm
Off
Light
Off
Protection
Off
Off
Light
Stop discharging, PRC lighting
Abnormal
Protection
Off
Off
Light
Off
Off
Off
Off
Stop charging/discharging,
PRC lighting
Note: The flashing instructions, flash 1 –0.25s light / off 3.75 seconds; flash 2 - 0.5s light / 0.5s off; flash
3 - 0.5s light / 1.5s off.
2.3 System Diagram
2.3.1 Multiple battery string parallel connection via CAN communication between MBMS and BMS
diagram (battery string qty. ≤6 sets)

15
2.3.2 Diagram between BMS and battery modules:
3. Installation
Please check every installation step in detail at <Annex 2: Installation and System Turn ON Progress
List> during the install.
3.1 Tools
The following tools are required to install the battery pack:
Wire Cutter
Crimping Modular Plier
Cable Ties
Screw Driver Set
Electric Screw Driver
Adjustable Wrench
Sleeve Piece
1000VDC Multimeter

16
NOTE
Use properly insulated tools to prevent accidental electric shock or short circuits.
If insulated tools are not available, cover the entire exposed metal surfaces with available insulated
alternatives, except their tips, with electrical tape.
3.2 Safety Gear
It is recommended to wear the following safety gear when dealing with the battery pack.
Il est recommandé de porter l'équipement de sécurité suivant lors de l’opération de la batterie.
Insulated gloves Safety goggles Safety shoes
Gants isolés Lunettes de sécurité Chaussures de sécurité
3.3 System Working Environments Checking
3.3.1 Cleaning
The battery system has high voltage connectors. The clean condition will cause the isolation
characteristic of the system.
Le système de batterie a des connecteurs à haute tension. La condition de nettoyage entraînera la
caractéristique d’isolation du système.
Before installation and system working must clean the dust and iron scurf to keep the environments
cleaning. And the environment must have certain anti-dust ability.
Avant l'installation et le fonctionnement du système, vous devez éliminer la poussière et le copeau
de fer pour maintenir l'environnement propre. Et l'environnement doit avoir une certaine capacité
anti-poussière.
The system after long term running must check the humidity and dust cover or not. If heavy dust
cover with high humidity on the system should stop the system running and make clean specially for
the high voltage connectors.
Après une longue période de fonctionnement, le système doit vérifier l’humidité et le pare-poussière
ou non. En cas de forte couverture de poussière avec une humidité élevée sur le système, celui-ci
doit être arrêté et doit être nettoyé spécialement pour les connecteurs à haute tension.
Danger: the power cables and plugs still have high voltage DC power from serial connected
battery modules (battery module can’t be turned off), must be careful to handle the
Power Plugs.
Les câbles d’alimentation et les fiches sont toujours alimentés en courant continu à haute
Other manuals for PowerCube-X1
3
This manual suits for next models
1
Table of contents
Other Pylontech Storage manuals

Pylontech
Pylontech Force-H2-V2 User manual

Pylontech
Pylontech PowerCube-X1-V2 User manual

Pylontech
Pylontech PowerCube-X1 User manual

Pylontech
Pylontech Force-L2 User manual

Pylontech
Pylontech amber rock User manual

Pylontech
Pylontech Force-H1 User manual

Pylontech
Pylontech PowerCube-X1 User manual

Pylontech
Pylontech Force-H1-V2 User manual

Pylontech
Pylontech PowerCube-M2 User manual

Pylontech
Pylontech PowerCube-H1-V2 User manual