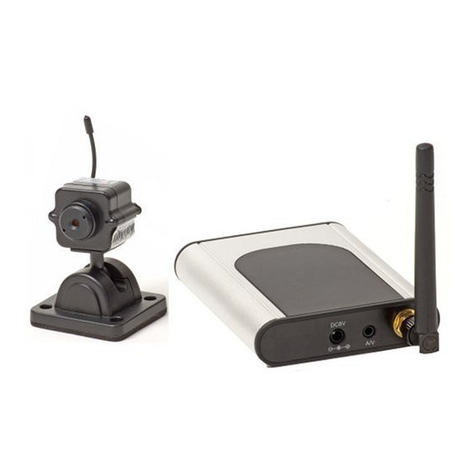
Q-See EasyView QN6401X User manual

1
Streaming Wireless IP Camera
User Manual
EasyView
QN6401X
View Anywhere ∙ Share Anytime

2 3
© 2011 Q-See. Reproduction in whole or in part without written permission is
prohibited. All rights reserved. This manual and software and hardware described
herein, in whole or in part, may not be reproduced, translated, or reduced to any
machine-readable form without prior written approval.
Trademarks: All brand names and products are trademarks or registered
trademarks of their respective owners.
Q-See is a registered trademark of DPS, Inc.
Disclaimer: The information in this document is subject to change without
notice. The manufacturer makes no representations or warranties, either express
or implied, of any kind with respect to completeness of its contents.
Manufacturer shall not be liable for any damages whatsoever from misuse of this
product.
Thank You for Choosing a Q-See
Product!
All of our products are backed by a conditional service warranty covering all
hardware for 12 months from the date of purchase. Additionally, our products also
come with a free exchange policy that covers all manufacturing defects for one
month from the date of purchase. Permanent upgrading service is provided for the
software and is available at www.Q-See.com.
Be certain to make the most of your warranty by completing the registration
form online. In addition to warranty and technical support benefits, you’ll receive
notifications of product updates along with free downloadable firmware updates
for your DVR. Register today at www.Q-See.com!
Please see the back of this manual for exclusions.
This manual is written for the Q-See’s QN6401X EasyView wireless IP camera.
This manual was accurate at the time it was completed. However, because of our
ongoing effort to constantly improve our products, additional features and functions
may have been added since that time and on-screen displays may change. We
encourage you to visit our website at www.Q-See.com to check for the latest
product announcements. You can also find technical details for your specific
camera on its product page at our site.
Throughout the manual we have highlighted warnings and other important
information that will assist you in operating your new system in a safe and
trouble-free manner. Please take the time to read and follow all instructions and
pay attention to alerts as shown below:
About this Manual
DMQN6401X Rev. 1.0 12/12/12
NOTE! Text in blue boxes with the Information icon offer
additional guidance and explanations about how to make the
most out of your system.
IMPORTANT! Red boxes with this icon indicate warnings.
To prevent possible injury or damage to the product, read all
warnings before use.

4 5
1. BEFORE YOU BEGIN 5
2. INTRODUCTION 7
3. CAMERA SETUP 8
3.1 Placement 8
WiFi 8
Field of View 8
3.2 Connecting the camera 9
Micro SD Memory Card 9
Network Cable 9
4. INSTALLING EVIEW APP 11
4.1 Installing eView for Android 12
4.2 Installing eView for Apple 13
4.3 Registering and Login 14
Creating an eView Account 14
About Passwords 15
Login 15
Adding Cameras 16
4.4 Setting up WiFi 18
5. SET UP USING A COMPUTER 20
5.1 Registration and Software 20
5.2 Adding Cameras 22
5.2 Setting up WiFi 23
6. USING YOUR CAMERA 24
6.1 eView Mobile App 24
6.2 Web Features 29
Questions or Comments? Contact Us 31
Product Warranty 31
TABLE OF CONTENTS
For your safety
To prevent damage to your Q-See product or injury to yourself or to others, read
and understand the following safety precautions in their entirety before installing
or using this equipment.
1. BEFORE YOU BEGIN
Care and caution
nCare should be taken during transportation, storage and installation of this
camera to avoid rough handling, dropping, or other abuse in order to prevent
damage to the optics or components inside the camera.
nThe camera should be installed in accordance with electrical standards
including keeping the camera and cable away from high voltage, using a surge
protector and using only the rated power supply.
nDo not use strong or abrasive cleaners on camera body or lens. The camera
should not be immersed in water. Use a damp cloth for cleaning the housing
and a lens cloth for the optics.
nDo not attempt to disassemble the camera. Only authorized, trained
technicians should service this camera.
nYour camera is designed for indoor use and should not be placed outdoors.
nDo not point camera directly at the sun or other strong light source.
FCC Class B Notice
This device complies with Part 15 of the FCC Rules. Operation is subject to the
following two conditions:
1. This device may not cause harmful interference.
2. This device must accept any interference received, including interference that
may cause undesired operation.
Note: This equipment has been tested and found to comply with the limits
for a Class B digital device, pursuant to Part 15 of the FCC Rules. These limits
are designed to provide reasonable protection against harmful interference
in a residential installation. This equipment generates, uses and can radiate
radio frequency energy and, if not installed and used in accordance with the
instructions, may cause harmful interference to radio communications. However,
WARNING! ELECTRIC
SHOCK RISK!

6 7
2. INTRODUCTION
The QN6401X EasyView camera is designed to let you connect with what is
important in your life. Whether you’re checking in on your pets from work, family
members in another state, or a child in the next room, the EasyView helps you
make the connection. Just as importantly, you can share live views from your
camera - or recordings - through email, the most popular social media outlets and
by letting others access your camera.
All this with a simple connection procedure and no need for a computer or
monthly subscription fees.
Product features
This camera offers the following features:
nStandalone operation. Once it’s set up, your camera only needs to have power
and a wireless link to your router.
nState-of-the-art IR cut filter to ensure accurate color representation during the
day and sharper images at night.
nEasily allow others to view video, or capture video and snapshots on your
computer or mobile device to share online.
nAutomatically switches to infrared (black and white) mode when no light is
detected.
nInfrared illumination up to 30 feet.
nTwo-way audio communication.
nBuilt-in Micro SD card slot to capture and save video and images in the
camera. (Max capacity 32GB. Micro SD card not included)
nCompatible computer systems: Windows XP, Vista, 7 and 8. Use Macintosh
OSX 10.6, 10.7 or 10.8.
nMinimum supported web browsers: Firefox 5.0, Internet Explorer 7, Safari
3.2 and Chrome 13. As of this writing, later versions of those browsers are
compatible.
nYour camera is compatible with mobile devices using Apple’s iOS 5 and 6 or
Android 2.2 or later.
there is no guarantee that interference will not occur in a particular installation. If
this equipment does cause harmful interference to radio or television reception,
which can be determined by turning the equipment off and on, the user is
encouraged to try to correct the interference by one or more of the following
measures:
∙ Reorient or relocate the receiving antenna.
∙ Increase the separation between the equipment and receiver.
∙ Connect the equipment into an outlet on a circuit different from that to which
the receiver is connected.
∙ Consult the dealer or an experienced radio/television technician for help.
FCC (USA) § 15.9 Prohibition against eavesdropping.
Except for the operations of law enforcement officers conducted under lawful
authority, no person shall use, either directly or indirectly, a device operated
pursuant to the provisions of this part for the purpose of overhearing or recording
the private conversations of others unless such use is authorized by all of the
parties engaging in the conversation.
Local jurisdiction
State and local jurisdictions may have specific laws and regulations regarding the
use of recording devices (video and/or audio). It is your responsibility to be aware
of any applicable laws or regulations that prohibit or restrict the use of cameras in
your area and to comply with those statutes.
Any modifications made to this device may void the authority granted to the user
by the FCC to operate this equipment.
Privacy
Your camera’s audio feature is turned off by default. When you enable this audio
feature, please take the necessary steps needed to ensure your privacy before
sharing this camera with others.

8 9
Your EasyView camera is designed to be shared over the Internet, allowing you
- and those you invite - to watch and share video from anywhere in the world
with Internet access. To do this, your camera must be connected to your network
router, either using the included Ethernet cable, or wirelessly if your router sup-
ports it. Regardless of which method you will be using over the long term, you will
need to use the included Ethernet cable to directly connect your camera to your
router for the initial setup.
3.1 PLACEMENT
You should first determine whether the location where you want to place your
camera is within effective WiFi range of your router, as well as providing a proper
field of view (FOV). While you do not need to worry about WiFi range if you plan on
keeping your camera connected to your network with the Ethernet cable, making
sure that you can see the area you want to capture is important. Fortunately, if
you have an Android or Apple smartphone, you can use that device to gauge the
strength of the signal from your router. And, you can use the camera in your phone
or tablet to get an idea of what your EasyView camera will see.
WIFI
Your EasyView camera can communicate with your router from up to 25 feet away.
However, as you have probably noticed when using a wireless device, walls,
floors and other obstacles can reduce the strength of the signal. Interference
from microwave ovens and other electronics can also cause connection issues.
Lastly, the broadcasting strength of the router itself can
also vary by model. Use your mobile device’s connection
indicator (shown at right) to determine the strength of the
signal in the area you want to place the camera. It is not
recommended that you place the camera in an area where
signal strength is low.
If a WiFi connection is impossible or impractical, you can connect your camera to
your local network using the Ethernet cable and a network port.
FIELD OF VIEW
Now that you’ve determined that the location for your camera will be able to
communicate with your router, you will want to make sure that you can view the
desired area. Use the camera in your mobile device to find the best position, keep-
ing in mind that the camera can be mounted on the wall as well as on a surface
and that your EasyView camera will likely have a larger FOV of 65° than your
mobile device (typically 40-60°) so it will see a wider area.
PICTURE 3-1
3.2 CONNECTING THE CAMERA
You will need to directly connect your camera to your router using the Ethernet
cable before it can connect to the router wirelessly. This connection can be made
either at the router itself, or by using a wall network outlet that is connected to that
router. You will also need your mobile device or a computer with Internet access to
complete the registration and setup process.
You will need to have the password (also referred to as the network key by some
brands) available when making the wireless connection later. Therefore, if you will
be making this first connection in another room away from the router, you should
have that password handy before you begin.
MICRO SD MEMORY CARD
If you plan on using a Micro SD
memory card to record video from your
camera, you will need to install it before
connecting the camera to power to
avoid damaging the card.
The slot for the card is located on
the bottom of the camera. For more
information on using the card to record
video, please see Section 6.1.
NETWORK CABLE
Connect the camera to your router
with the included network cable. If you
will be operating your camera in the
wireless mode, this connection will only
be temporary.
PICTURE 3-2
PICTURE 3-3
If there are no available ports on the back of your router, you will need to unplug
one of the cables currently connected to the router. Use only the LAN ports, which
are generally grouped together. These ports are marked in green in the image
above. The actual position and configuration will vary by model. Do not disconnect
the cable from the port marked “Internet”, “WAN” or “Network” (shown in red,
above) as this will disconnect the router - and all attached devices - from the
Internet. This is an especially bad idea if one of those devices is being used in an
intense online gaming session so choose your port wisely.
3. CAMERA SETUP
10 11
You may now proceed with downloading and installing the free eView mobile app
on your mobile device which is covered in the next chapter. Instructions below
show how to mount your camera in its final location.
MOUNTING THE CAMERA
Your camera is capable of being placed on any stable horizontal surface without
the need to screw it down. However, if you need to mount it on the wall, ceiling or
other surface in order to get the right viewing angle, the base conceals mounting
holes for the included screws.
Plug the other end of the cable to
the network port on the back of the
camera.
CONNECT POWER
Plug the power adapter cord into the
socket on the back of the camera leav-
ing the network cable connected. Plug
the other end into a power outlet.
Once the camera is powered up, the
LEDs above the network port will light
up. The yellow light will glow steadily if
you have a good connection while the
green light will flash to show that the
router and camera are communicating.
PICTURE 3-5
PICTURE 3-6
PICTURE 4-1
PICTURE 3-4
STEP 1 Remove cover plate by twisting
counterclockwise (in the direction of
the arrows moulded on the plate). You
may also need to remove the camera
from the base by unscrewing the
collar on the mounting arm.
STEP 2 Mark the screw holes using the
base as a template.
STEP 3 If mounting into brick or drywall,
install wall anchors before inserting
screws. Drive screws into surface,
leaving just enough space for the
base to slip over.
STEP 4 Slip base over screw heads and hand tighten screws securely.
STEP 5 Replace cover plate and reattach camera to mounting arm if necessary.
4. INSTALLING EVIEW APP
The whole point of getting the EasyView camera is so that you can use it with your
Apple or Android mobile device, right? You’ll also be able to use a web browser on
a PC or Macintosh computer as well, but for most people, the mobile application
will be the way they most often connect with their camera.
Q-See’s eView mobile app is available for free on either the App Store or Google
Play for Apple and Android devices, respectively. All of the apps offer the same
functionality with the tablet version having a slightly different user interface to take
advantage of the larger screens.
iPhone Screen iPad Screen
Similarly, the apps for the tablets are located and installed in the same manner as
with the corresponding smartphone. The correct application will be suggested for
you in the online store based on what device (tablet or smartphone) you are using
for your search.
The installation process will be covered for Android and Apple devices separately
on the next pages.

12 13
4.1 INSTALLING EVIEW FOR ANDROID
Connect to the Google Play market on
your mobile device and click Search.
Enter “eView” into the search field.
PICTURE 4-2
PICTURE 4-3
PICTURE 4-4
PICTURE 4-5
Download and install eView.
Selecting Allow automatic updating
will ensure that you are always using
the latest version of eView.
Once downloading is complete, you will
receive a notice saying that the app has
finished downloading. Click on Open to
launch the program.
You may proceed to Section 4.3 to setup eView for use.
4.2 INSTALLING EVIEW FOR APPLE
Connect to the App Store on your
mobile device by clicking on its icon.
Once it has opened, click Search.
Enter “eView” into the search field.
Begin downloading eView by clicking on
the Free button.
The button will change to blue and read
Installing.
When the app has finished download-
ing, the button will change to Open.
Click it to launch eView.
You may proceed to Section 4.3 to setup eView for use.

14 15
4.3 REGISTERING AND LOGIN
When you launch eView, you will be presented with the Login Screen. Since this
is your first use of the application, you will need to register with the service. This
is free. Even if you do not own an EasyView camera, but are only sharing the video
feed from someone else, you will still need to create an account. Your account
allows you to manage the cameras you own as well as view the ones that you’ve
been invited to share.
The process is identical whether you’re on an Android or Apple device.
CREATING AN EVIEW ACCOUNT
IMPORTANT! Under the Terms of Service for eView (available
in the mobile or web app), you are responsible for actions taken
by anyone using your account. To ensure your security, you must
safeguard your account. Q-See is unable to make any changes to
your account including recovering lost passwords.
To create your account, click on the
Register button located at the bottom
right of the Login Screen. This will
open up the Registration window.
PICTURE 4-6
PICTURE 4-8
PICTURE 4-7
Enter your User Name, your Pass-
word (twice) and the Email Address
where you wish to receive event alerts.
Your password must be between 3 and
20 characters in length. You may only
use letters, numbers and the under-
score “_” character. Spaces and special
characters will not work.
Once complete, click on Submit to
return back to the Login Screen.
ABOUT PASSWORDS
The usual warnings and guidance about passwords should be used when using
eView. You should not share passwords with other users. To grant access to your
camera to other users, you should use the Share feature as this will prevent oth-
ers from making changes to your camera (such as enabling sound) without your
knowledge. This could cause embarrassment (at the very least).
If you forget your password, the only way to recover it is by using the Recover
button located at the bottom left of the Login Screen. This will generate an
automated email to the address that you used when registering.
You are responsible for remembering and safekeeping your user name and pass-
word. Q-See does not maintain a database of passwords and for security reasons,
we cannot reset or reveal your user name, email address or password.
You may change your password by logging into your camera using a web browser
or by using the Account Management window accessed by clicking on the
More icon at the bottom of the Management screen once you’ve logged in.
LOGIN
Once you have returned back to the
Login Screen, you can enter your
new Username and Password into the
appropriate fields.
If you select Auto Login by either
checking the box (Android) or sliding
the selector to On (Apple), eView will
automatically attempt to log into your
account every time it is launched.
Press on Login to connect to the eView
servers.

16 17
ADDING CAMERAS
Once you have logged in, the application will open its Management screen. This
is where you will add new cameras as well as manage them later.
PICTURE 4-9
Click on the Add button in the upper
right.
The next window will let you add a
camera the application either by using
the mobile device’s camera to scan
the QR code located on the back of the
camera or by manually entering the
serial number that is printed below it.
PICTURE 4-10
PICTURE 4-11
PICTURE 4-12
PICTURE 4-13
PICTURE 4-14
Push the Scan QR Code button to have
your mobile device try to capture the
code. If successful, the app will return
to the Add Camera window with the
camera’s serial number shown in the
ID box.
Once the camera’s ID is captured, click
on Next in the upper right.
If the camera is unable to capture the camera ID, enter it manually into the ID area
at the bottom of the screen. Then tap on Next in the upper right of the screen to
continue.
The next screen will display the cam-
era’s ID number and allow you to name
it. While you can pick a generic name,
if you plan on adding more cameras or
sharing this one, a unique name will
help you - or those you’re sharing with
- easily select the right camera. You
can only use letters, numbers or the
underscore “_”.
You can change the name later on the
camera settings page.
You should make sure that your camera
is properly powered up and connected
to the router using the Ethernet cable
as the camera will now proceed to
communicate with your network to get
a local network IP address. This ad-
dress is how your network will connect
your camera to the Internet so that you
can access it remotely.
When the camera has successfully
connected, the status will have a green
circle and will say “Online”.
Click Submit to connect your camera.
When the camera has connected suc-
cessfully, you return to the Manage-
ment screen where you will see your
camera available to connect. Later,
after you’ve logged into your camera,
the generic icon will be replaced by
a thumbnail screenshot from the last
video streamed.
You may add more cameras at this time
or tap on the arrow to the right of the
camera to connect. Tapping directly on
the camera icon will take you to stored
events which you won’t have yet.
If you want to operate this camera
wirelessly, then proceed to the next
section. Otherwise, camera operation is
covered in Chapter 6.

18 19
4.4 SETTING UP WIFI
When you open up the connection to
your camera, tap on the Setting icon
in the upper right corner to access the
Camera Config window.
PICTURE 4-15
PICTURE 4-16
PICTURE 4-19
PICTURE 4-19
PICTURE 4-17
PICTURE 4-18
This window will allow you to control
how your camera performs. Note that
the audio function is set to Off by de-
fault. Take care to consider where you’ll
be placing this camera when deciding
to activate the camera’s microphone
or you may share more than you intend.
Click on the Configure WiFi button to
begin setting up the camera to wire-
lessly connect to your network.
Select your preferred network from the
WiFi List. If you own more than one
network, be sure to use the connection
that is stronger in the area where the
camera will be placed.
Secured networks (those with a padlock
icon next to them) will require you to
enter the password. If needed, you can
have the input window show you the
password as you enter it so you can
make sure that you’ve entered all the
characters.
The camera will then attempt to find
the network’s wireless signal. When it
has done so, it will instruct you to un-
plug the Ethernet cable that connects it
to the router.
After the cable is disconnected, the
camera may take several minutes to
reconnect to the router using the WiFi.
It will show an estimated countdown
(in seconds). During this process, the
camera will be offline.
The green network light on the back
will also flash as this takes place.
Once the camera has connected to the router using WiFi, the app will return to
the Camera Config window. You may move the camera to its new location at this
time. The camera will again attempt to reconnect wirelessly once you’ve plugged
its power cord back in.
Operating instructions are in Chapter 6.

20 21
5. SET UP USING A
COMPUTER
You may also set up your EasyView camera using a computer if needed. This pro-
cess requires either a Macintosh running OSX 10.6 through 10.8 or A PC running
Windows XP, Windows Vista, Windows 7 or 8. You can use the Chrome, Firefox or
Safari browsers on either platform. Windows users can also use Internet Explorer.
You will still be able to access the camera using a mobile device after setting up
the camera once you’ve downloaded the eView app.
5.1 REGISTRATION AND SOFTWARE
In a web browser, enter www.Q-SeeEview.com
PICTURE 5-1
PICTURE 5-2
PICTURE 5-3
PICTURE 5-4
Click on Sign Up for Free to begin
your registration.
Enter your User Name, your Pass-
word (twice) and the Email Address
where you wish to receive event alerts.
Your password must be between 3
and 20 characters in length. Use only
letters, numbers and the underscore
“_”. Do note use spaces or special
characters.
Please read the passage entitled “About Passwords” in Section 4.3 earlier in
this manual for important considerations regarding password security, including
not sharing your login information to share your camera.
Once complete, click on Signup to return back to the Homepage.
Click on Login to proceed. You may receive pop-up notifications regarding
needed software updates.
Please note that eView requires that your browser’s version of Adobe Flash Player
is up-to-date. For this reason, users of Macintosh computers with operating
systems earlier than 10.6 will be unable to access their camera via their browser
since Adobe Flash no longer supports that OS.
The browser access also requires
Oracle’s Java Virtual Machine.
The pop-up windows should provide
you the option to download one or both
pieces of software as needed. Please
accept and allow the software to down-
load and install to ensure that you will
be able to access your cameras.
Links to the required software can also
be found in the lower left of the web
page under Download Software.
When logging into your account for
the first time, you will likely also get
a security warning - especially on
PCs - asking whether you wish to trust
the eView program. You will need to
check the box where needed and click
Accept.

22 23
5.2 ADDING CAMERAS
Once you have logged into your account and installed the needed software, you
may add cameras for viewing.
Click on the Add New Cameras button
to begin. Your camera must be con-
nected to your network and online as
described in Chapter 3.
PICTURE 5-5
PICTURE 5-6
Since you cannot scan the QR code on
the back of the camera into the web
application, you will need to enter the
ID number printed below it into the area
marked Camera ID. While you can pick
a generic name, if you plan on adding
more cameras or sharing this one, a
unique name will help you - or those
you’re sharing with - easily select the
right camera. Camera names may only
consist of letters, numbers and the
underscore “_” character.
Click Submit to enter your information and return to the MyCameras window.
To begin viewing your camera’s video, simply click on it. There will be a brief delay
while the computer, network and camera communicate to deliver the video feed to
your desktop.
Cameras with names shown in green are online and available for viewing. Those
with names in red are offline and cannot be accessed.
If you wish to operate your camera using WiFi, please proceed to the next section.
Operating instructions for the camera are in the next chapter.
5.2 SETTING UP WIFI
To enable your camera to connect to your network without the use of the Ethernet
cable, you will need to give it access to your router’s WiFi signal.
Clicking on the camera’s icon will take
you to that camera’s page where you
can configure sharing, change the
camera’s name, and select which WiFi
network it connects to.
Click on WiFi and Firmware to begin the
wireless connection process.
PICTURE 5-7
PICTURE 5-8
PICTURE 5-9
It may take a few seconds for the WiFi
list to populate depending on your
connection speeds. Select the desired
network, remembering that you will
want to use the one with the best
signal in the area that your camera will
be operating in.
Enter the password for that network
and click Submit.
Wait at least half a minute before disconnecting the camera from the Ethernet
cable. The camera will then attempt to connect to the network via the WiFi. The
green connection LED on the back of the camera will flash until it obtains a con-
nection after which it will shine continuously.
You may now move the camera to its new location at this time. The camera will
again attempt to reconnect wirelessly once you’ve plugged its power cord back in.
Operating instructions are in the next chapter.

24 25
6. USING YOUR CAMERA
As stated before, both the Apple and Android versions of eView operate in the
same manner. The tablet versions also have the same functions, but are laid out
differently to take advantage of the larger screen size. The web application can
show up to four cameras at the same time.
Whether you’re using a mobile app or the web-based one, bandwidth is always
a consideration. This not only includes the amount of video streaming to your
device, but the number of other devices competing for your network’s attention.
Other wireless devices are attempting to access your router at the same time as
your camera. They will not interfere with the signal to or from your camera, but too
many wireless devices on the same network can create an “electronic traffic jam”
slowing communication speed. Multiple users accessing the camera at the same
time can also cause delays or problems connecting.
On mobile devices connecting via 3G or 4G, please keep in mind that streaming
video from live cameras will count against your data plan. You can gauge this
data usage by checking your current usage, then connecting to a camera for five
minutes and then checking your data usage again.
6.1 EVIEW MOBILE APP
FUNCTIONS AND FEATURES
Main Menu - My Cams
Switch between lists of yours and shared cameras and the account management
window by tapping on the icons at the bottom of the screen.
PICTURE 6-2
PICTURE 6-4
PICTURE 6-3
1
2
2 31
4
5
6
7 8
PICTURE 6-1
1 2
3
6 7 8
5
4
# Name Function
1 Edit Delete camera
2 Add Add camera
3 Event Tap picture to view motion events
4 Status Green = Online
Red = Offline
5 Live View live video
6My
Cams List of your cameras. Number
shows motion event alerts.
7My
Views List of others’ cameras that
they’ve shared
8 More Open account management
window
# Name Function
1 Back Return to camera list
2 Replay Switch to playback mode
3 S
ettings
Camera configuration
4 Video Camera video
5Status/
Owner/
Title
Shows camera connection status,
camera name and camera owner
6 Talk When highlighted in red, you can
speak through the camera. Dese-
lect to hear audio from camera.
7Screen
shot Capture still image from video
8 Record Tap to record video
Shared Cameras - My Views
This list shows cameras belonging to others who have given you access. This win-
dow operates just like the Main Menu except that you are only able to stop sharing
other people’s cameras and they are the ones who control the camera settings
such as audio, and motion detection.
# Name Function
1 Edit Stop sharing a camera
2 Camera Tap a camera to start viewing
2
3
4
1
# Name Function
1 Change Password
2 Logout Logout user account
3 Terms Terms of service agreement
4 About App information
(Version number below)
Account Management
Live View
Watch, record and communicate through this
window. There will be a time lag as video and
audio travel through the network.

26 27
IMPORTANT! If you plan on inserting or removing
a Micro SD card into your camera, the camera must be
unpowered in order to avoid damaging the card and possibly
deleting stored video.
Two additional functions are available by tapping on
the arrow to the right of the icons on the bottom of
the screen.
21
# Name Function
1 Share Opens the Share dialog to allow
you to share this camera with
others
2 Alarm View the push notice and
screenshots triggered by motion
detection.
PICTURE 6-5
PICTURE 6-8
PICTURE 6-9
PICTURE 6-6
PICTURE 6-7
Sharing
Sharing your camera with others is the heart of
the EasyView. Click on the Share icon to open the
Share Camera window. Enter the eView account
user name that you want to share with in the box
and then click Add.
When you get a Success message, the shared
camera will appear showing the camera name
and who it’s shared with along with its connection
status.
When you want to stop sharing simply click on the
Edit button and then select which camera you want
to remove from your share list by clicking on the
Delete button.
Click on Done in either window to return to the
camera’s live view.
Camera Configuration
This window is where you configured your WiFi
connection. It is here where you can rename your
camera, take your camera offline, switch to another
WiFi network, and turn Audio and Motion Detection
on or off.
You can also turn on Push Notification so that alerts
triggered by motion detection will be sent to your
e-mail address. Still images will sent to the eView
servers and, if you’ve inserted a Micro SD card into
the camera, video of the event will be recorded
onto it.
Recording onto an Micro SD card
Your camera supports recording onto a Micro SD memory card. When a card is
inserted, the camera will record constantly to it. The largest supported cards are
32GB which averages about seven days’ worth of video. When full, older video will
be recorded over.
You can access this video by pressing the Replay
button at the top of the Live View and it will bring
up scrolling wheels to select the date and time. You
can use your push notification or motion detection
alerts to narrow down your search considerably.
Click OK to begin the playback.

28 29
Sharing Recorded Video & Pictures
In addition to sharing live video feeds from your
camera, you can also capture video and still images
and share them through social media, e-mail or by
saving them onto your mobile device for later.
Tapping on the Screenshot button captures and
image and then brings up the Share window. Tap-
ping the Record button will begin recording video,
and when it is tapped again to end the recording,
the Share window will also open. Depending on the
file type you can post it to a number of social media
sites where you have an account. Facebook (1),
Sina Weibo (4) and Pinterest will accept both still
images and video while Twitter (2) and Instagram
(3) can only post still images. Youtube, of course,
will is for videos only.
2 4
6
1
5
3
PICTURE 6-10
You may e-mail video or still images using your mobile device’s mail app by tap-
ping on the mail icon (5). Tapping on the save to device icon (6) will save the file
to your internal memory. The layout of this feature is currently undergoing revision
to make it easier to share files so your screen may differ than the one shown in
Picture 6-10, but the functionality will remain the same.
6.2 WEB FEATURES
With the exception of the direct links to share with social media (those are on your
computer, after all), the functions available on the mobile eView apps are repeated
on the web application. The computer-based program also allows you to view up
to four cameras at the same time - whether they’re yours or shared by someone
else.
My Cameras Window
1
2
3
4
8
10
9
11
5 6 7
# Name Function
1My
Cameras The list of your
cameras
2Sharing
with me Cameras shared
with you by others
3Multi-
screen
View live stream-
ing from up to 4
cameras
4User
name This is the account
you’re signed in as.
5 Change password
# Name Function
6 Help Online help docu-
ments
7 Logout Sign off
8Add new
cameras Add more cameras
that you own
9Go to
video Go to the named
camera
10
Software Flash and Java
11
TOS Terms of Service
PICTURE 6-11

30 31
Live View Window
1 2
34
5
# Name Function
1 Live Select Live View mode
2 Playback Switch to Playback mode
3 Share Share this camera with others
4 Revoke Stop sharing this camera with others
5 Rename Rename this camera
PICTURE 6-12
PICTURE 6-13
Playback/File Search
You can access files recorded on the camera’s SD card by selecting Playback from
above the camera’s video stream and then searching for the desired clip by time.
Digital Peripheral Solutions, Inc.
8015 E. Crystal Drive
Anaheim, CA 92807
Q-See is proud to back all of our products with a conditional service warranty
covering all hardware for 12 months from the date of purchase. Additionally, our
products also come with a free exchange policy that covers all manufacturing
defects for one month from the date of purchase. Permanent upgrading service is
provided for the software.
Liability Exclusions:
Any product malfunction or abnormalities in operation or damage caused by the
following reasons are not within the free service scope of our company:
1. Equipment damage caused by improper operation.
2. Improper equipment operation environment and conditions (e.g., improper
power, extreme environmental temperatures, humidity, lightning and
sudden surges of electricity).
3. Damage caused by acts of nature (e.g., earthquake, fire, etc).
4. Equipment damage caused by the maintenance of personnel not
authorized by Q-See.
5. Product sold over 12 months ago.
In order to fulfill the terms of your warranty, you must complete the registration
process after purchasing our product. To do this, simply fill out the User’s
Information Card on our website at www.Q-See.com
Q-SEE
PRODUCT WARRANTY
QUESTIONS OR COMMENTS?
CONTACT US
24/7 TECHNICAL RESOURCES,
KNOWLEDGE BASE AND MORE
www.Q-See.com/Support

32
Digital Peripheral Solutions, Inc.
8015 E. Crystal Drive
Anaheim, CA 92807
Other manuals for EasyView QN6401X
1
Table of contents
Other Q-See Security Camera manuals

Q-See
Q-See QSDS4936D User manual

Q-See
Q-See QS2350C User manual

Q-See
Q-See Security Camera User manual

Q-See
Q-See QCW3MP16 User manual

Q-See
Q-See QC8116 Operating and maintenance instructions

Q-See
Q-See QSDS3636W User manual

Q-See
Q-See QSPDC User manual

Q-See
Q-See QCW2MPSL User manual

Q-See
Q-See QSDS1349H User manual

Q-See
Q-See QSC480100 User manual

Q-See
Q-See QD6523ZH User manual

Q-See
Q-See QCN8068BA User manual

Q-See
Q-See QSOCWC User manual

Q-See
Q-See QSDS1428D User manual

Q-See
Q-See QSZ515D User manual

Q-See
Q-See QTN8043B User manual

Q-See
Q-See QCN7005B User manual

Q-See
Q-See QOCDC User manual

Q-See
Q-See QSDS13358A User manual

Q-See
Q-See QSWLOC User manual