Qdos Extending SafeGate User manual

USER GUIDE
Extending SafeGate - Hardware Mount
IMPORTANT: Qdos wants to keep your children safe
and for that we need you to do your part by carefully
reading and following the instructions below. Please read
through the instructions before starting the installation.
For installation videos and FAQ go to: QdosSafety.com
Height
29.9" (76 cm)
Outside Opening
Min 22.4" (57 cm)
Max 37.8" (96 cm)
Inside Opening
Min 25.6" (65 cm)
Max 40.9" (104 cm)

2 3
IMPORTANT!
PLEASE READ AND FOLLOW THESE INSTRUCTIONS
CAREFULLY AND KEEP FOR FUTURE REFERENCE
When installed between two strong and rigid surfaces
and according to these instructions, this gate has been
tested to meet or exceed the following Safety Standards,
US- ASTM F-1004, Canada- SOR/90-39, and European-
EN 1930.
WARNING
• Children have died or been seriously injured
when gates are not securely installed.
• ALWAYS install and use gates as directed using all
required parts.
• Intended for use with children from 6 months up
to 24 months of age.
• STOP using when a child can climb over or
dislodge the gate.
• NEVER use gate to keep child away from pool.
• Use only with the locking mechanism securely
engaged.
• Regularly check all hardware and do not use if any
part of gate is broken or missing.
• This product will not necessarily prevent all
accidents. NEVER leave child unattended.
• NEVER step or climb over the gate, always open
to pass through.
• For indoor use only.
• Fits inside openings 25.6-40.9″(65-104 cm)
HELP?
To help you install your gate quickly and easily, please go
to qdossafety.com for installation videos and FAQ’s to help
you succeed. You may also contact our customer service at
MAINTENANCE AND CLEANING
Check the gate regularly to ensure all the hardware and
mountings are tightened. Clean using a mild soap and
wipe with a damp cloth.
WARRANTY
Your Qdos product is warranted to be free from
manufacturing defects in material or workmanship for
a period of 1 year from date of purchase, when used
under normal conditions and in compliance with these
instructions.
Qdos will either repair, or at its option replace, free of
charge, any parts necessary to correct any defect in
material or workmanship during the warranty period.
USE LOCATIONS
This gate can be used on top of or at the bottom of
stairs, as well as inside and in front of doorways and
openings when installed between two strong and rigid
surfaces.
Top of stairs Bottom of stairs Inside or In front of
Opening/doorway
!

4 5
OPENING SIZE
The Extending SafeGate will fit inside openings from
25.6″-40.9″(65-104 cm). The size of the gate is adjustable
by how you clamp the two gate sections together as
shown below. If installed in front of the opening, see page
8, the gate will fit openings 22.4"(57 cm) - 37.8"(96 cm).
Inside
Opening
In front of
Opening
Where to clamp gate
together (Top and Bottom)
25.6″-28.1″
(65-71.5
cm)
22.4″-25″
(57-63.5
cm)
28.1″-30.7″
(71.5-78
cm)
25″-27.6″
(63.5-70
cm)
30.7″-33.3″
(78-84.5
cm)
27.6″-30.1″
(70-76.5
cm)
33.3″-35.8″
(84.5-91
cm)
30.1″-32.7″
(76.5-83
cm)
35.8″-38.4″
(91-97.5
cm)
32.7″-35.2″
(83-89.5
cm)
38.4″-40.9″
(97.5-104
cm)
35.2″-37.8″
(89.5-96
cm)
ANGLE MOUNTING
Besides the normal perpendicular
mounting, the Extending SafeGate can
also be mounted at any angle within
180 degrees. This allows the gate to
be mounted inside the opening, in
between odd angled locations, as well
as in front of openings outside the
door frame.
INSTALLATION
General
This gate may be installed at the top and bottom of
stairs, in openings and doorways, that are strong and
rigid with a smooth and clean mounting surface. For
challenging installation situations and surfaces, one or
more of the following Qdos installation accessories might
be necessary to use for a secure installation.
Qdos Universal Baseboard Kit –
If installing where a baseboard is
present. Fits over baseboards 7/8″
(22 mm) thick and up to 7″(18 cm) tall.
Qdos Universal Stair Mounting Kit –
If installing on stair banisters or in
between spindles, use Qdos Universal
Stair Mounting Kit that wraps
around square banister posts up to
4" and round banisters up to 5" in
circumference, as well, as between
stair spindles. No screws required so
no damage to your staircase.
wallwall

6 7
PARTS LIST:
2x Clamping
Brackets
8x Socket Screws
2x Bottom Covers
for Clamping
Bracket
2x Top Covers for
Clamping Bracket
1x Lower Locking
Bracket
1x Top Locking
Bracket
1x Gate Section with
Two Hinge Spindles
1x Gate Section with
Two Locking Spindles
2x Hinge Brackets
1x Double Sided
Installation
Template
6x Short 3/4″(20 mm)
Screws
2x Top Covers
for Hinges
2x One-Way Stop
6x Medium 1.5″
(40 mm) Screws
2x Long 2″(50 mm)
Screws
1x Installation
Wrench
Installation Level
with Marking Tool

8 9
Determine Installation Position
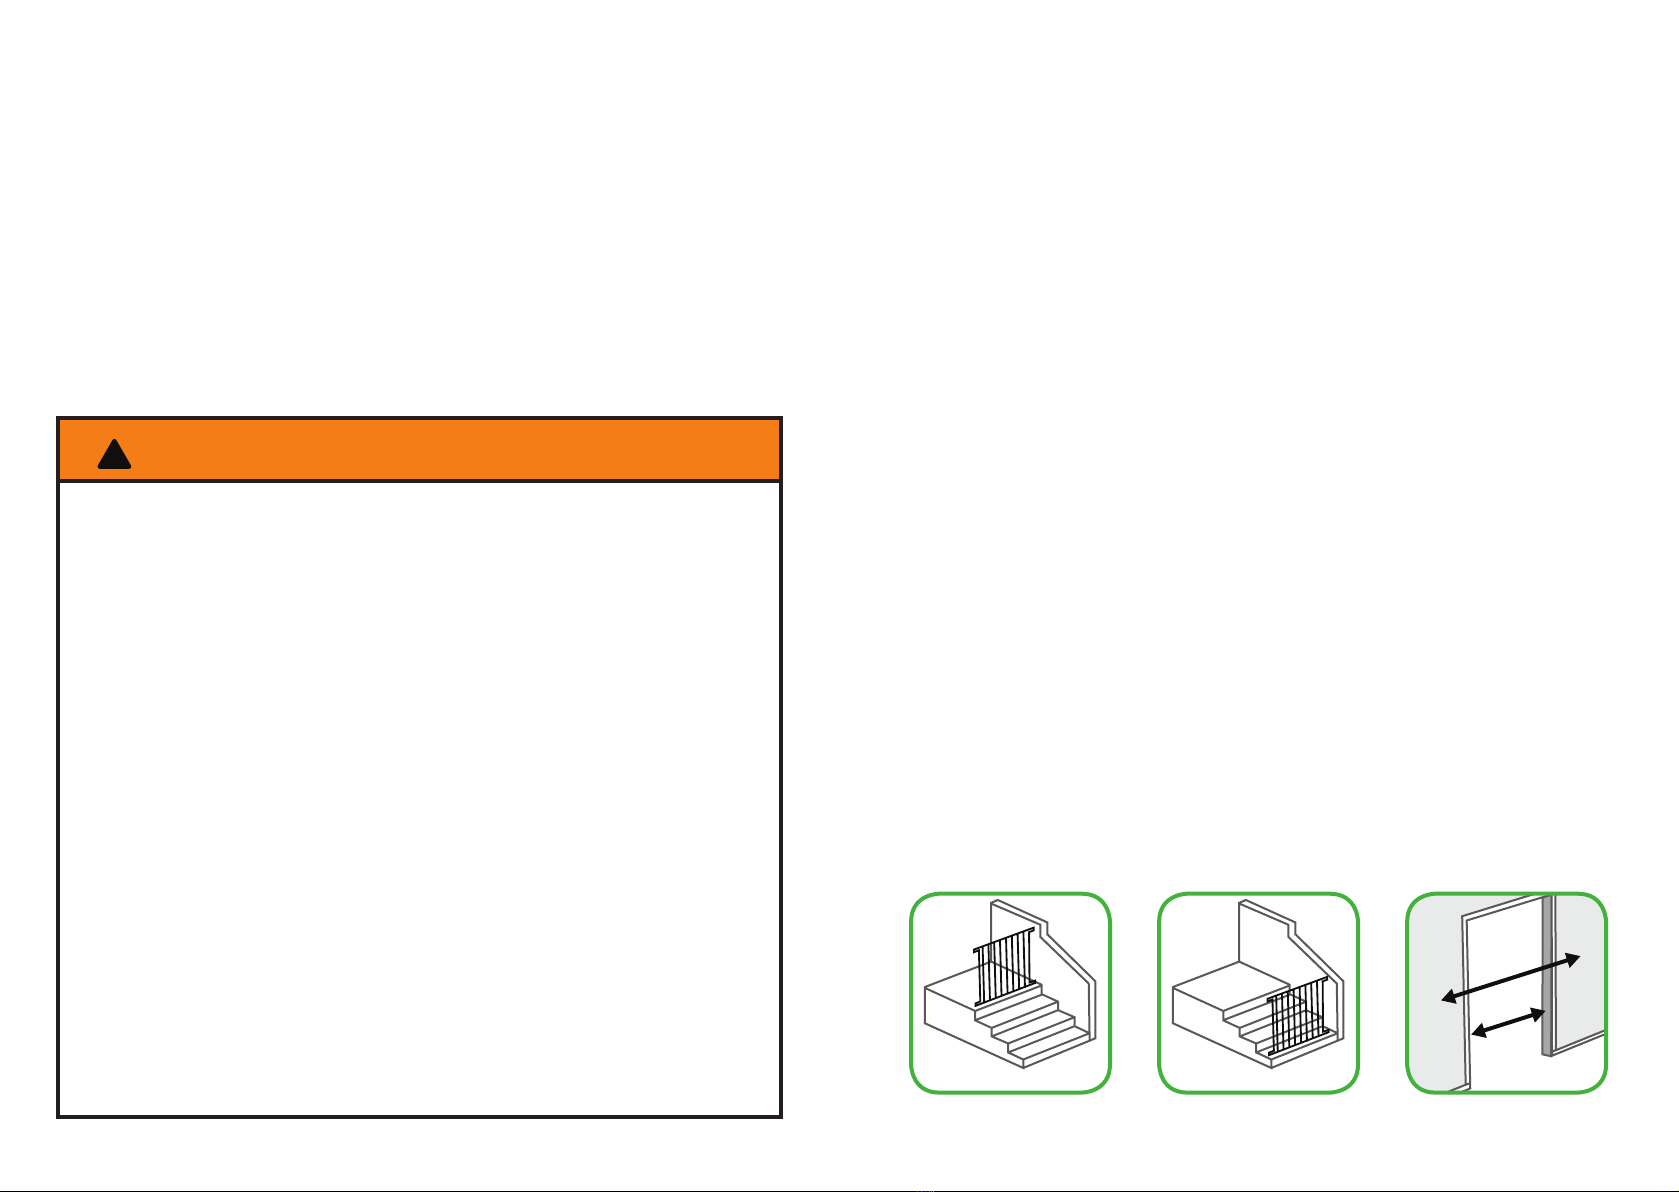
Your gate can be installed in two dierent ways.
Inside an opening in
between two surfaces In front of an opening
See step 1 See step 8
Step 1
Determine the size your gate
needs to be in the sizing chart
on page 4. When putting your
panels together the flat side of
the curved plastic end caps (on
the end of the panel) must line
up flush with the other panel.
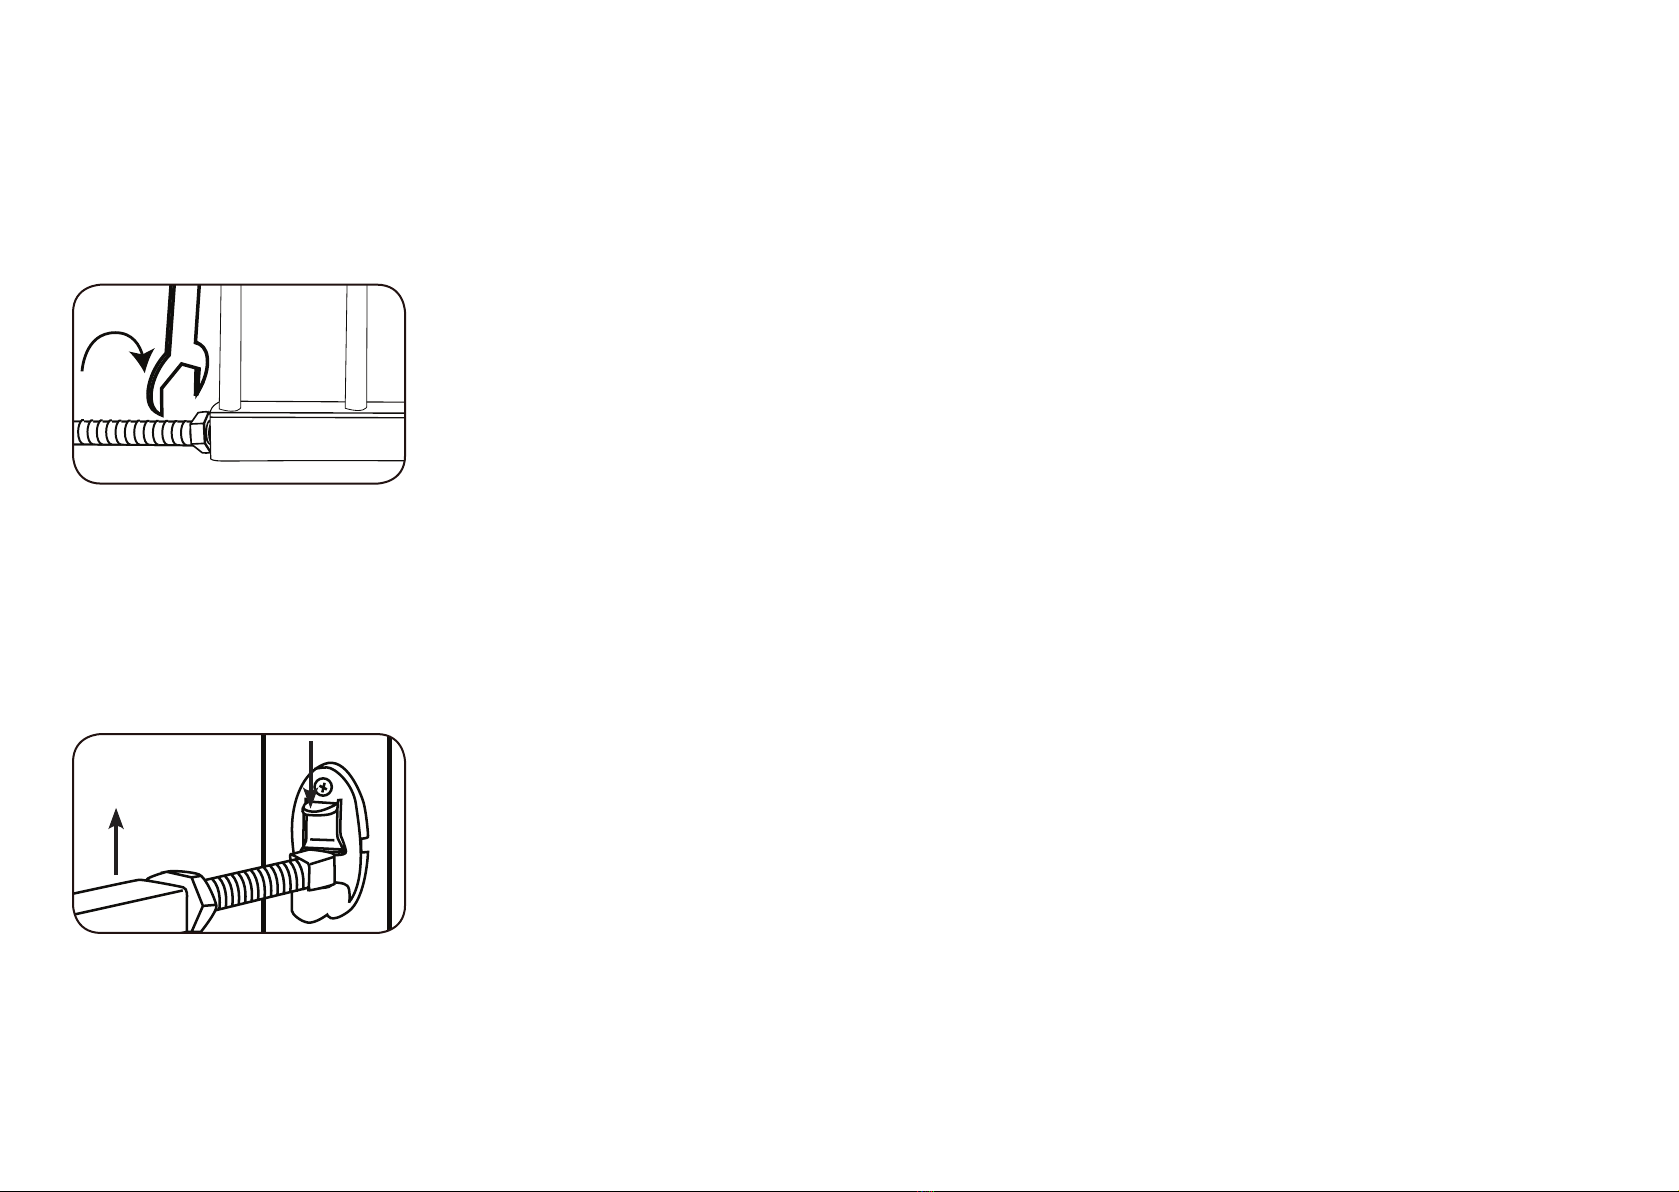
Place one of the Clamping Brackets just under the top
rail between the spindles in the center opening, with the
studs pointing up. Match up one of the Top Covers to
nest with the Clamping Bracket. Use two of the Socket
Screws and screw the Top Cover and Clamping Bracket
together. It might be helpful to lay the gate down or turn
the gate over to screw them in. Then attach the second
Top Cover.
Repeat Step 1 for the second Clamping Brackets at the
bottom of the gate.
IMPORTANT:
REGARDING THE INCLUDED MOUNTING SCREWS!
Before marking where to attach the gate, make sure you
have chosen a solid surface for mounting the gate to. The
included screws are intended for the following locations.
Directly into wood
Use the 2 Medium 1.5″(40 mm) Screws for the
lower holes in the hinge brackets and the 6
Short 3/4″(20 mm) Screws for the other holes
when mounting directly into wood, for example
in a door frame or other framed opening. If
installing into hardwood, first drill a 3/32"
(2mm) pilot hole.
Into a stud behind drywall
Use a stud finder to locate where there is a stud
behind the drywall. Use 2 Long 2″(50 mm)
Screws for the lower holes in the hinge brackets
and 6 Medium 1.5″(40 mm) Screws for the
other holes when mounting the gate into a stud.
Any other surface
If mounting into drywall only, brick or other surface, use
only the appropriate hardware for that surface. Consult
with a certified child proofer, a handyman or your local
hardware store if you are unsure.
Top Bottom

10 11
Step 2
If using at the top of stairs install gate a minimum of 1"
(2.5 cm) from the top step! Before marking the holes
for the hinges, using the Hinge side of the Installation
Template(Side B), decide which way is the best direction
for the gate to swing. Once the location of the Hinge
side of the gate is decided place the template with the
bottom edge touching the floor. It is very important that
you use the Installation Level to ensure that the template
is VERTICAL. Now use a pencil to mark the 4 holes, 2 for
each hinge bracket.
Step 3
Repeat step 2 on the opposite side using the Locking
side of the Installation Template (Side A) for the upper
and lower Locking Brackets.
Step 4
Attach the two Hinge
Brackets through the
bottom holes only at this
time using the appropriate
screws. The Hinge Brackets
are both identical so there
is no top or bottom.
Step 5
Before attaching the Top and Bottom Locking Brackets
decide if the gate should only open in one direction. For
top of stairs, the gate should never open out over the
stairs. If needed, attach the One-Way Stop from behind
the Top and Bottom Locking brackets and tilt into place.
Step 6
Attach the Top Locking
Bracket using the
appropriate screws.
Step 7
Attach the Bottom
Locking Bracket using the
appropriate screws.
Top left stop
Bottom left stop Bottom right stop
Top right stop

12 13
Step 8
When installing the gate in front of an opening, use both
sides of the template to mark positions of screws. If there
is a baseboard interfering with the lower brackets, you
must use one or two Qdos Baseboard Kits to create a
smooth vertical surface to mount the gate to. Do not mount
the gate over baseboards. Now follow Steps 1 – 7 above.
Step 9
To fit the gate to the hinge and locking brackets, hold the
gate centered inside or in front of the opening. Starting
with Top Spindles, unscrew those and extend until they
are lined up with the hinge and lock.
IMPORTANT:
If the Installation Level, when held
horizontally fits through the gap
between the out most vertical bar and
the frame of the opening, the gap is
too big. You will then need to adjust
the width of the gate panels out one
space at a time until the gap is smaller
than the width of the Installation Level.
(see table on page 4).
Reassemble gate and adjust spindles. Adjust the lower
spindles to the same length as the top ones. Do not
tighten the Locking Nuts yet.
Step 10
Hang the gate on the Hinge Brackets and make sure
the gate is horizontal with the Locking Brackets of the
opposite side. If not, remove to adjust the length of one
of the spindles and test until horizontal.
Place the Hinge Top Covers on the Hinge Brackets and
attach them, with the appropriate screws.
Step 11
Adjust the length of the Top and Bottom Locking
Spindles so they line up perfectly with the sockets on the
Locking Brackets.
Now lock the gate by lifting it up slightly and line up with
the sockets on the Locking Brackets and push it into the
locked position.
To open the gate push down on the release latch on the
Top Lock, while simultaneously lifting the gate. If not
operating smoothly, adjust the Locking spindles in or out
as needed so they line up with the sockets.
Release Latch
bottom
bottom
top
top

14 15
Step 12
With the gate in the locked position and adjusted
properly, hand tighten all four Locking Nuts and finally
secure them firmly using the Installation Wrench.
The gate is now installed and ready to be used.
GATE OPERATION
To open the gate with one hand, push down on the
release latch on the Top Lock with your thumb, while
simultaneously lifting the gate. This dual action makes it
harder for children to figure out how to open the gate.
1
2

Distributed by Regal Lager, Inc.
Kennesaw, GA 30144 USA
1-800-593-5522 • www.QdosSafety.com
©2019 Qdos All rights reserved.
Qdos is a trademark of Regal Lager, Inc.
Made in China
06/19
Other manuals for Extending SafeGate
1
Table of contents
Other Qdos Indoor Furnishing manuals
Popular Indoor Furnishing manuals by other brands

BLACK RED WHITE
BLACK RED WHITE LARGO PREG2D1K3S Assembly manual

studioduc
studioduc indi full Assembly instructions

ACID
ACID Core Products CP713 manual

Walker Edison
Walker Edison BU60WYT2D Assembly instructions

Furniture of America
Furniture of America Menodora CM7311CK Assembly instructions

Walker Edison
Walker Edison BTODSP Assembly instructions