4 5
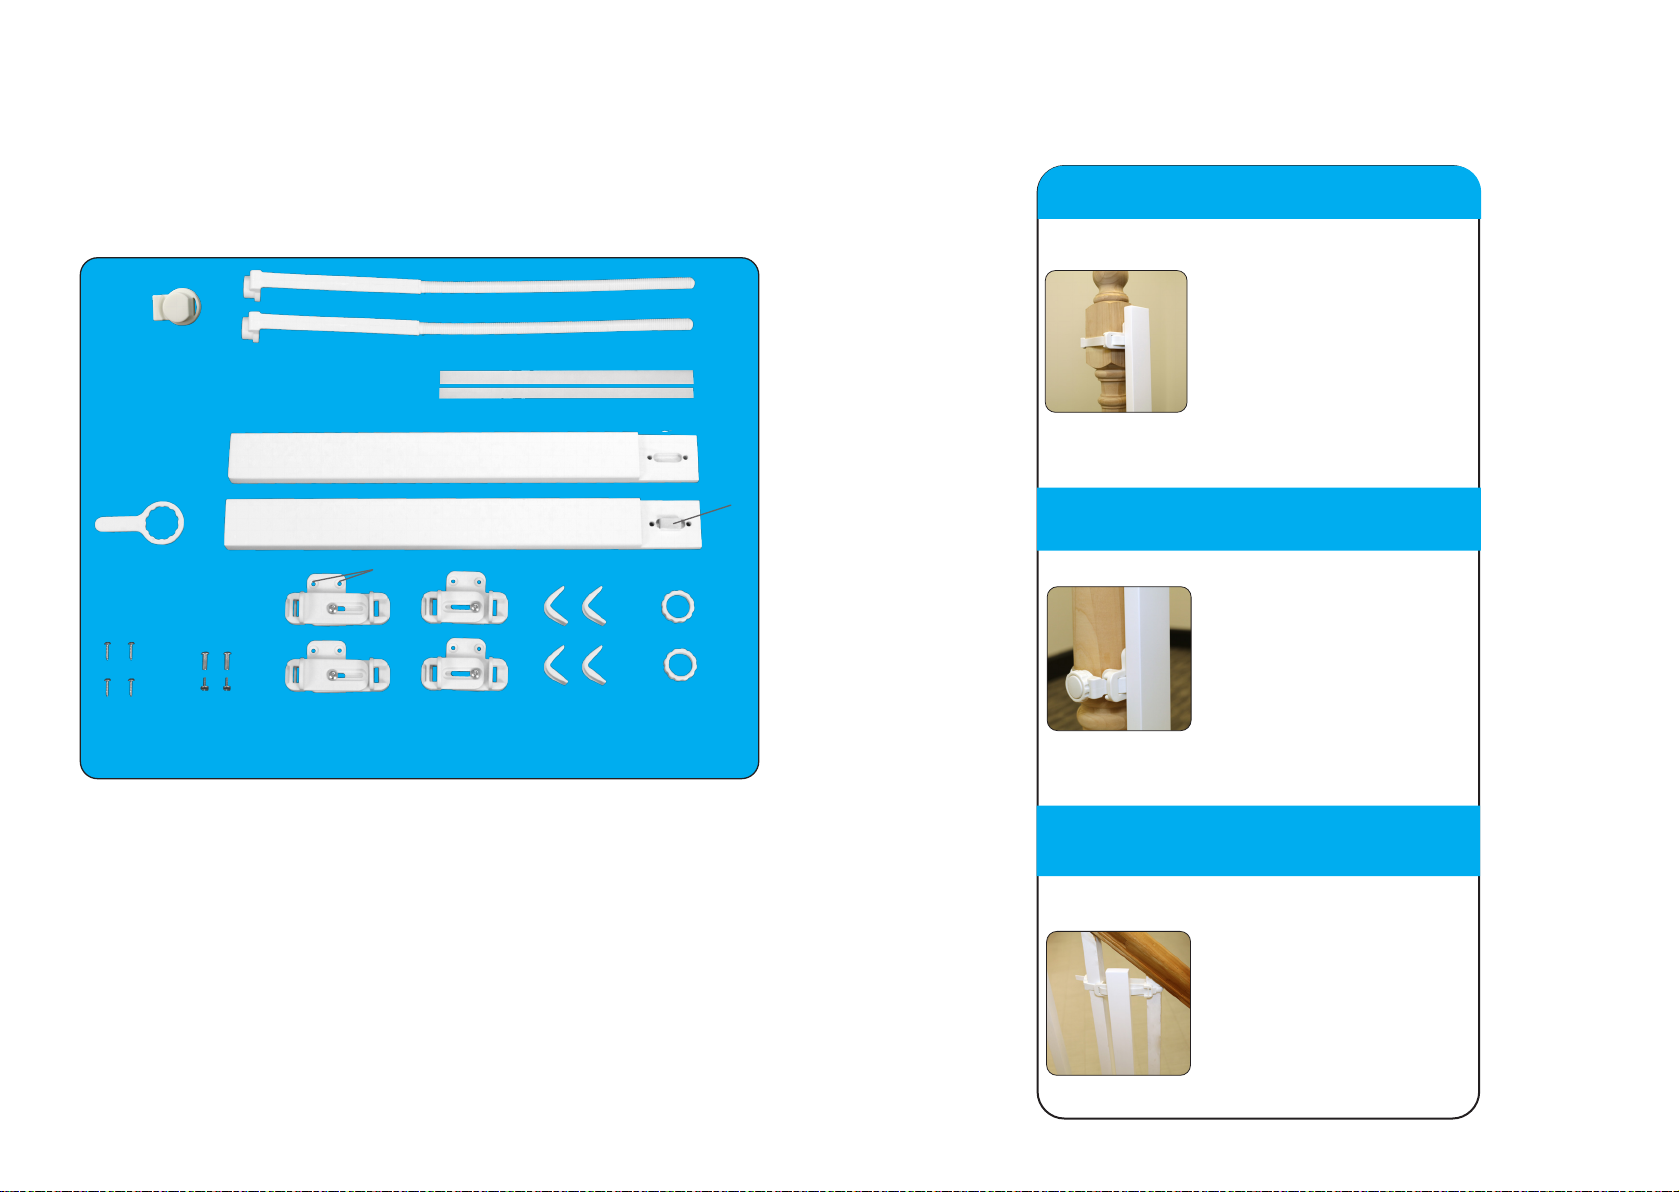
Installation on SQUARE Post/Banister
For Posts 2.4″-4.2″(62 - 107 mm)
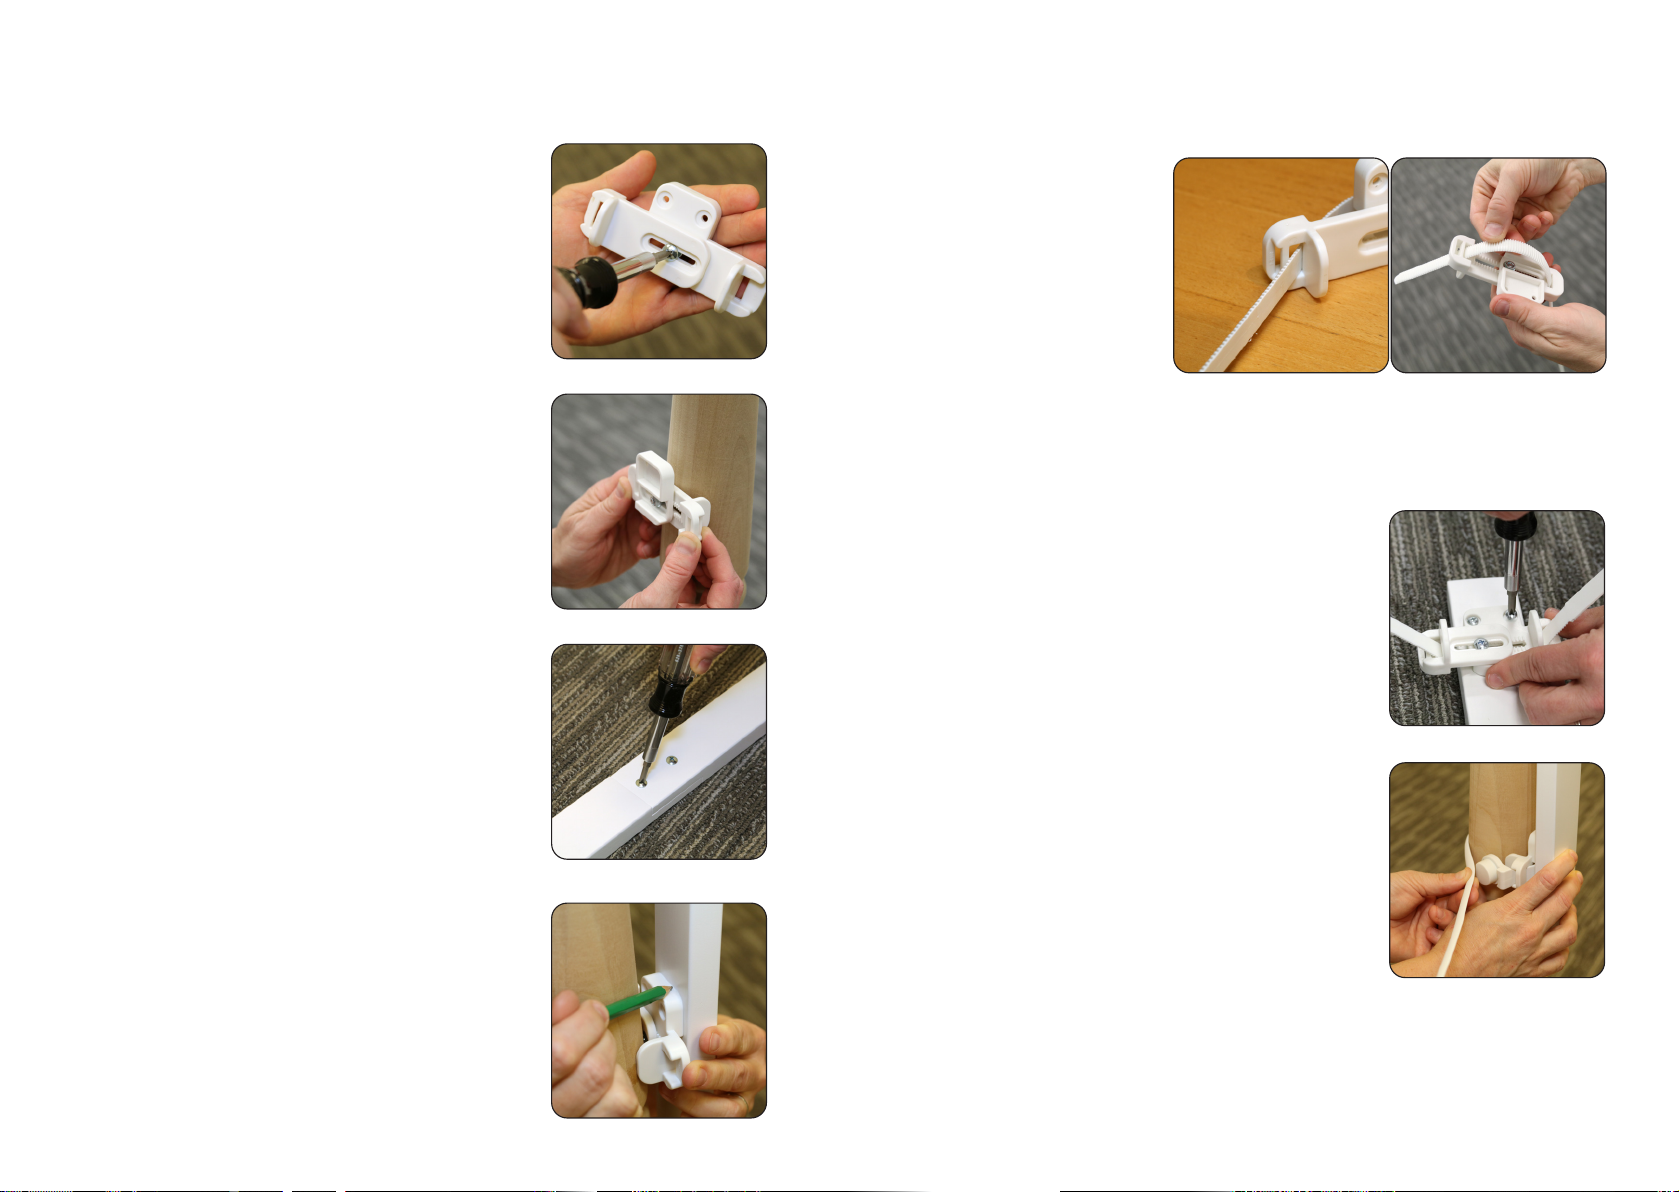
Step 1
Carefully loosen the screws on the
two Long Mounting Brackets by using
a Phillips screwdriver until it allows
the width to be adjusted.
Position against square post and
adjust the width until the angled
stops are as close to the post as
possible.
Tighten the screws.
Step 2
Use the included Socket Screws and
connect the two Wood Boards to
create one long board. Make sure the
wood block is in place.
Step 3
Hold one of the Long Mounting
Brackets and the long wood board
up to the post/banister. Adjust the
Mounting Brackets on the back of the
board to find one location 0-3″(0-7.6
cm) from the top and one location 2-4″
(5-10 cm) from the bottom where the
Long Mounting Brackets will fit on a
flat surface of the post/banister. Hold
each Long Mounting Bracket against
board and mark the locations on the
“backside” of the long wood board.
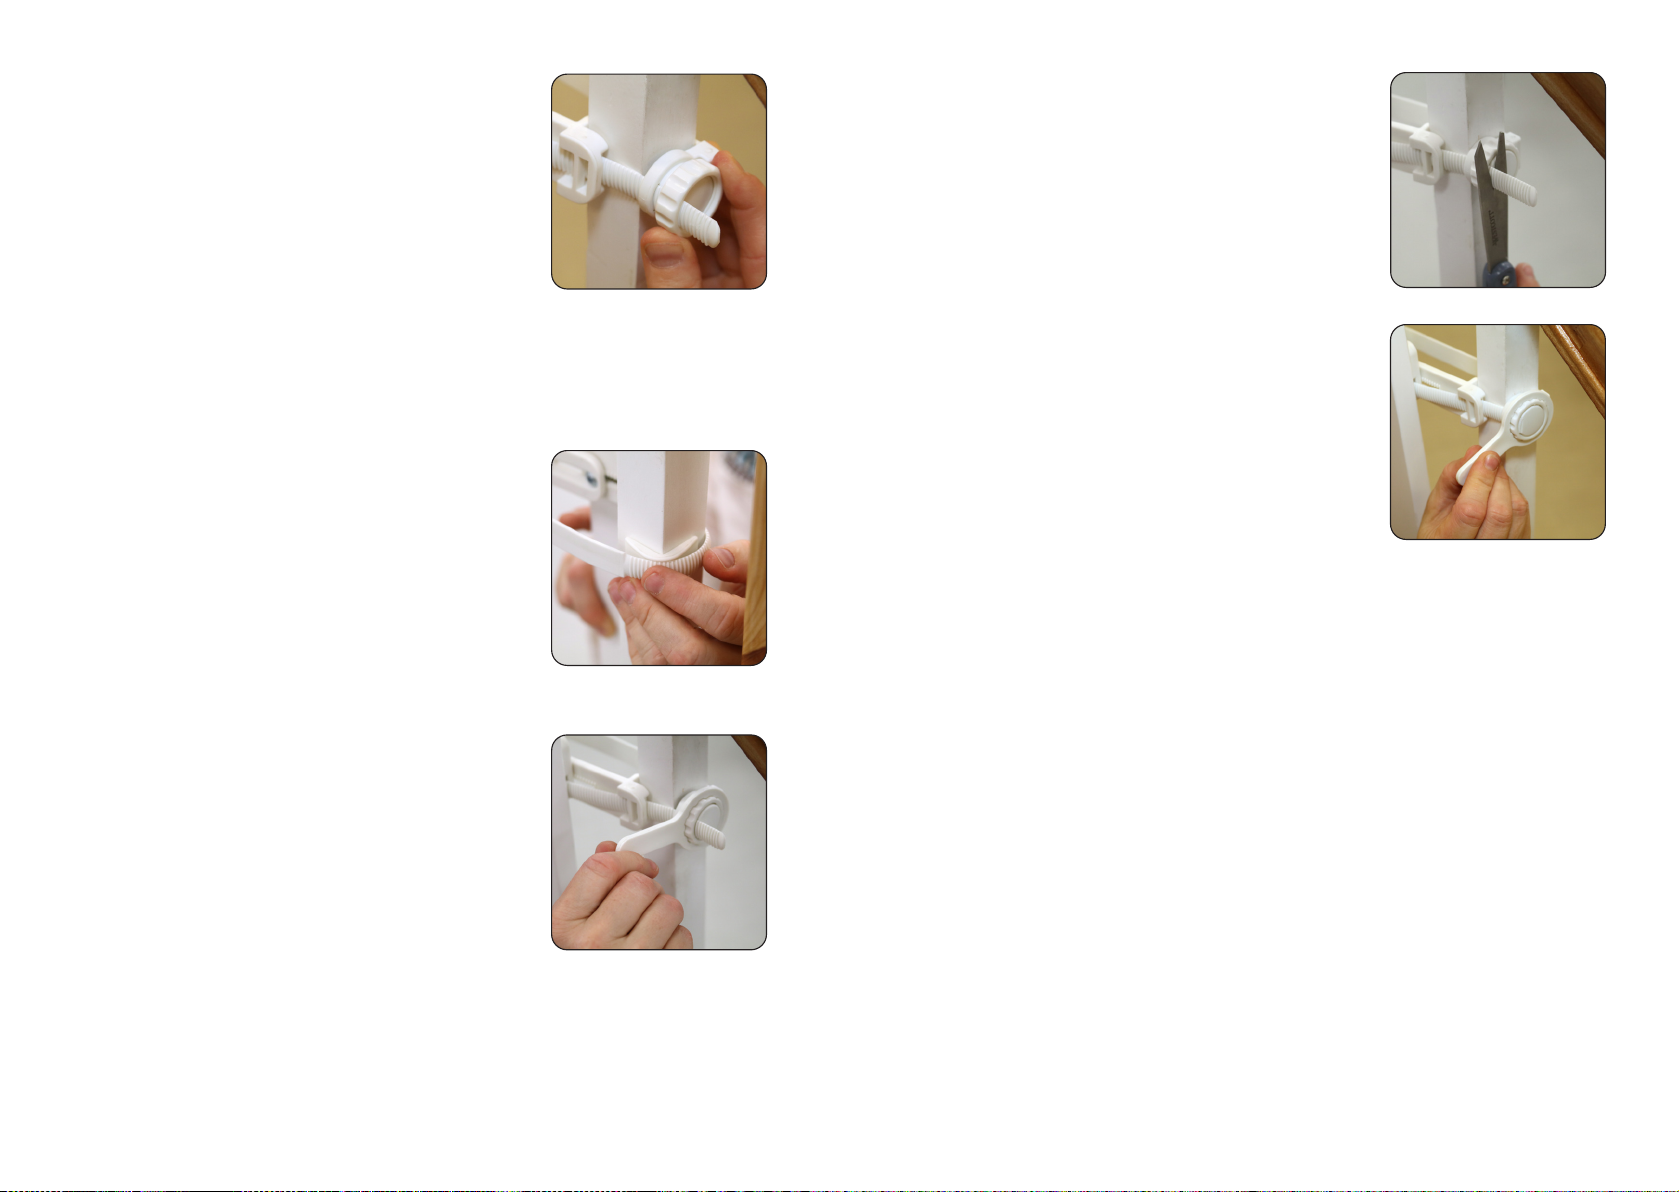
Step 4
Thread the Mounting Strap through
the Long Mounting Bracket with the
smooth side of the Mounting Strap
towards the nut holding the Long
Mounting Bracket together.
Step 5
Attach the two Long Mounting
Brackets to the back of the long
wood board in the marked locations,
using the four wood screws.
Step 6
Hold the long wood board with the
Long Mounting Brackets up to the
square post with the wood board
facing the gate location. Wrap the
Top Tightening Strap around the post
and feed the end through the small
hole in the Tightening End of the
strap.
Pull on the strap and attach the
Tightening Nut that will thread on
the threads in the strap. DO NOT
TIGHTEN YET.
Repeat for the bottom Mounting
Bracket and Tightening Strap.