4
English
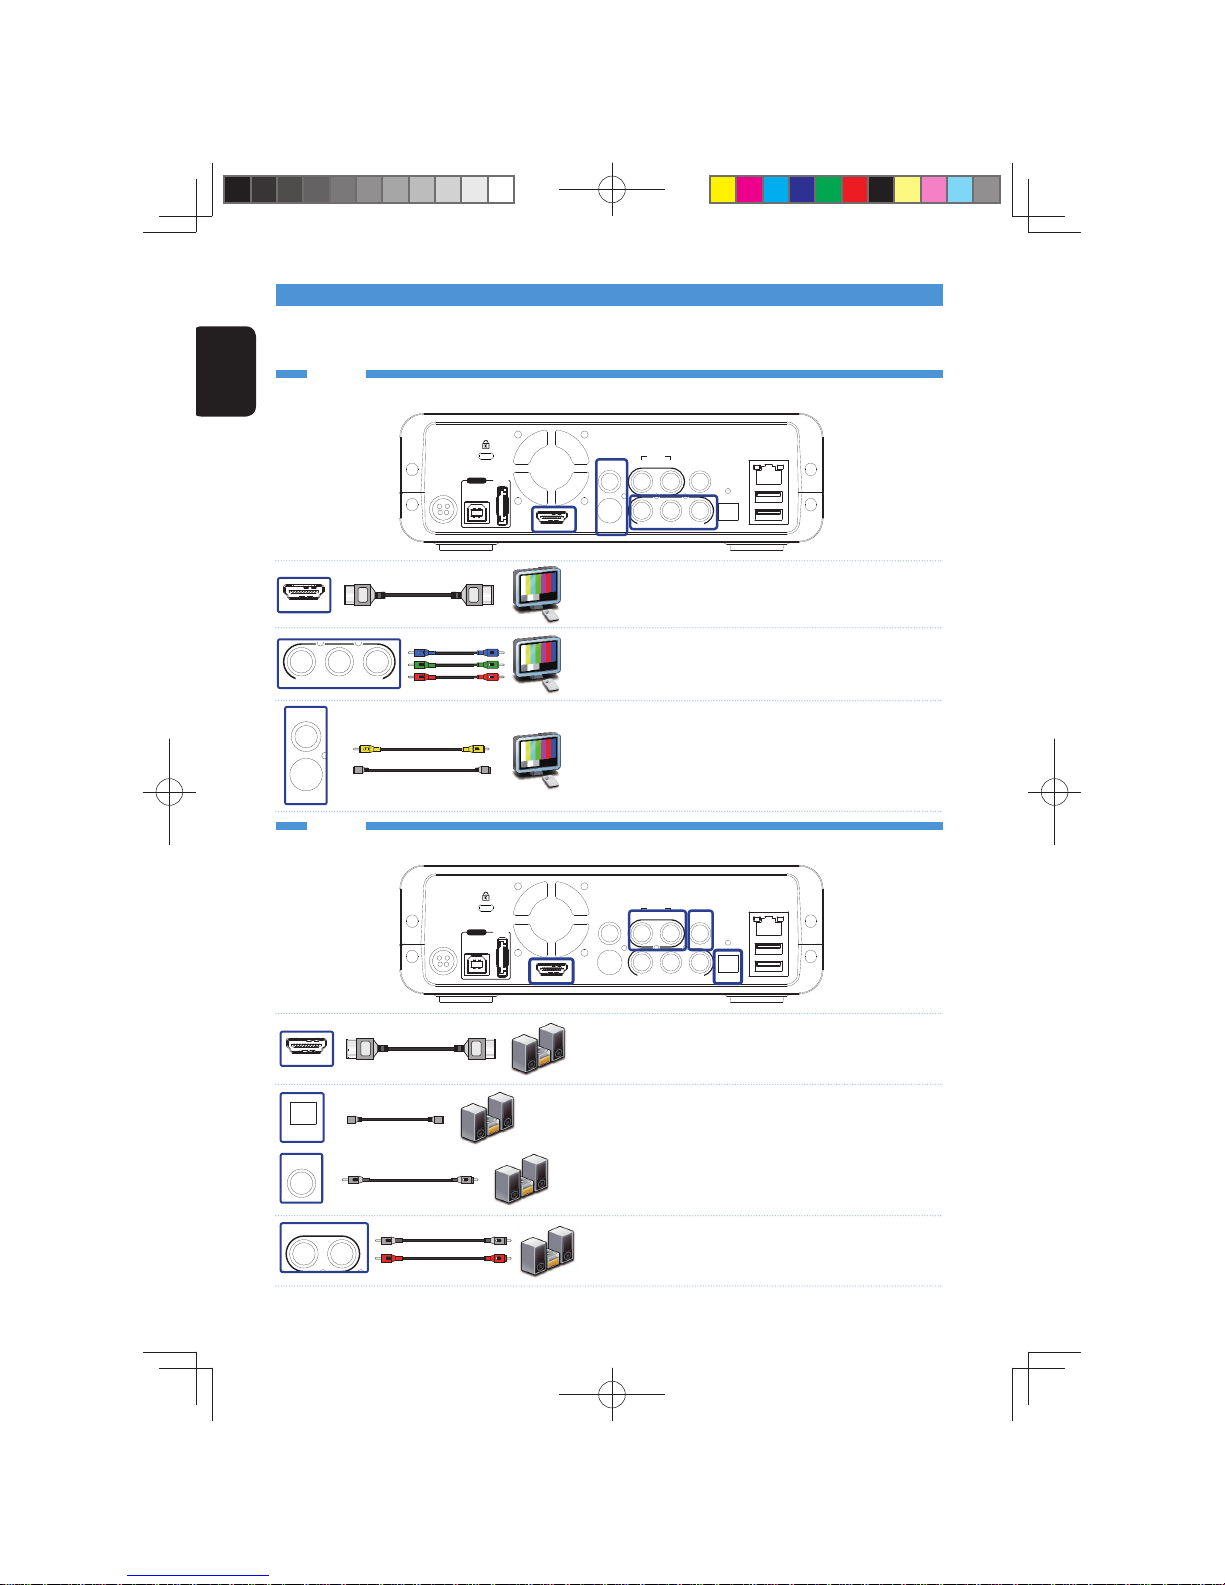
Connect the NMP-1000 to the audio device by one of the following methods.
Connect the NMP-1000 to the video device by one of the following methods.
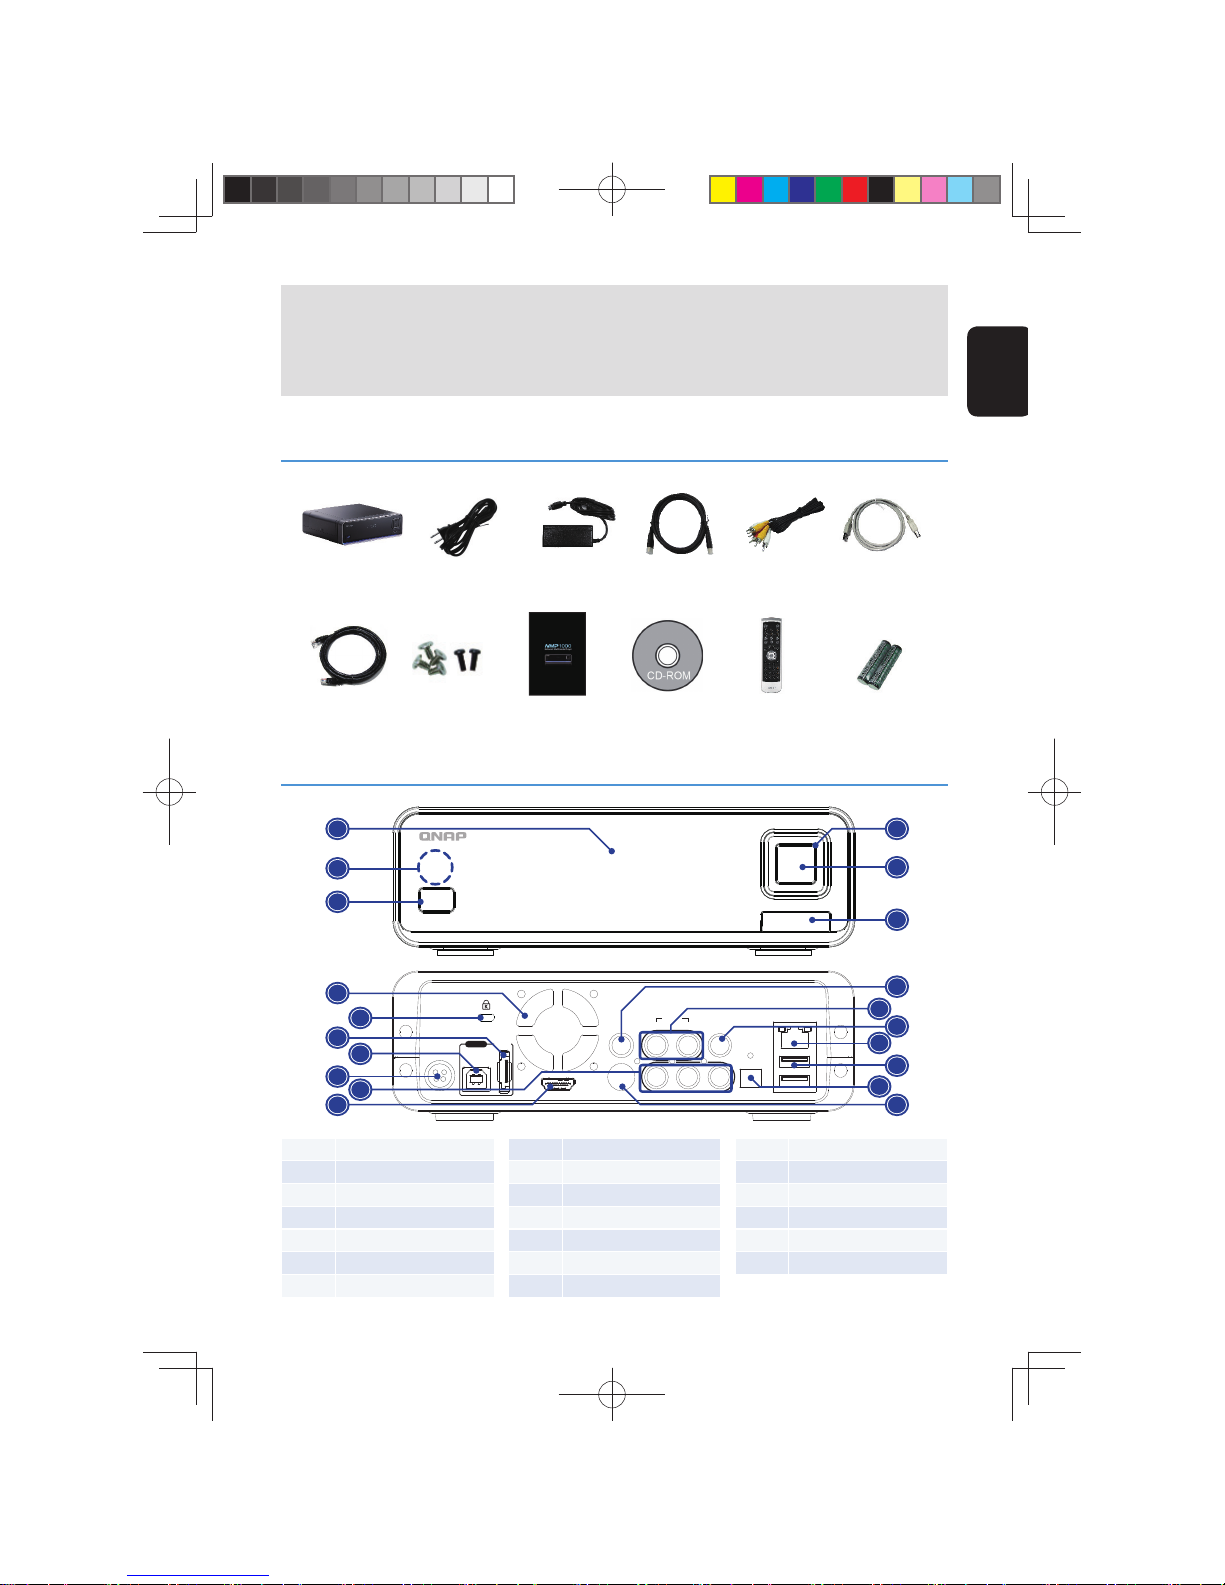
The NMP-1000 network multimedia player is designed to play music, photos, and videos on the TV and/or the
audio system. Connect the correct video and audio outputs from the NMP-1000 to the TV and/ or the audio
amplifi er.
Audio
Video
HDMI
Pr Pb Y
S-VIDEO
VIDEO
DC 5V/12V
USB
eSATA
HDMI S-VIDEO Pr Pb Y OPTICAL
VIDEO R L
AUDIO
COAXIAL
USB
LAN
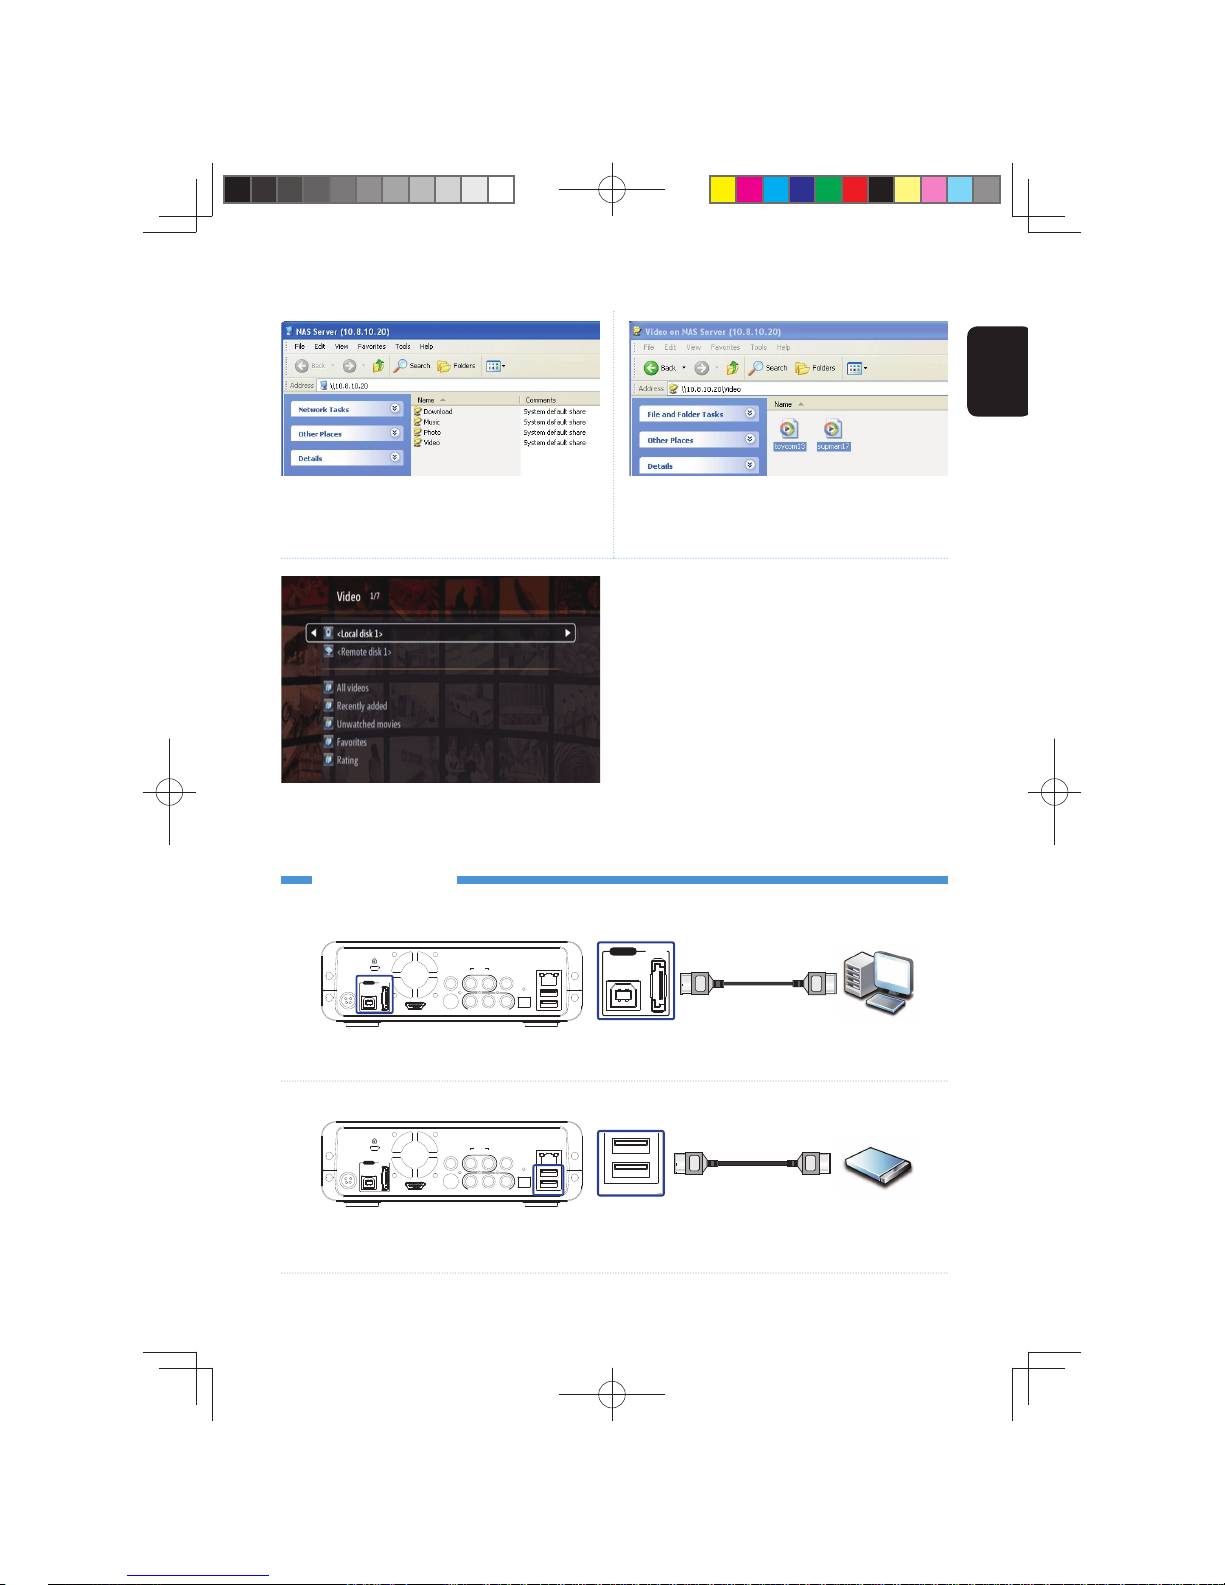
to PC
HDMI
OPTICAL
COAXIAL
RL
DC 5V/12V
USB
eSATA
HDMI S-VIDEO Pr Pb Y OPTICAL
VIDEO R L
AUDIO
COAXIAL
USB
LAN
to PC
Connect the NMP-1000 to Video & Audio Output
• HDMI (TV/ amplifi er)*: Connect the NMP-1000 to the amplifi er (if
available) or to the TV by the HDMI cable.
• Component: Connect the NMP-1000 to the TV by the Component
cable (not included in the package). Additional audio cables are
required.
• S-Video/ Composite: Connect the NMP-1000 to your TV by the
S-Video (not included in the package) or Composite video cable
(yellow).
• HDMI (amplifi er)*: Connect the NMP-1000 to the amplifi er by the
HDMI cable.
• S/PDIF (coaxial/ optical): Connect the NMP-1000 to the amplifi er
by the S/PDIF coaxial or optical cables (not included in the
package).
• Composite (audio): Connect the NMP-1000 to the TV or analog
output, e.g. amplifi er or speaker by the Composite audio cables.
* The video and audio signals are carried through the same HDMI cable if you choose to use the HDMI interface.
Left (white)
Right (red)
NMP-1000-QIG 20090406.indd 4NMP-1000-QIG 20090406.indd 4 2009/4/6 下午 06:40:392009/4/6 下午 06:40:39