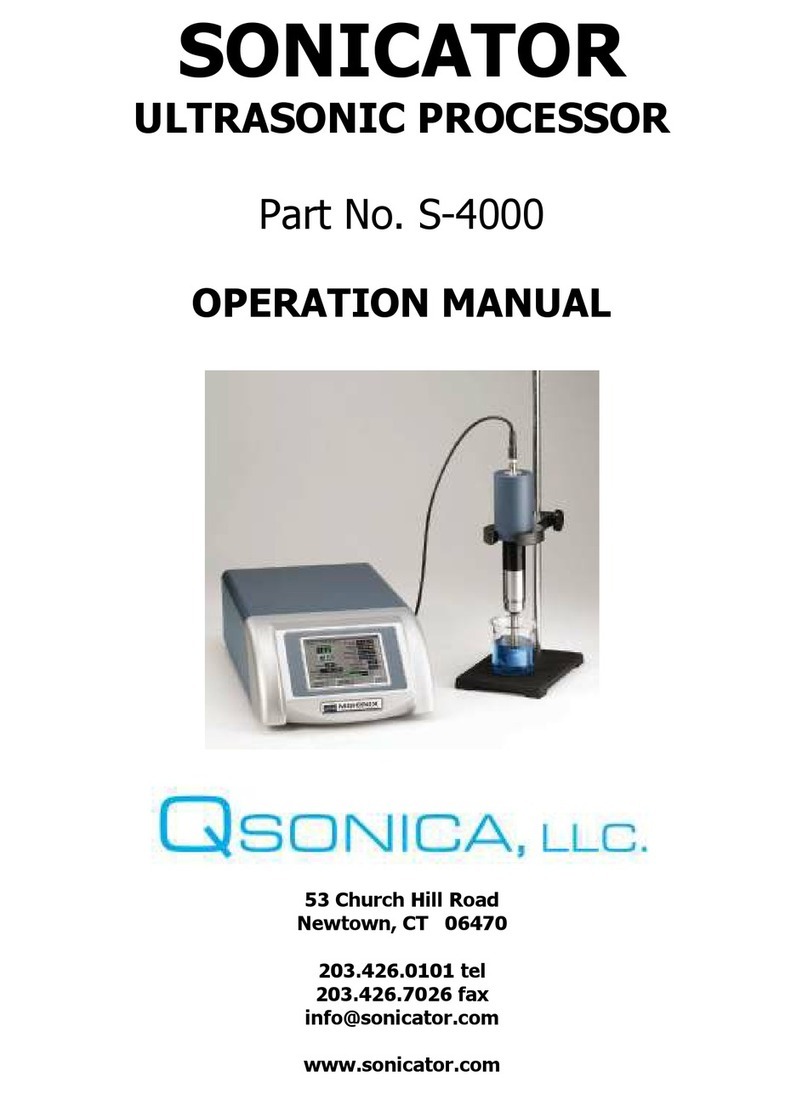
Qsonica CT2000 User manual

1
Sonicator
ULTRASONIC PROCESSOR
Part No. Q2000/Q2000FCE
OPERATION MANUAL
Qsonica, LLC.
53 Church Hill Rd.
Newtown, CT 06470
Phone: 203.426.0101
www.sonicator.com
Part No. CT2000
1

3
WARRANTY
Your Ultrasonic Processor is warranted for a period of two years from the date of
shipment against defects in material and workmanship under normal use as described in
this instruction manual. During the warranty period, the manufacturer will, at its option,
as the exclusive remedy, either repair or replace without charge for material and labor,
the part(s) which prove to be defective, provided the unit is returned to us properly
packed with all transportation charges prepaid.
Ultrasonic probes are guaranteed against defects for a period of one year from date of
shipment. A defective probe will be replaced once without charge, if failure occurs within
the warranty period. Wear resulting from cavitation erosion is a normal consequence of
ultrasonic processing, and is not covered by this warranty.
This warranty is in lieu of any other warranties, either express, implied, or statutory. The
manufacturer neither assumes nor authorizes any person to assume for it any other
obligations or liability in connection with the sale of its products. The manufacturer
hereby disclaims any warranty of either merchantability or fitness for a particular
purpose. No person or company is authorized to change, modify, or amend the terms of
this warranty in any manner whatsoever. Under no circumstances shall the manufacturer
be liable to the purchaser or any other person for any incidental or consequential
damages or loss of goodwill, production, or profit resulting from any malfunction or
failure of its product.
This warranty does not apply to equipment that has been subject to unauthorized repair,
misuse, abuse, negligence or accident. Equipment which, shows evidence of having
been used in violation of operating instructions, or which has had the serial number
altered or removed, will be ineligible for service under this warranty.
All probes are manufactured to exacting specifications and are tuned to vibrate at a
specific frequency. Using an out-of-tune probe will cause damage to the equipment and
may result in warranty nullification. The manufacturer assumes no responsibility for
probes fabricated by another party or for consequential damages resulting from their
usage.
The aforementioned provisions do not extend the original warranty period of any product
that has either been repaired or replaced by the manufacturer.
one year
2

4
IMPORTANT SAFEGUARDS
READ BEFORE INSTALLING OR USING THE EQUIPMENT
Your Ultrasonic Processor has been designed with safety in mind. However, no design can completely protect against
improper usage, which may result in bodily injury and/or property damage. For your protection and equipment safeguard,
observe the following warnings at all times, read the operating instructions carefully before operating the equipment, and
retain this instruction manual for future reference. If the Ultrasonic Processor is used in a manner contrary to that specified
in this instruction manual, the protection features designed into the unit may be impaired. Observe the following
WARNINGS:
High voltage is present in the generator (power supply), converter and high frequency cable. There are no user-
serviceable parts inside any of these devices. Do NOT attempt to remove the generator cover or converter case.
Do NOT touch any open cable connections on the unit while the power is turned ON.
Do NOT operate generator with converter disconnected from high voltage cable. High voltage is present in the cable
and may pose a shock hazard.
Do NOT attempt to disconnect the converter high voltage cable while the unit is running.
The generator must be properly grounded with a 3-prong plug. Test electrical outlet for proper grounding before
plugging in unit.
Install the ultrasonic processor in an area free from excessive dust, dirt, explosive or corrosive fumes and protected
from extremes in temperature and humidity. Do not place the Generator within a Fume Hood.
Hearing protection is highly recommended. It is recommended that a sound abating enclosure or ear protection be
used when operating the Ultrasonic Processor
NEVER immerse the converter in liquids of any kind, or let condensed moisture or liquid drip into the converter.
NEVER grasp an activated horn or probe. It can cause severe burns and tissue damage.
NEVER allow a probe to vibrate in air.
NEVER hold or clamp the converter by the front driver or by the horn itself. This can cause permanent damage to
the system. Support the converter by only clamping around the converter housing (upper portion).
Air-cool the converter with 10psi, clean dry compressed air.
Do NOT allow the tip of a vibrating horn or probe to touch the counter top or any other hard surface. It could damage
the probe, overload the generator, or damage the surface.
Avoid touching the bottom or sides of a glass or plastic container with an activated probe. It could crack or shatter
the glass or melt the plastic.
Turn OFF the power switch, unplug the generator and disconnect the power cord from the back of the generator
before attempting to replace the fuses.
Inspect high frequency cable for cracks in the protective outer jacket.
Do not operate unit with a damaged cable. Doing so may cause serious injury.
In case of AC power loss, wait 3 minutes minimum before reapplying power.
Do not turn off AC mains power while running a horn. Stop sonication via touch screen prior to stopping power.
Symbols
Caution, Risk of electric shock, Hazardous voltage
Caution, Risk of danger. Refer to User Manual.
3

5
SPECIFICATIONS
POWER SUPPLY
MODEL NUMBER: Q-2000XXX-220, XXX=ACCESSORY
OPTIONS
POWER RATING 2000 WATTS. FREQUENCY: 20 KHz
DIMENSIONS: 7 X 15 X 18 (H x W x D)
178 mm x 380 mm x 463.5 mm
WEIGHT: 21 lbs. (9.5 kg)
CONVERTER
PART NUMBER: CL-294
DIAMETER: 3 (76.2 mm)
LENGTH: 6 (158.7mm)
WEIGHT: 2 lbs. (900 grams)
STANDARD
PROBE
PART NUMBER: 4777
DIAMETER: 1.5 (37 mm)
LENGTH: 9.6 (244 mm) REFERENCE ONLY, ACTUAL
TUNED LENGTH WILL VARY.
WEIGHT: 2.0 lbs. (900 grams) REFERENCE ONLY,
ACTUAL WEIGHT WILL VARY WITH TUNED LENGTH.
TITANIUM ALLOY
STANDARD
BOOSTER
PART NUMBER: 4121TI
LENGTH: 5
CONVERTER
CABLE
CABLE LENGTH 10 (3 m)
ELECTRICAL
REQUIREMENTS
230 VAC ± 10%, 50/60 Hz, SINGLE PHASE, 20 AMPS
4
CT2000-220
1.5” Full-Wave High Gain OR 39mm Half-Wave High Gain
Flowcell Probe
37mm OR 39mm
9.6” OR 5”
2.0 lbs. OR 1.0 lbs.

6
POLLUTION
DEGREE
2
INSTALLATION
CATEGORY
II
ENVIRONMENT
INDOOR USE ONLY
HUMIDITY
MAXIMUM RELATIVE HUMIDITY 80 % FOR
TEMPERATURES UP TO 31°C DECREASING
LINEARLY TO 50% RELATIVE HUMIDITY AT 40°C
OPERATING LIMITS
TEMPERATURE: 41°F –104°F (5°C - 40°C)
ALTITUDE: 6,651 FEET (2000 METERS)
SHIPPING/STORAGE
LIMITS
TEMPERATURE: -4°F –120°F (-20°C - 49°C)
RELATIVE HUMIDITY: 10 –95 % (NON CODENSING)
ALTITUDE: 40,000 FEET (12,192 METERS)
RESTRICITION OF
HAZORDOUS
SUBSTANCE (RoHS)
RoHS
*Only use IEC approved Fast acting fuses, Cooper Bussman series S500.
The Power Cord supplied with the ultrasonic processor must be used. If the 230V plug is
not configured to match the wall receptacle, a properly grounded universal AC socket adapter
must be added.
Important: Universal adapters do not convert voltage or frequency. The manufacturer is not
responsible for damage caused by the use of an improper power cord or adapter. Transformers
are not recommended.
WEEE Statement
This product contains electrical or electronic materials. The presence of these materials may, if
not disposed of properly, have potential adverse effects on the environment and human health.
Presence of this label on the product means it should not be disposed of as unsorted waste and
must be collected separately. As a consumer, you are responsible for ensuring that this product
is disposed of properly. To find out how to properly dispose of this product contact Customer
Service.
5

7
SECTION 1 –INSTALLATION
INSPECTION
Prior to installing the Ultrasonic Processor, perform a visual inspection to detect any
evidence of damage, which might have occurred during shipment. Before disposing of
any packaging material, check it carefully for small items.
The equipment was thoroughly inspected and carefully packed before leaving our
factory. The carrier, upon acceptance of the shipment, assumed responsibility for its safe
delivery. Claims for loss or damage sustained in transit must be submitted to the carrier.
If damage has occurred, contact your carrier within 48 hours of the delivery date. DO
NOT OPERATE DAMAGED EQUIPMENT. Retain all packing materials for future
shipment.
ELECTRICAL REQUIREMENTS
The Ultrasonic Processor requires a fused, single phase 3-terminal grounding type
electrical outlet capable of supplying 230 +/- 10% VAC, 50/60 Hz, 20 amps.
If the desired plug type is different for your country or region see page 41 for a wiring
diagram and consult an electrician.
INSTALLING THE ULTRASONIC PROCESSOR
The ultrasonic processor should be installed in an area that is free from excessive dust,
dirt, explosive and corrosive fumes, and extremes of temperature and humidity. If
processing flammable liquids, use an approved fume hood and do not place the power
supply in the fume hood.
Unit shall be placed on a flat clean level surface. The mounting feet shall not be
removed from the bottom of the unit. The unit vents through the holes in the chassis
located on the underside of the unit. Keep this area clear of debris and dust.
When positioning the unit, be sure to leave adequate space behind the unit so that all
connections can be easily disconnected. Verify the fan on the rear of the unit is rotating
and operational.
WARNING
For your personal safety, do not, under
any circumstances, defeat the grounding
feature of the power cord by removing the
grounding prong.
6

8
DESCRIPTION OF COMPONENTS
The del Q2000 iclde a 1.5 Diameter High Intensity Probe (Part #4777)
Note: The compressed air hose for cooling the converter is not included.
Power Supply
Converter
(#CL-294)
Booster
(# 4121TI)
Probe
(#4777)
Converter Cable
(#201-0106)
Compressed Air Hose
Optional
Stand with
Clamp
(#461)
7
CT2000 pictured with #4777 1.5” batch probe

9
Q2000 REAR PANEL
Cooling Fan
Converter
Cable
Connector
Power Cord
Connector
Temperature Probe
Connector
Fuses
Footswitch
Jack
DB9
Connector
8
REAR PANEL

10
Q2000 PROBE SELECTION
3 of the 4 available probes are used with a Booster as shown below:
Note: #4776 must not be used with the booster.
#CL294 Converter
#4676 Flocell
Probe with
Cover Plate
#4697
Probe
#4777
Probe
#4776
Probe
#4121TI
Booster
39mm Flow Cell Probe
1.5” Batch Probe
1” Batch Probe
0.5” Batch Probe
PROBE SELECTION
9

12
Q2000 ASSEMBLY
1. Screw the
converter to
booster by hand.
2. Set the Torque
wrench to 64.5 ft.lb.
Use the spanner
wrench and Torque
wrench to tightly
attach the
converter to the
booster.
ASSEMBLY
10

13
3. Screw the
booster to the horn
by hand.
4. Set the Torque
wrench to 64.5 ft.lb.
Use the spanner
wrench and Torque
wrench to tightly
attach horn to
booster.
11

12
FLOW CELL ASSEMBLY
1- Mount o-rings on horn.
2- Slide flow cell lid over top of horn.
3- Insert horn into flow cell, align lid.
4- Install 4 mounting bolts, fully tighten by hand.

14
Converter Cooling for Q2000 systems
Introduction:
The nature of sonication causes the probe, converter and sample temperature to
increase during operation. Processing samples requires significant amounts of energy
and some of this energy manifests as heat in the converter and probe. The converter
contains sensitive internal crystals which can crack due to overheating, which would
require the converter to be replaced. Converter damage due to overheating is not
covered under warranty. Air cooling using compressed air is required to always keep
the converter within safe operating temperatures. The elements of the system will still
heat up when air cooling is employed, but the converter will operate at an acceptable
temperature for continuous use. It is important to note that your sample liquid may also
require cooling, using an ice bath, heat exchanger or a chiller. Cooling both the sample
and the converter will ensure safe operation.
Instructions:
Connect your compressed air source to the hose barb fitting on the top of the converter
with 1/4 ID tubing.
The compressed air source must meet the following specification:
3-4 cubic feet per minute (CFM)
10 psig ±1
70°F
Dry
Oil free
Filtered with a 5 micron filter
Any deviation from the above compressed air specifications may void the
warranty. Contact us for assistance.
13

22
SECTION II –OPERATION
PRINCIPLES OF ULTRASONIC DISRUPTION
The ultrasonic electronic generator transforms AC line power to a 20 KHz signal that
drives a piezoelectric converter/transducer. This electrical signal is converted by the
transducer to a mechanical vibration due to the characteristics of the internal
piezoelectric crystals.
The vibration is amplified and transmitted down the length of the horn/probe where the
tip longitudinally expands and contracts. The distance the tip travels is dependent on
the amplitude selected by the user. As you increase the amplitude setting the sonication
intensity will increase within your sample.
In liquid, the rapid vibration of the tip causes cavitation, the formation and violent
collapse of microscopic bubbles. The collapse of thousands of cavitation bubbles
releases tremendous energy in the cavitation field. The erosion and shock effect of the
collapse of the cavitation bubble is the primary mechanism of fluid processing.
Please consult with a product specialist for assistance with selecting a probe for your
application.
Relationship of Amplitude and Wattage
Sonication power is measured in watts. Amplitude is a measurement of the excursion of
the tip of the probe (probe is also known as a horn).
Some ultrasonic processors have a wattage display. During operation, the wattage
displayed is the energy required to drive the radiating face of a probe, at that specific
amplitude setting against a specific load, at that particular moment. For example, the
unit experiences a higher load when processing viscous samples then when compared
to aqueous samples.
The speed /cruise control on an automobile, can, to a certain extent, be compared to an
Ultrasonic Processor. The speed/cruise control is designed to ensure that the vehicle
maintains a constant rate of travel. As the terrain elevations change, so do the power
requirements. The cruise control senses these requirements, and automatically adjusts
the amount of power delivered by the engine in order to compensate for these ever
changing conditions. The greater the terrain rate of incline and greater the resistance to
the movement of the vehicle, the greater the amount of power that will be delivered by
the engine to overcome that resistance and maintain a constant speed.
The ultrasonic processor was designed to deliver constant amplitude, to your liquid
sample, regardless of these changes in load (much like the vehicles cruise control
described above). As a liquid is processed, the load on the probe will vary due to
changes in the liquid sample (i.e. viscosity, concentration, temperature, etc.). As the
resistance to the movement of the probe increases (increased load on the probe),
additional power will be delivered by the power supply to ensure that the excursion at the
14

23
probe tip remains constant. The displayed wattage readings will vary as the load
changes, however the amplitude will remain the same.
The resistance to the movement of the probe determines how much power will be
delivered to maintain amplitude. For example, a 1/2 probe at 100% amplitude will
require approximately 5 watts to operate in air. The maximum amplitude of this probe is
approximately 100um. Insert the probe in water and the wattage reading will increase to
approximately 90 watts. The wattage required to operate the probe will increase as the
load increases but the amplitude remains the same.
The amplitude control allows the ultrasonic vibrations at the probe tip to be set to any
desired level. Although the degree of cavitation/ultrasonic energy required to process
the sample can readily be determined by visual observation, the amount of power
required cannot be predetermined. A sensing network continuously monitors the output
requirements, and automatically adjusts the power to maintain the amplitude at the
preselected level. The greater the resistance to the movement of the probe due to
higher viscosity, deeper immersion of the probe into the sample, larger probe diameter
or higher pressure, the greater the amount of power that will be delivered to the probe.
Setting the amplitude control to its maximum will not cause the maximum power rating of
the unit to be delivered to the sample. The maximum power (2,000 watts) that the
Ultrasonic Processor is capable of delivering will only be delivered when the resistance
to the movement of the probe is high enough to draw maximum wattage.
It is the intensity of cavitation that determines the effectiveness of the sonication, not the
total power applied to the system. Intensity is directly related to the amplitude of the
radiating face of the tip or horn. It is amplitude that must be provided, maintained, and
monitored. The unit provides controlled amplitude under varying load conditions in order
to give reproducible results.
15

24
DIRECT PROBE SONICATION
Proper setup is important to optimizing the sonication amplitude
settings and processing times. The probe should be securely
held using the Qsonica stand and clamp. This clamp can be
secured to either the booster ring or bottom of the converter.
Probe depth must be adjusted to ensure adequate mixing and
sample circulation. Larger volumes and viscous samples will
process more quickly and effectively with the addition of a mixer
or stir bar.
Probe Depth Example:
Probe Options:
Part #
Tip Diameter
Processing
Volume
Range*
Amplitude
4777
1.5" (38mm)
5 - 20L
100µm
4697
1" (25mm)
1 - 5L
100µm
4776
0.5" (12mm)
50 - 400ml
100µm
*Note: Processing volumes are application specific. There are
many variables (viscosity, concentration, etc.) that can affect the
min/max processing volumes and processing times.
In addition, the amplitude setting needed for an application must
be determined empirically.
Contact us for help with selecting the amplitude and time settings
to begin your optimization trial.
Note: the booster cannot be ed ih diameter tip probe #4776.
Probe depth is volume
dependent.
Do not insert the
#4777 probe deeper
than indicated by the
arrow. Contact us for
guidance.
16

26
FUNCTIONS OF KEYS, CONTROLS, INDICATORS AND CONNECTORS
FRONT PANEL
SCREEN
Displays prompts and the following control parameters:
Amplitude selected
Output power delivered to the probe in watts and as
percentage of the total power
Selected duration of processing
Actual processing time
Elapsed time
Set and read temperature
Pulse duration
Amount of energy (Joules) delivered to probe.
0-9 key
Input digits.
CLEAR key
Clears preceding entry.
ENTER/REVIEW
key
Enters data into the program, and selects various parameters
for display on the LCD screen.
TIMER
key
Used to set the duration of ultrasonic application –from 1
second to 9 hours, 59 minutes, 59 seconds.
TEMP
key
Used with the numeric keys to set the high temperature limit
–from 1°C to 99°C. Red indicator lights when the
temperature limit has been reached. (optional temperature
probe must be used for this feature)
PULSER
key
Used with the numeric keys to set the pulse mode. The ON
cycle and OFF cycle can be set independently from 1 second
to 59 seconds. Red indicator lights when pulser is in the OFF
portion of the cycle.
ENERGY key
Used to set the Energy Setpoint
START/STOP key
Starts or stops the ultrasonics. Red light indicates sonication.
PAUSE key
Suspends operation. Red light indicates Pause mode.
SAVE/RECALL
key
Used with the numeric keys to assign a number to a program
and store it in memory. Up to 9 programs (1-9) can be
stored. Also used to recall any of 9 stored programs.
AMPL key
Controls the amplitude (intensity) of vibration at the tip of the
probe.
|key
Switches the main power ON.
Okey
Switches the main power OFF.
key
Used with the AMPL key to increase/decrease amplitude.
To accomplish this task, depress the AMPL key to display the
percentage of amplitude previously selected, then depress
the or key as required
17

27
REAR PANEL
Footswitch jack
Connects to the footswitch cable.
Coax connector
Connects to the converter
DB9 connector
I/O Connector
Electrical line cord
Connects to the 220/240V electrical outlet
Temperature probe jack
Connects to the optional temperature probe
I/O Connector Description
The following I/O connections are available for remote control and monitoring. This I/O interface
provides remote monitoring and signaling to the Power Supply. Remote control can be used to
vary the Amplitude, Command Sonics Start, monitor power output and frequency.
PIN
Name
Description
1
O.L. Indication (*1)
Output - Over Load Indicator. When a power supply
overload has occurred this line will be set low referenced
to pin 9. This is an open collector output. See schematic
for ratings.
2
Not Connected
3
Frequency Lock (*1)
Output –Frequency Lock Indicator. When the power
supply has achieved frequency lock this line will be set
low referenced to pin 9. This is an open collector output.
See schematic for ratings.
4
Frequency Output /
10
Output –Square wave output representing the power
supply frequency divided by 10. See schematic for
ratings. This output is referenced to pin 9.
5
Power Output Watts
Output –Analog output representing power supply output
wattage. 5.44mV = 1 Watt. See schematic for ratings.
6
Ground
Ground –Common reference point for pins 2, 5, 7 and 8.
7
Sonics Start
Input –Sonics Start signal. Apply a switch closure to
ground (pin 6). This will start the ultrasonic cycle as
programmed by the keypad. See schematic for ratings.
8
Amplitude Control
Input –Analog Input representing the Amplitude setting of
the power supply. 0 to 10 VDC signal representing 20% to
100% amplitude. See Note 1. See schematic for ratings.
9
Common Emitter
Common reference point for pins 1, 3, and 4. See
schematic for ratings.
Note 1. In order to activate remote amplitude control, the Amplitude Select switch on the Back
Panel Interface PCBA must be set in the External position. To set the switch, power off the unit
and disconnect the power cord from the wall socket. Remove the six screws holding the cover to
the chassis. Set the switch to External on the Backplane Interface PCB. Re-install the cover and
fasten all 6 screws. Re-connect the power cord to the wall socket.
Please contact Qsonica for specific applications assistance related to remote control and
monitoring.
18

28
PREPARATION FOR USE
1. Plug the electrical line cord into the electrical outlet. If the unit is already on, switch
the unit off by depressing the Okey.
2. If the optional footswitch is used, insert the footswitch plug into the jack located on
the rear panel.
3. Complete the converter/booster/probe or flocell assembly as described on pages 10
-18.
4. Connect the converter cable to the power supply. Connect one end of the converter
cable to the connector on the rear panel of the power supply. Connect the other end
to the converter. The connectors on the cable are interchangeable.
5. Connect the air fitting on top of the converter to a source of dry, filtered compressed
air at 10 psi (5 CFM). Air cooling is required.
CAUTION
Do not operate an Ultrasonic Processor that has been in a very
cold or hot environment for a prolonged period of time. Allow
the system to reach room temperature before use.
CAUTION
Never place a washer between the converter, booster or
probe. Never apply grease to the mating surfaces or
threads of the converter, booster or probe.
Converter Air Cooling
Sonication will cause both the probe and sample temperature to increase. The heat will transfer up
to the converter. If the converter overheats the internal crystals can crack and the converter will
require replacement. Converter damage due to overheating is not covered under warranty.
Continuous processing applications require both chilling the sample and air cooling of the converter.
Cooling Air Regulation and Adjustment:
Adjust the regulated compressed air until the gauge indicates 10 ± 1 PSIG (approximately 5 CFM).
The compressed air will flow into the converter and out through the bottom.
Note: The compressed air should be dry, oil free and filtered with a 5 micron filter. See page 12 for
details.
19

29
USING THE ULTRASONIC PROCESSOR
Press the |key on the front panel.The screen will display the power rating and the
frequency of the Ultrasonic Processor, and the following control parameters.
AMPLITUDE: Amplitude is the intensity of sonication and the only parameter that must
be set in order for the Ultrasonic Processor to be operational. The other control
parameters –Time and Pulse, do not have to be set for continuous operation. AMPL
Displays the percentage of amplitude that was previously selected. Press the AMPL key
and then use the numeric keys to enter the desired value. Then depress the
ENTER/REVIEW key. For example, to enter a value of 40% amplitude, first depress the
4key, then the 0key and then depress the ENTER/REVIEW key.
The screen will display:
The Ultrasonic Processor is now ready for continuous operation. To energize the
equipment, press the START key or the footswitch. To de-energize the equipment,
press the STOP key or release the footswitch. If the Time or Pulse* functions must be
used, refer to the appropriate paragraphs(s) below.
To increase or decrease the amplitude in small increments when the equipment is on,
depress the AMPL key to display the percentage of amplitude that was previously
selected, then depress the or key, as required.
CAUTION
Do not operate the power supply unless it is
connected to the converter.
NOTE
Any combination of functions can be
selected in any order. To clear an
erroneous entry press the CLEAR key.
TIME __:__:__ TEMP__ __°C
PULSE _ _ _ _ AMPL__ __%
TIME __:__:__ TEMP__ __°C
PULSE _ _ _ _ AMPL 40%
20
Table of contents
Other Qsonica Computer Hardware manuals