manuals.online logo
Brands
  1. Home
  2. •
  3. Brands
  4. •
  5. Quadra-Fire
  6. •
  7. Stove
  8. •
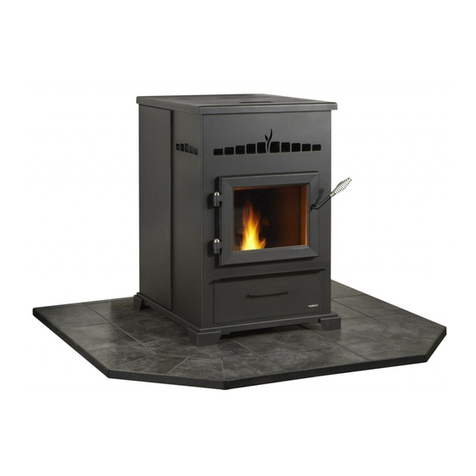
  9. Quadra-Fire 18000 FreeStanding User manual

Quadra-Fire 18000 FreeStanding User manual

This manual suits for next models

1

Other Quadra-Fire Stove manuals

Quadra-Fire CASTILE-MBK-C User manual

Quadra-Fire

Quadra-Fire CASTILE-MBK-C User manual

Quadra-Fire Direct Room CASTILE-GAS-CSB User manual

Quadra-Fire

Quadra-Fire Direct Room CASTILE-GAS-CSB User manual

Quadra-Fire MT VERNON User manual

Quadra-Fire

Quadra-Fire MT VERNON User manual

Quadra-Fire COLUMBIA BAY User manual

Quadra-Fire

Quadra-Fire COLUMBIA BAY User manual

Quadra-Fire OUTFITTER-II User manual

Quadra-Fire

Quadra-Fire OUTFITTER-II User manual

Quadra-Fire Castile Gas Stove User manual

Quadra-Fire

Quadra-Fire Castile Gas Stove User manual

Quadra-Fire 4300 Series User manual

Quadra-Fire

Quadra-Fire 4300 Series User manual

Quadra-Fire 3100 Millennium User manual

Quadra-Fire

Quadra-Fire 3100 Millennium User manual

Quadra-Fire MT. VERNON AE Programming manual

Quadra-Fire

Quadra-Fire MT. VERNON AE Programming manual

Quadra-Fire QFI30FB-IFT User manual

Quadra-Fire

Quadra-Fire QFI30FB-IFT User manual

Quadra-Fire GRAND BAY 40 GB40FS User manual

Quadra-Fire

Quadra-Fire GRAND BAY 40 GB40FS User manual

Quadra-Fire SAPH-MBK-IPI User manual

Quadra-Fire

Quadra-Fire SAPH-MBK-IPI User manual

Quadra-Fire MTVI-E2-MBK-C User manual

Quadra-Fire

Quadra-Fire MTVI-E2-MBK-C User manual

Quadra-Fire SAPPHIRE Sapphire Cast Iron User manual

Quadra-Fire

Quadra-Fire SAPPHIRE Sapphire Cast Iron User manual

Quadra-Fire Explorer II series User manual

Quadra-Fire

Quadra-Fire Explorer II series User manual

Quadra-Fire TOPAZ-MBK-IPI User manual

Quadra-Fire

Quadra-Fire TOPAZ-MBK-IPI User manual

Quadra-Fire MT VERNON-AE Programming manual

Quadra-Fire

Quadra-Fire MT VERNON-AE Programming manual

Quadra-Fire CASTILE-MBK-B User manual

Quadra-Fire

Quadra-Fire CASTILE-MBK-B User manual

Quadra-Fire SAPPHIRE-D-CSB User manual

Quadra-Fire

Quadra-Fire SAPPHIRE-D-CSB User manual

Quadra-Fire GARN-MBK-IPI User manual

Quadra-Fire

Quadra-Fire GARN-MBK-IPI User manual

Quadra-Fire MTVI-E2-MBK User manual

Quadra-Fire

Quadra-Fire MTVI-E2-MBK User manual

Quadra-Fire MTVERNON-AE-CSB User manual

Quadra-Fire

Quadra-Fire MTVERNON-AE-CSB User manual

Quadra-Fire 800 NOVA Manual

Quadra-Fire

Quadra-Fire 800 NOVA Manual

Quadra-Fire CAB50-C User manual

Quadra-Fire

Quadra-Fire CAB50-C User manual

Popular Stove manuals by other brands

Wildfire F-131 2 Series User instructions

Wildfire

Wildfire F-131 2 Series User instructions

Dansons Group Pit Boss PB820FB1 manual

Dansons Group

Dansons Group Pit Boss PB820FB1 manual

Sylvania SO111R-MBK instruction manual

Sylvania

Sylvania SO111R-MBK instruction manual

Breckwell SP6000 Installation & operator's manual

Breckwell

Breckwell SP6000 Installation & operator's manual

Breckwell P24FSA owner's manual

Breckwell

Breckwell P24FSA owner's manual

Bartscher 1509851 instruction manual

Bartscher

Bartscher 1509851 instruction manual

Continental Fireplaces CDVS280-1NSB Installation and operation manual

Continental Fireplaces

Continental Fireplaces CDVS280-1NSB Installation and operation manual

Arada Cassette Stove installation guide

Arada

Arada Cassette Stove installation guide

Astonica 40100008 instruction manual

Astonica

Astonica 40100008 instruction manual

Cattara FAMILY manual

Cattara

Cattara FAMILY manual

Stanley Argon F500 OVAL Installation and operating instructions

Stanley

Stanley Argon F500 OVAL Installation and operating instructions

Nordpeis Vega user manual

Nordpeis

Nordpeis Vega user manual

Exquisit EKC601-5 Instructions for use and installation

Exquisit

Exquisit EKC601-5 Instructions for use and installation

Stanley Oisin Oil MK II Installation and operation instruction

Stanley

Stanley Oisin Oil MK II Installation and operation instruction

HASE delhi operating instructions

HASE

HASE delhi operating instructions

Vermont Castings Intrepid 2 User instructions

Vermont Castings

Vermont Castings Intrepid 2 User instructions

Italiana Camini CLASSICA Installation, use and maintenance

Italiana Camini

Italiana Camini CLASSICA Installation, use and maintenance

Avalon Vashon Avanti DVS FS manual

Avalon

Avalon Vashon Avanti DVS FS manual

manuals.online logo
manuals.online logoBrands
  • About & Mission
  • Contact us
  • Privacy Policy
  • Terms and Conditions

Copyright 2025 Manuals.Online. All Rights Reserved.

Installation,Operation,and
Model: Quadra-Fire MaintenanceInstructions
1800
FreeStandina
I
Nous Avons Aussi Le Manuelen Francais.
Demandez
6
Volre Vendeur
I
CONGRATULATION
--
You are nowtheproudowner of one of thefinest insertsintheworldfor your home
--
the
QUADRA-FIRE.
Now, before installinqyour insert and buildino your first fire
--
recordthe serial number onthe warrantv card.
PLEASE READALL OFTHE OWNERS MANUALAND SAFETY NOTES.
IMPORTANTSAFETY NOTES:
1. When installingyour stove, particular attentionshouldbe paidto fireprotection. If this unit is not properly installed,
a housefire may result. Foryour safety,followthe installationinstructionsandcontact local buildingor fire officials
about restrictionsand installationinspection requirements in your area.
2. Neverusegasoline or similar liquidsto start
a
tire inthis unit. Kee~all suchliauidswell away fromstove.
3.
Duringoperation
ff
any panof the stove starts to glow, tne stove isinan overhidcondition. Close the air controls
Comoletelv untlthe alowna has stoooed. OVERFIRING VOIDS WARRANTY.
.
,
~~
-
~~~
~~~~~~
..
4.
~ooiashe&hould
b;,
disposed of carefully
-
usingametalcontainer.
5.
Do not burnwet or greenwood. Storewood in
dry
location.
6.
Do not burngarbage, treatedwood, or wood with salt (driftwood,etc.).
7.
DOnotpermit creosote or sootto accumulateexcessivelyinthe chimney or inside the firebox.
8.
Checkyourchimneysystemthoroughlywheninstallingintoanexistingmetalormasonrychimney. Seekprofessional
advice
if
in doubt about itscondition.
9.
Do not connectthis unit to a chimneyflue already sewing another appliance.
10.
Comply with all minimum clearancesto combustibles as shown inthis manual.
11. Buildfire on brick firebox floor
--
Donot use grates, andirons or other methodto support fuel.
12. Hotwhile in operation. Keepchildren, clothingand furniture away. Contact can cause skin burns.
13.
Do not connect to any air distributionduct or system.
ALADDIN
STEEL
PRODUCTS.
INC.
(
401
N.
WYNNE
COLVILLE, WASHINGTON
99114
Page
2
NOTES
Page
3
TABLE
OF CONTENTS
Page
Installation Materials Needed
.....................................................................................................................
3-4
Installation
......................................................................................................................................................
4
Clearances To Combustibles
......................
..
..........................................................
4
Floor Protector
.....................
...
4
Chimney Connec or
ConnectionTo
A
Masonry Chimney
ConnectionTo
A
Metal Prefabricate
Mobile Home InstallationOutside Combustio
14
14
Fan Operating Instruction
14
14
15
16
16
16
Wood Selection
&
Storage
...................
..
.............
.....
..................................................
16
Brick Patterns
...............................................................................................................................................
I7
Maintenance Instructions
..
....................................................
17
Creosote Formation Inspection
&
Removal
........................
...
........
.....
..................................
17
Door Handle
&
Glass Replacement
Optional Blower lnstruction
Baffle Removal
&
Installation
INSTALLATION
MATERIALS
NEEDED
FOR
YOUR
SAFETY
CHIMNEY CONNECTOR: (Also knownas flue pipe or stove pipe) The chimneyconnector joins the stove chimney. It should be
6
in. diameter
24
MSG
black or blued steel
24
gauge minimum.
THIMBLE: A manufacturedor site-constructeddevice installedincombustible wallsthroughwhich thechimney connectorpasses
to the chimney. Itis intended
to
keepwalls
from
igniting.
Page 4
The Quadra-Fire
1800
was safety tested and is listed byWarnock Hersey INC. to UL 1482and ULC 5627
Also approved for mobile home installation with outside combustion air. (Kit Order #821-0240
&
#82i-0230)
WARNING: "DO NOT INSTALL INSLEEPING ROOM"
CAUTION: THESTRUCTURAL INTEGRITYOFTHEMOBILEHOMEFLOOR,WALLANDCEILINGIROOFMUSTBEMAINTAINED.
Ina residential Installation inCinadawithout anoutside combustion air kit a source of fresh air into the room shall be provided.
CHIMNEY: APPROVED MASONRY (seespecificationon page5), with at least 518 fire clay lining joined with refractorycement
or other listedsystem suitable for usewith wood stoves OR
PREFABRICATED 6in.listedhightemperature(UL103orULC629M)chimney. Componentsrequiredbymanufacturersforinstallation
suchas the chimneysupport base,firestop (as appropriate),attic insulationshield, insulatedtee, etc.,are necessaryto assure a safe
chimney installation. Use only components manufacturedfor the chimney.
CLEARANCETO COMBUSTIBLES
Minimum
Clearance
To
Combustible
(In
Inches
And
Millimeters)
P
R
F
0
L
T
0
E
0
C
R
T
0
!?
Installation Clearance Chimney
&
Dimensions
Connector
A
I3
C
D
E
F
------
.
8
Stove
FCinhiT
Residential Standard Note1 18'(457mm) 24"(610mm) 21"(533mm) i6"(406mm) lY(381mm) lY(305mm)
Residential/
Mobile Hm. Reduced Note
2
12"(305mm) 24"(610mm) Zl"(533mm) lO"(254mm) lY(381mm) lY(305mm)
Alcove Standard Note2&3 lY(305mm) 24"(610mm) 21"(533mm) lO"(254mm) 15(38imm) lY(305mm)
Minimumclearances to combustible materialwith double-wallchimney connector and top heat shield (Pan#831-1260)
Installation Clearance Chimney
&
Dimensions
Connector
A
B
C D
E
F
Residential/
Mobile Hm. Reduced Note2
&
3 V(203mm) 20(508mm) 17"(432mm) V(152mm)
1
l"(279mm) 8"(203mm)
Note
1:
6
in. diameter single, minimum24 MSG steel connector pipe with a listed factory-built chimney or a masonry chimney.
Note
2:
6
in. diameter double wall air insulated connector pipe with listed factow-built chimnev or a masontv chimnev.
Note
3:
Alcove maximumdepthof nomorethan48", anda" .icoveceiling heightof84" --withtbp heat shieldi~art#8$-1260) and
double-wail chimney connector alcove ceiling height is 72".
When locatingyour stove, cons~dersafety, convenlence, trafflc flow andthe fact that the stove w~llneeda ch~mneyand ch~mney
connector.
Floor protector must be non-combust~blemaler~al,extendng beneatn heater an0 to tne front, sldes and rear as ndlcaleo
AVOID
FIRE:
Maintain tne aesignated clearance d~stanceto combust~bles.ins~laton mJst NOTto-ch tne cnlmney Tnere m~stbe
thedesignated airspaceclearance around thechimney. This air spacearound achimney is necessaryto allow natural heat removal
from the area. Insulation inthis space will cause a heat buildupwhich may ignitewood framing.
VENTING SYSTEM
The venting system consists of a chimney connector and a chimney. These get extremely hot when the stove is being used.
Temperatures insidethe chimney may exceed2000" inthe event of acreosotefire. To protectagainstthe possibilityof a housefire,
'he chimneyconnectorandchimney must be properly installedand maintained. A thimble Must be usedwhen a connection ismade
,?rougha combustible wall to a chimney. A chimney support package Must be usedwhen a connection is madethrough the ceiling
to a prefabricatedchimney. These accessories are absolutely necessary to providesafe clearancesto combustiblewall and ceiling
material
..
.
-
.
-
..
-
..
Thisstovemaybeconnectedtoalinedmasonrychimneyor alistedhightemperatureprefabricatedresidentialtype buildingheating
appliancechimney. Donotconnectittoachimneysewinganotherappliance. Todosowillaffectthesafeoperationof bothappliances.
CHIMNEY CONNECTOR
The chimney connectormust be
6
in. diameterpipewith a minimumthicknessof 24 gauge. Do not use aluminum or galvanized
steel. Theycannotproperlywithstandtheextremetemperaturesof awoodfire. Donotusechimneyconnector pipeasachimney. You
must connect your stove to a chimney at least equalto those specified in this manual.
Chimnevconnectorsectionsmust beattachedto the stove andto each otherwith the crimoedendtowardthe stove. Thisallows
creosoteto iunintothe stove and not onto the outside of the pipe. Alljoints should be securedwith three metalscrews. Otherwise,
inthe event of a creosotefire, the connector may come apart due to movement.
Toward
Stove Flue
Gas
Directior
Forproperoperationthechimneyconnectorshould beas short as possible. Horizontallenqthsof chimneyconnectorshouldhave
..
.
a minimum upwardslope fromthe stove of at least 114 in. per foot.
-
CHIMNEY HEIGHTIDRAFT
To insurethatyour Quadra-Firestove burnsproperly,thechimneydraft(StaticPressure)shouldbeapproximately0.100in.water
column (W.C.) during a high burn and 0.040 in. W.C. during a low burn, measured
6
in. above the top of the stove afler one hour of
operationat each burnsetting.
Your Quadra-Firestove was designedandtestedon a
6
in.chimney, 12
-
14feet high,measuredfrom the top of the stove. The
furtheryour stack height or diameter varies from this configuration, the probabilityof performanceproblemsincreases. Inaddition,
exterior conditions such as roofline, surroundingtrees, prevailingwinds and nearby hills can influencestove performance.
Page
5
i
I
I
I
!
CONNECTIONTO A MASONRY CHIMNEY
1.
Chimney
--
Shouldthe stove beconnectedto a masonrychimney, thechimneyshould beexaminedfor cracks, loose mortarand
othersignsof deteriorationaswellasblockage. ThestoveshouldnotbeinstalleduntilitIsdeterminedthechimneylssafetouse. Since
i
oversizedflue contributestotheaccumulationofcreosote,thesizeoftheflueshouldbe checkedtodeterminethat itisnottoo large
,
thestove. Thechimneyshouldalsobecheckedtoassureit meetstheminimumstandardsoftheNationalFireProtectionAssociation
(NFPA) Standard21
1.
The followingisa listof the more critical minimumrequirementsfora properlyconstructedchimney.
Page
6
1.
The masonry wail of the chimney, if brick or modular block, must be a minimumof
4
in. nominalthickness.
A
mountainor rubble
stone wall must beat least
12
in. thick.
2.
Thechimney must haveafireclayflue liner(orequivalent)with aminimumthicknessof
518
in.and must beinstalledwith refractory
mortar. There must beat least
112
in. air space between the flue liner and the chimnev wail.
A
eauivalent liner must be a listed
chimney linersystem or other approved meterial
518"
Fireclay
Flue Liner
Chimney Wall
4"
[Nominal]
/
Foundation
A
chimney inside the house must have a least
2
in. ofclearanceto any combustible material.
A
chimney outside the housemust
haveat least one in.clearanceto anvcombustibie material. Firestops must be installed at the spaces wherethe chimnevpasses
Page
7
Rememberthat insulationmustnotcontactthechimney. There must be an air spacearoundthechimneyandany insulationmust
beat least
2
in. or more from the chimney.
Minimum
2
Inch
Clearance From
Combustible Material
and
Insulation
N~ncombustible
Rre-Stopping Materia
A
chimney mustbe the requiredheightabovetherooforother
obstructionforsafetyandforproper
draftoperation. Thechimneymust
be at least
3
feet higherthan the highestpointwhere itpassesthroughthe roof andat least
2
feet higherthanthe highestpart of
the roofor structurethat iswithin
10
feetof the chimney, measuredhorizontally.
CHIMNEY
HEIGHT
II.
Thimble
--
A
thimble must beusedwhentheconnectionfromthestove is madethroughacombustiblewallto a masonrychimney.
Thereareseveralmethodsto usefor connectionsmadethroughacombustiblewall, twoofwhich are illustratedinthis manual. Local
buildingauthorities may be consultedor
(NFPA) 21
1
may be usedfor additionalmethodsof chimney connection.
Page
8
Also, listedprefabricatedmetalthimbles can be boughtfor usewith woodstoves. The manufacturer'sinstallationinstructionslor
athimble must be strictly followed to assure the safety of the system. Besureto maintainthe designatedclearance to combustible
materials.
1.
Brickchimneythimbleassembly
--
Constructionofa brickthimble assemblyrequires 12in. of brickaroundafireclay liner.
Besurethe pointof penetrationallowsa
24
in.clearancefromthetopofthe connectortotheceiling. An openingof
30
in.(for
a
6
in.chimneyconnector) must becut inthewallto maintainthe required12in.ofbrickseparationfromcombustibles. Itwill
be necessaryto cutwallstuds andinstalla headerandsillframe to maintainthe properdimensions andto holdthe weight of
the brick.
Wood Stud
2
lnchesClearance
.FromChimney Wall
Header
1!11
16
Thimble
ASS^^^^\^.
1
2
Inches
of
Brick
Separation FromClay
Fireclay Liner
518"
~inimum
'
or Eauivalent
Wall
Minimum3-112 in.
(4
in. nominal)thick solidbricksare to be used. The fire clay liner (ASTMC35 or equivalent)minimum518 in
wall thickness, must notpenetrateintothe chimneybeyondthe inner surfaceofthechimneyflue linerandmust be firmly cementedin
place. ifitisnecessaryto cutaholeinthe chimneyliner, useextremecareto keep it from shattering. Refractorymortar must be used
at thejunction to the chimney liner. Afterthe assemblyiscomplete,insertthe chimney connector in the fire clay liner. Donot push it
beyondthe inside edge of the chimney liner becausethis will affectthe draw of the chimney.
Page
9
-
Fireclay Flue Liner
With Airspace
1'
Clearance
Thimble-
12
Inches
of
Bridc
Door
2.
6
in. solidpack chimney with metalsupports
as
a thimble
--
Forthe methodof installationto a masonrychimney shown,
it
willbenecessarvto ourchasea
8
in.insidediameter 12in. lonosectionoforefabricatedlistedsolidchimnevtouseathimble. Purchase
,
.
a wali spacer, trim collarand wali bandthat are manufacturedto fit the chimney sectionyou purchase.
The safetyfeaturesofthissystemarethe
2
in.air space betweenthe chimneysectionandcombustiblewallandthe
1
in.air space
aroundthe chimneyconnector where the connector passes through the chimney sectionto the chimney.
The locationof the openingthroughthewallto the chimneymust leavea minimum24 in.verticalclearancebetweenthe connector
pipeandthe ceilingto prevent the ceiling from catching fire.
Cutouta 14-112in.diameteropeninginthewall. Itmaybe necessarytocutwallstudsand installaheaderandsillframetomaintain
thewallsupport. The holeinthe chimney must have at least
a
6
in.diameter fireclay lineror equivalentsecuredwith refractorymoriar.
If it is necessaryto cut a hole in the chimney liner, use extreme careto keep it from shattering.
First,makethe framefor thethimble, beingsure it is nosmaller than 14-112in. diameter,to maintaina
2
in. air space aroundthe
chimneysection. Attach the wallspacer to the chimneyside of theframe. Then insertthe frame intothe opening, toe-nailingitto the
wall studs. Install the wall bandintheframingto securethe chimney sectionin place. Inserta single sectionof chimney connector
'9
the chimneythroughthe wall band, beingsure it does not protrudeintothe chimney beyondthe edge of the chimney flue lining.
9ly high temperature furnace cement to the end of the chimney sectionand installit over the connector, throughthe wall spacer.
I
ightenthe wall bandto holdthe chimneysectionfirmlyinplaceandagainstthe chimney. Installthe trim collaronthe outside of the
opening. Check to assurethere isa 1in. airspacebetweenthe connectorandthe chimney section. Also, duringinstallation,always
checkto assurethat a
2
in. airspaceisbeingmaintainto the wood framing. Donot
fill
this space with insulation
.
Insulationinthis air
spacewill cause a heat buildupwhich couldignite the wood framing.
Page
10
Minimum Chimney Clearance
to Wall Spacar and
Combustibles
2
Inches
MinimumClearance
2
lnches
ChimneyFlue Liner
Fireday
Liner
or
Chimney Connector
Equivalent
'
Masonry
Chimney Constructed
to NFPA
21
1
,,Fire Clay FlueLiner
Masonry
'
Chimney
Wall
Spacer
Wall BandTo
Secure Chimney
Section
CONNECTIONTO A METAL PREFABRICATEDCHIMNEY
When ametalprefabricatedchimney is used,the chimney manufacturer'sinstallationinstructionmust be followedprecisely. You
mustalsopurchase(fromthesame manufacturer)andinstalltheceilingsupportpackageorwallpassthroughand
"T"
sectionpackage.
firestops(whenneeded),insulationshield, roofflashing,chimney cap, elc. Maintainthe properclearanceto the structureas specified
by the manufacturer. This clearance is usuallya minimumof
2
in., althoughit may vary by manufactureror for certain components.