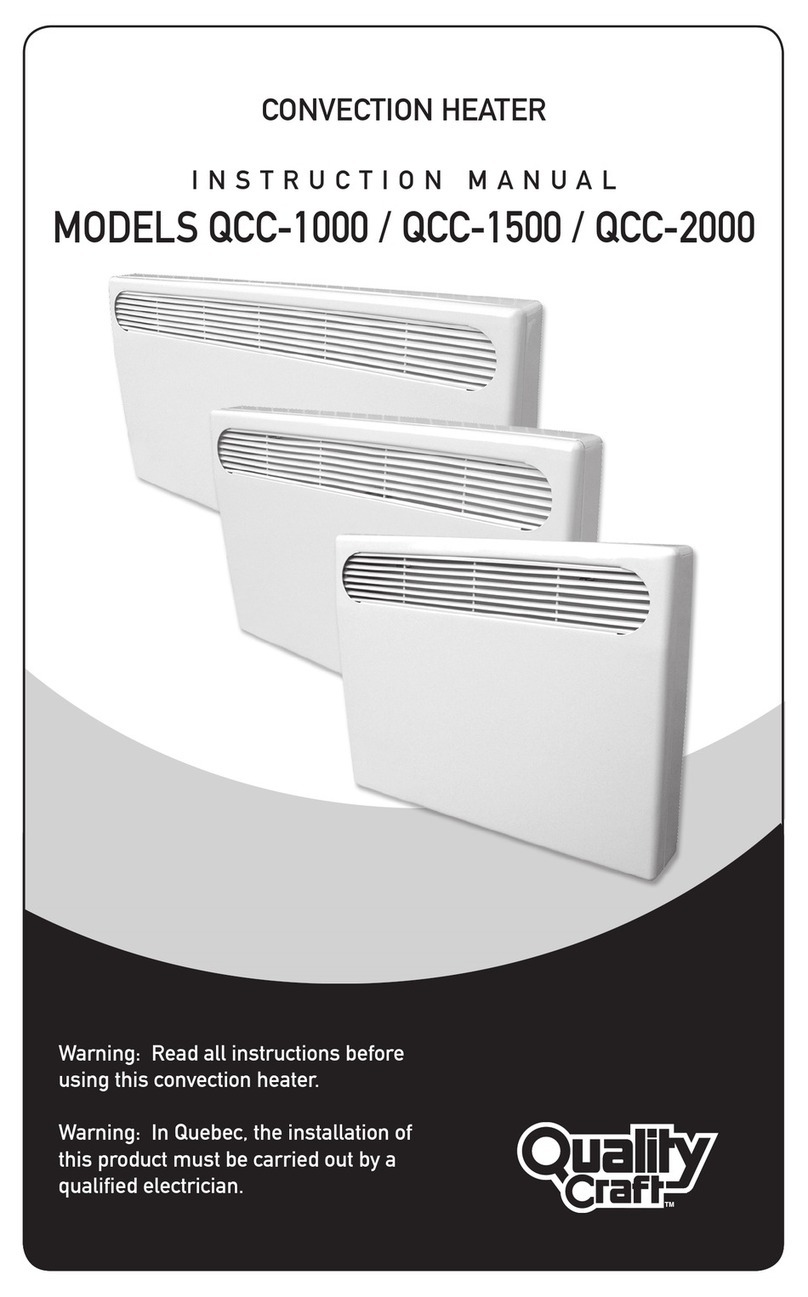
Quality Craft MCVT120-150 User manual

1
Model: MCVT120-150
PLUG IN CoNveCtIoN heater
wIth bUILt-IN ProGraMMabLe
therMostat
IMPORTANT
PLEASE NOTE WHEN YOU OPEN THE CARTON CAREFULLY CHECK THE UNIT
AND MAKE SURE THERE IS NO DAMAGE. IF YOU HAVE ANY PROBLEMS WITH
THE UNIT, WITH HOW THE VARIOUS FUNCTIONS WORK, DAMAGED OR MISSING
PARTS PLEASE CALL 1-800-459-4409 (9 AM TO 5 PM EST) IMMEDIATELY FOR
SERVICE.
NOTE: DO NOT RETURN UNIT TO THE STORE BEFORE CALLING THE TOLL FREE
NUMBER. DO NOT DISPOSE OF YOUR CARTONS UNTIL YOU ARE COMPLETELY
SATISFIED WITH YOUR NEW CONVECTOR HEATER.
INstrUCtIoN MaNUaL
ATTENTION:
1. Find a location for the convection heater that is protected from direct sunlight.
2. Do not plug the unit into the power outlet before reading all instructions.
IMPortaNt saFetY INstrUCtIoNs
WHEN USING ELECTRICAL APPLIANCES, BASIC PRECAUTIONS SHOULD ALWAYS
BE FOLLOWED TO REDUCE THE RISK OF FIRE, ELECTRIC SHOCK, AND INJURY
TO PERSONS, INCLUDING THE FOLLOWING:
1) Read all instructions carefully before using the heater.
2) This heater is hot when in use. To avoid burns, do not let bare skin touch
hot surfaces. If provided, use handles when moving this heater. Keep
combustible materials such as furniture, pillows, bedding, papers, clothing
and curtains at least 3 feet (0.9 m) away from front, sides and rear of the
heater.
3) Extreme caution is necessary when any heater is used by or near children
or individuals with disabilities and whenever the heater is left operating and
unattended.
4) Do not operate the heater with a damaged cord or plug or if the heater
malfunctions, has been dropped or damaged in any manner. Disconnect
power at service panel and have heater inspected by a qualified electrician
before use.
5) Do not use outdoors.
6) This heater is not intended for use in bathrooms, laundry areas or in wet
or moist indoor locations. Never place the heater where it may fall into a
bathtub or other water containers.
7) To disconnect the heater, turn controls to OFF then remove plug from outlet.
8) Do not insert or allow foreign objects to enter any ventilation or exhaust
openings as this may cause an electric shock, fire or may damage the heater.
Do not use on soft surfaces, such as a bed where openings may become
blocked.
9) To prevent possible fire, do not block air intakes or exhaust in any manner.
10) Heaters may have hot and sparking parts inside. Do not use it in areas where
gasoline, paint or flammable liquids are used or stored.
11) Use this heater only as described in this manual. Any other use not
recommended by the manufacturer may cause fire, electric shock or injury to
persons.
12) Do not run the electric cord under carpeting. Do not cover the cord with
throw rugs, runners or similar coverings. Do not place the cord in a traffic
area.
13) Always plug heater directly into a wall electrical outlet. Never use with an
extension cord or power bar.
14) Always unplug heater when not in use.
15) Connect to properly grounded outlets only.
16) Avoid the use of extension cord as the cord may overheat and cause a risk of
fire. However, if you must use an extension cord, the plug must be a grounding
type, 3-wire cord, No. 14 AWG minimum size and rated not less than 1875
watts.
save these INstrUCtIoNs For FUtUre Use.
WARNING:
PROCEDURES AND TECHNIQUES IF NOT CAREFULLY FOLLOWED WILL RESULT
IN DAMAGE TO THE EQUIPMENT AND WILL EXPOSE THE USER TO THE RISK OF
SERIOUS INJURY, ILLNESS OR DEATH.
THIS HEATER IS FOR USE ON 120 VOLTS. THE CORD HAS A PLUG AS SHOWN
AT A IN ILLUSTRATION BELOW. AN ADAPTER AS SHOWN AT C IS AVAILABLE
FOR CONNECTING THREE-BLADE GROUNDING-TYPE PLUGS TO TWO-SLOT
RECEPTACLES. THE GREEN GROUNDING PLUG EXTENDING FROM THE ADAPTER
MUST BE CONNECTED TO A PERMANENT GROUND SUCH AS A PROPERLY
GROUNDED OUTLET BOX. THE ADAPTER SHOULD NOT BE USED IF A THREE-SLOT
GROUNDED RECEPTACLE IS AVAILABLE.
GeNeraL INForMatIoN
This convection heater is intended for permanent wall-mounting with the provided
brackets.
The heater has a thermal cut-off protection. If the thermal cut-off protection trips, switch
off the power. The unit should reset automatically after 10 minutes. If the thermal cut-off
protection trips again, determine the reason for overheating.
sPeCIFICatIoNs
MODEL VOLTS WATTS HEIGHT WIDTH DEPTH
MCV T12 0-150 120VAC 1500W 443MM 581MM 112MM

2
Parts LIst
Mounting bracket .................................................................................................. 1
Screws ................................................................................................................ 4
Wall anchor........................................................................................................... 4
INstaLLatIoN
Tools required:
• Electricdrill
• Phillips(cross-head)screwdriver
• Tapemeasure
Choose a suitable location for mounting the convector:
A. The location shall have enough space and clearance as illustrated in Fig. 1.
B. The power outlet shall be accessible by the electrical cord of this convector without
using an extension cord.
C. The power outlet shall not be located directly behind or above the convector.
Fig. 1
WIDTH OF CONVECTOR
6 in
(15.3 cm)
6 in
(15.3 cm)
Minimum
clearance to
adjacent
surface
6 in
(15.3 cm)
Minimum
clearance to
adjacent
surface
Minimum
distance
to ground
58.1 cm
33.7 cm
9.8 cm 14.6 cm
22.2 cm 22.2 cm
waLL MoUNtING INstrUCtIoNs
1. Release the mounting bracket by pressing the locking brackets on both sides.
2. Use the mounting bracket as a template by holding it against the wall as illustrated
in Fig. 1.
3. Follow the dimensions specified in Table 1 and place mounting bracket in the
desired location.
4. Markthe4screwholes.Placemountingbracketonthescrewmarkingsandensure
the mounting bracket is perfectly level.
5. Predrillholesandinsert4wallanchors.Wallanchorsareneededformountingon
drywallorconcretewalls.Ensureyouusetheproperanchorsforyourwalltype.
6. Replacethemountingbracketandfastenitwithscrews(minimum4screws).
7. Mount the convector to the mounting bracket and engage the 2 locking brackets at
the top. See Fig. 2.
CAUTION – HIGH TEMPERATURE, RISK OF FIRE. KEEP ELECTRICAL CORDS,
DRAPERY, FURNISHINGS AND OTHER COMBUSTIBLES AT LEAST 3 FT (0.9 M)
AWAY FROM THE FRONT OF THE HEATER AND AWAY FROM THE SIDE AND OF
HEATER.
WARNING – TO REDUCE RISK OF FIRE, DO NOT STORE OR USE GASOLINE OR
OTHER FLAMMABLE VAPORS AND LIQUIDS IN THE VICINITY OF THE HEATER.
Fig. 2
Wall
Wall bracket Convector
oPeratIoN
Turn the “0/I” switch on the right side of the convector to “I” position. The indicator light
and display will be ON.
1. Timesetting–PressMODEbuttonandpressUPandDOWNbuttonsatthesame
time.
A.PresstheUPorDOWNbuttontosetthe‘DAY’fromMONDAY(MO)–TUESDAY
(TU)–WEDNESDAY(WE)–THURSDAY(TH)–FRIDAY(FR)–SATURDAY(SA)–
SUNDAY(SU).
B. PressMODEbuttonagain.Thedisplay‘HOUR’willashandthenpresstheUPor
DOWNbuttontosetthe‘HOUR’.
C.PressMODEbuttonagain.Thedisplay‘MINUTE’willashandthenpresstheUP
orDOWNbuttonagaintosetthe‘MINUTE’.
D.PressMODEbuttonagaintoexitandsavethesetting.

3
2. SwitchingbetweenCelsius(°C)andFahrenheit(°F)–PresstheMODEbuttonand
UPbuttonatthesametimetoswitchthetemperaturedisplaybetweenCelsius(°C)
andFahrenheit(°F).
==>
3. Activatethebacklight–Pressanybuttononthecontrolpaneltoactivatetheblue
color back light. The light will automatically turn off if no button is being pressed
again.
4. Work mode – Under this mode the convector will operate under the pre-set
temperature.PresstheMODEbutton,theconvectorisnowenteringtheHOLD
mode.ThenpresstheUPorDOWNbuttontoadjustthepre-settemperature.The
adjustablerangeofpre-settemperatureis3–40°C.
Under this mode, the programming mode will not be activated and the convector is
working under the pre-set temperature continuously.
5. Programmingmode–Thereare4programmablesetting(P1toP4).Theconvectoris
workingunderthepresettemperature,timeandcyclingfromP1toP4everydayofthe
week.
A.PresstheMODEbuttontoentertheHOLDmoderst.
B. PresstheMODEbuttonagaintoentertheprogrammingmode.Thedisplaywill
show“P1”ashing.
C.PressUPorDOWNbuttontoadjustthepre-settemperature.
D.PresstheMODEbuttonagaintosetthe‘HOUR’ofbypressingtheUPandDOWN
button.
E. PresstheMODEbuttonagaintosetthe“MINUTE”oftimebypressingUPand
DOWN button.
F. PresstheMODEbuttonagainandrepeatthestepsin(C)to(E)tosetthe
temperatureandtimeofP2toP4.
E.g. P1 – Temperature 25°C; time 6:00 AM
P2 – Temperature 20°C; time 8:00 AM
P3 – Temperature 25°C; time 6:00 PM
P4 – Temperature 18°C; time 11:00 PM
TheconvectorwillworkundertheabovepresettimeandtemperaturefromP1to
P4everyday.
Without pressing any button for 15 seconds, the controls will automatically save
the setting.
==>
6. Overridemode–ThismodeallowsyoutotemporaryCHANGEthepresettemperature
inWORKMODEorPROGRAMMINGMODE.
PressMODE+DOWNbutton,thedisplaywillash.PressUPorDOWNbuttontoset
the override temperature.
PressMODE+DOWNbuttonorMODEagaintoentertheoverridetemperature.The
convectorisnowworkingundertheOVERRIDEtemperature.
IftheOVERRIDEtemperatureissetunderthePROGRAMMINGMODE,theconvector
willonlyworkatthatOVERRIDEtemperatureunderthecurrentprogram(e.g.P1).
Whentheprogramautomaticallyproceedtothenextprogram(P1>>P2)the
OVERRIDEMODEwillbecancelandreturntothepresettemperatureofcurrent
program(e.g.P2).
IfyouwanttocancelOVERRIDEmode,pressMODE+DOWNbuttonandthe
convectorwillreturntoWORKMODEorPROGRAMMINGMODE.

4
7. Queryofcontinuousheatingtime–PressMODEbuttonfor5seconds,thedisplay
will show the total heating time for the previous day.
PressMODEbuttonagainfor5seconds,thedisplaywillshowthetotalheatingtime
of the week.
8. ResumefactorysettingforP1–P4–TorestorethefactorysettingofP1toP4,
presstheUPbuttonfor10seconds(thecurrenttimeandweekwillnotbechanged).
Factory setting:
P1 morning 6:00 AM 20.5°C 69°F
P2 daytime 8:00 AM 20.5°C 69°F
P3 evening 5:00 PM 20.5°C 69°F
P4 night 10:00 PM 17.5°C 62.5°F
Completerestoreofthedigitalcontrol–PressDOWNbuttonfor10secondsandthe
program and time will be resumed to factory setting.
MaINteNaNCe
WARNING: TO REDUCE THE RISK OF FIRE OR ELECTRIC SHOCK, ALWAYS
SWITCH OFF THE UNIT AND WAIT 10 MINUTES TO ALLOW IT TO COOL BEFORE
ATTEMPTING ANY MAINTENANCE OR CLEANING.
It is recommended that the heater is cleaned periodically in order to avoid dust blocking
the grill and allow proper ventilation.
CLeaNING
Wipe the unit with a soft damp cloth. Do not use abrasive cleaners or spray liquids on the
unit surfaces.
Note:Itispossiblethattheunitsurfacemaydiscolour(yellow)overtime,duetodustor
cigarette smoke. This is normal and not a manufacturing defect.
storaGe
When the heater is not in use, the heater shall be stored in a dry location, away from
possible damage. The power cord should be stored properly to avoid contact with hot or
sharpobjects.
warraNtY
The heating element is guaranteed for 10 years and all other components are guaranteed
for one year from the date of purchase. If the unit should fail to operate correctly, call
customerserviceat1-800-459-4409EST.Wewill,atourdiscretion,eitherrepairor
replace the unit. It will have to be returned to us freight prepaid and we will return the
repairedorreplacedunittoyou,freightprepaid.Thecompany’ssoleobligationisto
repair or replace the unit. This warranty is void if in the opinion of Quality Craft the unit
has been tampered with, altered, misused, damaged, abused or used with the wrong
power source. The warranty is for home use only and does not cover units used in
commercial situations.
Imported by
Quality Craft
Laval,Quebec,Canada H7S2G7
1-800-459-4409(EST)
www.qualitycraft.com
Made in China

5

1
Modelo: MCVT120-150
CALENTADOR DE CONVECCIÓN A
CORRIENTE CON TERMOSTATO
PROGRAMABLE INTEGRADO
IMPORTANTE
DESPUÉS DE ABRIR LA CAJA, VERIFIQUE MUY BIEN EL APARATO Y ASEGÚRESE
DE QUE NO ESTÉ DAÑADO. SI TUVIERA PROBLEMAS ENSAMBLANDO EL
APARATO, LAS DIVERSAS FUNCIONES DEL MISMO, O SI FALTARAN PIEZAS Y
HUBIERA DAÑOS INTERNOS, SÍRVASE LLAMAR DE INMEDIATO AL SERVICIO AL
CLIENTE, MARCANDO EL 1-800-459-4409 (ENTRE LAS 9 Y 17 HORAS, HORA
NORMAL DEL ESTE).
NOTA: NO DEVUELVA EL APARATO A LA TIENDA DONDE LO COMPRÓ ANTES DE
HABER LLAMADO AL NÚMERO SIN CARGO MENCIONADO. NO DESECHE LOS
EMBALAJES HASTA QUE QUEDE PLENAMENTE SATISFECHO CON SU NUEVA
CONVECCIÓN.
MANUAL DE INSTRUCCIONES
IMPORTANTE:
1. Encuentre un lugar para instalar la convección donde esté protegida de la luz solar
directa.
2. Antes de enchufar la estufa eléctrica en el tomacorriente, lea todas las instrucciones
INSTRUCCIONES IMPORTANTES DE
SEGURIDAD
AL USAR APARATOS ELÉCTRICOS, SE DEBEN TOMAR SIEMPRE CIERTAS
PRECUACIONES BÁSICAS COMO LAS SIGUIENTES, PARA REDUCIR EL RIESGO
DE INCENDIO, DESCARGA ELÉCTRICA Y LESIONES PERSONALES:
1) Lea todas las instrucciones antes de usar convección.
2) Convección se calienta cuando se usa. Para evitar quemaduras, no toque
las superficies calientes con la piel desnuda. Si el calefactor tiene manijas
incluidas, úselas para trasladarlo. Mantenga materiales combustibles, como
muebles, almohadas, ropa de cama, papeles, ropa y cortinas a un mínimo
de 3 pies (0,9 m) de la parte delantera de la estufa y manténgalos alejados
también de los costados y de la parte trasera.
3) Es necesario tomar precauciones extremas cuando se usa un aparato
como éste cerca de niños o minusválidos o cuando el aparato se deja en
funcionamiento sin supervisión.
4) No utilice el calefactor si presenta un cable o enchufe dañados, o si está
averiado, se cayó o se dañó de algún modo. Desconecte la energía eléctrica
del tablero de servicio y llame a un electricista calificado para que revise el
calefactor antes de usarlo.
5) No utilice la estufa al aire libre.
6) Esta convección no ha sido concebida para usar en cuartos de baño,
lavaderos y áreas interiores similares. Nunca coloque la calentador donde se
pueda caer a la bañera u otro lugar donde se acumule el agua.
7) Para desconectar la calentador, gire los controles a “apagado” y luego saque
el enchufe del tomacorriente.
8) No inserte ni permita que entre ningún objeto en ninguna abertura de
ventilación o de salida de aire, ya que puede producir un choque eléctrico, un
incendio o dañar el aparato. No ponga la estufa sobre superficies blandas,
como una cama, donde las aberturas pueden bloquearse.
9) Para impedir que se produzca un incendio, no bloquee las tomas o escapes
de aire.
10) Un calentador puede tener piezas que se calientan y que hacen arco o
producen chispas en el interior. No lo utilice en áreas donde se use o se
guarde gasolina, pintura o líquidos inflamables.
11) Utilice esta calentador conforme a lo que se indica en este manual. Cualquier
otro uso no recomendado por el fabricante puede producir incendios,
descargas eléctricas o lesiones personales.
12) No pase el cordón por debajo de la alfombra. No cubra el cordón con
alfombras pequeñas, alfombrillas de pasillo o cubiertas similares. Ponga el
cordón lejos del área de tráfico y donde no sea posible tropezar con él.
13) Siempre enchufe el calefactor directamente a un tomacorriente eléctrico de
pared. Nunca use un cable de extensión o una barra de corriente eléctrica.
14) Desenchufe siempre la calentador cuando no se use
15) Enchufe únicamente en un tomacorriente con conexión a tierra.
16) Evite usar un cable de extensión, ya que el cable puede recalentarse y
ocasionar un riesgo de incendio. Sin embargo, si debe usarlo, el enchufe debe
tener un cable de 3 hilos, conexión a tierra, calibre de 14 AWG como mínimo y
clasificación para no menos de 1875 vatios.
GUARDE ESTA INFORMACIÓN PARA
CONSULTARLA EN EL FUTURO.
PRECAUCIÓN :
SI NO SE SIGUEN ATENTAMENTE LOS PROCEDI-MIENTOS Y TÉCNICAS INDICADOS,
SE DAÑARÁ EL EQUIPO; EL USUARIO QUEDARÁ EXPUESTO AL RIESGO DE SUFRIR
LESIONES O DOLENCIAS GRAVES O FATALES.
ESTA CONVECCUIÓN DEBE UTILIZARSE CON 120 VOLTIOS. COMO SE OBSERVA EN
LA FIGURA A, EL CABLE POSEE UN ENCHUFE. HAY UN ADAPTADOR DISPONIBLE,
COMO SE OBSERVA EN LA FIGURA C, PARA CONECTAR ENCHUFES DE TRES
CLAVIJAS CON CONEXIÓN A TIERRA A TOMACORRIENTES DE DOS ESPIGAS. EL
ENCHUFE CON CONEXIÓN A TIERRA VERDE DEL ADAPTADOR DEBE CONECTARSE
A UN CONTACTO A TIERRA PERMANENTE, POR EJEMPLO, UN TOMACORRIENTE
DE CONEXIÓN A TIERRA. EL ADAPTADOR NO DEBERÍA UTILIZARSE SI HAY UN
TOMACORRIENTE DE TRES ESPIGAS DISPONIBLE.
INFORMACIÓN GENERAL
Este calefactor por convección fue diseñado para ser montado en la pared de manera
permanente con los soportes proporcionados.
El calefactor tiene una protección térmica de corte automático. Si la protección térmica
de corte automático se interrumpe, apague el suministro electrónico. La unidad debería
reiniciarse automáticamente luego de 10 minutos. Si la protección térmica de corte

2
automático vuelve a interrumpirse, detecte la razón del recalentamiento.
ESPECIFICACIONES
MODELO VOLTIOS VATIOS ALTO ANCHO PROFUNDIDAD
MCV T12 0-150 120VAC 1500W 443MM 581MM 112MM
LISTA DE PIEZAS
Soporte de sujeción............................................................................................... 1
Tornillos ................................................................................................................ 4
Anclaje para pared ................................................................................................ 4
INSTALACIÓN
Herramientas necesarias:
• Taladroeléctrico
• DestornilladorPhillips(cruz)
• Cintamétrica
Elija un lugar adecuado para instalar el calefactor por convección:
A. El lugar debe tener espacio libre y distancia sobre el suelo suficientes, como se
muestra en la fig. 1.
B. El cable eléctrico deberá entrar en el tomacorriente de este calefactor por
convección sin usar un cable de extensión.
C. El tomacorriente no se encontrará detrás ni encima del calefactor por convección.
Fig. 1
ANCHO DEL CALEFACTOR POR CONVECCIÓN
6 in
(15.3 cm)
6 in
(15.3 cm)
Distancia
mínima hasta
la superficie
adyacente
6 in
(15.3 cm)
Distancia
mínima hasta
la superficie
adyacente
Distancia
mínima hasta
el piso
58.1 cm
33.7 cm
9.8 cm 14.6 cm
22.2 cm 22.2 cm
INSTRUCCIONES DE MONTAJE EN LA PARED
1. Presionelossoportesdesujeciónqueestánenamboslados,paraliberarelsoporte
de montaje.
2. Useelsoportedemontajecomounaplantilla.Parahacerlo,sosténgalocontrala
pared, como se muestra en la fig. 1.
3. RespetelasdimensionesespecicadasenlaTabla1ycoloqueelsoportede
montaje en el lugar elegido.
4. Marquelos4oriciosparatornillos.Coloqueelsoportedemontajesobrelas
marcasidenticadorasdetornillos,yasegúresedequeestéperfectamente
nivelado.
5. Perforepreviamentelosoricioseintroduzca4anclajesdepared.Losanclajes
de pared son necesarios para realizar el montaje en paredes de yeso u hormigón.
Asegúrese de colocar los anclajes adecuados para su tipo de pared.
6. Vuelvaacolocarelsoportedemontajeyfíjelocontornillos(4tornilloscomomínimo).
7. Coloqueelcalefactorporconvecciónsobreelsoportedemontajeyacople2
soportes de sujeción en la parte superior. Vea la fig. 2.
PRECAUCIÓN: ALTA TEMPERATURA; RIESGO DE INCENDIO. MANTENGA LOS
CABLES ELÉCTRICOS, LAS CORTINAS, LOS MOBILIARIOS Y OTROS ELEMENTOS
COMBUSTIBLES A UNA DISTANCIA DE AL MENOS 0.9 M (3 PIES) DE LA PARTE
DELANTERA Y DE LOS LATERALES DEL CALEFACTOR.
ADVERTENCIA: PARA DISMINUIR EL RIESGO DE INCENDIO, NO GUARDE NI
USE GASOLINA U OTROS VAPORES Y LÍQUIDOS COMBUSTIBLES EN LAS
INMEDIACIONES DEL CALEFACTOR.
Fig. 2
Pared
Soporte de pared
Calefactor por
convección
FUNCIONAMIENTO
Presioneellado“I”delinterruptor“0/I”,queestádelladoderechodelcalefactorpor
convección. La luz indicadora y la pantalla se encenderán.
1. Valoresdetiempo–PresioneelbotónMODO(MODE)ypresionelosbotonesARRIBA
yABAJOalmismotiempo.
A.PresionelosbotonesARRIBAoABAJOparacongurarel“DÍA”conLUNES(MO)
–MARTES(TU)–MIERCOLES(WE)–JUEVES(TH)–VIERNES(FR)–SÁBADO
(SA)–DOMINGO(SU).
B. PresionenuevamenteelbotónMODO(MODE).Lapantallaparpadeará“HOUR”y
deberápresionarlosbotonesARRIBAoABAJOparacongurarla“HOUR”.
C.PresionenuevamenteelbotónMODO(MODE).Lapantallaparpadeará“MINUTE”
ydeberápresionarlosbotonesARRIBAoABAJOparacongurarlos“MINUTE”.

3
D.PresionenuevamenteelbotónMODO(MODE)parasaliryguardarla
configuración.
2. CambiardeCelsius(ºC)aFahrenheit(ºF):PresionelosbotonesMODO(MODE)y
ARRIBAalmismotiempoparacambiarlavisualizacióndelatemperaturadeCelsius
(ºC)aFahrenheit(ºF).
==>
3. Activarlailuminacióndefondo:Presionecualquierbotóndelpaneldecontrolpara
activar la iluminación de fondo de color azul. La luz se apagará automáticamente si
no vuelve a presionar ningún botón.
4. Modo de funcionamiento: En este modo, el calefactor por convección funcionará en
latemperaturaprecongurada.PresioneelbotónMODO(MODE)yelcalefactorpor
conveccióningresaráalmodoENESPERA.PresionelosbotonesARRIBAoABAJO
para ajustar la temperatura preconfigurada. El rango ajustable de la temperatura
preconguradaesde3a40ºC.
El modo de programación no se activará en este modo, y el calefactor por
convección funcionará de manera continua en la temperatura preconfigurada.
5. Mododeprogramación:Hay4conguracionesprogramables(P1aP4)Elcalefactor
por convección funciona todos los días de la semana en la temperatura, la hora y los
ciclospreconguradosdeP1aP4.
A.PresioneelbotónMODO(MODE)paraingresaralmodoENESPERA.
B. PresioneelbotónMODO(MODE)nuevamenteparaingresaralmodode
programación.Lapantallaparpadeará“P1”.
C.PresionelosbotonesARRIBAoABAJOparaajustarlatemperatura
preconfigurada.
D.PresioneelbotónMODO(MODE)nuevamenteparacongurarla“HOUR”
presionandolosbotonesARRIBAoABAJO.
E. PresioneelbotónMODO(MODE)nuevamenteparacongurarlos“MINUTES”
presionandolosbotonesARRIBAoABAJO.
F. PresioneelbotónMODO(MODE)nuevamenteyrepitalospasos(C)a(E)para
congurarlatemperaturaylahoradeP2aP4.
E.g. P1 – Temperatura 25 ºC; hora 6:00 AM
P2 – Temperatura 20 ºC; hora 08:00 AM
P3 – Temperatura 25 ºC; hora 6:00 PM
P4 – Temperatura 18 ºC; hora 11:00 PM
El calefactor por convección funcionará todos los días en la hora y temperatura
preconguradasdeP1aP4.
Los controles guardarán automáticamente la configuración si no presiona ningún
botón durante 15 segundos.
==>
6. Mododereemplazo:EstemodolepermiteCAMBIARdemaneratemporariala
temperaturapreconguradaenelMODODEFUNCIONAMIENTOoenelMODODE
PROGRAMACIÓN.
PresionelosbotonesMODO(MODE)+ABAJOylapantallaparpadeará.Presionelos
botonesARRIBAoABAJOparacongurarlatemperaturadereemplazo.
PresionelosbotonesMODO+ABAJOopresionenuevamenteelbotónMODO
(MODE)paraingresarlatemperaturadereemplazo.Elcalefactorahorafuncionaenla
temperaturadeREEMPLAZO(OVERRIDE).
SilatemperaturadeREEMPLAZO(OVERRIDE)seconguraenelMODODE
PROGRAMACIÓN,elcalefactorporconvecciónsolofuncionaráenlatemperatura
deREEMPLAZO(OVERRIDE)delprogramaactual(p.ej.,P1).Cuandoelprograma
avanzaautomáticamentealpróximoprograma(P1>>P2)elMODODEREEMPLAZO
se cancelará y volverá a la temperatura preconfigurada del programa actual
(p.ej.,P2).
SiquierecancelarelmododeREEMPLAZO(OVERRIDE),presionelosbotones
MODO(MODE)+ABAJOyelcalefactorporconvecciónvolveráalMODODE
FUNCIONAMIENTOoalMODODEPROGRAMACÍON.

4
7. Consultadetiempodecalefaccióncontinua:PresioneelbotónMODO(MODE)
durante 5 segundos y la pantalla mostrará el tiempo total de calefacción del día
anterior.
PresioneelbotónMODO(MODE)nuevamentedurante5segundosylapantalla
mostrará el tiempo total de calefacción de la semana.
8. VolveralaconguracióndefábricadeP1aP4:Paravolveralaconguraciónde
fábricadeP1aP4,presioneelbotónARRIBAdurante10segundos(lahorayla
semanaactualesnosemodicarán).
Configuración de fábrica:
P1 mañana 6:00 AM 20.5°C 69°F
P2 día 8:00 AM 20.5°C 69°F
P3 tarde 5:00 PM 20.5°C 69°F
P4 noche 10:00 PM 17.5°C 62.5°F
Restauracióntotaldelcontroldigital:PresioneelbotónABAJOdurante10segundos
y el programa y la hora volverán a la configuración de fábrica.
MANTENIMIENTO
ADVERTENCIA: PARA REDUCIR EL RIESGO DE INCENDIO O DESCARGA
ELÉCTRICA, SIEMPRE APAGUE LA UNIDAD Y ESPERE 10 MINUTOS PARA QUE SE
ENFRÍE ANTES DE REALIZAR CUALQUIER MANTENIMIENTO O LIMPIEZA.
Serecomiendaqueelcalefactorselimpieperiódicamenteparaevitarqueelpolvo
bloqueelarejillaylaventilaciónsealacorrecta.
LIMPIEZA
Limpielaunidadconunpañosuaveyhúmedo.Noutilicelíquidoslimpiadoresabrasivos
ni en aerosol en las superficies de la unidad.
Nota:Esposiblequelasuperciedelaunidaddedestiña(sevuelvaamarilla)conel
tiempo debido al polvo o al humo de cigarrillos. Esto es normal y no es un defecto de
fábrica.
ALMACENAMIENTO
Cuando el calefactor no esté funcionando, deberá almacenarlo en un lugar seco, donde
no pueda sufrir daños. El cable de alimentación debe ser almacenado correctamente
para evitar el contacto con objetos calientes o filosos.

5
GARANTíA
El elemento de calefacción tiene 10 años de garantía y el resto de los componentes
tienen un año de garantía a partir de la fecha de compra. Si la unidad no funciona
adecuadamente,comuníqueseconelserviciodeatenciónalclienteal1-800-459-
4409(horadelestedelosEstadosUnidos).Cualquierreparaciónosustituciónde
launidadquedaráanuestrocriterio.Tendráquedevolvernoslaunidadconelete
prepagadoyleenviaremoslaunidadreparadaounanuevaconeleteprepagado.
La única obligación de la compañía es reparar o sustituir la unidad. Esta garantía
seanulasiQualityCraftconsideraquelaunidadsehaforzado,alterado,utilizado
incorrectamente, dañado, maltratado o usado con la fuente de energía eléctrica
incorrecta. La garantía cubre únicamente el uso doméstico del producto y no incluye su
uso en situaciones comerciales.
Importadopor
Quality Craft
Laval,Quebec,Canada H7S2G7
1-800-459-4409(EST)
www.qualitycraft.com
Hecho en China
Table of contents
Languages:
Other Quality Craft Heater manuals
Popular Heater manuals by other brands

Detroit Radiant Products
Detroit Radiant Products AVD Series installation manual

ARDES
ARDES ARAM4F14W Instructions for use

Clarke
Clarke OFR 9/90 Operation & maintenance instructions

Toyostove
Toyostove Toyotomi Laser 730 Assembly, installation and operation instructions

Coltech
Coltech CH-500P-UK Original instructions

Fostoria
Fostoria FFH-912B Operation and installation manual