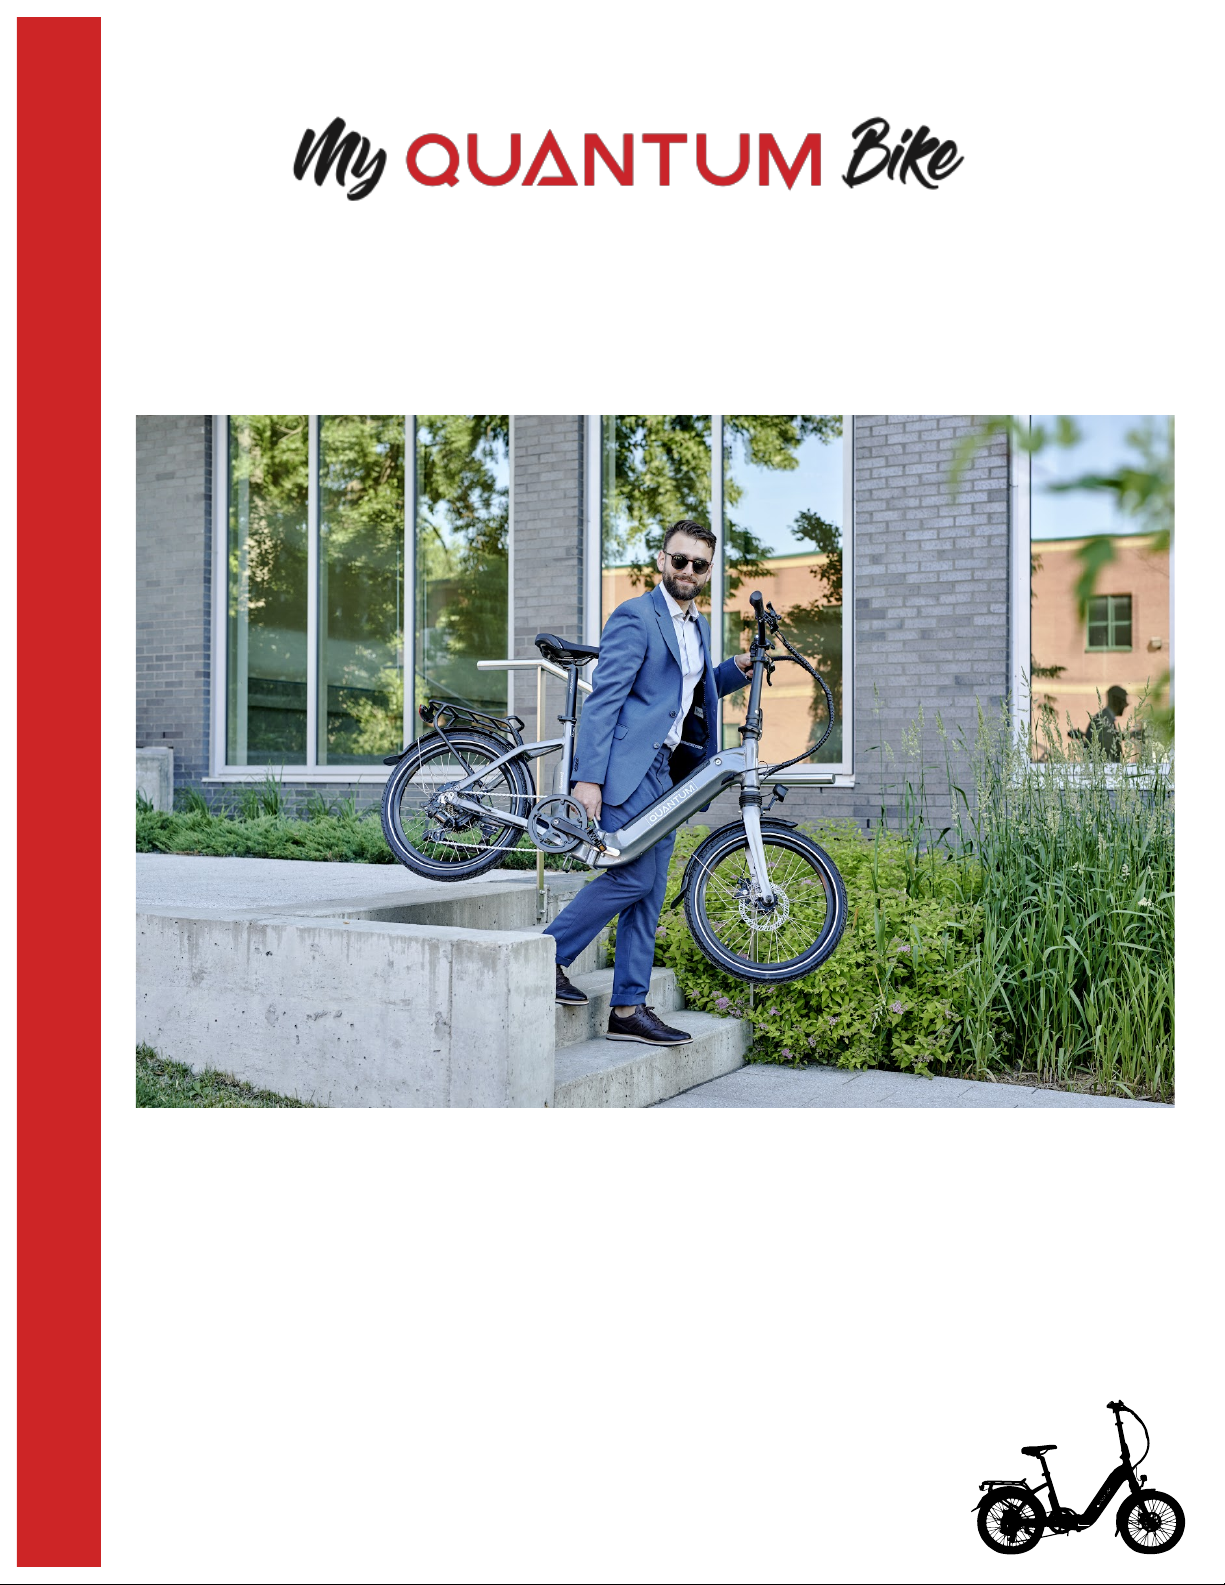
Quantum BROADWAY User manual

!!
4710 St-Ambroise street, suite148, Montréal, QC H4C 2C7
514 397 0230 | info@myquantumbike.com
!
BROADWAY!BIKE!MANUAL!
myquantumbike.com

!
2!
Introduction
Congratulations on your new Quantum Broadway folding e-bike!
Your new Quantum Broadway will bring you an easy and practical time cycling when cared for
properly. Your Quantum bike has been designed for convenience and simplicity. The frame and
the majority of components are made from light-weight aluminum able to resist corrosion.
Components such as the stem and handlebar, seat post, and folding mechanism are designed
so that you can adjust them without the need for tools. The controls have been chosen for
intuitive use. In order to be able to derive optimum enjoyment from your new bike, it is important
to maintain it properly and have it checked regularly by your Quantum specialist. In this manual,
you will read how to do this, and how you can carry out minor repairs by yourself. You will also
find all the necessary information to set up your bike for your needs and wishes. We advise you
to read through the user manual and keep it readily available for reference. Your Quantum
specialist is always ready to advise and assist you.
We wish you many hours of cycling enjoyment!

!
3!
Table of contents
Bicycle components
Folding e-Bike components
General information
1. Handlebar, stem, grips and purion
2. Front fork & head tube suspension
3. Lighting
4. Brakes
5. Gears
6. Chain
7. Bottom bracket, cranks, and pedals
8. Kickstand
9. Wheels
10. Tires
11. Seat
12. Frame
13. E-bike components
14. Folding and Storage of your bicycle
15. Fenders, Racks and Accessories
16. Theft prevention
17. Contact details

!
4!
Bicycle Components
Index:
1. Grips 11. Chain ring/crank set
2. Handlebar 12. Chain
3. Derailleur Lever 13. Rear Derailleur
4. Brake Levers 14. Kickstand
5. System Control Cables 15. Rear Wheel
6. Front light 16. Rear Light
7. Fender 17. Rack
8. Front Wheel 18. Seat
9. Disc Brake rotor 19. Pedals
10. Disc Brake Caliper 20. Adjustable handlebar
stem
2
1
3
4
5
6
7
8
9
10
19
11
12
14
13
15
17
18
16
20
7

!
5!
Folding e-Bike Components
Index:
1. Electronic Display
2. Stem/Handlebar Height Quick Release
3. Seat Post Quick Release
4. Key/Port/Battery lock
5. Integrated Battery
6. Frame Quick Release Lever
7. Folding Stem Quick Release
1
2
3
4
5
6
7

!
6!
General Information
It's advised to have your bicycle checked regularly by your Quantum specialist. We advise
having the first service carried out on your bike around four to six weeks and no later than two
months after starting to use it. It is desirable to take the bike to your Quantum specialist once a
year for a tune-up to ensure spoke tension is correct, to check if there is any play in the hubs,
the bottom bracket, headset or any other bearings, and to assess the wear of the chain, gears,
and other components. If you detect any looseness while riding your bike, it is best to go straight
to your Quantum specialist. If you carry on cycling too long before making adjustments and/or
repairs, it will make the problems worse, cause damage, and lessen the pleasure of your cycling
experience. We do accept that you might like to look after maintenance and minor repairs
yourself. This user manual explains how to maintain, adjust and repair your bike. If you can’t
manage it yourself or are in doubt as to the correct procedures, please make your way to your
Quantum specialist. Maintenance, repairs or adjustments carried out incorrectly can result in
damaged equipment and injury and death.
• NEVER use a pressure washer to clean your bike. It will force grease and/or oil out of
components which could result in corrosion or serious damage. It will force water into highly
sensitive electrical components and cause them to short out and need to be replaced.
• Bikes are not intended for extreme loads such as those encountered when jumping or riding
over curbs and steps. Do not stunt ride.
• Take care to ensure that loose clothing, scarves, laces, pant legs, etc., do not get trapped in
moving parts such as spokes
or pedals or chains and chain rings.
• Like all mechanical system, a bicycle is subject to
wear and tear. This will affect the various components in different ways. More intensive use will
shorten the lifespan of certain parts.
• Become familiar and always comply with local and national traffic rules which apply in the
country where you will be using your bicycle.
• Make certain to have all the required reflectors and lights to use your bicycle safely in the
area and country where you will ride.
• It is strongly advised to use a bike helmet for added safety.
Observe the national rules and standards for use of helmets in all cases.

!
7!
1. Handlebar, stem, grips and purion
The height of the handlebar determines the pressure on your hands and your back posture,
among other things, and therefore, has a substantial impact on your ride comfort. Quantum
Broadway bikes are fitted with upright handlebars that are adjusted with a quick release lever.
Your handlebar should be centered and the grip portion level. To tighten the handlebars, the
lever should be folded closed so that it produces 5Nm to 8Nm of torque.
• If you are unfamiliar with the hand pressure required to properly close a quick release lever
please see your Quantum specialist.
• If you adjust the handlebar height, take care to ensure
that the MAX safety marking on the stem is not visible. If it is visible, it raises the risk of the
handlebar becoming loose and the rider losing control of the bike.
• The stem height can be adjusted by opening the quick release lever below the handlebars.
Again, become familiar with the hand pressure required to ensure the lever is closed properly
and see your Quantum specialist to learn how to do so.
• Avoid accidents, do not adjust the stem or handlebar while riding!
Steering Maintenance
The headset bearings below the handlebar and stem require lubrication every so often. If you
notice that steering is stiff, creaks or does not operate correctly in some other way, then it may
need lubrication. You can go to your Quantum specialist for this.
Steering Safety & Repairs
After an extended amount of use the headset may get a little loose. If this is the case you will
need to visit your Quantum specialist, who has the tools and expertise to address the issue.
Should you have a fall and bend or damage the handlebar or stem as a result, it must be
replaced. Attempting to bend the handlebar back into shape may cause it to break. Deep
scratches in aluminum handlebars risk developing into cracks. This also requires the handlebar
to be replaced.

!
8!
Handlebar Grips
Before every ride make certain that your grips are firmly attached and do not rotate or are loose
in any way. This is one of your main contact points with the bicycle and where you maintain
control of the bike. Grips that are loose can be removed and have hair spray sprayed inside for
easy installation and then stickiness when dry, or be replaced with 'lock-on' grips.
Index:
1. Grips
2. Handlebar
3. Stem
4. Brake Levers
5. Purion Display and Control Buttons
6. Handlebar Quick Release Lever
7. Derailleur Lever
8. Stem/handlebar quick release lever
9. Folding Stem Quick Release Lever
10. Safety Collar for Folding Stem Quick Release
11. Bell
1
1
2
3
4
5
6
7
8
9

!
9!
Side View
3
6
10
2
9
8

!
10!
Top View
11
5
4
4
7

!
11!
Purion Display
Index:
A. Power Assistance Increase/Light ON-OFF Switch**
B. Display ON-OFF Button**/Scroll Display Button
C. Power Assistance Decrease/Walk Assist***
D. Battery Charge Level Indicator
E. Clock, Trip elapse time*
F. Power Assistance Level Display (0,1,2,3,4,5) (off)
G. Speedometer Display, Average speed, Maximum speed*
H. Various Other Displays-Odometer*/trip distance/volume
*Change by scrolling
**Press AND Hold for three seconds
***Press AND Hold until desire to stop
A
B
C
D
E
F
G
H

!
12!
2. Front fork & head tube suspension
The front wheel fork needs to be adjusted so that it can rotate without resistance and at the
same time not have any looseness or slack in the bearing assembly. The bearing that do this
are called the Head Set and are adjusted under the folding mechanism of the stem. A 5mm bolt
presets the pressure on the bearings to keep them turning smoothly. A 6mm bolt on the side
and just below the quick release lever of the stem folding mechanism tightens the stem to the
fork. The 6mm bolt should be tightened to approx. 12Nm to 15Nm.
The Quantum Broadway is fitted with a low travel suspension front fork to smooth out the bumps
on the road and path. Be certain to keep the rubber boot in good condition and that it does not
get ripped or torn or develop holes. Dirt and moisture can get into the mechanism as it moves
up and down reducing its effectiveness. That is why the bicycle needs to be cleaned and
inspected regularly.
3. Lighting
As a cyclist, it is very important to be seen by other road users in order to be able to negotiate
traffic safely. Both front and rear lights have LED bulbs for brightness, low electrical
consumption, and long life. The lights can be activated be pressing and holding for 3 seconds
the 'up' button of the assistance selector beside the left grip. The lights can be turned off again
by depressing the same button for three seconds. Failure to hold the button long enough to turn
on or turn off the lights may cause the assistance level of the motor to increase. Be aware of the
level of assistance that is displayed on the screen before riding.
Repairs
Should the lights not function properly, check to see that the positive and negative wires have
not disconnected from the lights and be certain to ensure the correct lead attaches to the correct
terminal. These parts are small and fragile and may be best serviced by your Quantum
specialist.
4. Brakes
Brakes are of crucial importance for your safety and riding experience. Your Quantum
Broadway is equipped with cable actuated disc brakes and 160mm rotors. The left-hand lever
operates the front brake and the right-hand lever operates the rear brake. These can be
reversed by your Quantum specialist if you have become accustomed to riding a bicycle in
countries where it is reversed or for any other reasons.
• Your brakes have a longer stopping distance in wet weather. Be sure to allow for this!
• If you feel the brake lever pulling all the way without applying the brakes fully, then you will
need to tension the cable using the adjusting screw on the brake lever mount on the handlebar.
Unscrew the adjusting screw by a couple of turns. Next, tighten the lock nut against the
brake lever mount so the adjusting screw cannot work loose while riding the bike.
• Disc rotors can sometimes become slightly warped. If your rotor rubs on the caliper please
see your Quantum specialist as this requires specialized tools.
Do you want to adjust the position of the brake levers relative to the handlebar grips? Use the
adjusting bolt to change the position of the brake lever.

!
13!
Maintenance and repairs
Do your brakes work less well in the winter? It could be that your brake cables have frozen
solid. If this is the case, your cables will need to be re-lubricated. This is a specialist job.
It is advised you to go to your Quantum specialist for this.
• Brake discs must be kept free from oil, grease, and other contaminants. Disc brakes that have
become noisy should have the rotors cleaned with rubbing alcohol or other approved solvents.
Please check with your Quantum specialist for their recommendation.
5. Gears
Quantum Broadway bikes are fitted with a Shimano 7 speeds derailleur system. The gears will
be correctly adjusted by your Quantum specialist. With the passage of time and use the
derailleur cable may become stretched and it will be necessary to adjust them again.
Derailleur gear controls
On the indicator, the highest number (7) indicates the highest gear and the lowest number (1)
indicates the lowest gear. If you press the shifter once or shift its position, then you will always
shift the rear derailleur up or down one sprocket. You need to keep on pedaling when shifting
gears on a derailleur bike. It is suggested to ease up on the pedal pressure while shifting. Avoid
shifting under load such as going uphill. This causes the chain to flex and can cause damage to
the connecting pins and possibly cause the chai to break, as well as damage the teeth of the
chain ring and gears on the rear wheel.
• Your derailleur limit screws are there to ensure the chain doesn't exceed the range of the
gears and allow the chain to fall between the gears on the rear wheel or to allow the rear
derailleur to contact the spokes of the rear wheel. Please see your Quantum specialist if your
gears do not function properly.
• Your Quantum Broadway has a replaceable derailleur hanger that connects the rear derailleur
to the frame. This is made of a softer metal than the rest of the frame and is engineered to yield
under excessive pressure (thereby saving the larger component of the frame). When the
derailleur hanger has become bent and misaligned it will cause the gears to not engage
properly. The hanger may need to be adjusted or replaced. It is advised to stop riding your bike
and bring it to your Quantum specialist as it requires specialized tools and knowledge.
6. Chain
It is important that the chain is cleaned and lubricated from time to time. Do this by ensuring the
rear wheel is clear of the ground by placing the bike on a stand or safely suspending. TURN
OFF THE ELECTRIC ASSISTANCE. Turn the pedals backwards and spray the chain on the
rear sprockets with a degreaser. This provides a protective, dirt-repellent coating. After that,
lubricate the chain with thin oil, Teflon or silicone spray. Run the chain around a couple of times.
Remove excess lubricant with a dry cloth.
• Chains will wear overuse. As chains wear they also wear down the tooth profile of the chain
ring and gears. Shimano chains can be checked with a wear indicator at your Quantum
specialist. When a chain measures .75 on a chain wear indicator it is advised to replace it.

!
14!
Failure to do so in a timely manner will mean that the chain ring and gears may also need to be
replaced in the future.
7. Bottom bracket, cranks, and pedals
The pedals on your bike are attached through the cranks to the bottom bracket. The bottom
bracket and the pedals are manufactured as 'sealed units' and you never need the lubricate
them. It is recommended to keep these parts clean and inspect them. The cranks must be
secured by means of an 8mm Allen key bolt and they must not show any looseness. A loose
crank can cause irreparable damage to the bottom bracket and will keep you from having full
control of your bicycle. If the pedals themselves or the cranks are damaged after a fall they will
need to be replaced.
Pedals can be removed with a 15-mm open-ended wrench on the flats. Pedals do need to be
fitted on the correct side, which is why they are marked L (Left) and R (Right). To install pedals
correctly, you screw them on in the direction of the front wheel and unscrew them in the
direction of the rear wheel. You pedal can become slippery in wet weather, even if you have
non-slip pedals.
• Your Quantum Broadway pedals are foldable for ease of storage and compactness. DO NOT
RIDE THEM IN THE FOLDED POSITION. To fold the pedals, push with the palm of your hand
from the outside edge inward, and then rotate up or down. Be careful of your fingers as the
pedals have a spring to aid the folding mechanism and can snap into place quickly. To unfold
your pedals, firmly grasp the outside edge of the pedal and rotate in the direction to make it
level again.
8. Kickstand
Make certain that your kickstand does not develop and looseness where it attaches to the
frame. Your kickstand is made to support the bicycle and can Not support the weight of a
person. Do not sit on the bike while the kickstand is down.
9. Wheels
If the rim of your wheel is warped it is recommended that you involve your Quantum specialist
as soon as possible. Repairing a wheel requires specialized tools and knowledge. The same
applies to repairing a broken spoke. If there is a broken spoke the wheel can distort which
increases the chances of more spokes breaking. The hub is the heart of the wheel. If there is
play in a wheel or if it does not spin freely, then it is almost always due to hub problems. In such
cases pay your Quantum specialist a visit.

!
15!
Front Wheel
Index:
1. Frame 5. Tire
2. Fork 6. Rim/Wheel
3. Front Light 7. Disc Brake Rotor
4. Front Fender 8. Disc Brake Caliper
1
2
3
4
5
6
7
8

!
16!
Rear Wheel
Index:
1. Frame 5. Tire 9. Power Wire Motor
2. Rear Rack 6. Rim/Wheel
3. Rear Light 7. Derailleur
4. Rear Fender 8. Hub Motor
1
2
3
4
5
6
7
9
8

!
17!
Removing a wheel
-Front wheel
Unscrew the axle nuts with a 15mm wrench.
-Rear wheel
The rear wheel of your Quantum Broadway encompasses the motor. When servicing the rear
wheel have THE ELECTRIC ASSISTANCE TURNED OFF. To disconnect the power to the rear
hub motor, follow the cable to find the connector that is about 10cm from the axle end. This
unsnaps by pulling in opposite directions. Make sure not to pull too great of a distance. To
reconnect the cable, make sure the arrow points on each cable end line up to meet each other
as the cables are gently pushed back together. Before removing the wheel, remove the tie or
clip that secures it to the frame. After installing the rear wheel reinstall the tie or clip of the frame
so that the motor's electric cable is not lose or can get caught on anything.
The rear wheel axle nuts are 18mm. The axle has 'anti-rotation' spacers with a tab on them.
They must be used for proper spacing of the hub and to keep the hub from rotating inside the
frame. Make sure the tabs of the anti-rotation spacers line up to fill the opening at the bottom of
where the axle rests in the frame.
• When servicing the rear hub and motor give extra care to the electric cables exiting the center
of the axle on the right side. Do not crimp, cut, or pull on this cable. It may cause damage to
the motor. If it has become damaged please do not use the bicycle. See your Quantum
specialist.
• When installing a wheel be certain to carefully guide the disc brake rotor back into the caliper.
10. Tires
It is recommended that tire pressures are checked regularly. Well-inflated tires generate less
rolling resistance than underinflated tires, which means less effort when cycling and greater
battery range. Your tires are the bicycle contact points with the ground and where you maintain
your control and stability of the bicycle. Properly inflated tires support your weight and keep
traction for the bike. Underinflated tires do not provide adequate traction and cannot support
your weight thereby increasing chances of damage to the bicycle and injury to the rider.
Check your tire pressure with a pump that has a gauge. The tires need to be inflated to between
45psi and 65psi. The exact recommended tire pressure is shown on your tire sidewall.
Check the tread on your tires regularly. If the tread is almost gone, or you can see the canvas in
places, the tire will need to be replaced. If you see small cracks in the tire or get punctures often
it means you are due for a new tire. If you have a flat tire check first whether the valve has
failed. Do this by wetting the valve opening a little - if any bubbles appear, then the valve is
leaking. Check first whether the problem can be remedied by cleaning the valve. If this doesn’t
help, then you need to replace the valve core.
If the valve is working correctly and the tire still goes flat, then it has a puncture. To repair the
puncture, you need to remove the valve and the rim nut first (suspend the bike to do
this or turn it over making sure to protect the handlebar controls from damage). Press the edge
of the tire towards the center of the rim and push the first tire lever between the tire and the rim.
Take care not to pinch the inner tube while doing so to prevent further punctures. Now insert the
second tire lever right next to the first one and slide it over around a hand’s width. Repeat this
with the third one. Remove the second tire lever next and insert it next to the third one. Repeat
the procedure until you have freed the tire from the rim. Now push the valve stem out and

!
18!
withdraw the inner tube from the tire. Refit the valve in the inner tube again and inflate the tire. If
there is a large hole in the tube you will hear or feel the air escaping. You can locate a small
leak by holding the tube down in a bowl of water.
Once you have found the puncture, mark the spot with a pen and then let all the air out of the
tube and dry it off. Clean the area around the hole thoroughly with a small piece of emery cloth.
Apply a coating of solution sparingly and allow it to dry for a minute until 'tacky' (follow the
instructions with the solution). Cut out a patch to the right size and stick it on the puncture. Apply
firm pressure to the patch and hold it down for a bit. Leave to dry for a few minutes. Carefully
check the tire casing for sharp objects (glass, nails, debris, etc.) and remove them to prevent
any further punctures. In order to verify whether the puncture has been sealed you can inflate
the tube again and draw it through the water. If the puncture has been corrected refit the tube
over the rim. Feed the valve stem through the hole in the rim first. Then fit the rest of the inner
tube; ensure that it is not folded over or twisted. Inflate it slightly. Ensure that the rim tape is
correctly centered as it protects the inner tube from the spokes. Now fit the tire working around
the rim starting from the valve by pressing it into the rim (this may require quite a lot of force in
the final section). Keep the valve stem pressed in as far as possible, this will ensure that the
inner tube is positioned correctly. Press the tire into the rim again. Do not use tire levers or tools
to refit the tire, doing so risks puncturing the tire again! If the tire has been fitted correctly, inflate
the tube and then tighten the valve nut securely. Screw the dust cap onto the valve and you are
ready to go. If the hole in your inner tube is too big to be repaired, then it will need to be
replaced.

!
19!
11.Seat
Index:
1. Seat
2. Seat Post
3. Seat Post Quick Release Lever
1!
2!
3!

!
20!
The seat is an important component of your bike, and one of the contact points between bicycle
and rider. It is therefore advised to have a seat that is comfortable and well positioned.
Adjustment
The best way to test the height of your seat is by sitting on the bike. You must be able to touch
the ground with the toes of one foot while you rest the heel of your other foot on the pedal at
bottom dead center. Your leg should then be almost fully stretched but still with a little bend in
the knee. If you have the ball of your foot resting on the pedal, your leg will be slightly bent. If
you can touch the ground with both feet flat, then your saddle is set too low. If you want to
adjust the height of your seat then you need to open the quick release lever on the seat post
collar. You can then adjust the saddle as you wish. Firmly close the quick release lever once
you have adjusted the seat to the proper height.
• Ensure you tighten all bolts to the specified tightening torques. If you don’t do so, your seat
can suddenly shift while you are riding and cause discomfort or loss of control of the bicycle.
• Do not adjust the seat while riding the bike.
• Do not set your seat too high. The ‘min’ mark on the seat post must never come out above
the seat tube. The seat post can bend or break if you set the saddle too high.
12. Frame
Proper maintenance will prolong your new Quantum bike’s lifespan. That is why it is wise to
check it or have it checked regularly and keep it properly clean. You are best using a clean
cloth. This will remove the worst of the dirt. Take care to avoid scratching. Wash your bike
working from the top down with a clean cloth and dish soap and water or other mild cleaners.
Clean the chain with an old brush. Don’t forget to remove the dirt from under the fenders. Wipe
the bike down with a dry cloth. If you need to turn over your bike, be sure not to damage the
controls on the handlebars and remove loose items such as bags before you set about cleaning
the bike.
Paintwork
It is advisable to go about cleaning with care. For example, do not use alkaline cleaners such as
ammonia or soda or petrol based chemicals. It is better not to use products containing fluorides,
chlorides or sulfates either. These products can actually attack the varnish coating causing it to
lose its gloss. The best way to keep the paintwork clean is with a soft cloth and clean hot water.
You can add a mild-action liquid soap to it if required.
Never use a pressure washer! The jet of steam or water can actually penetrate right into the
bearings or the suspension system where it will force out the grease or oils which are essential
for your bike.
Other manuals for BROADWAY
1
Table of contents
Other Quantum Bicycle manuals