manuals.online logo
Brands
  1. Home
  2. •
  3. Brands
  4. •
  5. Quatreau
  6. •
  7. Plumbing Product
  8. •
  9. Quatreau SMARTTAP QST-B Operating instructions

Quatreau SMARTTAP QST-B Operating instructions

SmartTap
QUATREAU SMARTTAP™
QST-B/BC/BCS
Comissioning Guide
————————————————————
QST-553B
COMMISSIONING SEQUENCE
————————————————————
DO NOT POWER THE SYSTEM UP
UNTIL SECTION D STEP 3.
————————————————————
SECTION A:
Connections from QST-553B to Quatreau
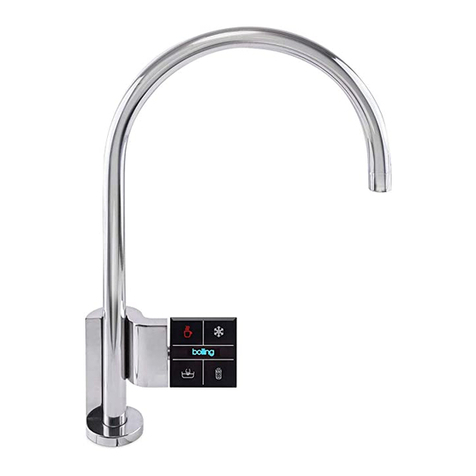
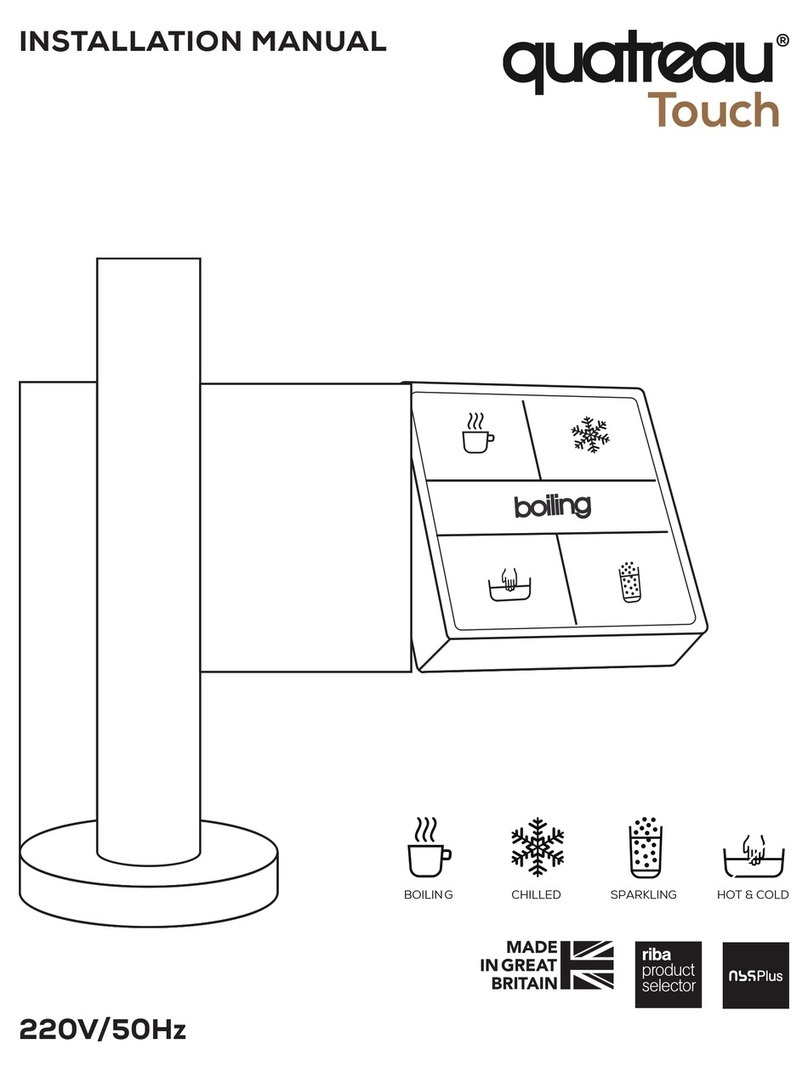
Touch tap
1. Connect (platinum cured) silicon 3
mm wall thickness from the front
outlet of the QST-553B to either of the
pipes protruding down from the tap.
2. Connect (platinum cured) silicone 3
mm wall thickness from the back
outlet of the QST-553B to the other
pipe.
3. This rear feed is the boiling line. It is
essential to position the venturi T in this
line so that there is a downhill
gradient to the type AA airgap
connector on the trapped drain
upstand.
4. Secure bottom fitting (outlet on top)
using the black compression clips
5. Ensure the silicon pipe is not kinked or
too long and ensure it flows in an
unrestricted manner into the QST-
553B. Back pressure from kinked
pipes or pipes that are too long may
cause the pipe to burst. The pipe
should fit without being stretched or
too long.
—————————————————
SECTION B:
Connections for Mains Cold water
1. Connect a supply of cold mains
water through the ¼” pipe work
provided into the top right inlet on the
QST-553B marked “pure inlet”.
2. Gradually open the cold water supply
checking that the fittings are water
tight.
————————————————————
SECTION C:
Interconnections QST553-B to Chiller
Carbonator - refer to the Chiller
Commissioning Guide
1. Connect the interconnections of
water and gas from the QST553-B to
the chiller carbonator module C20/
CS20/C50/CS50.
a. ‘CO2 out’ to ‘CO2 inlet’ on the
chiller front,
b. ‘H2O out’ to ‘H2O inlet’ on the
chiller front. install a 1/4” isolator
into this line feeding into the
chiller and turn it off. This is an
important step in commissioning.
c. ‘carb out’ on chiller to sparkling
(carb) inlet on QST-553B,
d. ‘chilled out’ on chiller back to
chilled inlet on QST-553B.
e. Refer to the Chiller
Commissioning Guide before
powering up.
————————————————————
DO NOT POWER THE SYSTEM UP
YET, READ THE COMMISSIONING
SEQUENCES IN SECTION D FIRST
————————————————————
COMMISSIONING GUIDE
SECTION D:
Commissioning
1. If not already done, connect the
comms cable from the tap to the
QST-553B
2. Connect the power cable provided.
(note that this is rated 16Amp. Do not,
under any circumstances, substitute
for a lower rated cable)
3. Power up the QST553-B. The tap panel
will illuminate.
4. SmartTaps come with optional safety
lock on the boiling function, to
disengage safety lock simply depress
the red illuminated boiling button and
then whilst depressing the red button
push down and release the chilled
blue illuminated button
a. FIRST Turn on the boiling function
and leave it running until water
comes out. This may take some
time because the tank will not be
full.
b. Once you have a normal flow of
water from the boiling option
release the button.
————————————————————
SECTION E:
Boiler
To vent the boiler simply activate the
boiling function every minute for 30
seconds. The green light on the front
panel of the 553B activates and the red
light goes out indicting that the boiler has
reached temperature.
If you fail to follow this sequence there is a
possibility that the boiler will go beyond
the set temperature and activate the
thermal trip. The thermal trip will reset itself
when temperature drops.
————————————————————
SECTION F:
Chiller Carbonator C20/CS20/C50/CS50
Refer to the Chiller Commissioning
Guide before powering up
————————————————————
SECTION G:
Conversion to Pureh2o
Once commissioned remove the mains
water supply to the QST-553B “pure inlet”
and reconnect using a supply of PurityPRO
purified water. The PurityPRO was designed
for seamless integration with SmartTaps
and will deliver the optimum pressure for
your system to work properly.
COMMISSIONING GUIDE
The Pure H2O Company Ltd, Unit 21 Boundary Business Centre, Boundary Lane,
Woking, Surrey GU21 5DH United Kingdom www.quatreau.com
QST-0619
Quatreau SmartTap is a registered trademark of the Pure H2O Company Limited.
Copyright © 2019 The Pure H2O Company Limited. All rights reserved.

This manual suits for next models

2

Other Quatreau Plumbing Product manuals

Quatreau QST-553BCS User manual

Quatreau

Quatreau QST-553BCS User manual

Quatreau SMARTTAP 553-B User manual

Quatreau

Quatreau SMARTTAP 553-B User manual

Quatreau QT553 Quick start guide

Quatreau

Quatreau QT553 Quick start guide

Quatreau QT-553BCS User manual

Quatreau

Quatreau QT-553BCS User manual

Quatreau Touch 553-B User manual

Quatreau

Quatreau Touch 553-B User manual

Quatreau SmartTap User manual

Quatreau

Quatreau SmartTap User manual

Quatreau SmartTap User manual

Quatreau

Quatreau SmartTap User manual

Popular Plumbing Product manuals by other brands

Tenacta GOCCIA 24 Instructions and warnings

Tenacta

Tenacta GOCCIA 24 Instructions and warnings

KWC QBIX/QBIX-ART 12.253.151.006 Specification sheet

KWC

KWC QBIX/QBIX-ART 12.253.151.006 Specification sheet

Glacier bay KAGAN 21-K153KCP-GB Use and care guide

Glacier bay

Glacier bay KAGAN 21-K153KCP-GB Use and care guide

Hansa DISC 0103 1174 Mounting and operating instructions

Hansa

Hansa DISC 0103 1174 Mounting and operating instructions

Glacier bay HD67751W-6101 002846191 Installation and care guide

Glacier bay

Glacier bay HD67751W-6101 002846191 Installation and care guide

Clou Freddo 2 CL/06.03.001.21.L installation instructions

Clou

Clou Freddo 2 CL/06.03.001.21.L installation instructions

Marco Mammoliti FRENK LAVABO Fitting instructions

Marco Mammoliti

Marco Mammoliti FRENK LAVABO Fitting instructions

Elkay EWCA4 Series Installation, care & use manual

Elkay

Elkay EWCA4 Series Installation, care & use manual

Moen 9796 installation guide

Moen

Moen 9796 installation guide

Sanela SLUN 17H Mounting instructions

Sanela

Sanela SLUN 17H Mounting instructions

Elkay LK67DDJ18 Specifications

Elkay

Elkay LK67DDJ18 Specifications

Balmani Deco Solitary Washbasin SS installation guide

Balmani

Balmani Deco Solitary Washbasin SS installation guide

Hans Grohe Raindance 27483000 Instructions for use/assembly instructions

Hans Grohe

Hans Grohe Raindance 27483000 Instructions for use/assembly instructions

Delabie TEMPOMATIC 428150 manual

Delabie

Delabie TEMPOMATIC 428150 manual

Moen POSI-TEMP L82691 Illustrated parts manual

Moen

Moen POSI-TEMP L82691 Illustrated parts manual

Aqua Free Baclyser neo S user manual

Aqua Free

Aqua Free Baclyser neo S user manual

Dornbracht 27 805 625-FF installation instructions

Dornbracht

Dornbracht 27 805 625-FF installation instructions

Omnires DA5020BL Installation and Maintenance

Omnires

Omnires DA5020BL Installation and Maintenance

manuals.online logo
manuals.online logoBrands
  • About & Mission
  • Contact us
  • Privacy Policy
  • Terms and Conditions

Copyright 2025 Manuals.Online. All Rights Reserved.