Quest Engineering F9 Manual

Installation, Operation and Maintenance Instructions
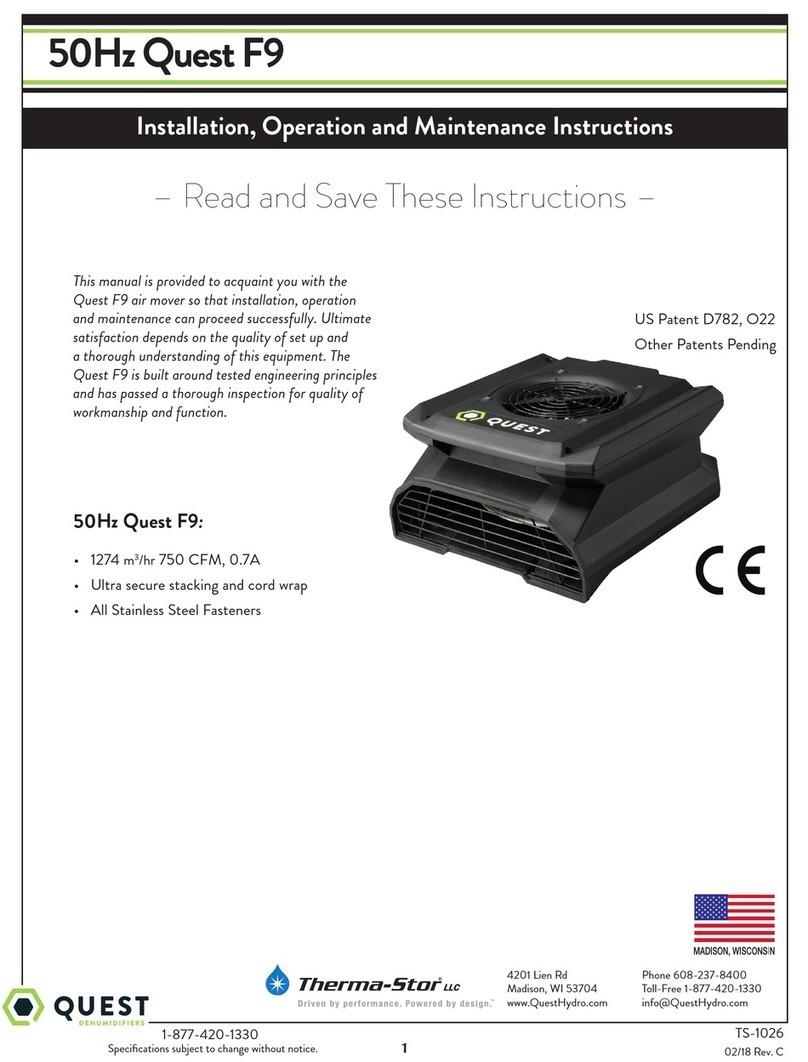
This manual is provided to acquaint you with the
Quest F9 air mover so that installation, operation
and maintenance can proceed successfully. Ultimate
satisfaction depends on the quality of set up and
a thorough understanding of this equipment. The
Quest F9 is built around tested engineering principles
and has passed a thorough inspection for quality of
workmanship and function.
Installation, Operation and Maintenance Instructions
– Read and Save These Instructions –
1
Quest F9:
• 925 CFM, 1.9A
• Onboard circuit breaker and branch protection
GFCI
• Daisy chain up to 6 fans on a single 15 Amp circuit
• Ultra secure stacking and cord wrap
• All Stainless Steel Fasteners
TS-896
05/17 Rev. C
US Patent D782, O22
Other Patents Pending
4201 Lien Rd Phone 608-237-8400
Madison, WI 53704 Toll-Free 1-877-420-1330
www.QuestHydro.com info@QuestHydro.com
Specifications subject to change without notice.
Quest Dry
Quest F9

1-877-420-1330 www.QuestHydro.com
info@QuestHydro.com
Quest F9 Installation, Operation and Maintenance Instructions
2
Table of Contents
Introduction1
1. Specifications................................................................................... 3
2. Important Safety Instructions........................................................ 3
3. Operation......................................................................................... 3
3.1 Transporting the Quest F9 ....................................................... 3
3.2 Electrical Requirements........................................................... 3
3.3 Ducting......................................................................................4
3.4 Resettable Circuit Breaker ................................................4
3.5 GFCI Protection and On-Board Duplex Receptacle...........4
4. Maintenance ....................................................................................4
4.1 Power Cord ................................................................................4
4.2 Cleaning.....................................................................................4
4.3 Service ....................................................................................... 5
5. Wiring Diagram ............................................................................... 5
6. Service Parts .................................................................................... 6
Warranty ...........................................................................................7
Serial No. ______________________________________
Purchase Date ______/______/_____
Dealer’s Name ___________________________________

Quest F9 Installation, Operation and Maintenance Instructions
3
1-877-420-1330 www.QuestHydro.com
info@QuestHydro.com
1. Specifications
Part No. 4035030
Power 110-120 VAC, 1.9 Amps
Blower 925 CFM
Cord 20’ 6” 14ga Power Cord
Warranty One Year, 100% Parts and Labor
Dimensions Width 17”
Height 8 7/8”
Depth 20 1/2”
Weight 21 lbs.
2. Important Safety Instructions
CAUTION: Risk of electric shock. Can cause injury or death to reduce the risk of electric shock:
• Do not expose to standing water or rain
• Unplug fan before servicing.
• Do not block air intake or outlet. One foot minimum distance to obstructions.
• Indoor use only
• Do not use as stool or bench
• Do not operate with damaged cord or plug.
• Do not run cord under carpeting. Do not cover cord with throw rugs, runners, or similar coverings. Do not route
cord under furniture or appliances. Arrange cord away from trac area and where it will not be tripped over.
WARNING: Not Suitable for use with Solid-State Speed Controls
AVERTISSEMENT: Ne Convient Pas a Des Regulateurs De Vitesse a Semi-Conducteurs
3. Operation
3.1 Transporting the Quest F9
The Quest F9 is designed to be stacked vertically or horizontally (“Bookshelf Stacking”) for transport.
3.2 Electrical Requirements
The Quest F9 can be plugged directly into any standard wall receptacle. Without ducting, the Quest F9 will draw 1.9
amps at 120 VAC. Ducting will reduce amp draw. Up to 6 Quest F9s can be daisy chained on a standard 15 amp branch
circuit.

Quest F9 Installation, Operation and Maintenance Instructions
4
1-877-420-1330 www.QuestHydro.com
info@QuestHydro.com
3.3 Ducting
The lip on the exhaust opening of the Quest F9 is designed to accommodate layflat ducting with 14” or larger diameter.
3.4 Resettable Circuit Breaker
The 12 Amp thermal circuit breaker protects the unit and devices connected to its duplex GFCI receptacle. In case of a
fault, the breaker can be reset at the Quest F9 control panel.
Use of multiple fans and any other connected devices must be in accordance with the National Electric Code and any
additional codes or laws required by your local government.
IMPORTANT: Total amperage of the Quest F9 plus all devices plugged into its convenience
receptacle is limited by the onboard circuit breaker. Excessive current will cause the circuit breaker
to trip. This may occur instantly or after a period of time depending on the operating conditions.
IMPORTANT: When the Quest F9 is plugged into a standard “powered” wall outlet the Quest F9’s
duplex outlet is electrically “HOT” and AC voltage is present.
3.5 GFCI Protection and the On-Board Duplex Receptacle
The on-board convenience receptacle provides electrical shock protection for the operator in damp or wet applications or
other conditions that would cause a ground fault. The Quest F9 is wired to branch protect all on-board components in
addition to protecting any fans or other equipment plugged into the onboard receptacle.
Testing GFCI operation can be done by pressing the “TEST” button located on the GFCI duplex outlet. If operating
properly, the “RESET” button will pop out. In addition, notice that the fan will NOT operate if the GFCI outlet is in the
TRIPPED condition as the motor and other on-board components are included in the GFCI protected circuit.
The GFCI circuit can only be “RESET” when the Quest F9 is connected to a properly grounded wall outlet providing the
rated voltage.
4. Maintenance
WARNING: Disconnect the unit from power before servicing or cleaning. Replace all safety grills after servicing or
cleaning.
4.1 Power Cord
Visually inspect cord and plug head before use. If there are signs of damage or excessive wear, discontinue use until the
unit has been serviced.
4.2 Cleaning
The housing is made of durable and washable polypropylene. When cleaning, the use of solvents is NOT recommended.
When washing inside the unit, disconnect the unit from its power source. Protect the switch, receptacle and circuit
breaker from water intrusion. Do not spray water or cleaning solution at motor. If motor does get wet, allow motor to
dry completely before restarting. If fan is to be washed and not used within 24 hours, allow fan to drip dry for 10 minutes
and then run for 5 minutes before storing.
IMPORTANT: Do NOT remove impeller blade from motor assembly. Doing so can cause
blade to become imbalanced upon re-assembly.

Quest F9 Installation, Operation and Maintenance Instructions
5
1-877-420-1330 www.QuestHydro.com
info@QuestHydro.com
4.3 Service
CAUTION: Servicing the Quest F9 with its high voltage circuitry presents a health hazard that
could result in death, serious bodily injury, and/or property damage. Disconnect the appliance
from the power supply before servicing. Only qualified service people should service this unit.
CAUTION: If the supply cord or GFCI become damaged, they must be replaced by the
manufacturer, its service agent or similarly qualified person in order to avoid a hazard.
5. Wiring Diagram
HOT
NEUTRAL
LOAD
LINE
GFCI
DUPLEX
YEL
GROUNDED
PLUG
WHTBLK
WHT
BLK
POWER
SWITCH
BRN
PUR
FAN MOTOR
12 AMP
CIRCUIT
BREAKER
20 µF
CAPACITOR
PUR
PUR

Quest F9 Installation, Operation and Maintenance Instructions
6
1-877-420-1330 www.QuestHydro.com
info@QuestHydro.com
6. Service Parts
Part No. Description
4035662 Impeller Assembly
4037338 Power Cord Kit (cord, bolts & nuts)
4035235-08 Run Capacitor, 20 mfd, 370 VAC
4035665 Rubber Feet
4036256 Duplex GFCI Outlet Kit
4035825 Rocker Switch
4035752 12A Circuit Breaker
4037469 Inlet Grill
4037336 20’ 6” Cord Only
Optional Parts
4024936 Duct, Lay Flat, 14” x 250’

Quest F9 Installation, Operation and Maintenance Instructions
7
1-877-420-1330 www.QuestHydro.com
info@QuestHydro.com
7
Quest F9 Limited Warranty
Warrantor:
Therma-Stor LLC
4201 Lien Rd
Madison, WI 53704
Telephone: 1-866-933-7486
Who Is Covered: This warranty covers Quest F9.
First Year Warranty: 100% parts and labor (all components)
End-User Responsibilities: Warranty service must be performed by a servicer authorized by Therma-Stor Products. To
obtain warranty service you must obtain a return material authorization (RMA). To obtain an RMA you must present
proof of purchase or (lease), by use of a warranty card, original sales receipt or other reasonable and reliable means.
To obtain an RMA call Therma-Stor LLC at the above number and ask for the Therma-Stor LLC Service Department,
which will then issue an RMA# and arrange for, at our option, either repair or replacement.
Freight: Freight to and from the servicer is the responsibility of the end-user. The end-user is responsible for normal care
and proper return packaging.
Limitations and Exclusions: This warranty does not cover any defect, malfunction, etc. resulting from misuse, abuse, lack
of normal care, corrosion, freezing, tampering, modification, unauthorized or improper repair or installation, accident,
acts of nature or any other cause beyond Therma-Stor LLC’s reasonable control.
If any Quest F9 part is repaired or replaced, the new part shall be warranted for the balance of original warranty (but
all warranty periods will be extended by the period of time, if any, that the Quest F9 with FOCUS Technology is out of
service while awaiting covered warranty service).
Warranty service will be performed during normal working hours.
UPON THE EXPIRATION OF THE WRITTEN WARRANTY APPLICABLE TO THE QUEST F9 OR ANY
PART THEREOF, ALL OTHER WARRANTIES IMPLIED BY LAW, INCLUDING MERCHANTABILITY AND
FITNESS FOR A PARTICULAR PURPOSE, SHALL ALSO EXPIRE. ALL WARRANTIES MADE BY THERMA-
STOR LLC ARE SET FORTH HEREIN, AND NO CLAIM MAY BE MADE AGAINST THERMA-STOR BASED
ON ANY ORAL WARRANTY. IN NO EVENT SHALL THERMA-STOR LLC, IN CONNECTION WITH THE
SALE, INSTALLATION, USE, REPAIR OR REPLACEMENT OF ANY QUEST F9 OR PART THEREOF BE
LIABLE UNDER ANY LEGAL THEORY FOR ANY SPECIAL, INDIRECT OR CONSEQUENTIAL DAMAGES
INCLUDING WITHOUT LIMITATION WATER DAMAGE (THE END USER SHOULD TAKE PRECAUTIONS
AGAINST SAME), LOST PROFITS, DELAY, OR LOSS OF USE OR DAMAGE TO ANY REAL OR PERSONAL
PROPERTY.
Some states do not allow limitations on how long an implied warranty lasts, and some do not allow the exclusion or
limitation of incidental or consequential damages, so one or both of these limitations may not apply to you.
Legal Rights: This warranty gives you specific legal rights, and you may also have other rights which vary from state to
state.
Other manuals for F9
1
This manual suits for next models
1
Table of contents
Other Quest Engineering Fan manuals
Popular Fan manuals by other brands

Taurus Alpatec
Taurus Alpatec FRESKO 3B manual

Minka-Aire
Minka-Aire CONCEPT II F518 Instruction manual warranty certificate

NuTone
NuTone Guardian AE60 Specification sheet

EDM Product
EDM Product 33987 Instructions for use

Waves
Waves FAN-105061 manual

EQUATION
EQUATION FS40-16CR Assembly, Use, Maintenance Manual