Quick Charge QPA User manual

O P E R A T I N G I N S T R U C T I O N S
QPA12v/50A Parallel Charger
INTRODUCTION:
Designed for
group charging starting batteries, gel batteries, AGM batt
eries, and wet cell deep cycles
in
parallel.
Current is adjustable
fr
o
m 1 to 50
amps. Voltage
from 13.0
- 16.0.
INITIAL INSTALLATION:
Before making AC connections, refer to the AC requirements labeled on the charger ID tag. If your charger i
s
not equipped with an AC plug, for example, a 220 volt charger
, have a qualified electrician install one.
CAUTION:
To reduce the risk of fire, use this charger only on circuits provided with a maximum of 20
ampere branch circuit protection (circuit breaker or fuse), In accordance with the
National
Elec
t
ric
Code, ANSI/NFPA 70, and all local codes and ordinances.
GROUNDING INSTRUCTIONS:
This battery charger must be grounded to reduce the risk of electric shock. If the charger is equipped with a
grounding type plug, it must be plugged into a nominal 115 volt, 60 Hertz circuit. If the charger is supplied with
no plug, have a qualified service person install one.
WARNING:
Improper connection of the equipment grounding conductor can result in a risk of an
electric shock.
DO NOT USE THIS CHARGER ON A TWO POLE
UNGROUNDED
OUTLET OR ATTEMPT TO BREAK OFF THE GROUND
PRONG
FOR USE ON
A RECEPTAC
LE
OR EXTINSION CORD NOT HAVING
A
GROUND.
The use of an extension cord with this charger should be avoided. The use of an improper extension cord could
result in a risk of a fire or electric shock. If an extension co
rd must be used, make sure it is in good condition.
Use a three conductor cord no smaller than 14 AWG. And keep it as short as possible. Locate all cords so that
they will not be stepped on, tripped over, or otherwise subjected to damage or stress.
Do not operate this charger if it shows any signs of physical damage.
PROPER CARE AND USE OF BATTERIES:
CAUTION:
Always wear protective eye shields and clothing when w
orking with batteries. Batteries
contain acids which can cause bodily harm. Do not put wrenches or other metal objects
across the battery terminal or battery top. Arcing or explosion of the battery can result. Do
not wear jewelry when working around batteries. Arcing can cause sever burns.
Quick Charge Corp. 1032 S.W. 22
nd
St. Oklahoma City, OK. 73109
800 658
-
2841
Fax (
405
) 632
-
5667
www.quickcharge.com

New batteries will not deliver thei
r full performance until after several cycles.
The tops of the batteries and battery hold downs must be kept clean and dry at all times to prevent excessive self
discharge and flow of current between the battery post and frame.
Maintain the proper electr
olyte level by adding water when necessary. Never allow the electrolyte level to fall
below the top of the battery plates. Electrolyte levels fall during discharge and rise during charging. Therefore,
to prevent the overflow of electrolyte when charging, add water ONLY AFTER the batteries have been fully
charged DO NOT OVERFILL. Old batteries require more frequent additions of water than do new batteries.
Do not over discharge the batteries. Excessive discharge can cause polarity reversal of individual ce
lls resulting
in complete battery failure.
Provide adequate ventilation for the batteries and charger. Do not obstruct the flow of cooling air around the
charger. Provide at least 1" of space around charger. Do not allow clothing, blankets or other mat
erial to cover
the charger.
WARNING:
Chargers can ignite flammable materials and vapors. Do not use near fuels, grain, dust,
solvents, or other flammables.
CAUTION:
Before connecting the charger to the batteries, make sure the battery pack is of the same
voltage rating of the charger.
Below is an illustration of Parallel and Series
battery packs.
WARNING:
Make sure the DC output leads, terminals or connector are all in good
working condition.
DO NOT USE THIS CHARGER IF:
The DC ou
tput connector,
(if equipped)
is loose or does not make good contact; Is cracked or broken; The leads
are cut or have exposed wires; The DC output leads
,
clamps
,
or
connector feel hot when used.
Using this charger with any of the above symptoms could result in a f
ire, property damage, or personal injury.
Have a qualified service person make the necessary repairs. Repairs should not be made by people who are not
qualified.

PREPERATION:
D
etermine how many batteries you want to charge. You have 50 amps of capacity which will be
divided between the
number of batteries on line.
For example, if you put 10 batteries on line and turn the rate control wide open
,
each battery
will
receive
approx. 5 amps.
Conversely
,
y
ou could
charge 1 battery
at
anywhere from 1
50
amps.
Next, determine the
maximum voltage you want to reach, if you are not sure, consult the battery mfg., or
use these settings as a general rule.
VOLTAGE SETTING
& NORMAL OPERATION
:
1).
First, we w
ill
set the maximum voltage you want to reach.
Th
e
easiest way
is to
connect
(1) fully charged battery to the
charger
, but before we do that
, m
ove switch to
o
ff position,
and
turn both controls down
.
2
).
Observing polarity, connect the leads to the battery. Plug the charger into a circuit known to have 117 volts 60 Hz.
Move the switch to the
ON
position.
3).
Turn the voltage control up to about the AGM marking. Slowly turn the current control up until the voltage rises
½
to
1
volt
be
yond the point you want to set
(
if you can
t reach it
,
turn the voltage control up more
)
, then
s
et the voltage
contr
ol back to the desired setting. When selecting the final voltage it is important that the current be
below
5 amps
or the
set point will drift lower as the current declines.
A below 5 amp reading should be easily obtainable on a fully charge
d
battery, if not, wait till it lowers.
4).
Leave the voltage control at set point.
Turn current down, and move switch to OFF position.
5).
Now
you can
begin
connecting batteries of the same type in parallel
,
or series parallel
as shown in
the
illustration.
Connect each
battery to the chargin
g
bus with
8 awg wire.
Make sure all connections are clean and secure.
6
).
Now turn the charger back ON
and increase the current control. Remember
,
whatever the current is on th
e ammeter is
divided among the batteries.
The
amount
of current going to each battery will be
proportionate
to
it
s
depth of discharge.
7).
Your battery
group has reach
ed
full charge
when the voltage you selected is registered on the voltmeter, and the charge
current is below 5 amps. If current fails to fall below 5 amps, you probably have a battery with a dead or shorted cell that
is cont
inu
ing to draw current. T
his battery should be identified and remove
d
from the group to avoid gassing and over
heating.
Don t
remove the battery until the charger has be
en shut down.
ADDITIONAL INFORMATION
:
WARNING:
A group of batteries should never be lef
t unattended for long periods of time
.
It is impor
tant to
identify
and remove
bad batteries as described
above.
If you desire, you may lower the voltage into the float range and leave the group connected without fear of overcharging.
A float setting of around 13.3
-
13.5 should b
e safe for all batteries.
This charger requires some experience and trial and error
. After a few u
ses you will gain confidence
and understanding in
it
s capabilities.
WARNING:
Do not disconnect the DC
connections
when the charger
is on. The resulting arcing could cause
burning
of terminals, clips or
receptacles
.
Gel batteries
13.5
-
14.0
AGM batteries
14.
4 -
14.
7
Wet
s
tarting batterie
s
13.8
- 14.7
Wet
d
eep
c
ycle batteries
15.0
15.
8

MAINTE
NANCE:
Keep charger clean using a damp cloth only.
TROUBLE SHOOTING:
DANGER:
To reduce the risk of electric shock, always disconnect both the AC power supply cord and the
outp
ut
leads or connector before attempting any maintenance cleaning.
1).
POWER LIGHT DOES NOT COME ON WHEN
PO
WER IS APPLIED
Check connections. Make sure you are plugged into a live AC circuit. Check fuse. If blown, replace with one having
the same ratings.
3).
AC LINE FUSE OR CIRCUIT BR
EAKER BLOWS:
The
charger is shorted internally.
4).
NO POWER IS PRESENT ACROSS THE DC LEADS WHEN A VOLT METER IS
CONNECTED:
The charger will not turn on until
connected
to the battery. The battery must have at least 5 volts to turn the
charger on.
5).
BATTERIES DON T REC
EIVE FULL CHARGE
:
Your volt setting might be too low.
6).
NO VOLTMETER READING:
The sense leads on the dc cables may be broken.
QUI
CK CHARGE
QPA12v/50A
APU
Battery Charger
LIMITED WARRANTY
Quick Charge
C
orporation warrants the
QPA12v/50A
charger
for three (3) years from the date of purchase.
After the warranty period, chargers returned to the
factory for repair will be charged a minimum ra
te of $25.00. Charger will be returned, freight and repair charges, C.O.D. unless other arrangements have been
made
. This warranty covers all defects in manufacture and performance, provided the unit is operated in compliance with manufacture s operating i
nstructions.
For repairs to be made at the Quick Charge factory, a charger and/or component(s) should be sent, freight prepaid to Quick Charge at::
Quick Charge Corp.
1032 S.W. 22nd St
.
Oklahoma City, OK. 73109
Quick Charge, will at it s option, repair or replace the charger or component in question. The repaired item will then be returned, freight prepaid by Quick Charge.
This warranty is void if the charger or component have been alte
red, changed, or repaired by anyone not authorized by Quick Charge, or if the charger or
component, have been subjected to misuse, negligence, or harsh environmental conditions. (Except those chargers designed for such conditions)
If returning the charger
to the factory is not practical, replacement parts may be shipped to the customer for field repair at no charge. On parts such as circuit
boards, the customer will be required to return the board suspected to be defective to Quick Charge, freight prepaid.
If such defective parts are not returned, the
customer will be invoiced for the repair parts.
Field repairs are made at the user s own risk. Authorization by Quick Charge to repair refers to maintaining the
warranty only. Quick Charge assumes no responsi
bility or liability for field servicing, and shall not be responsible for incurred travel or labor charges.
Quick Charge corporation shall not in any event be liable for the cost of any special, indirect or consequential damages to anyone, product or thing
.
This warranty
is in lieu of all other warranties expressed or implied. Quick Charge neither assumes nor authorizes any representative or other person to assume for us any
liability in connection with the sale of this product.
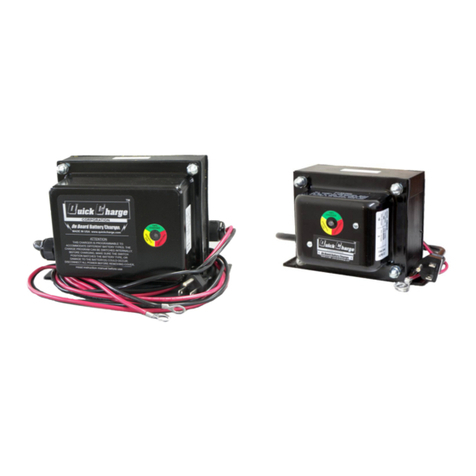
Table of contents
Other Quick Charge Batteries Charger manuals

Quick Charge
Quick Charge MB Multi MB1210X2 User manual

Quick Charge
Quick Charge QP User manual

Quick Charge
Quick Charge QPA6-127V/6A User manual

Quick Charge
Quick Charge SPARK EPA1205 User manual

Quick Charge
Quick Charge OBE User manual

Quick Charge
Quick Charge OB Series User manual

Quick Charge
Quick Charge SCP Programming manual

Quick Charge
Quick Charge BD6812 User manual

Quick Charge
Quick Charge OBET User manual

Quick Charge
Quick Charge OBAE User manual