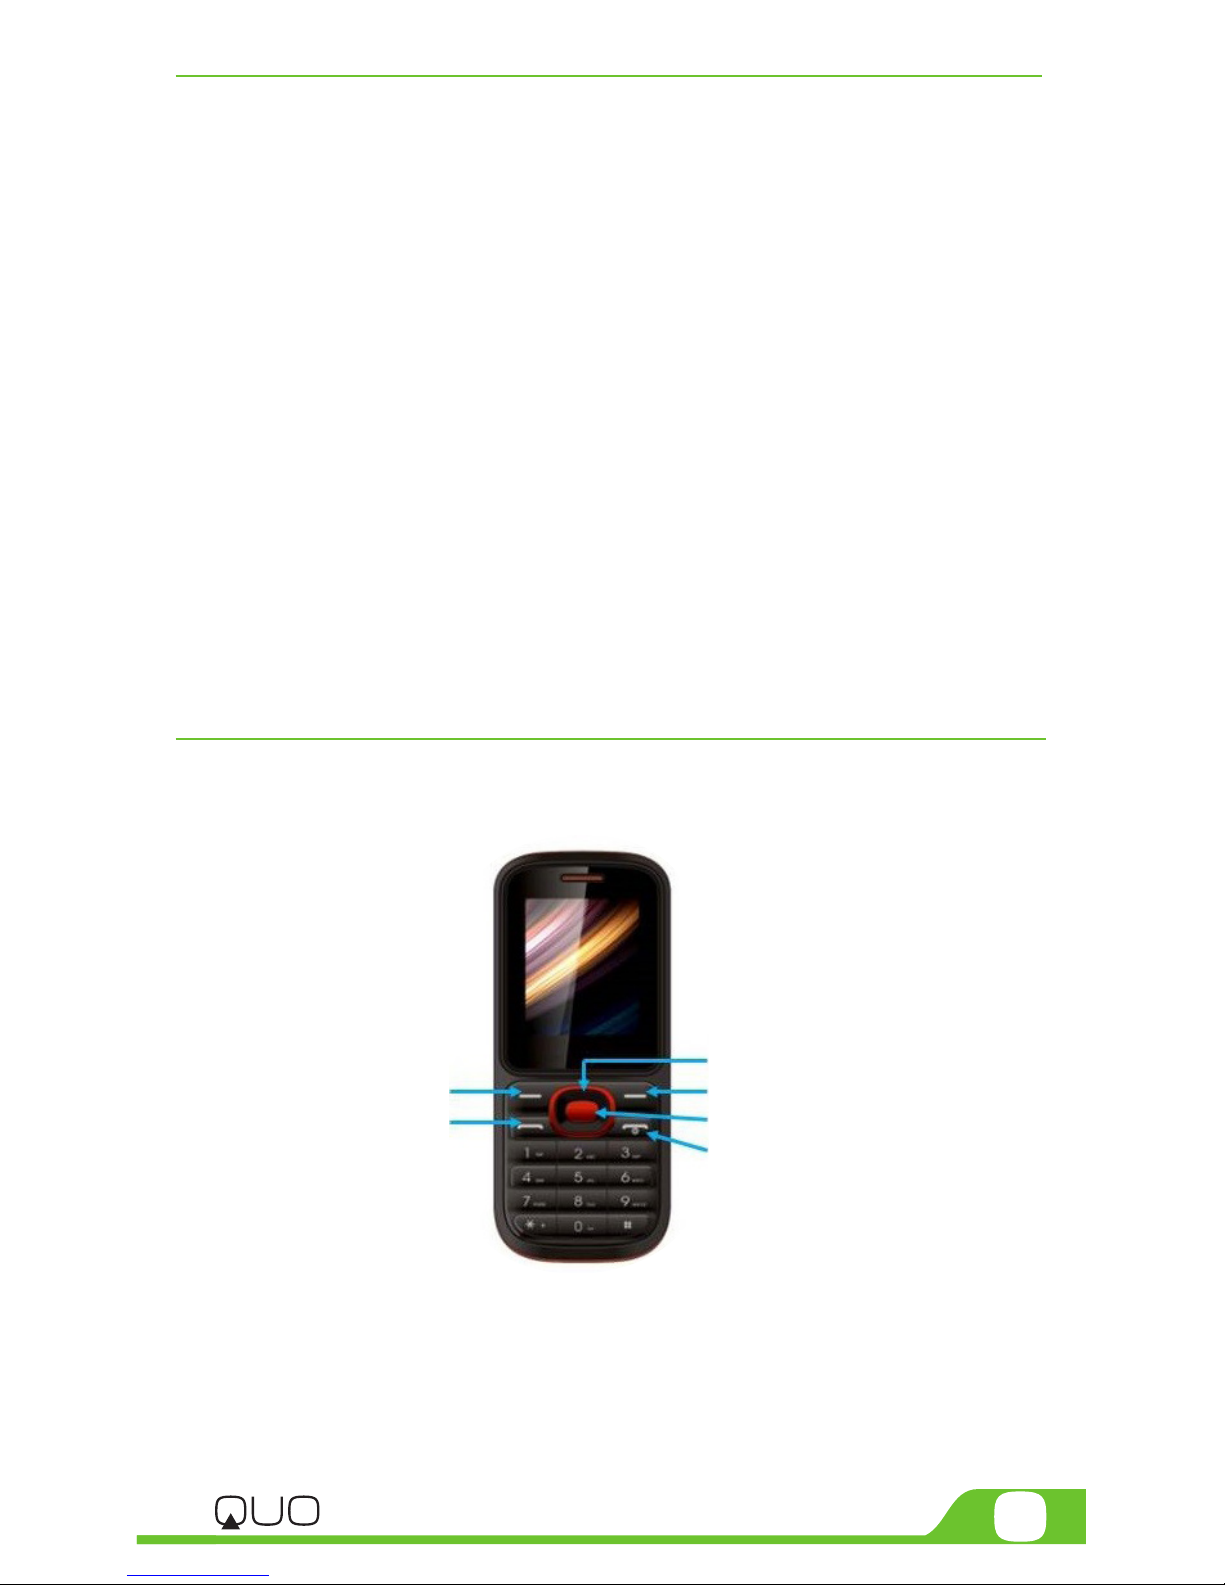
QUO INFINITY P1 User manual

mobility.com
User Manual

2
User Manual
Introduction
1. CHAPTER 1 • Basic Information
1.1 Brief introduction
2. CHAPTER 2 • Before Use
2.1. Name and explanation of each part
2.1.1 Appearance key map
2.1.2. Description of the standby pictures
2.1.3. Description of keys
2.2. Install SIM card and memory card
2.2.1. SIM card
2.2.2. Memory card
2.3. Battery
2.3.1. Install the battery
2.3.2. Charging
2.4. Security password
3. CHAPTER 3 • Quick User Guide
3.1. Dial a call
3.2. Reject a call
3.3. Receive a call
3.4. End a call
3.5. Emergency services
3.6. Dialed/Missed/Received/Rejected calls
3.7. Call forward
3.8. Call waiting
3.9. Call barring
3.10. Power o the phone
3.11. TF-ash card
4. CHAPTER 4 • Function Menu
4.1. Contacts
4.2. Message
4.3. Call logs
4.4. Settings
4.5. Naide zone
4.6. Multimedia
4.7. Tools
4.8. Proles
4.9. Internet
5. CHAPTER 5 • Text Input
6. CHAPTER 6 • Care and Maintenance

3
Infinit y P1
CHAPTER 1 Basic Information
1.1. Brief Introduction
Thanks for selecting Your QUO Innity P1 colour screen GSM/GPRS digital
mobile Phone. Through reading this manual, you can fully understand how
to use your mobile Phone, appreciate its complete function and simple
operating method.
The mobile Phone is designed and aimed at the GSM/GPRS network
environment and is a two Subscriber Identity Module (SIM) standby
phone. You can`t call the other SIM card when one SIM card is in a phone.
Besides basic call functions, the mobile Phone also provides many kinds
of practical functions, such as Caller ID, scene mode, message, audio and
video functions, camera and video, alarm clock, calculator, STK, time and
date, auto power-on and shut-down that is convenient for your work and
leisure activities. In addition the mobile Phone adopts a personalized
human-computer interface design and its total functions can meet your
dierent requirements.
The mobile Phone meets the GSM/GPRS criteria and has obtained the
certication of the relevant competent authority.
The manufacturing company reserves the rights to revise the contents of
this manual without prior notice.
CHAPTER 2 Before Use
2.1. Name and Explanation of Each Part
2.1.1 Appearance key map
2.1.2. Description of the standby pictures
Right soft Key
Left soft Key
OK Key
End Key
Navigation Key
Dial Key

4
User Manual
keys Function
Righ soft
key-Left
soft key.
1. Execute functions that the left-down/right-down
corner indicator shows.
2. In the standby mode, press Left Soft key to access
Menu, Right Soft key to access Contacts.
Navigation
key
Traverse text left, right, up or down by depressing the
navigation key in the relevant position. By depressing
the center button the selected function is activated.
Dial key 1. Press this key to dial or receive incoming calls.
2. When in the standby mode, press this key to access
Call Log. (Previously dialed calls)
Network signal strength: The larger quantity of stripes
displayed, the stronger the signal is. When SIM card (1)
Is inserted in card slot 1, the standby screen (shown in
yellow) will show the icon (1).
Network signal strength: The larger quantity of stripes
displayed, the stronger the signal is. When SIM card (2)
is inserted in card slot 2, the standby screen (shown in
yellow) will show the icon (2).
Battery strength: The strength remaining in the battery
is depicted by the bars shown in the battery icon.
Normal mode: When the phone is in normal mode, the
standby screen will show the depicted icon on the left.
Silent mode: When the phone is in silent mode, the
standby screen will show the depicted icon on the left.
Meeting mode: When the phone is in meeting mode,
the standby screen will show the depicted icon on
the left.
Indoor mode: When the phone is in Indoor mode, the
standby screen will show the icon depicted on the left.
Outdoor mode:
NO icon will be displayed when the phone is set in the
Outdoor mode.
2.1.3. Description of Keys:

5
Infinit y P1
OK key 1. In the dial panel mode, press this key to show or hide
dial panel.
2. A long press of this key (in standby interface) will turn
on/o the Torch light.
End key 1. Mainly used as power on/o.
2. Press to return to standby screen in any interface.
3. End calls or reject incoming calls.
Number key It is used to dial and input numbers or characters. Press
and hold Number key 1 or 2 to get through the preset
voice inbox.
* Key On the standby interface, input *; after inputting tel-
ephone number, if you want to input extension number,
press the asterisk key (*) twice, after the display screen
shows“+”, input your extension number.
#Key 1. In text editing interface, press “#”key to switch text to
the input method.
2. On the standby interface Press and hold “#” key to
transfer to the Normal/Silent/Meeting prole.
2.2. INSTALL SIM CARD AND MEMORY CARD
2.2.1. SIM Card
Before using the phone, you must insert your valid SIM (Subscriber
Identity Module) cards in the phone. SIM cards 1 and 2 shall be obtained
from the relevant preferred network providers.
(It is recommended that the SIM Cards being installed in the device shall be
obtained from diering network providers)
When you subscribe to a cellular network, you will receive a plug-in SIM
card complete with your subscription details which will include your
Personal Identity Number (PIN) and Personal Unlock Number (PUK).
Do not bend or damage your SIM card.
Avoid exposing your SIM card to static electricity, water or dirt.
Tips: Face the gold color contact point of the SIM card towards the cell
phone and push the SIM card into the slot and secure
2.2.2. Memory Card
Fit the TF card in place in the device in accordance with the peripheral shape
shown on the device.
Note: If the device does not read the memory card, please check if the card
is correctly secured in the phone.
2.3. BATTERY
2.3.1 Install the Battery
• Take o the rear cover of the mobile phone.

6
User Manual
• Place the end of the battery with its gold contacts in line with the battery
connector of the phone.
• Then gently press the battery inward to seat it in position.
• Gently replace the back cover of the device.
2.3.2 Charging
Insert the charger cable in the charging jack on the side of the phone.
Connect the charger to a standard wall outlet and the battery power icon
in the top-right corner of the screen will start scrolling. When the battery
bar stops scrolling, the phone is fully charged. The battery charger cable
can be removed.
Note: In order to ensure the integrity of the phone, please ensure that the
provided battery charger is used.
2.4. SECURITY PASSWORD
• PIN 1:
PIN (Personal Identication Number) is used to prevent your SIM card
from being used illegally.
PIN is provided with your SIM card.
If you input the incorrect PIN number three times, please input your
provided PUK number to unlock it.
Please contact your network provider for more details.
• PIN 2
You need to input PIN2 when entering some functions (such as call
charge); if you input wrong PIN2 for three times, you need to input the
provided PUK2 number to unlock it.
Please contact your network provider for more details.
• PUK
When changing the locked PIN, you need to input PUK (Personal Unlock
Key). PUK is provided with your SIM card. If it is not provided, please
contact your service provider.
If you input the wrong PUK ten times, the SIM card can’t be used again,
a new SIM card must be purchased in such instances. You PUK number
cannot be used with another SIM card, they are not interchangeable.
• PUK 2
When changing the locked PIN2, you need to input the PUK2 number.
If you input the wrong PUK2 ten times, the same circumstances apply
as per PIN 1 above.
Quick User Guide
CHAPTER 3 Quick User Guide
3.1. DIAL A CALL
In standby mode, press numerical keys to input phone number to dial.
When you nish inputting phone number, press the dial key to make the
call. If you’re making a long distance call, add the area code preceding the
telephone number. Press left soft key to access Options.

7
Infinit y P1
3.2. REJECT A CALL
You can press End key to reject an incoming call.
3.3. RECEIVE A CALL
When receiving an incoming call, the phone will give out the correspond-
ing prompt (such as vibration, ring tone, etc.) and the phone screen will
show the name and telephone number of the caller, if you have that
person on your contact log, if not, only the callers telephone number
will be displayed, at this time, you can press the Dial key to receive the
incoming call.
3.4. END A CALL
To end a call, press the End key
3.5. EMERGENCY SERVICES
You can directly dial an emergency service call without a SIM card.
Dierent networks use dierent emergency numbers; please consult your
network provider for more details.
3.6. DIALED/MISSED/RECEIVED/REJECTED CALLS
You can enter your phone call log to check the relevant details of dialed
calls, missed calls, received calls and rejected calls.
Note: The record of incoming calls from blacklist numbers will be saved
in Rejected Calls.
3.7. CALL FORWARD
After call forward function is started, according to different forward
conditions settings (Call Forward Unconditionally, Forward Busy, For-
ward No Answer, Forward Can Not Reach), you can select to switch the
incoming calls to voice inbox or other telephone numbers.
3.8. CALL WAITING
After call waiting function is started, when you are in a call, another call
can be answered. Both the still mode and the video capture mode have
additional settings. Still and video capture modes: slide the dot towards
the plus (+) sign to zoom in or towards the minus (-) sign to zoom out. You
may also tap the menu icon next to the minus sign to open options such as
White balance, Exposure, Store location and Time lapse interval, only for
video capture mode.
3.9. CALL BARRING
After call barring function is started, according to dierent restricted
condition settings (all the dialed calls, all the incoming calls, incoming calls
when roaming, dialed international calls, outgoing international calls when
roaming), you can restrict the calls under the corresponding conditions
(you need to contact the network operator for conditions).
3.10. POWER OFF THE PHONE
Click In the standby mode, press and hold End key to Power O the phone.
3.11. TFFLASH CARD
Insert the TF-Flash card into the phone from the back. This will expand the

8
User Manual
Flash memory of the phone.
Tap Multimedia menu, you can browse MP3, MP4, picture, video,
photograph etc.
CHAPTER 4 Function Menu
4.1. CONTACTS
This function could help you browse the name card holder, store, edit and delete
the names and phone numbers in the phone and SIM card. To facilitate the
management of the records, this phone sets the group function, collecting the
similar items into a group. The storage capacity of the SIM card varies and the
maximum storage capacity of this phone is 300 telephone numbers.
4.2. MESSAGES
Message service is actually a network service. This menu works soundly depend-
ing on the type of your SIM card and the services provided by the Network
Operator. Therefore, please check it before applying such function.
Write Messages:
Please have the service center number from the network operator before apply-
ing this function. The storage capacity of your SIM card depends on its type.
• Inbox
Saves the received SMS messages
• Outbox
Saves the SMS message not sent out successfully
• Drafts
Saves the unsent messages
• Send box
Saves the SMS message you sent successfully.
• Security inbox
Stores information for safety after moving from the inbox, to view you must
enter your password.
• Templates
Directly uses the default phrases when writing the messages.
e.g. In Meeting
• Broadcast message
Network service enables you to receive all kinds of text messages, such as
news, weather reports, trac conditions, etc. For the details, please refer to
your network provider.
• Voice mail server
This is similar to an answering machine. This service will transfer the incoming
calls that you fail to answer to your Voice Mail server, where the caller can
leave a voice message. You are reminded of a message, if any, in the mailbox
by a notication. This function is part of the mating software provided by the
network operator, which needs to be registered, please refer to your network
operator for the details.
On the interface of the message list, press“options”to operate the functions:

9
Infinit y P1
Settings: To set relevant parameters for the short messages, push messages
and select other settings.
Message capacity: Shows the memory capacity of the messages.
4.3. CALL LOGS
• Call logs
Displays your recent call logs
• Missed calls
Displays the list of your recent missed call numbers. The operation is the same
as Dialed calls.
• Dialed calls
Displays the list of your recent dialed numbers
• Received calls
Displays the list of your recent answered numbers. The operation is the same
as the Dialed calls.
• Rejected calls
Displays the incoming call records in the blacklist settings (blocked calls).
• Delete all
You can delete all the records of the Dialed, Received, Missed and Rejected
calls.
• Call timers (call duration time)
Displays information details of SIM1/SIM2: Last Call, Received Calls, Dialed
Calls, and All Calls
Press left soft key to“Reset”.
• GPRS counter
Displays information details of SIM1/SIM2: Last sent, Last received, Total sent,
and Total received. Press left soft key to“Reset”.
4.4. SETTINGS
You can customize the settings, such as time and date, language, call settings
etc.
• Call settings
Multi-SIM: including Standby mode, Reply by original SIM, Set SIM name.
Call Divert: When“call divert”function is activated, you can transfer the
incoming calls to voice inbox or other phone number according to the tasked
“call divert”conditions.
Call waiting: You can start up or shut down the function. When it is started
up, even when you are making a call, you can also receive another income call.
Call Barring: All outgoing calls, incoming calls, roaming incoming calls, inter-
national outgoing calls, roaming international outgoing calls can be barred.
Hide ID: Set the display mode of the phone number.
Others: The setting options include Call time minute reminder, Auto redial,
Vibration when connected, Reply SMS after reject, Auto record voice call.
• Phone settings
Date & time:You can set up the date and time on the phone as well as their
display mode. (Analogue or Digital clock)
Language settings: You can select phone language.

10
User Manual
Shortcut settings: You can set the menu when you press navigation button to
enter in standby interface.
Auto Power on/o: You can set the time and repeat mode of power-on and
power-o.
Power saving mode: When setting pattern set to save electricity mode. And
can view your battery power.
Restore factory settings: You can restore the phone settings back to factory
settings. The default code for restoring factory settings is: 1234.
• Display settings
Animation eect: Including Power on display, Power o display.
Wallpaper Settings: Supported: Static wallpaper and more pictures.
Idle display settings:
Contrast:Adjust the screen backlight.
Backlight: Adjust the backlight time.
Keypad backlight time: Adjust the keypad backlight time.
• Security
PIN: Start and close of PIN code and the modication of PIN.
Modify PIN2: Modication of PIN2 code.
Phone locked:Open or close the phone lock. The default password is“1234”.
Modify the cell phone password: Change the phone and privacy password.
Privacy: Set the privacy protection. The default password is“1234”.
Auto keypad lock: Set the time of mobile phone for automatically locked.
Lock screen by end-key: Manually lock the screen by pressing the end key.
Choose open or closed by red key locking function
Fixed dialing: Start and close of the xed dialing, and management of the
xed dialing list
Blacklist: Set the Settings of the blacklist and management of the list.
• Connections
Network account: Manage internet account, and support edit and delete.
GPRS Service: Choose turn“On or O”GPRS service.
Data connection settings: Select to connect as needed or stay connected.
Network selection: Select to automatically or manually search for networks.
4.5. NAIDE ZONE
• Snake
This mobile phone provides a snake game. Please see the specic operations
within the game operating instructions.
4.6. MULTIMEDIA
• Camera
The device is equipped with a webcam with high pixels. You can take photos at
any time and save the photos in the device or SIM card.
Image viewer: Enter into image browser list.
DV/DC mode: Through this function, you can switch to picture or video mode.
Eect: The special eects can be classied into: normal, black and white, blue,
green, yellow, red, canvas and negative.
Contrast: Six levels of contrast are available.
Brightness: Six levels of brightness are available.
White balance: You can set as automatic white balance, incandescent lamp,

11
Infinit y P1
uorescent lamp, sunlight and cloudy.
Settings: Sets the size, quality, banding, shutter sound, auto save, storage,
continuous shot etc.
• Image
Check the pictures and stores photos in the memory card through the photo
album.
Edit the opened pictures, press options, can be set as wallpaper, Set as contact
icon, Delete, Share, Rename, Slide play, or Details.
• DV
The device is equipped with a video capture so that you can chat with your
friends through it. A driver needs to be installed when the video capture func-
tion is used. The details can be found in“driver installation guide”.
View video directory: Enter into videos list.
DC/DV mode: Through this function, you can switch to picture or video
mode.
Eect: The special eects can be classied into: normal, black and white, blue,
green, yellow, red, canvas and negative.
Contrast: Six levels of contrast are available.
Brightness: Six levels of brightness are available.
Settings: Including size, banding, naide player, video format, storage etc.
• Video
This phone supports the video format of 3GP, AVI and MP4.
Enter the video play list interface, press left soft key, you could go on the
following operations.
• NAIDE player
This phone can play MP3’s stored in the phone memory and support the
background play. Press the left soft key or “OK” key to enter and use the
Navigation keys to operate the MP3 player. According to * and adjust the
volume # key. Press left soft key to access Options:
Music list: Display all the MP3’s or the play list you have saved.
Add: To save the play list, to new play list, to music mark
Set as ring tone: Set the selected MP3 as the call ring tone or alarm ring
tone of the incoming call.
Shue: Select the play mode shue
Repeat: Select the play mode repeat
Settings: Set the music equalizer or BT stereo output or BT stereo
headset.
Open review: You can choose to open or close A-B answer read function
Exit: Return to previous menu.
• FM radio
You can listen to FM radio freely. Enter the radio interface. Press the left
and right navigation keys to switch channels. Press the ok key to stop/
play FM radio. Press the * and # keys to adjust the volume.
On the interface of the Radio, press left soft key so that you can enter the
options menu and do operations as follows.
•Recorder
Use this function you can record or listen to your own record. The record

12
User Manual
le format: amr, wav.
• My files
My le manager can manage the les in the phone and memory card.
4.7. TOOLS
• Bluetooth
Open/Close Bluetooth: You can choose to “activate” or “deactivate”
Bluetooth.
Bluetooth visibility: You can choose “show phone”or “hide”Bluetooth. If
the Bluetooth is hidden, others cannot search your phone.
Paired device: You can search dierent Bluetooth devices and nd
compatible ones (as long as the PIN codes of two Bluetooth devices are
identical with each other, the match will be successful.) The PIN code of
Bluetooth earphone is dierent due to dierent types, and you can nd
the code in the operating manual of the Bluetooth earphone.
Device name: On Bluetooth, you can change the name of the phone.
See “rename phone”
Bluetooth le storage: You can choose to save the Bluetooth le to
phone or memory card.
Help: You can view the operating instructions of Bluetooth.
• Calculator
The function will make your device a calculator with which you can carry
out simple mathematical calculations.
• Calendar
You can use this feature to view the year, date and solar term easily. Use
up/down/left/right direction key to navigate other dates.
• Alarm
You can edit the alarm time, ringtone and repeated ring modes.
In “alarm edit” mode, you can scroll the up or down direction keys, when
the cursor goes to the desired option, press “OK”, then you can select
desired settings.
• Torch
You can turn the torch light “On/O”in settings or long press“OK key” in
standby interface.
• STK
Enter STK submenu, you can use the additional services that the network
service operator provides.
4.8. PROFILES
The preset modes are Normal mode, Silent mode, Meeting mode, Indoor
mode, Outdoor mode, Earphone mode, Bluetooth mode and Flight mode.
An additional eight custom proles can be created, and users can set the
parameters of the proles.
Note: The preset proles do not support delete, while the custom proles
support delete.
More Functions
Choose one mode, to open the option menu:
Rename: Renames the current mode.

13
Infinit y P1
Ring settings: Sets the SIM1/SIM2 call ring and message tones.
Adjust volume: Adjust volumes for Caller ring tone, Message ring tone,
Alarm & calendar ring tone, call volume and Power ring tone.
Ring type: Set the SIM1/SIM2 call alert and message alert, Alarm &
calendar reminder tone.
Other alert rings: Set the other alert tones, such as Key tone, Battery low
alert, Power ring tone, Dial tone.
4.9. INTERNET
The device is compatible with WAP service. You can visit various WAP
services, for instance, news, weather forecast etc. The services are specially
designed for the device and are maintained by WAP service supplier.
WAP service requires network backup. You can consult the network operator
or service supplier about the availability and rates of WAP services.
Select SIM1/SIM2 to enter:
CHAPTER 5 Text Input
The device provides several text input modes so that you can write text
or input data in your“contacts”, edit“contacts” record, search inputs and
write SMS’s.
In “text input” mode, if you want to change the input way, you can press“#”
key. The selected input way will appear on the top left corner of the screen.
Letter (Capital, Normal):
Enter edit page, press “#”and switch the input mode to “letter”, then press the
keys on keypad, selected letters will appear on the screen.
Press the number key you can get the rst letter marked on the key, press
twice quickly you can get the second letter marked on the key. Similarly, if
the letters you want to input have the same key with the former letter, please
wait until the cursor appears again, and then input the new letter.
For example, if you want to input“ok”, you need to press the “6” key three
times continuously and get“o”, then press the key”5” twice, “ k” will appear on
the screen. Press right soft key, you can delete the text you input.
Number:
Enter“edit” mode, press“ key”you can change the input mode to “number”.
Then press the keys, number will appear on the screen. The key 0-9 sepa-
rately represents the gure from 0 to 9. You can press corresponding keys to
get the desired numbers. Press right soft key you can delete the
number you input.
CHAPTER 6 Care and Maintenance
Maintenance of battery:
• Your device is powered by a rechargeable battery. It is necessary to have
the battery charged when it is low. The full performance of a new battery
is achieved only after it has been fully charged.
• Unplug the charger from the electrical plug and the device when not
in use. Do not leave a fully charged battery connected to a charger over a

14 User Manual
prolonged period, since overcharging may shorten its lifespan.
• Temperature tends to aect the limit of battery to be charged. Therefore,
it is necessary for the battery to be cooled or warmed before it is charged.
If the temperature of battery exceeds 40ºC , the battery cannot be
charged.
• Use the battery only for its intended purpose and avoid short-circuiting.
Accidental short-circuiting can occur when a metallic object causes direct
connection of the positive (+) and negative (-) terminals of the battery.
• Do not use damaged batteries.
Leaving the battery in hot or cold places will reduce the capacity and
lifespan of the battery. A device with a hot or cold battery may not work
temporarily, even when the battery is fully charged.
• Do not dispose of batteries in a re as they may explode. Dispose of
batteries according to local environmental regulations.
Care of maintenance of your device:
The suggestions below will help you protect your warranty coverage.
• Keep the device and accessories out of reach of small children.
• Keep the device dry. All types of liquids or moisture will corrode the
electronic circuits.
• Do not store the device in hot areas. High temperatures can shorten the
lifespan of electronic device and warp or melt certain plastics.
• Do not attempt to open the device other than as instructed in this guide.
Non-professional handling may damage the device.
• Do not use harsh chemicals or strong detergents to clean the device.
• Use only the supplied or an approved replacement attachment, for the
unauthorized ones could invalidate the warranty.
Screen: 1.77”
CPU: MTK6261M
Core model: Single Core 400MHz
RAM: 24M
Memory storage: 32M
External storage: Up to 32GB
Flash light: Torch
Bluetooth: Yes 2.0
Vibrator: Yes
Video: Yes
You can visit www.QUOmobility.com to nd more info about this phone
and also get any required support.
1 Year Limited Warranty
Audio: Yes
FM: YES (Require earphones as antenna)
Cellular: GSM 850/900/1800/1900
Sim slot: Dual Standard
Battery: 750mAh or higher
Accessories: Adapter, UserManual,
StandardBox , Earphone (with
Microphone)
Weight: 70 gr
Dimension: 113*48.5*13.1mm

14 Manual del Usuario
introducido.
Capitulo 6 Cuidado y Mantenimiento
Mantenimiento de la batería:
• Su dispositivo es alimentado por una batería recargable. Es necesario
tener la batería cargada cuando es baja. Se logra el rendimiento
óptimo de una batería nueva sólo después de que se haya cargado
completamente.
• Desconecte el cargador del enchufe eléctrico y del dispositivo cuando
no esté en uso. No deje una batería completamente cargada conectada a
un cargador durante un periodo prolongado, ya que la sobrecarga puede
acortar su vida útil.
• La temperatura tiende a afectar el límite de batería a cargar. Por lo tanto,
es necesario que la batería esté fria o tibia antes de que sea cargada. Si la
temperatura de la batería excede de 40ºC, la batería no puede ser cargada.
• Utilice la batería sólo para la nalidad prevista y evitar cortocircuitos. Un
cortocircuito accidental puede ocurrir cuando un objeto metálico ocasiona
la conexión directa de los terminales positivo (+) y negativo (-) de la batería.
• No utilice baterías dañadas.
• Si deja la batería en lugares calientes o fríos reducirá la capacidad y vida
útil de la batería. Un dispositivo con una batería caliente o fría puede dejar
de funcionar temporalmente, aun cuando la batería está completamente
cargada.
• No arroje las baterías al fuego, ya que pueden explotar. Elimine las baterías
conforme a las regulaciones ambientales locales.
Cuidado de mantenimiento de su dispositivo:
Las siguientes sugerencias le ayudarán a proteger la cobertura de la
garantía.
• Mantenga el dispositivo y los accesorios fuera del alcance de los niños.
• Mantenga el dispositivo seco. Todos los tipos de líquidos o humedad cor
roen los circuitos electrónicos.
• No guarde el dispositivo en lugares calurosos. Las altas temperaturas
pueden acortar la vida útil de los dispositivos electrónicos y deformar o
derretir algunos plásticos.
• No intente abrir el dispositivo de una forma distinta a las instrucciones de
esta guía. La manipulación no profesional puede dañar el dispositivo.
• No utilice productos químicos o detergentes fuertes para limpiar el
dispositivo.
• Utilice únicamente la suministrada o un accesorio de repuesto aprobado,
para los no autorizados podrían invalidar la garantía.
Para cualquier información o soporte requerido favor conectarse vía web a
nuestra pagina www.QUOmobility.com
1 Año de Garantia Limitada

13
Infinit y P1
Nota: Los perles predenidos no se pueden borrar, mientras que los
perles personalizados permiten borrar.
Más funciones: Elija un modo, para abrir el menú de opciones:
Renombrar: Renombra el modo actual.
Conguración del tono: establece los tonos de las llamada SIM1/SIM2 y
de los mensajes.
Ajustar el volumen: ajuste el volumen de tono de llamada, tono de
mensaje, tono de alarma y calendario, volumen de llamada y tono de
Encendido \ establecer la alerta de llamada SIM1/SIM2 y la alerta de
mensaje, el tono de recordatorio de la alarma y el calendario.
Otros timbres de alertas: establezca otros tonos de alarma, tales como el
tono de las Teclas, la alerta de batería baja, el tono de llamada o discado,
el tono del Encendido.
4.9. Internet
El dispositivo es compatible con el servicio WAP. Usted puede visitar diversos
servicios WAP, por ejemplo, noticias, previsión del tiempo etc. Los servicios
están especialmente diseñados para el dispositivo y son mantenidos por el
proveedor deservicios WAP. El Servicio WAP requiere el respaldo de la red.
Usted puede consultar el operador de red o proveedor de servicios acerca
de la disponibilidad y tarifas de servicios WAP. Seleccionar SIM1/SIM2 para
entrar.
Capitulo 5 Entrada de Textos
El dispositivo proporciona varios modos de entrada de texto para que usted
pueda escribir texto o ingresar datos en sus “contactos”, editar registro de
“contactos”, buscar entradas y escribir mensajes SMS. En el modo “texto”, si
usted desea cambiar el modo de entrada, usted puede presionar la tecla
“#”. La manera de entrada seleccionada aparecerá en la esquina superior
izquierda de la pantalla.
Letras (Capital, Normal):
Entre en la página Editar, pulse la tecla “#” y cambie el modo de entrada
a “letra”, luego presione las teclas en el teclado, las letras seleccionadas
aparecerán en la pantalla.
Pulse la tecla del número se puede obtener la primera letra marcada en
la tecla, pulse dos veces rápidamente se puede obtener la segunda letra
marcada en la tecla. Del mismo modo, si las letras que desea entrada tienen
la misma Tecla que la letra anterior, por favor espere hasta que el cursor
aparezca de nuevo, y luego ingrese la nueva letra.
Por ejemplo, si usted desea introducir “ok”, usted necesita pulsar la Tecla “6”
tres veces de forma continua y obtener“o”, a continuación, pulse la tecla “5”
dos veces, “k” aparecerá en la pantalla. Pulse la tecla suave derecha, usted
puede borrar el texto introducido.
Número:
Introduzca el modo “editar”, pulse la tecla “#” usted puede cambiar el
modo de entrada a “número”. A continuación, pulse las teclas, aparecerá el
número en la pantalla. Las teclas 0-9 representan por separado la cifra del
0 al 9. Puede pulsar las teclas correspondientes para obtener los números
deseados. Presionando la tecla suave derecha usted puede borrar el número

12 Manual del Usuario
OK para detener / reproducir la radio FM. Pulse las teclas * y # para
ajustar el volumen.
En la interfaz de la radio, pulse la tecla suave izquierda para que pueda
entrar en el menú de opciones y hacer las operaciones de la siguiente
manera.
• Grabadora: Utilizando esta función usted puede grabar o escuchar su
propia grabación. El formato del archivo de registro: amr, wav.
• Mis archivos: Mi gestor de archivos puede administrar los archivos en
el teléfono y en la tarjeta de memoria.
4.7. Herramientas
• Bluetooth:
Abrir/cerrar Bluetooth: Usted puede elegir“activar”o “desactivar”
Bluetooth.
Visibilidad de Bluetooth: usted puede elegir “Mostrar teléfono” u
“ocultar” Bluetooth. Si el Bluetooth está oculto, otros no pueden buscar
su teléfono.
Dispositivo emparejado: puedes buscar dispositivos Bluetooth distintos
y encontrar algunos compatibles (mientras los códigos PIN de dos
dispositivos Bluetooth son idénticos entre sí, la armonización tendrá
éxito.) El código PIN del auricular Bluetooth es diferente debido a los
diferentes tipos, y usted puede encontrar el código en el manual de
funcionamientode los auriculares Bluetooth.
Nombre de dispositivo: en Bluetooth, usted puede cambiar el nombre
del teléfono. Vea “renombrar teléfono”
Almacenamiento de archivos Bluetooth: Usted puede elegir guardar el
archivo de Bluetooth en el teléfono o en la tarjeta de memoria.
Ayuda: Puede ver las instrucciones de uso de Bluetooth.
• Calculadora: La función hará de su dispositivo una calculadora con la
cual puede realizar cálculos matemáticos simples.
• Calendario: Usted puede utilizar esta función para ver el año, la fecha
y el término solar fácilmente. Use las Teclas de dirección arriba/abajo/
izquierda/derecha para navegar en otras fechas.
• Alarma: Usted puede editar la hora de alarma, el tono de llamada y
modos de tonos repetidos. En el modo de “edición de alarma”,
usted puede desplazar hacia arriba o hacia abajo las teclas de
dirección, cuando el cursor pasa a la opción deseada, pulse“OK”,
entonces usted puede seleccionar la conguración deseada.
• Linterna: Usted puede activar la luz antorcha “Encendido/Apagado”
desde herramientas o presionando por un tiempo largo la TECLA OK en
la interfaz principal.
• STK: Entrar en el submenú de STK, usted puede utilizar los servicios
adicionales que ofrece el operador de servicio de red.
4.8. Perfiles
Los modos predenidos son modo Normal, modo Silencioso, modo de
Reunión, modo de Interior, modo al aire libre, modo de Auricular, modo
Bluetooth y modo de vuelo. Pueden crearse ocho perles personalizados
adicionales, y los usuarios pueden establecer los parámetros de los
perles.

11
Infinit y P1
Visor de imágenes: entrar en la lista del navegador de imágenes.
Modo DV/DC: mediante esta función, usted puede cambiar a modo de
foto o video.
Efecto: Los efectos especiales pueden clasicarse en: normal, blanco y
negro, azul, verde, amarillo, rojo, lienzo y negativo.
Contraste: Seis niveles de contraste están disponibles.
Brillo: Existen seis niveles de brillo.
Balance de blancos: usted puede denir como automático el balance de
blancos, la lámpara incandescente, la lámpara uorescente, luz del sol
y nublado.
Ajustes: Establece el tamaño, calidad, bandas, sonido del obturador, auto
guardar, almacenaje, disparos continuos, etc.
• Imagen: Mire las fotos y la lista de fotos en la tarjeta de memoria a través
del álbum de fotos. Editar las imágenes abiertas, pulse Opciones, puede
establecerse como fondo de pantalla, establecerse como icono de
contacto, eliminar, compartir, renombrar, juego de diapositivas o detalles.
• DV: Ver video directorio: entrar en lista de vídeos.
Modo DC/DV: mediante esta función, usted puede cambiar a modo de
foto o video.
Efecto: Los efectos especiales pueden clasicarse en: normal, blanco y
negro, azul, verde, amarillo, rojo, lienzo y negativo.
Contraste: Seis niveles de contraste están disponibles.
Brillo: Existen seis niveles de brillo.
Ajustes: Incluyendo tamaño, bandas, naide jugador, formato de vídeo,
almacenaje etc.
• Video
: Este teléfono es compatible con el formato vídeo 3GP, AVI y MP4.
Entrar en la interfaz de lista de reproducción de vídeo, oprima la tecla
izquierda inferior, usted podría seguir a las siguientes operaciones.
• Music Player: Este teléfono puede reproducir MP3 almacenados en
la memoria del teléfono y apoyar la reproducción de fondo. Presione la
tecla izquierda inferior o la tecla “OK” para introducir y utilizar las teclas de
navegación para operar el reproductor de MP3. Utilice * y ajuste el volume
con la Tecla #. Oprima la tecla izquierda inferior para acceder a opciones:
Lista de música: Mostrar todo el MP3 o la lista de reproducción que usted
ha guardado.
Añadir: Para guardar la lista de reproducción, para una nueva lista de
reproducción, para marcar música.
Establecer como tono de timbre: establecer el seleccionado MP3 como
tono de timbre o tono de alarma de la llamada entrante.
Shue: Seleccione el modo aleatorio de reproducción.
Repetir: Seleccionar el modo de repetición de reproducción.
Ajustes: Ajuste el ecualizador musical o salida estéreo BT o auriculares
estéreo BT.
Abrir revisión: usted puede elegir abrir o cerrar la función leer
respuesta A-B.
Salida: Volver al menú anterior.
• Radio FM (requiere de accesorio externo): Puede escuchar la
radio FM libremente. Introduzca la interfaz de radio. Presione la tecla
de navegación derecha e izquierda para cambiar de canal. Pulse la tecla

10 Manual del Usuario
de repetición de encendido y apagado.
Modo de ahorro de energía: cuando el patrón de ajuste se establece para
salvar a modo de electricidad. Y puede ver la energía de su batería.
Restaurar conguraciones de fábrica: usted puede restaurar la congura-
ción del teléfono a conguración de fábrica. El código por defecto para
restaurar la conguración de fábrica es: 1234.
• Configuración de visualización
Efecto de animación: incluyendo el encendido y apagado de la pantalla.
Conguración de fondo de pantalla: Apoyos: fondos estáticos y más fotos.
Conguración de la pantalla en reposo: Cambio conguracion
Contraste: Ajustar la retroiluminación de la pantalla.
Contraluz: Ajustar el tiempo de luz de fondo.
Tiempo de retroiluminación del teclado: ajustar el tiempo de luz de fondo
del teclado.
• Seguridad
PIN: Inicio y cierre de código PIN y la modicación del PIN.
Modicar PIN2: Modicación del código PIN2.
Teléfono bloqueado: Abrir o cerrar el bloqueo del teléfono. La contraseña
predeterminada es “1234”.
Modicar la contraseña de teléfono celular: cambiar la contraseña del
teléfono y de la privacidad.
Privacidad: Establece la protección de la privacidad. La contraseña
predeterminada es”1234”.
Auto bloqueo del teclado: jar la hora del teléfono móvil para bloquearse
automáticamente.
Bloqueo de pantalla por la Tecla Finalizar: bloquear manualmente la
pantalla presionando la Tecla nalizar. Elegir abrir o cerrar por la Tecla roja
de la función de bloqueo.
Marcación ja: Inicio y cierre de la Marcación ja y manejo de la lista de
Marcación ja.
Lista negra: Establecer la conguración de la lista negra y el manejo de
la lista.
• Conexiones
Cuenta de la red: administrar la cuenta de internet y apoyar, editar y borrar.
Servicio GPRS: Elija cambiar a encendido o apagado el servicio GPRS.
Conguración de conexión de datos: Seleccione esta opción para conectar
según sea necesario o manténgase conectado.
Selección de red: seleccione manualmente o automáticamente búsqueda
para redes.
4.5. Zona Juego
• Serpiente (Snake)
Este teléfono móvil proporciona un juego de serpiente.
Por favor vea las operaciones especícas dentro del juego para las instruc-
ciones de uso.
4.6. Multimedia
• Cámara: El dispositivo está equipado con una cámara. Usted puede tomar
fotos en cualquier momento y guardar las fotos en el dispositivo o en la
tarjeta SIM.

9
Infinit y P1
llamadas pérdidas. La operación es la misma que Llamadas realizadas
(marcadas).
• Llamadas marcadas
Muestra la lista de los últimos números marcados.
• Llamadas recibidas
Muestra la lista de los números de sus últimas llamadas contestadas. La
operación es igual que las llamadas marcadas
• Llamadas rechazadas
Muestra los registros de llamadas entrantes en la conguración de lista negra
(llamadas bloqueadas).
• Borrar todo
Usted puede borrar todos los registros de las llamadas hechas, recibidas,
perdidas y rechazadas.
• Cronómetros (tiempo de duración de la llamada)
Muestra los detalles de la información de las tarjetas SIM1/SIM2: Ultima
llamada, llamadas recibidas, llamadas hechas y todas las llamadas.
Oprima la tecla suave izquierda para reajustar o “RESET”.
• Contador de GPRS
Muestra los detalles de la información de las tarjetas SIM1/SIM2: último
enviado, último recibido, total enviado y total recibido. Oprima la tecla suave
izquierda para reajustar o “RESET”.
4.4. Ajustes (Configuración)
Usted puede personalizar la conguración, tales como fecha y hora, idioma,
conguraciones de llamadas, etc.
• Configuraciones de llamada
Multi-SIM: incluyendo el modo de espera, responder por el original SIM,
establecer el nombre SIM.
Desvío de llamada: Cuando se activa la función “desvío de llamadas”, usted
puede transferir las llamadas entrantes a la bandeja de entrada de voz u
otro número de teléfono de acuerdo a las condiciones asignadas para el
“desvío de llamadas”.
Llamada en espera: puede encender o apagar la función. Cuando se inicia,
incluso cuando usted está haciendo una llamada, usted también puede
recibir otra llamada.
Restricción de llamadas: Todas las llamadas salientes, llamadas entrantes,
llamadas entrantes con roaming, llamadas internacionales salientes,
llamadas internacionales salientes con roaming pueden ser bloqueadas.
Ocultar ID: Congurar el modo de visualización del número de teléfono.
Otros: Las opciones de conguración incluyen recordatorio de minutos
de tiempo de llamada, remarcado automático, vibraciones cuando está
conectado, SMS de respuesta después de rechazar llamado, auto grabar
llamada de voz.
• Ajustes del teléfono
Fecha y hora: Usted puede congurar la fecha y hora en el teléfono, así
como su modo de visualización. (Reloj Digital o analógico)
Conguración de idioma: usted puede seleccionar el idioma del teléfono.
Conguración de acceso directo: usted puede jar el menú cuando pre-
siona el botón de navegación para entrar en la interfaz de reserva.
Automático de encendido/apagado: puede establecer el tiempo y el modo
Table of contents
Other QUO Cell Phone manuals