Version 22.08.2018 HW CAM(V31)/(V22) RL2-RLINK
Contents
1. Prior to installation
1.1. Delivery contents
1.2. Checking the Interface compatibility of vehicle and accessories
1.3. Boxes and connectors
1.3.1. Video-interface
1.3.1.1. Dip-switch settings
1.3.1.2. Enabling the interface’s video inputs (dip 2-3)
1.3.1.3. Rear-view camera setting (dip 5)
1.3.1.4. Monitor Selection (dip 6-8)
1.3.2. CAN-box
2. Installation
2.1. Place of installation
2.1.1. Place of installation –Video interface and CAN-box
2.1.2. Place of installation –daughter PCB
2.2. Connection scheme
2.3. Connecting video-interface and CAN-box
2.4. Installation of ribbon cables into monitor panel
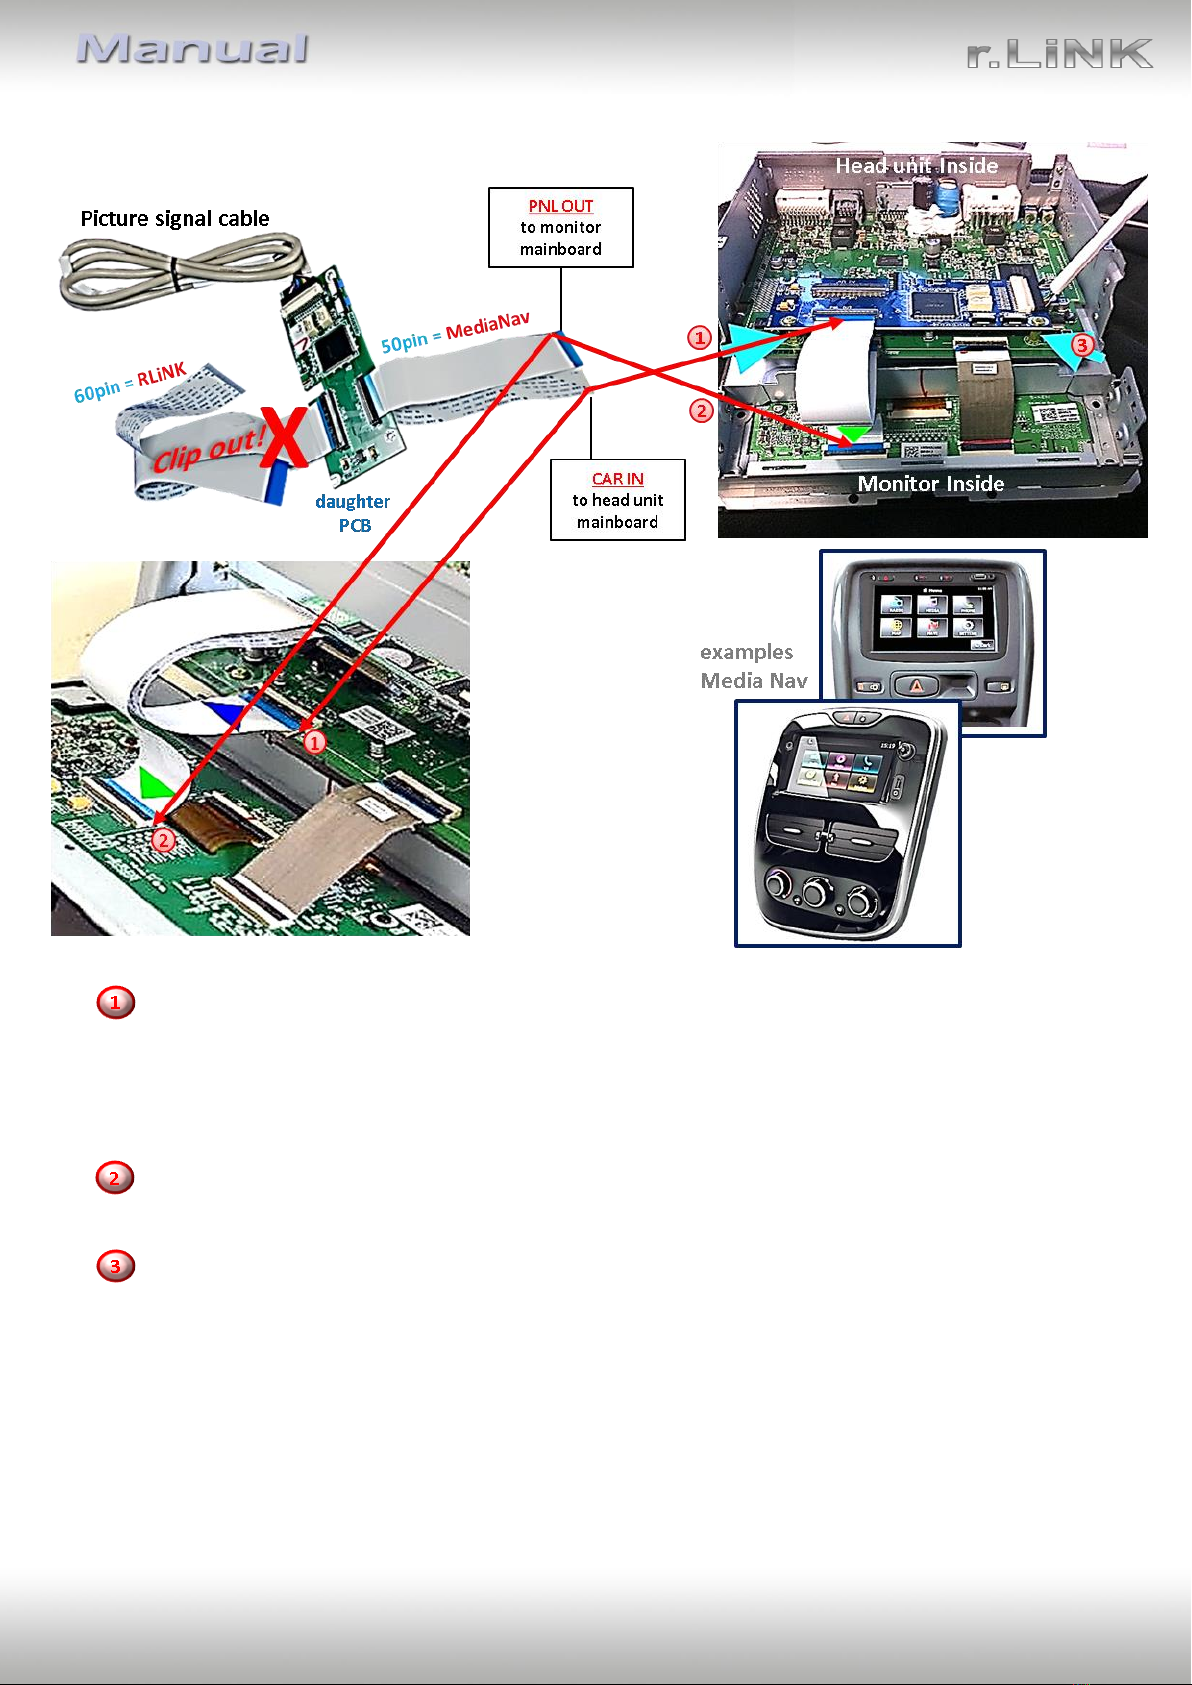
2.4.1. 50Pin-Version (MediaNav)
2.4.1.1. Warning notes, concerning the installation of ribbon cables
2.4.2. 60Pin-Version (RLink)
2.4.2.1. Warning notes, concerning the installation of ribbon cables
2.5. Connection to Head-Unit –Power / CAN
2.5.1. MediaNav with 50pin Ribbon cable
2.5.2. RLink with 60pin Ribbon cable
2.6. Connection of video sources
2.6.1. Audio-insertion
2.6.1.1. After-market rear-view camera
2.6.1.2. Case 1: CAN-box detects reverse gear
2.6.1.3. Case 2: CAN-box does not detect reverse gear
2.7. Connecting video-interface and keypad
2.8. Picture settings and parking guide lines
3. Interface operation
3.1. By VOL-Button
3.2. By external keypad
4. Specifications
5. Frequently asked questions
6. Technical support