Rac RAC01 User manual


Introduction
Thank you for choosing the RAC01 Digital CarCam. Please read these instructions
carefully before use.
Unpacking
Unpack the contents of the box and ensure the following components are present.
RAC01 Digital CarCam
Mounting Bracket
Cigar Lighter Power Adaptor
USB Cable
4Gb TF Memory Card (Micro SD)
User Guide
Identification of Controls
1. Menu
2. Photo
3. OK / File-Lock
4. Camera (LENS)
5. LED Highlight
6. REC indicator light
7. Charging indicator light
8. MIC indicator light
9. REC / Up
10. MIC / Down
11. MIC
12. TF / microSD card slot
13. USB interface
14. Reset
15. On / Off button
16. Speaker
17. Heat dissipation hole 1
18. Holder
19. Heat dissipation hole 2
20. TF / microSD card
12 16 173 20
654 7 10 8
12
13
14
18
19
11
915

Preparing for Use
IMPORTANT: To get the best quality recordings when using this CarCam, always ensure
your windscreen is clean from dirt, smudges and fingerprints on both the inside and
outside of the windscreen. Such dirt and smudges can and will affect the quality of the
video recorded.
1. Insert the Memory Card into TF socket on the side of the CarCam. The exposed
contacts of the Memory Card should be placed into the slot facing the front of the
CarCam (see Identification of Controls).
2. Place the CarCam onto the Mounting Bracket and slide sideways to lock into place.
3. Insert the Cigar Lighter Power Adaptor cable into the USB Socket on the side of the
CarCam.
4. Place the Mounting Bracket suction pad on the inside of the windscreen and lock into
place by lifting up the lever.
5. Remove the protective film from the front of the lens and the LCD screen.
Important: Ensure the Mounting Bracket is located in such a way as to not block your
field of view while driving, or affect your ability to operate or control the car safely while
driving. Never mount the CarCam in a position that could interfere with the operation
of any Air Bags in the event of a collision.
Switching On and Recording
The CarCam is designed in such a way that it will automatically switch on and start
recording the moment it detects a connection to the car electrical system via the cigar
lighter socket. It is important to note however that while some cars provide power to
the cigar lighter socket even when the car ignition is off, other cars require the ignition
to be ON before providing power to the cigar lighter socket.
1. Insert the free end of the Cigar Lighter Power Adaptor into the cigar lighter socket.
Note: if your car provides power to the cigar lighter socket even when the car ignition
is off, the CarCam will switch on and start recording immediately.
2. Switch on the car ignition. The CarCam will automatically switch on and start
recording.

3. If necessary, loosen the mounting bracket collar and adjust the CarCam to obtain the
optimum viewing angle. Tighten the collar to fix the CarCam securely.
4. The CarCam will continue to record for 10 seconds after the ignition is switched off
or when the adaptor is removed from the cigar lighter socket.
5. To STOP recording at any time, press the Rec button.
6. To switch OFF the CarCam, press and hold the for a few seconds.
7. To switch ON the CarCam (for example, when outside of the car) press and hold the
for a few seconds.
8. You can switch on or off the internal microphone by pressing the Mic button. The
yellow Mic LED indicates that the microphone is on.
Note: The internal battery must be charged for the CarCam to operate without an
external power source (such as a cigar lighter socket or USB charger). Please refer to
SECTION “Charging the CarCam” for details.
Note: If the CarCam is switched on while connected to an external power source, it will
automatically start recording after switch on. If the CarCam is switched on without a
connection to an external power source (i.e. using the internal rechargeable battery
only), it will switch on but will NOT start recording automatically.
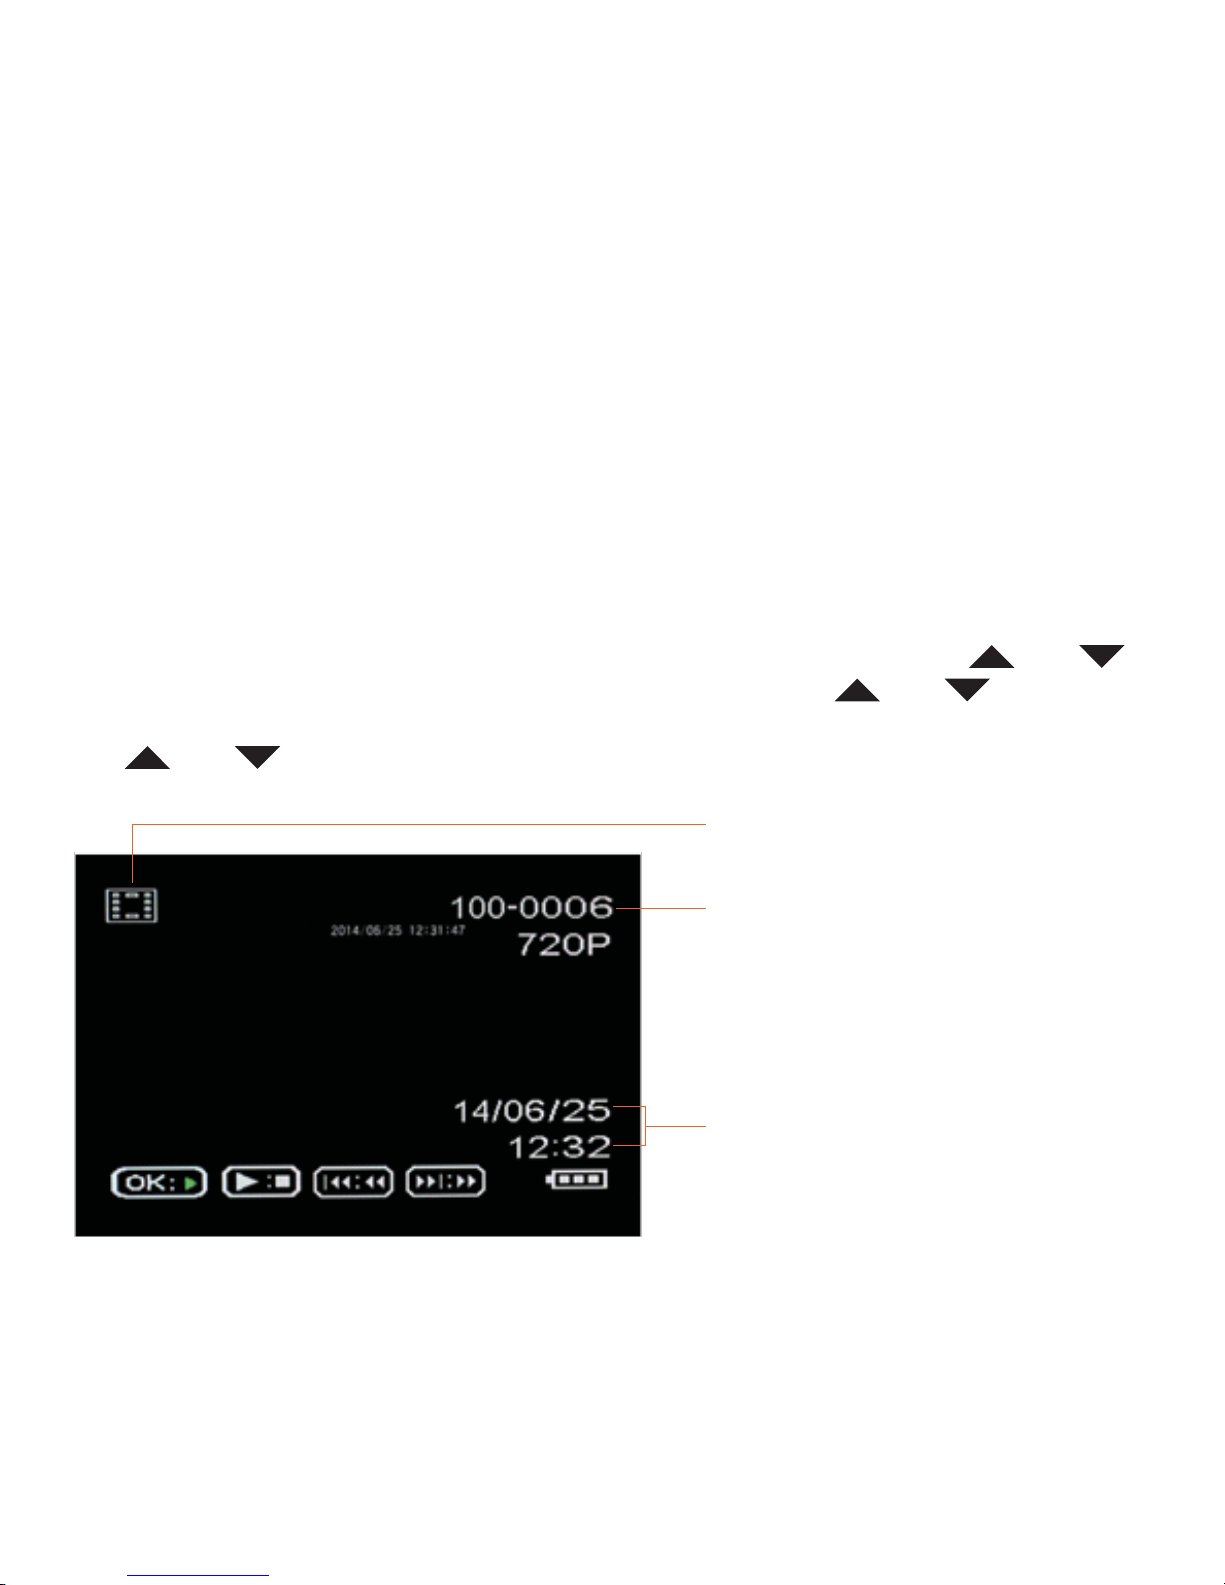
Setting the Time & Date
The CarCam has a Time & Date function which can be embedded onto all video footage
recorded for easy reference. To ensure the Time & Date is correct, adjust as follows:-
1. Switch on the CarCam by pressing and holding the button for a few seconds.
2. If the Car Cam is recording, press the Rec / Stop button to stop the recording.
3. Press the Menu button twice to enter the Setup Menu.
4. Press the button to select Date / Time then press OK.
5. Use the OK button to scroll through the Year, Month, Date, Hour, Minute & Second
options and the use the and buttons to adjust each option.
6. When the Time and Date is set correctly, press the Menu button to exit the menu.

Charging the CarCam
The CarCam has a built in Lithium Ion battery that can be charged while in use in the
car, or outside the car using the supplied USB cable. The battery will take approximately
90 minutes to charge.
1. The CarCam will charge when connected to the cigar lighter socket using the
supplied cable.
2. Outside of the car, the CarCam can be charged by connecting to a standard USB
charger using the supplied cable.
The Red Power indicator LED will illuminate when the CarCam is being charged. This
LED will switch off when the charging is complete.
Additionally, when switched on and connected to an external power source such as a
USB charger or the electrical system of a car via the cigar lighter adaptor, the battery
level indicator will change to a charging indicator.
Table of contents